
ハイライト
visionOS 2 では Volume に自動ベースプレート、角のリサイズハンドル、ツールバー、カスタムオーナメントが追加され、Immersive Space では没入度制御と空間トラッキング能力が強化されました。
主要内容
visionOS には Window、Volume、Immersive Space の 3 つのシーンタイプがあります。本セッションは Volume と Immersive Space、特に visionOS 2 の強化に焦点を当てます。
visionOS 2 では Volume が大きく改善されました。Volume を注視すると、底部にベースプレート(Baseplate)が自動表示され、境界の把握を助けます。コンテンツが Volume 全体を埋めている、または独自の底面を描いている場合は .volumeBaseplateVisibility(.hidden) でベースプレートを非表示にできます。
もう一つの重要な変化は、Volume に角のリサイズハンドルが付いたことです。デフォルトでは最小/最大サイズはコンテンツビューの frame から継承されます。固定サイズの frame を設定するとリサイズできません。最小/最大値を設定すれば、ハンドルをドラッグしてスムーズにスケールできます。コードで状態変数を動的に変更して Volume サイズを駆動することも可能です。
ツールバー(Toolbar)は Volume 底部のオーナメントに浮かせられます。visionOS 2 ではツールバーはユーザーの立ち位置に応じて最も近い側面へ自動移動し、ウィンドウコントロールも同様です。ツールバー以外に、visionOS 2 では Volume 周囲の任意の位置にカスタムオーナメントを追加でき、距離に応じて自動スケールして可読性を保ちます。
ユーザーが Volume 周囲を移動すると、ロボットやコンテンツも応答する必要があります。Volume の各側面はビューポイント(Viewpoint)であり、システムはウィンドウコントロールとオーナメントをユーザーに最も近い側面へ移動します。onVolumeViewpointChange でビューポイント変化を監視し、コンテンツも追従させられます。特定の側面だけをサポートしたい場合は supportedVolumeViewpoints で制限できます。
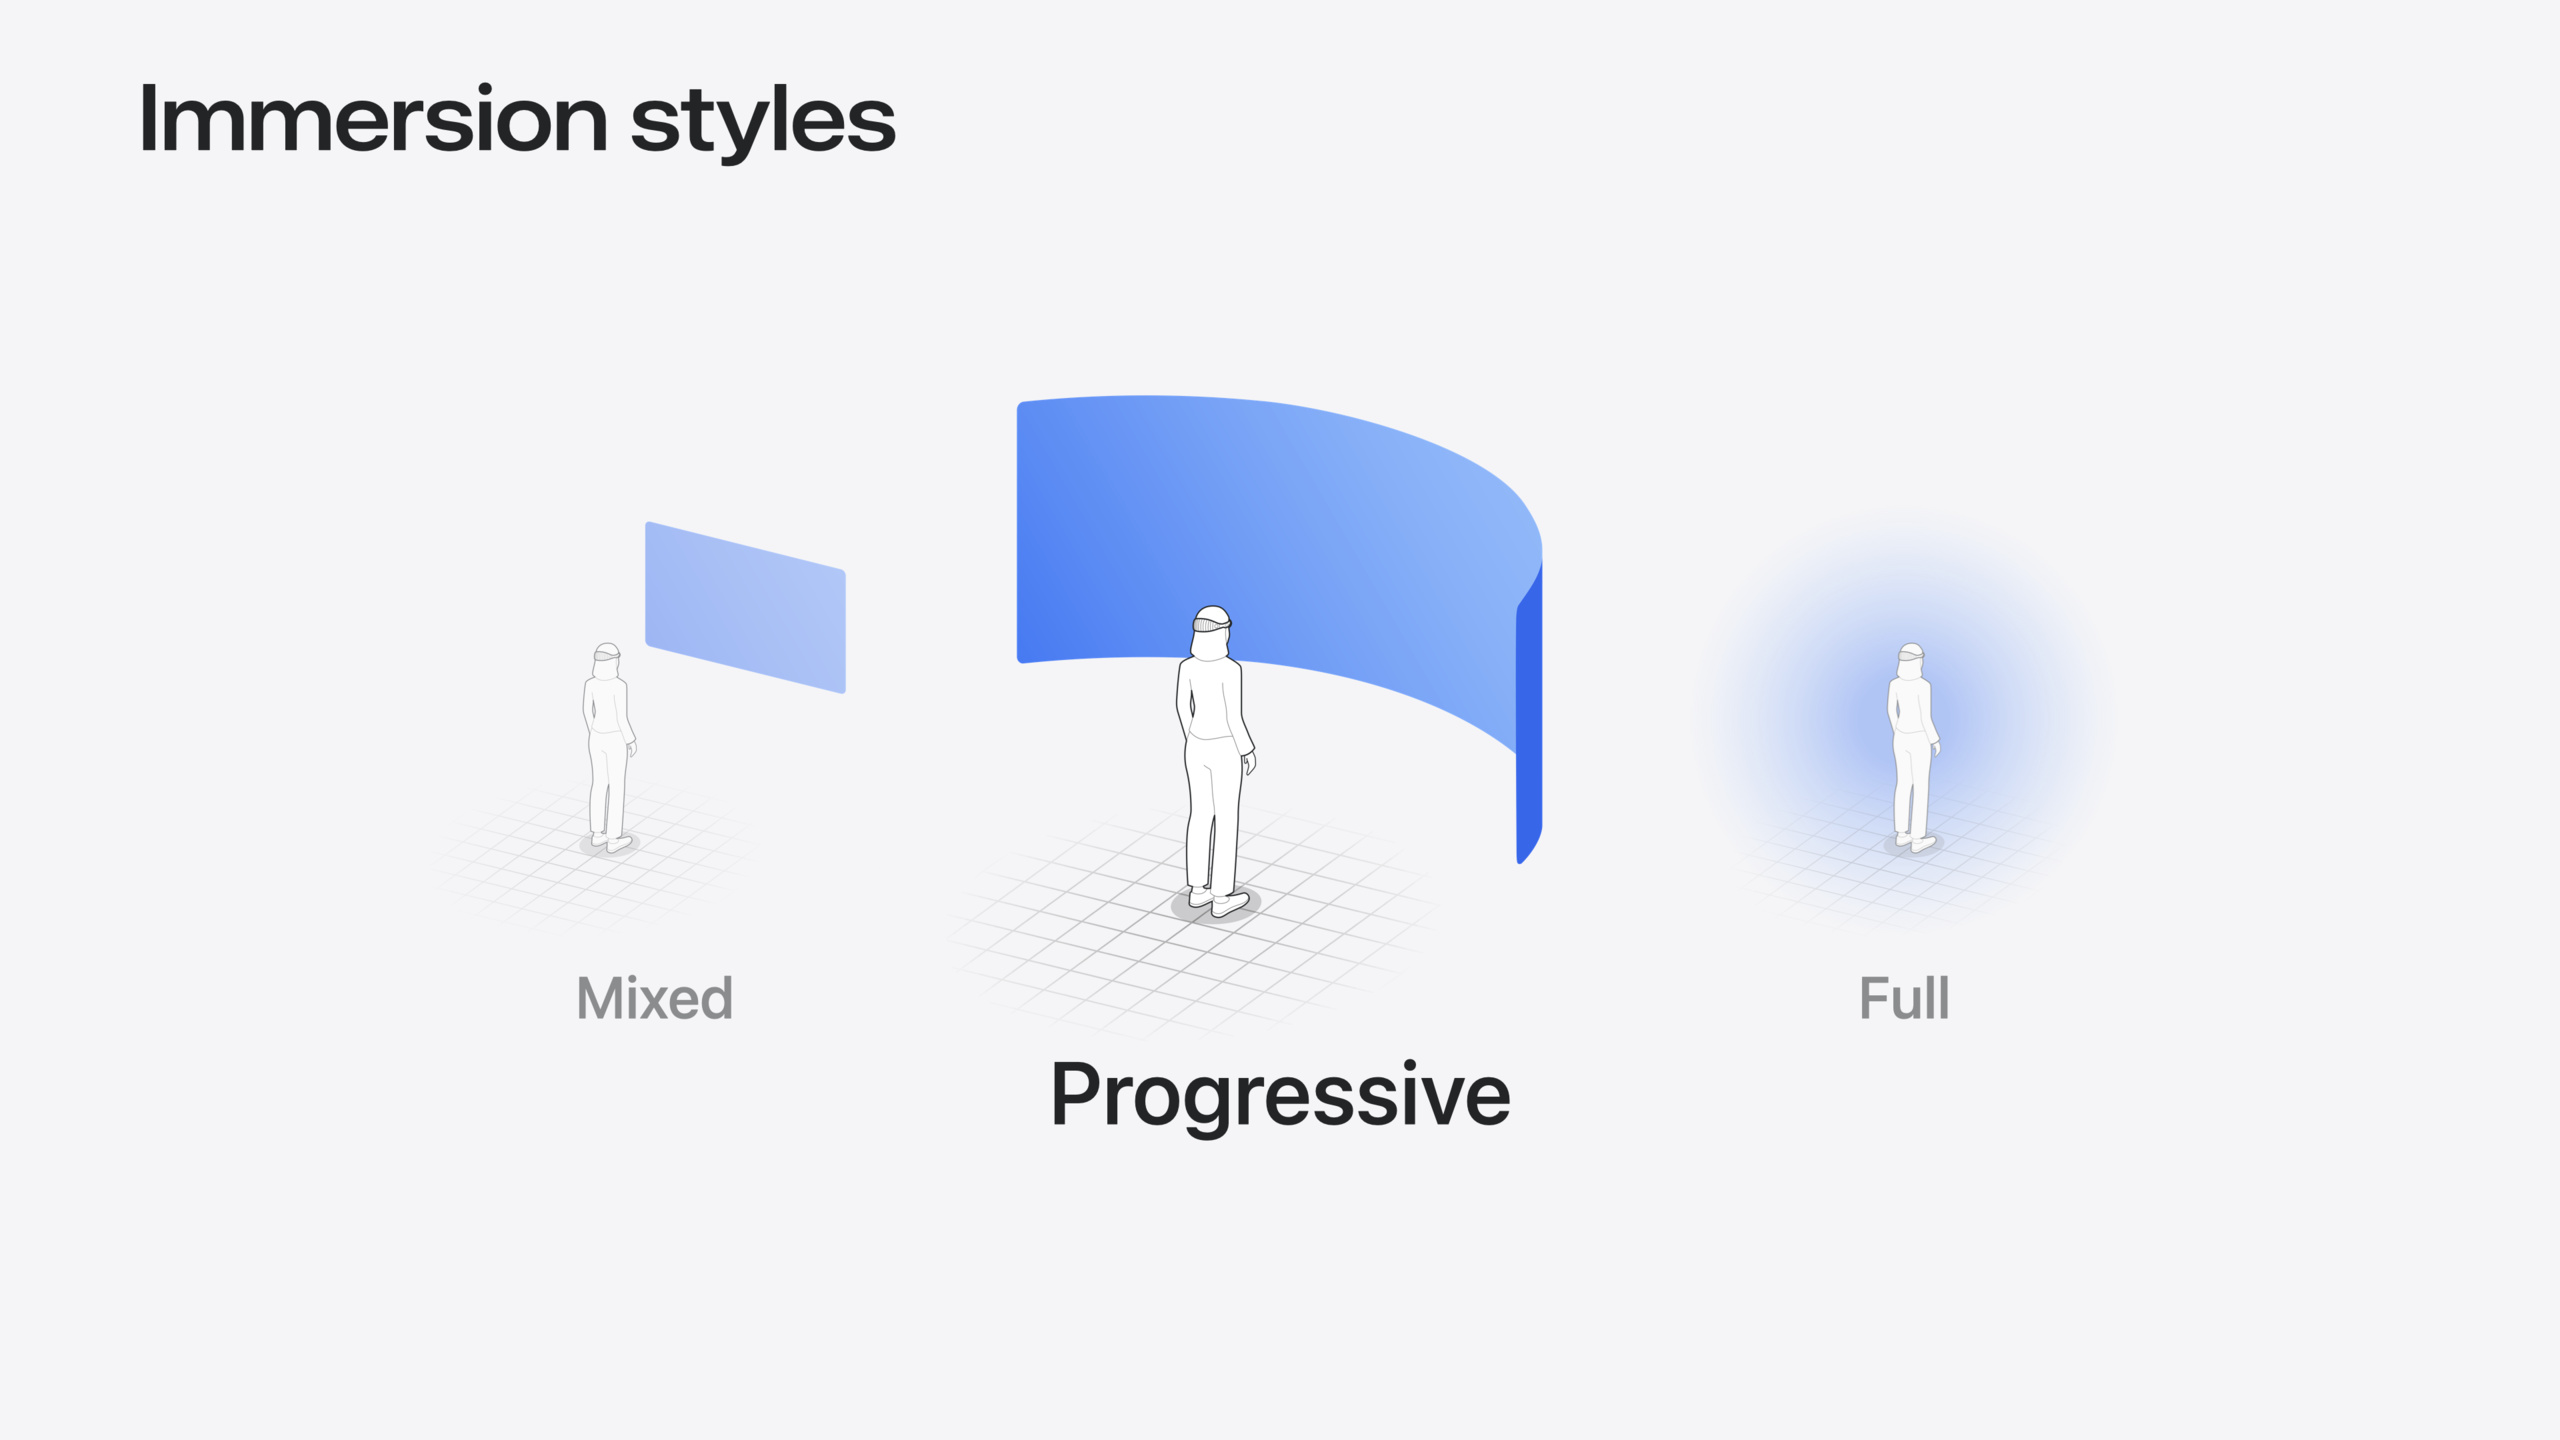
Immersive Space 部分では制御能力が拡張されました。visionOS 2 はカスタム没入度範囲をサポートし、プログレッシブ没入の初期値と最小/最大値を指定できます。ユーザーがデジタルクラウンで没入度を調整するとき、onImmersionChange で反応できます。
新しい SpatialTrackingSession API で平面アンカーをトラッキングできます。floor anchor を作成後、SpatialTapGesture で Immersive Space 内のタップを検出し、ユーザーがタップした位置に植物を配置できます。最後に SurroundingsEffect で現実のパススルーの色を動的に変更できます——例えばロボットが植物に衝突したとき、対応する鉢の色で環境トーンを変えられます。
詳細
Volume ベースプレート
visionOS 2 では Volume にベースプレートがデフォルトで有効です。ユーザーが注視するとフェードインし、Volume の境界把握を助けます。
// Baseplate

WindowGroup(id: "RobotExploration") {
    ExplorationView()
        .volumeBaseplateVisibility(.visible) // Default!
}
.windowStyle(.volumetric)volumeBaseplateVisibility(.visible)がデフォルト。注視時にベースプレートが自動フェードイン- コンテンツが Volume 境界を埋めている、または底面をカスタム描画している場合は
.hiddenで視覚的衝突を回避 - ベースプレートは角のリサイズハンドルを見つけやすくする
Volume リサイズ
Volume には角のリサイズハンドルがあり、frame の最小/最大値を正しく設定する必要があります。
// Enabling resizability

WindowGroup(id: "RobotExploration") {
    let initialSize = Size3D(width: 900, height: 500, depth: 900)

    ExplorationView()
        .frame(minWidth: initialSize.width, maxWidth: initialSize.width * 2,
               minHeight: initialSize.height, maxHeight: initialSize.height * 2)
        .frame(minDepth: initialSize.depth, maxDepth: initialSize.depth * 2)
}
.windowStyle(.volumetric)
.windowResizability(.contentSize) // Default!minWidth/maxWidth、minHeight/maxHeight、minDepth/maxDepthを設定するとリサイズ可能- 固定 frame 値はリサイズを無効化
windowResizability(.contentSize)がデフォルト。Volume サイズはコンテンツから継承
コード駆動の Volume サイズ
状態変数で Volume サイズを動的に変更できます(06:10)。
// Programmatic resize

struct ExplorationView: View {
    @State private var levelScale: Double = 1.0

    var body: some View {
        RealityView { content in
            // Level code here
        } update: { content in
            appState.explorationLevel?.setScale(
                [levelScale, levelScale, levelScale], relativeTo: nil)
        }
        .frame(width: levelSize.value.width * levelScale,
               height: levelSize.value.height * levelScale)
        .frame(depth: levelSize.value.depth * levelScale)
        .overlay { Button("Change Size") { levelScale = levelScale == 1.0 ? 2.0 : 1.0 } }
    }
}- 状態変数
levelScaleがスケールを制御 - frame 値が scale に連動し、Volume が自動リサイズ
- RealityKit エンティティも同期してスケールが必要
ツールバーオーナメント
ツールバーは Volume 底部に浮かせられます(07:39)。
// Toolbar ornament

ExplorationView()
.toolbar {
		ToolbarItem {
      	Button("Next Size") {
          	levelScale = levelScale == 1.0 ? 2.0 : 1.0
        }
    }
  	ToolbarItemGroup {
      	Button("Replay") {
          	resetExploration()
        }
      	Button("Exit Game") {
          	exitExploration()
          	openWindow(id: "RobotCreation")
        }
    }
}ToolbarItemとToolbarItemGroupでボタンを整理- ツールバーはユーザーの移動に合わせて最も近い側面へ自動移動
- 距離に応じて自動スケールし可読性を維持
カスタムオーナメント
ツールバー以外に、Volume 周囲にカスタムオーナメントを追加できます(10:41)。
// Ornaments

WindowGroup(id: "RobotExploration") {
    ExplorationView()
    .ornament(attachmentAnchor: .scene(.topBack)) {
        ProgressView()
    }
}
.windowStyle(.volumetric)
attachmentAnchor: .scene(.topBack)で Volume 後上方に配置- オーナメントはビューポイントに追従して移動
- 距離に応じて自動スケール
ビューポイント変化の監視
ユーザーが Volume 周囲を移動する際にコンテンツが応答するようにします(12:08)。
// Volume viewpoint

struct ExplorationView: View {
    var body: some View {
        RealityView { content in
            // Some RealityKit code
        }
        .onVolumeViewpointChange { oldValue, newValue in
            appState.robot?.currentViewpoint = newValue.squareAzimuth
        }
    }
}onVolumeViewpointChangeはアクティブビューポイント変更時に発火newValue.squareAzimuthは front、left、right、back の 4 値のいずれか- キャラクターをユーザー方向へ向けるのに使える
サポートするビューポイントの制限
特定の側面からのみ見るコンテンツの場合、サポートするビューポイントを制限できます(13:43)。
// Supported viewpoints
struct ExplorationView: View {
  	let supportedViewpoints: Viewpoint3D.SquareAzimuth.Set = [.front, .left, .right]

  	var body: some View {
      	RealityView { content in
        		// Some RealityKit code
        }
      	.supportedVolumeViewpoints(supportedViewpoints)
      	.onVolumeViewpointChange { _, newValue in
        		appState.robot?.currentViewpoint = newValue.squareAzimuth
        }
    }
}supportedVolumeViewpointsはサポートする側面のセットを受け取る- 非サポート側面ではオーナメント/ウィンドウコントロールの移動はトリガーされない
- デフォルトは 4 側面すべてをサポート
ビューポイント更新戦略
updateStrategy で非サポートビューポイントの更新を制御します(14:30)。
// Viewpoint update strategy

struct ExplorationView: View {
    let supportedViewpoints: Viewpoint3D.SquareAzimuth.Set = [.front, .left, .right]

    var body: some View {
        RealityView { content in
            // Some RealityKit code
        }
        .supportedVolumeViewpoints(supportedViewpoints)
        .onVolumeViewpointChange(updateStrategy: .all) { _, newValue in
            appState.robot?.currentViewpoint = newValue.squareAzimuth
            if !supportedViewpoints.contains(newValue) {
                appState.robot?.animationState.transition(to: .annoyed)
            }
        }
    }
}
updateStrategy: .allですべてのビューポイント変化がコールバックをトリガー- 非サポート側面にユーザーがいることを検出し、ヒントアニメーションをトリガー可能
- デフォルトはサポートビューポイント間の切り替え時のみ
カスタム没入度範囲
visionOS 2 はプログレッシブ没入の初期値と範囲をカスタマイズ可能(23:54)。
// Customizing immersion
struct BotanistApp: App {
    // Custom immersion amounts
    @State private var immersionStyle: ImmersionStyle = .progressive(0.2...1.0, initialAmount: 0.8)

    var body: some Scene {
        // Immersive Space
        ImmersiveSpace(id: "ImmersiveSpace") {
            ImmersiveSpaceExplorationView()
        }
        .immersionStyle(selection: $immersionStyle, in: .mixed, .progressive, .full)
    }
}
.progressive(range, initialAmount:)でカスタムプログレッシブ没入を作成0.2...1.0は最小から最大の没入度範囲initialAmount: 0.8で初期没入度を 80% に設定
没入度変化への反応
デジタルクラウンでの没入度調整イベントを監視(25:17)。
// Reacting to immersion
struct ImmersiveView: View {
    @State var immersionAmount: Double?

    var body: some View {
        ImmersiveSpaceExplorationView()
            .onImmersionChange { context in
                immersionAmount = context.amount
            }
            .onChange(of: immersionAmount) { oldValue, newValue in
                handleImmersionAmountChanged(newValue: newValue, oldValue: oldValue)
            }
    }
}onImmersionChangeで新しい没入度値を取得onChangeで没入度変化を検出して応答をトリガー- 新旧値を比較して増加/減少を判定
没入度変化の処理
没入度変化に応じてロボットを反応させる(25:39)。
// Reacting to immersion
func handleImmersionAmountChanged(newValue: Double?, oldValue: Double?) {
    guard let newValue, let oldValue else {
        return
    }

    if newValue > oldValue {
        // Move the robot outward to react to increasing immersion
        moveRobotOutward()
    } else if newValue < oldValue {
        // Move the robot inward to react to decreasing immersion
        moveRobotInward()
    }
}- 没入度増加時はロボットが外側へ移動
- 没入度減少時はロボットが内側へ移動
- この応答でユーザーの没入度変化の感知が強化される
空間トラッキングセッション
SpatialTrackingSession で平面アンカーをトラッキング(26:57)。
// Create and run spatial tracking session
struct ImmersiveExplorationView {
    @State var spatialTrackingSession: SpatialTrackingSession
        = SpatialTrackingSession()

    var body: some View {
        RealityView { content in
            // ...
        }
        .task {
            await runSpatialTrackingSession()
        }
    }
}SpatialTrackingSessionが空間トラッキングを管理.taskで Immersive Space オープン時にセッション開始- 平面アンカーアクセスにはユーザー認可が必要
トラッキングの設定と実行
平面トラッキング設定を行いセッションを実行(27:11)。
// Create and run the spatial tracking session
func runSpatialTrackingSession() async {
    // Configure the session for plane anchor tracking
    let configuration =
        SpatialTrackingSession.Configuration(tracking: [.plane])

    // Run the session to request plane anchor transforms
    let _ = await spatialTrackingSession.run(configuration)
}
Configuration(tracking: [.plane])で平面トラッキングを設定run(configuration)で認可を要求しトラッキング開始- 戻り値は認可成功を示す
地面アンカーの作成
水平地面のアンカーエンティティを作成(27:32)。
// Create a floor anchor to track
struct ImmersiveExplorationView {
    @State var spatialTrackingSession: SpatialTrackingSession
        = SpatialTrackingSession()

    let floorAnchor = AnchorEntity(
        .plane(.horizontal, classification: .floor, minimumBounds: .init(x: 0.01, y: 0.01))
    )

    var body: some View {
        RealityView { content in
            content.add(floorAnchor)
        }
        .task {
            await runSpatialTrackingSession()
        }
    }
}
.plane(.horizontal, classification: .floor, ...)で地面アンカーを作成minimumBoundsで最小検出サイズを設定- RealityView にアンカーを追加してトラッキングを有効化
空間タップの検出
SpatialTapGesture で Immersive Space 内のタップを検出(27:54)。
// Detect taps on entities in immersive space
RealityView { content in
    // ...
}
.gesture(
    SpatialTapGesture(
        coordinateSpace: .immersiveSpace
    )
    .targetedToAnyEntity()
    .onEnded { value in
        handleTapOnFloor(value: value)
    }
)
SpatialTapGesture(coordinateSpace: .immersiveSpace)で 3D 空間のタップを検出.targetedToAnyEntity()で任意のエンティティにジェスチャーを適用onEndedでタップイベントを処理
タップで植物を配置
タップ位置を地面アンカー座標に変換して植物を配置(28:09)。
// Handle tap event
func handleTapOnFloor(value: EntityTargetValue<SpatialTapGesture.Value>) {
    let location =
        value.convert(value.location3D, from: .immersiveSpace, to: floorAnchor)

    plantEntity.position = location
    floorAnchor.addChild(plantEntity)
}
convert(location3D, from: .immersiveSpace, to: floorAnchor)で座標系を変換- 変換後の位置を植物の位置に設定
- 植物を地面アンカーの子エンティティとして追加
パススルーの色付け
SurroundingsEffect で現実パススルーの色を変更(30:48)。
// Apply effect to tint passthrough
struct ImmersiveExplorationView: View {
    var body: some View {
        RealityView { content in
            // ...
        }
        .preferredSurroundingsEffect(surroundingsEffect)
    }

    // The resolved surroundings effect based on tint color
    var surroundingsEffect: SurroundingsEffect? {
        if let color = appModel.tintColor {
            return SurroundingsEffect.colorMultiply(color)
        } else {
            return nil
        }
    }
}SurroundingsEffect.colorMultiply(color)で色乗算エフェクトを作成preferredSurroundingsEffectで環境エフェクトを適用- ロボットが植物に衝突したとき、対応する色で環境トーンを変更
重要ポイント
-
Volume リサイズを有効化: Volume コンテンツが固定サイズでない場合、固定 frame ではなく
frame(minWidth:maxWidth:minDepth:maxDepth:)を使い、ユーザーが角ハンドルでリサイズできるようにする。動的調整が必要なら状態変数で frame 変化を駆動——Volume は自動適応する。 -
オーナメントでメインビューの混乱を減らす: 補助 UI(進捗表示、ステータス情報)をメインビューからカスタムオーナメントへ移す。オーナメントはユーザーに最も近い側面へ自動移動し、距離に応じて自動スケール。メインビューには核心 3D コンテンツのみ残す。
-
コンテンツをユーザーの視点に応答させる:
onVolumeViewpointChangeで Volume 周囲のユーザー移動を監視し、キャラクターやコンテンツをユーザー方向へ。特定側面のみサポートする場合はsupportedVolumeViewpointsで制限し、updateStrategy: .allで非サポート側面にユーザーが来たときヒントを出す。 -
没入度体験をカスタマイズ: visionOS 2 ではプログレッシブ没入の初期値と範囲を指定可能。より強い没入感が必要なら高い初期値(例:80%)を設定。
onImmersionChangeでユーザーの没入度調整に応答。 -
空間トラッキングでインタラクションを実現: SpatialTrackingSession で平面アンカーをトラッキングし、SpatialTapGesture と組み合わせて 3D 空間のタップを検出。「地面をタップして物体を配置」など、現実環境にコンテンツを配置するインタラクションが可能。
関連セッション
- Create custom environments for your immersive apps in visionOS — 視覚的に豊かで高性能なカスタムアプリ環境の作成方法
- Create enhanced spatial computing experiences with ARKit — ARKit で魅力的な Immersive 体験を作成する方法
- Design interactive experiences for visionOS — Apple Vision Pro 向けの魅力的なインタラクティブ叙事体験の設計
- Meet RealityKit 4 — RealityKit 4 の最新能力と空間コンピューティングアプリへの活用
コメント
GitHub Issues · utterances