
Highlight
RealityKit in visionOS 27 adds
ClippingComponentand hierarchicalManipulationComponent, letting developers build disassembly, clipping, and automatic exploded-view interactions for 3D models on Apple Vision Pro without hand-written shaders or physics engines.
Core Ideas
From “view only” to “take it apart”
In earlier visionOS apps, showing a complex 3D model such as an engine or a building BIM usually meant users could only walk around it and look. Want to remove the shell and inspect the internal parts? Developers had to write raycasting, collision handling, and gesture conflict logic themselves. Want to cut a cross-section to reveal the inside? That meant writing a shader or using CSG, or constructive solid geometry, to subtract from the model. These interactions are standard in industrial software, but they have long been missing from spatial computing.
Apple has now built this capability directly into RealityKit. The core idea is simple: where a component sits in the Entity tree determines what the user can manipulate.
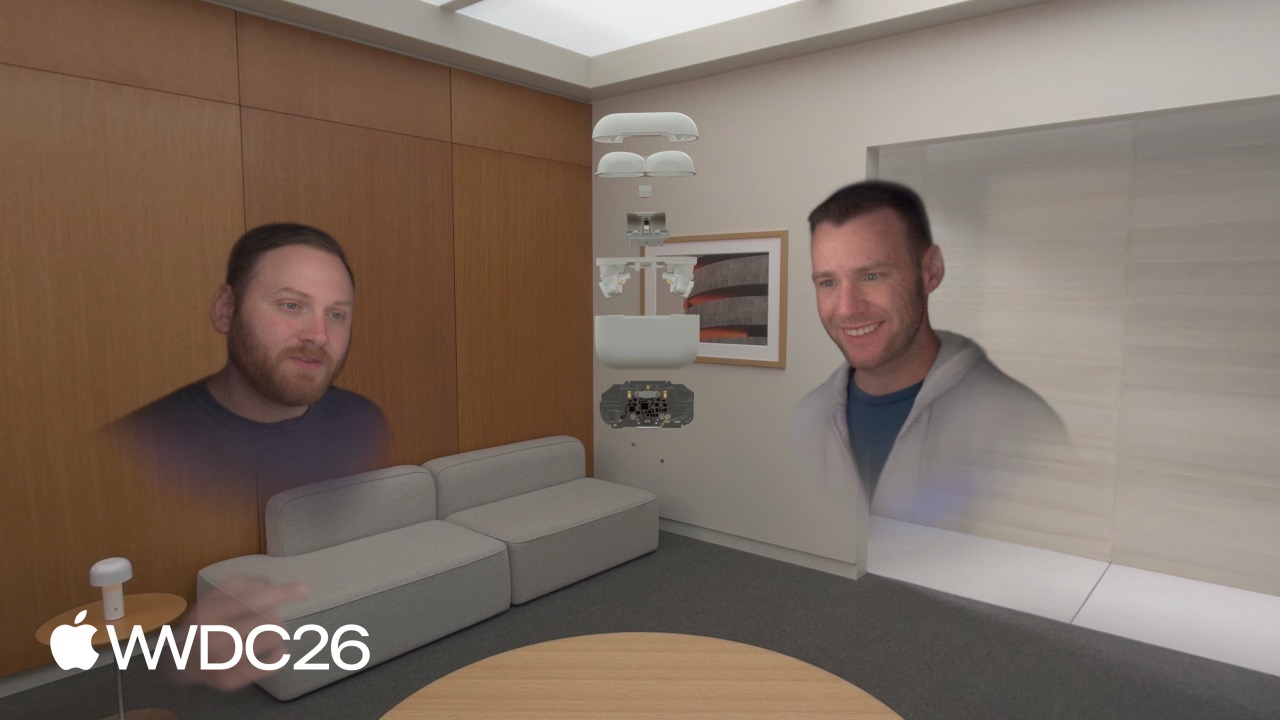
In the demo (05:22), an AirPods Pro model starts as a single whole. After tapping “Disassemble,” the shell, earbuds, and circuit board suddenly become independent grabbable parts. One person can pick up the board and inspect it, while another rotates an earbud to examine the connector. Everyone in the same SharePlay space sees exactly the same model state.
Clipping: make internal structure visible layer by layer
Internal structure is always hard in complex models. Pipes inside buildings, circuit boards inside devices, pistons inside engines - all of these are hidden behind shells. You cannot see them on a 2D screen, and you cannot reach them in 3D space either.
ClippingComponent solves this problem (08:16). It defines the retained region with an axis-aligned bounding box, or AABB. Geometry outside that box is discarded by the renderer every frame. The six faces can become draggable interaction planes. When the user pulls one face, the clipping plane moves and the internal structure is revealed layer by layer.
This is not just a simple “one cut” feature. It has three states: .off for no clipping, .on for clipping with the current bounding box, and .editing for showing six interaction planes so the user can adjust the clipping range.
Automatic exploded views: code decides how to separate parts
When disassembling a model, which axis should the parts expand along? The X axis may crush parts into a clump, while the Y axis may look more natural. Developers used to hard-code that decision. Now RealityKit uses math to calculate it.
The algorithm is called volume-weighted position variance (18:16). It takes each child part’s position and volume as input, calculates weighted variance along the three axes, and chooses the axis with the largest variance as the best expansion direction. Large parts that sit far away carry more weight in the decision. The result is much more reliable than guessing and hard-coding.
Details
Asset preparation: hierarchy is the foundation
A 3D model without hierarchy gives code no way to decide what to hide or manipulate (02:57). The talk compares two engine models. One was exported with every mesh flattened to the root node, leaving parts named InteriorPart_01, InteriorPart_47, and so on. Code cannot find the target. The other preserves a deeply nested hierarchy, with each piston and crankshaft as an independently named node that code can address directly.
Artists must preserve hierarchy when exporting USDZ. Every interaction that follows depends on it.
Disassembly and assembly: move components through the tree
Users can manipulate whichever node has ManipulationComponent and InputTargetComponent attached (07:09).
To disassemble, remove these two components from the root and attach them to each child part:
func openAssembly() {
    components[ManipulationComponent.self] = nil
    components[InputTargetComponent.self] = nil

    for child in assemblyChildren {
        child.components.set(InputTargetComponent())

        var manipulation = ManipulationComponent()
        manipulation.releaseBehavior = .stay
        child.manipulationComponent = manipulation
    }
}
To assemble, do the reverse: clear the child components and attach them back to the root:
func closeAssembly() {
    for child in assemblyChildren {
        child.manipulationComponent = nil
        child.components[InputTargetComponent.self] = nil
    }

    components.set(InputTargetComponent())
    var manipulation = ManipulationComponent()
    manipulation.releaseBehavior = .stay
    manipulationComponent = manipulation
}
Key points:
releaseBehavior = .staykeeps a part where it is after the user releases it instead of snapping it backInputTargetComponentlets an entity receive gesture events, provided it also has aCollisionComponent- There is no extra state flag and no complex animation state machine; moving components changes behavior
Clipping: four coordinate systems and vector projection
The core property of ClippingComponent is bounds, an AABB in the entity’s local coordinate system (09:12). Geometry outside that range is discarded every frame.
var clipping = ClippingComponent()
clipping.bounds = bounds
clipping.shouldClipChildren = true
clipping.shouldClipSelf = true
entity.components.set(clipping)
Key points:
boundsmust be defined in the entity’s local spaceshouldClipChildrendefaults tofalse; child nodes are not clipped unless you explicitly set it totrueshouldClipSelfdefaults totrueand controls whether the entity’s own geometry is clipped
The hard part is coordinate conversion (11:12). The user’s drag gesture happens in the Clipping Plane coordinate system, but ClippingComponent needs its bounds updated in the Model coordinate system. The full path involves four coordinate systems:
- World: the world coordinate system, the base for everything
- Model: the model coordinate system, where
ClippingComponentoperates - Clipping Control: the space that contains the six interaction planes
- Clipping Plane: the space in which gesture events are expressed
The conversion path is: gesture delta in Clipping Plane -> World -> Model -> constrain to the normal direction -> update bounds. The constrained delta also has to be converted back to the Clipping Plane coordinate system to update the interaction plane’s position.
The constraint uses vector projection (15:44). Project the drag delta onto the clipping plane’s normal direction, such as the +x axis {1, 0, 0}, and keep only the component in that direction. This ensures that even when the user drags diagonally, the clipping plane only moves along its normal, which feels natural.
The math is: normalize the direction vector, take the dot product with the drag delta to get a scalar length, then multiply that length by the direction vector to get the constrained vector.
Automatic exploded views: choose an axis with volume-weighted variance
Choosing the expansion direction is based on the statistical concept of variance (19:46). Variance measures how far a set of values are from their average. High variance means values are spread out; low variance means they are clustered.
Weighted variance gives each value a weight. Here, each child part’s volume is the weight, and RealityKit calculates “volume-weighted position variance” along the three axes:
weighted_variance = sum(weight * (position - average)^2) / countThe axis with the largest variance is selected as the expansion direction. A large part far from the average position strongly influences the result because it is both far away and high volume. In the AirPods Pro demo, the Y axis has the largest variance because the shell and earbuds are most spread out along Y and are also large enough to carry significant weight.
After the direction is determined, a FromToBy animation moves child parts along that axis to the expanded positions (23:35).
Key Takeaways
1. Industrial design review apps
What to build: An app that lets engineering teams review mechanical parts together on Apple Vision Pro.
Why it is worth doing: Hierarchical propagation of ManipulationComponent makes the workflow of “view the whole assembly -> break it into parts -> discuss one part -> assemble it again” possible with almost no custom logic. SharePlay keeps remote teams in the same state.
How to start: Prepare a USDZ model with a hierarchy, attach ManipulationComponent to the root node, and add two buttons that call openAssembly() and closeAssembly().
2. BIM clipping viewers for architecture
What to build: Let architects and clients walk inside a virtual building in visionOS and clip through walls in real time to inspect pipes and structure.
Why it is worth doing: The .editing state of ClippingComponent lets non-technical users adjust clipping planes directly. The six colored planes are interaction handles, so the learning curve is almost zero.
How to start: Add ClippingComponent to the building model, set initial bounds to the full model size, then enter .editing so users can drag the six clipping planes.
3. 3D teaching tools for medical devices
What to build: A teaching app for medical schools or device makers that reveals the internal structure of organs or medical equipment.
Why it is worth doing: The automatic exploded-view algorithm makes the separation direction natural for complex models without tuning each one manually. Volume weighting ensures large organs such as the heart or lung lobes dominate the direction choice.
How to start: After loading the USDZ model, calculate the volume and position of each child part, run the volume-weighted variance algorithm to choose an axis, and expand the model with a FromToBy animation.
4. Exploded product demos for commerce
What to build: Let users “open up” electronic products they may buy in visionOS to inspect internal craftsmanship and part layout.
Why it is worth doing: This kind of interaction used to be possible only in manufacturer videos. Now users can take the product apart with their hands. releaseBehavior = .stay lets parts hover in midair so users can inspect them from every angle.
How to start: Use a USDZ model with a preserved hierarchy. During disassembly, attach ManipulationComponent and CollisionComponent to each part.
5. Urban infrastructure visualization
What to build: A planning tool that shows underground utility networks, subway tunnels, and cable layouts.
Why it is worth doing: Combining clipping with exploded views makes buried infrastructure visible in an intuitive way for the first time. Keep the above-ground surface normal, clip away ground layers, and expand underground elements.
How to start: Model the ground and underground infrastructure as separate layers. Use ClippingComponent to cut away the ground layer, then use an automatic exploded view for the underground parts.
Related Sessions
- Discover the spatial preview framework - Control 3D models in visionOS from a Mac app in real time, useful for workflows that edit on desktop and preview in the headset
- Explore enhancements to visionOS object tracking - Overlay virtual 3D content on physical objects, such as placing a virtual engine model over a real racing simulator to reveal internal structure
- What’s new in RealityKit - A deeper look at the underlying APIs for
ManipulationComponentandClippingComponent - Reality Composer Pro 3 - Best practices for preparing USDZ assets with a preserved hierarchy
- Share visionOS experiences with nearby people - The technical foundation of SharePlay spatial collaboration, including how multiple people share the same synchronized 3D model
Comments
GitHub Issues · utterances