
Highlight
Vision adds RecognizeDocumentsRequest, which returns a hierarchical DocumentObservation that recovers tables, lists, paragraphs, barcodes, and key data from a document directly — no more inferring rows and columns from coordinates.
Core content
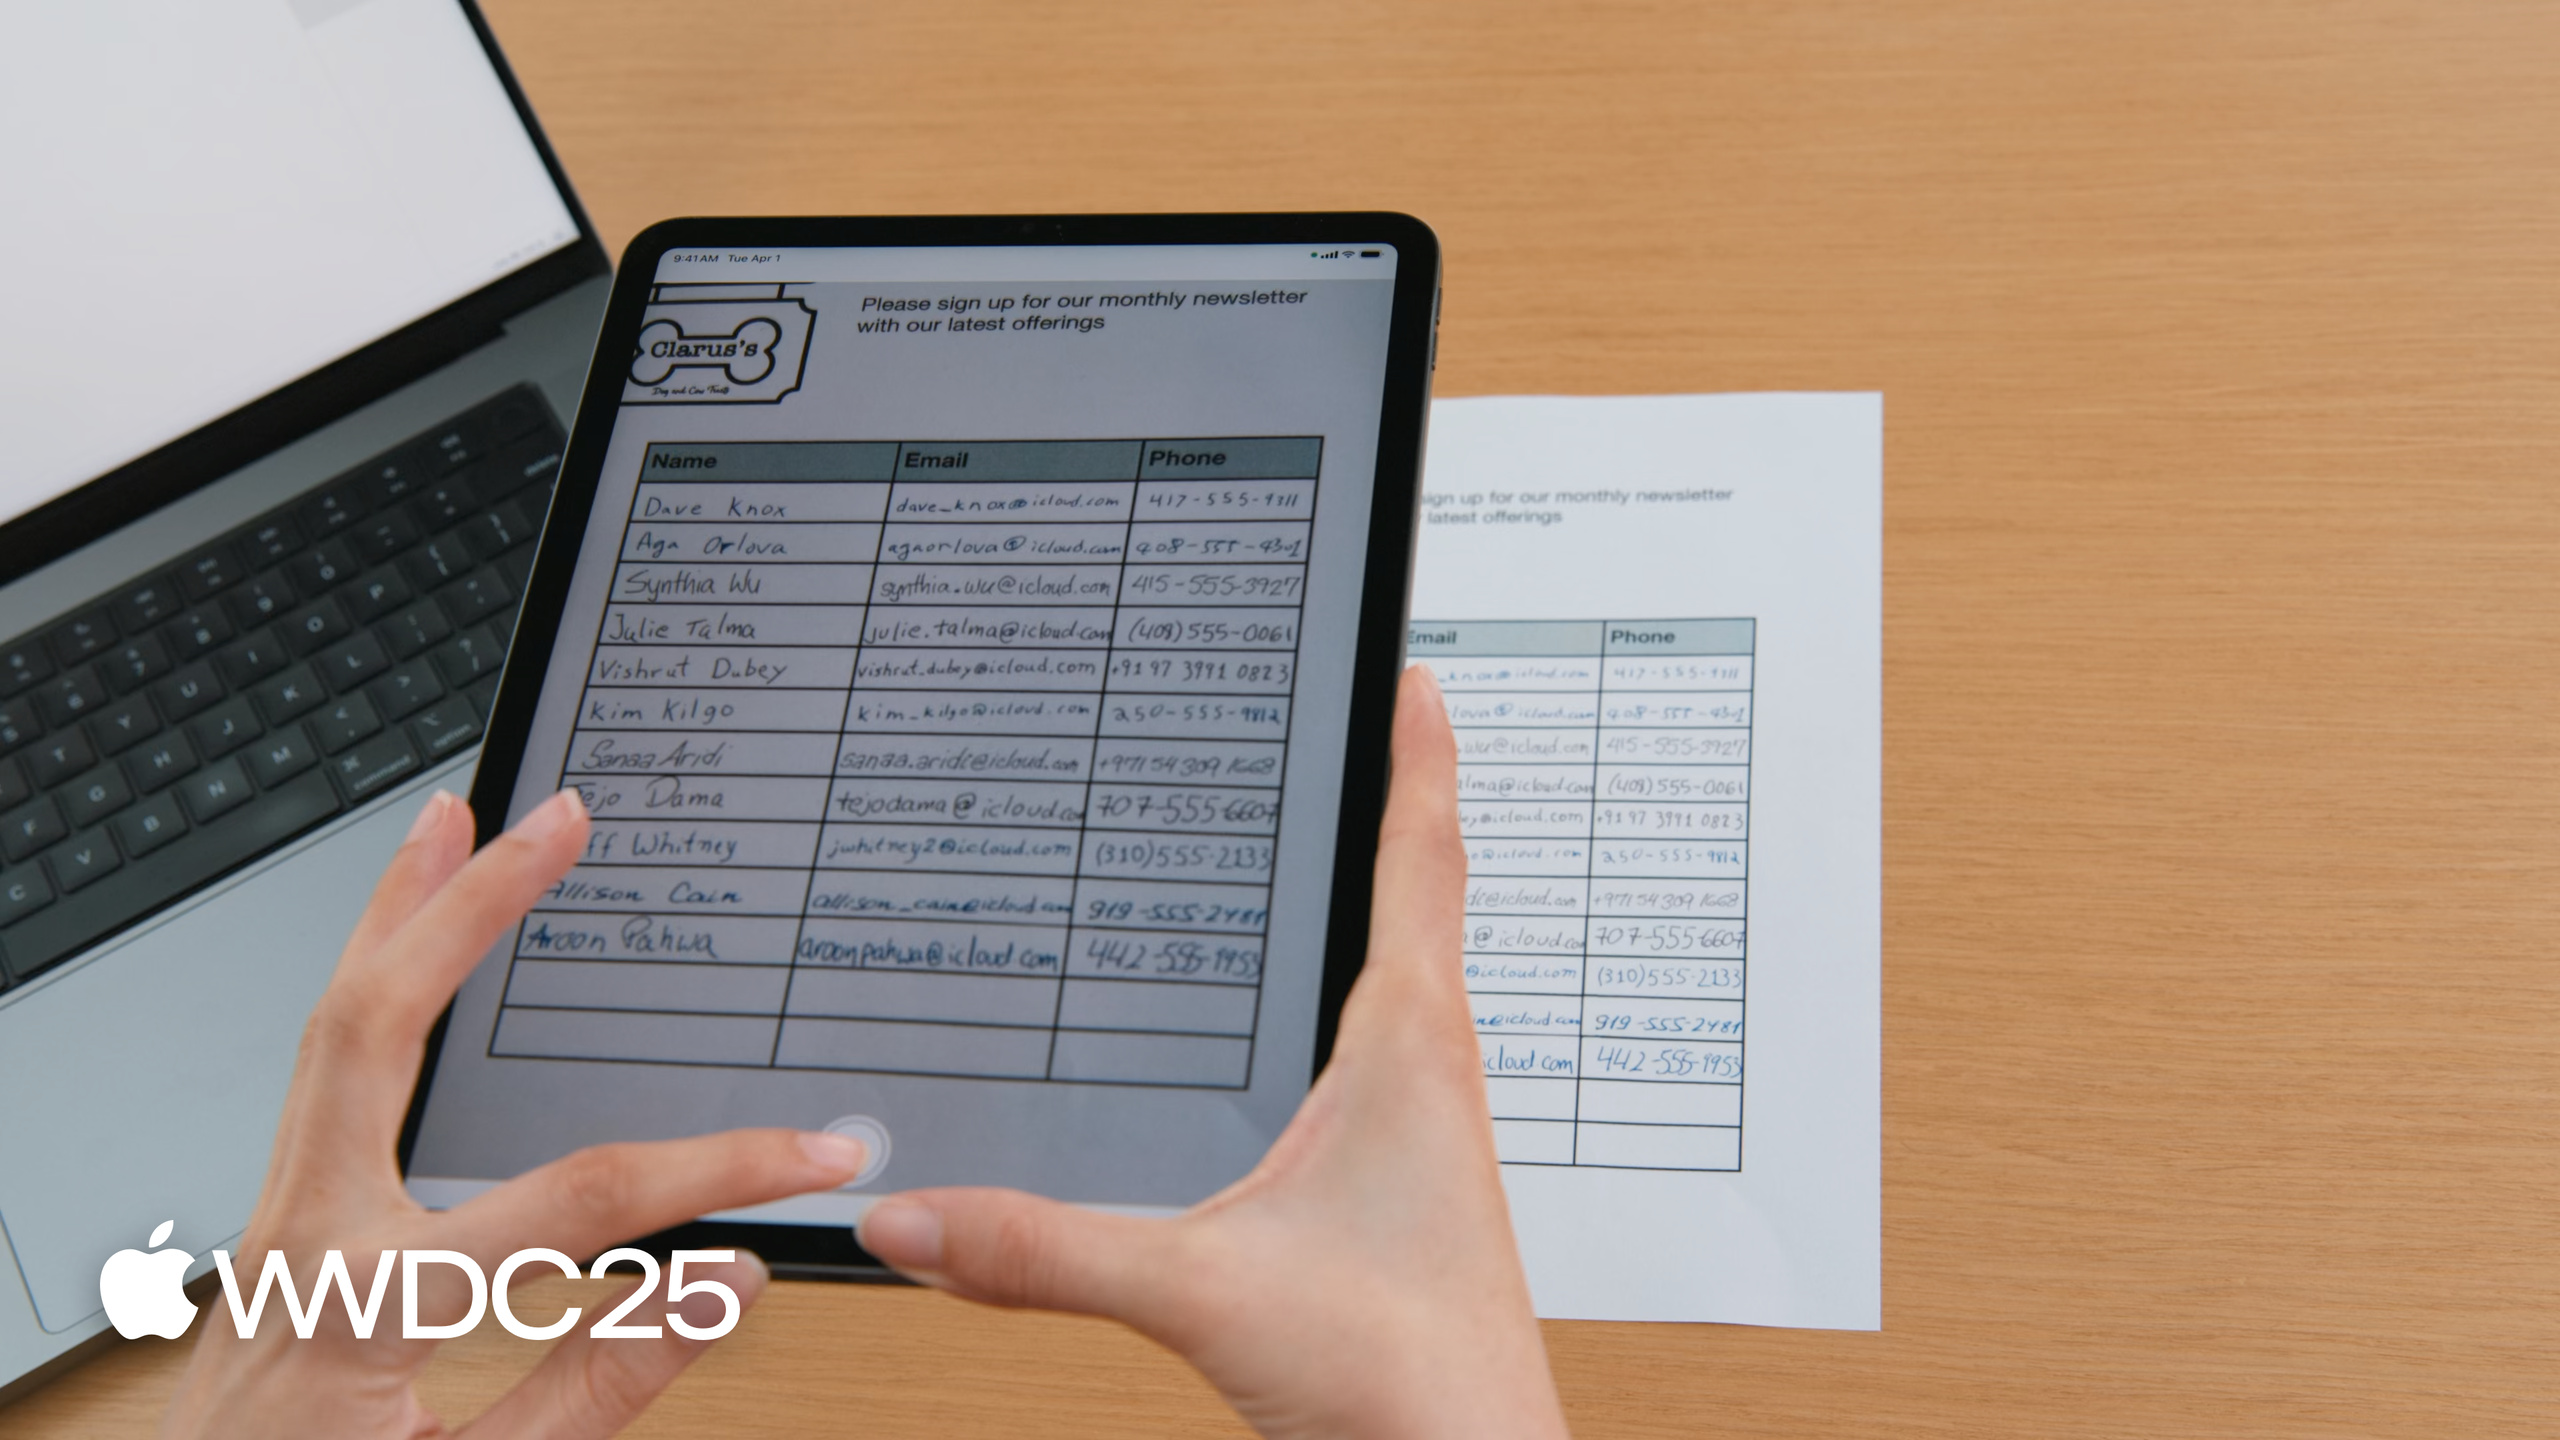
A walk-in store asks customers to write their name, email, and phone on a paper form, then scans the form into an image. To turn that form into a contact list, developers used to call RecognizeTextRequest, get back a pile of scattered text boxes, and rely on each box’s coordinates to guess which cells belonged to the same row. A small skew in the coordinates and the whole table fell apart. Megan Williams opens the talk with this exact pain point (01:23): recognizing the text alone is useless; once the structure is gone, you have to rebuild everything.
WWDC25’s answer is RecognizeDocumentsRequest. Its DocumentObservation is a tree: a Document container holds Text, Table, List, and Barcode; a Table is a 2D array of Cells; each Cell carries its own row/column range, and a Cell’s contents are themselves a container that can keep nesting (05:15). For the same form, the old API hands you a pile of boxes, the new API hands you the rows directly — walk table.rows, take the first cell as the name, hand the rest to DataDetection for the email and phone, and a few dozen lines of code finish the job (10:14). Vision also ships DetectLensSmudgeRequest for lens smudge detection and an upgraded hand pose model, rounding out the quality side of a document scanning pipeline.
Details
RecognizeDocumentsRequest supports 26 languages and runs on-device. After the request runs, document.tables.first gets you the first table directly (06:39).
/// Process an image and return the first table detected
func extractTable(from image: Data) async throws -> DocumentObservation.Container.Table {

    // The Vision request.
    let request = RecognizeDocumentsRequest()

    // Perform the request on the image data and return the results.
    let observations = try await request.perform(on: image)

    // Get the first observation from the array.
    guard let document = observations.first?.document else {
        throw AppError.noDocument
    }

    // Extract the first table detected.
    guard let table = document.tables.first else {
        throw AppError.noTable
    }

    return table
}
Key points:
RecognizeDocumentsRequest()takes no arguments and turns on text, tables, lists, barcodes, and DataDetection by default.request.perform(on:)is async, takesData(and alsoCGImage,URL, and so on), and returns an array of observations.observations.first?.documentpulls out theDocumentObservation— each image yields one document.document.tables.firstgrabs the table directly; the same shape applies todocument.lists,document.barcodes, anddocument.paragraphs.
Once you have the Table, walk it row by row to turn each row into a contact record. Text exposes four views: transcript (one combined string), lines (an array of lines), paragraphs (grouped by natural reading order), and words (not returned for Chinese, Japanese, Korean, or Thai) (08:30). detectedData comes from the DataDetection framework and covers email, phone number, address, URL, date (as a calendar event), units of measurement, money, tracking number, payment identifier, and flight number (09:13).
/// Extract name, email addresses, and phone number from a table into a list of contacts.
private func parseTable(_ table: DocumentObservation.Container.Table) -> [Contact] {
    var contacts = [Contact]()

    // Iterate over each row in the table.
    for row in table.rows {
        // The contact name will be taken from the first column.
        guard let firstCell = row.first else {
            continue
        }
        // Extract the text content from the transcript.
        let name = firstCell.content.text.transcript

        // Look for emails and phone numbers in the remaining cells.
        var detectedPhone: String? = nil
        var detectedEmail: String? = nil

        for cell in row.dropFirst() {
            // Get all detected data in the cell, then match emails and phone numbers.
            let allDetectedData = cell.content.text.detectedData
            for data in allDetectedData {
                switch data.match.details {
                case .emailAddress(let email):
                    detectedEmail = email.emailAddress
                case .phoneNumber(let phoneNumber):
                    detectedPhone = phoneNumber.phoneNumber
                default:
                    break
                }
            }
        }
        // Create a contact if an email was detected.
        if let email = detectedEmail {
            let contact = Contact(name: name, email: email, phoneNumber: detectedPhone)
            contacts.append(contact)
        }
    }
    return contacts
}
Key points:
for row in table.rows: rows is the logical view of[[Cell]], ordered by visual row.firstCell.content.text.transcript:contentis a Container,textis the text view, andtranscriptjoins all the text into one string.cell.content.text.detectedData: returns every match DataDetection found, each with a strongly typedmatch.detailsenum.case .emailAddress(let email)/case .phoneNumber(let phoneNumber): use Swift’s switch pattern matching to unwrap the associated value and read outemail.emailAddressandphoneNumber.phoneNumberas strings.row.dropFirst(): skip the name column and only look for contact info in the rest.
DetectLensSmudgeRequest is another new request (13:35). It returns a SmudgeObservation with a confidence between 0 and 1 — the closer to 1, the more likely the image was shot through a smudged lens. Megan uses 0.9 as the threshold for filtering (15:34); a lower threshold rejects more aggressively but will also reject good images, so you need to tune it on your own data set. She also notes that motion blur, long exposure, and fog can trigger false positives. You can chain it with DetectFaceCaptureQualityRequest for face quality and CalculateImageAestheticScoresRequest for an aesthetic score plus utility-image detection, building a multi-axis quality filter.
The hand pose model also gets a quiet refresh: the 21-joint definition is unchanged, but the model is smaller, more accurate, and uses less memory and latency. The joint positions differ from the old model, so any hand-gesture classifier you have already trained needs to be retrained on new data.
Takeaways
-
What to do: replace
RecognizeTextRequestplus coordinate-inference logic in your form, receipt, or sign-up sheet apps withRecognizeDocumentsRequest.- Why it pays off: the old approach handles tilted cells, merged rows, and blank gaps poorly, so row/column mismatches are common; the new API hands you the row/column structure and cuts the code to a third.
- How to start: pick the simplest two-column table (name / email), get the minimum loop running with
table.rowsandtranscript, then extend to multi-column and spanning cells.
-
What to do: when you need to find emails, phone numbers, addresses, or tracking numbers in text, hand it all to
cell.content.text.detectedData.- Why it pays off: writing your own regex for international formats (phones with parentheses, phones with
+country codes, emails with subdomains) is expensive to maintain; DataDetection already covers them and ships updates with the system. - How to start: replace each regex with a switch over the strongly typed branches of
data.match.details; run both implementations side by side first to compare coverage, then retire the old one.
- Why it pays off: writing your own regex for international formats (phones with parentheses, phones with
-
What to do: add a
DetectLensSmudgeRequestquality gate at the scan entry point.- Why it pays off: smudged images degrade every step that follows — OCR, table recognition, barcode reading — so rejecting up front saves a chain of retries.
- How to start: log hit rates with a wide threshold (such as 0.9) first, then tune the threshold to your scenario based on precision/recall; for edge cases, layer aesthetic scoring as a fallback.
-
What to do: build the quality check as a multi-stage pipeline — smudge detection → aesthetic score → utility-image detection.
- Why it pays off: each API covers one axis, so used alone it will miss cases; chained, they cover each other on different failure modes.
- How to start: run an offline pass over a batch of historical photos, count the rejection rate at each stage, then decide the production order.
-
What to do: audit the ML hand-gesture classifiers in your app and decide whether to retrain them with the new hand pose model.
- Why it pays off: the joint coordinate distribution has shifted, so the old classifier shows a steady bias on the new model and gestures can quietly stop working without users realizing.
- How to start: collect a small sample with the new model and compare against the old classifier’s outputs; if the bias exceeds your threshold, retrain with the same labels.
Related sessions
- Discover Swift Enhancements in the Vision Framework — the basics of the Vision framework and the request/observation model; recommended pre-watch for this session.
- Bring advanced speech-to-text to your app with SpeechAnalyzer — the new on-device speech-to-text API, in the same family of perception workflows as document recognition.
- Code-along: Bring on-device AI to your app using the Foundation Models framework — build AI features on top of the on-device large model; pairs well with document parsing results.
- Deep dive into the Foundation Models framework — guided generation and other mechanics, useful for restructuring recognition output.
- Design interactive snippets — the compact views of App Intents; turn recognized contacts or tables into a snippet you can show right away.
Comments
GitHub Issues · utterances