
Highlight
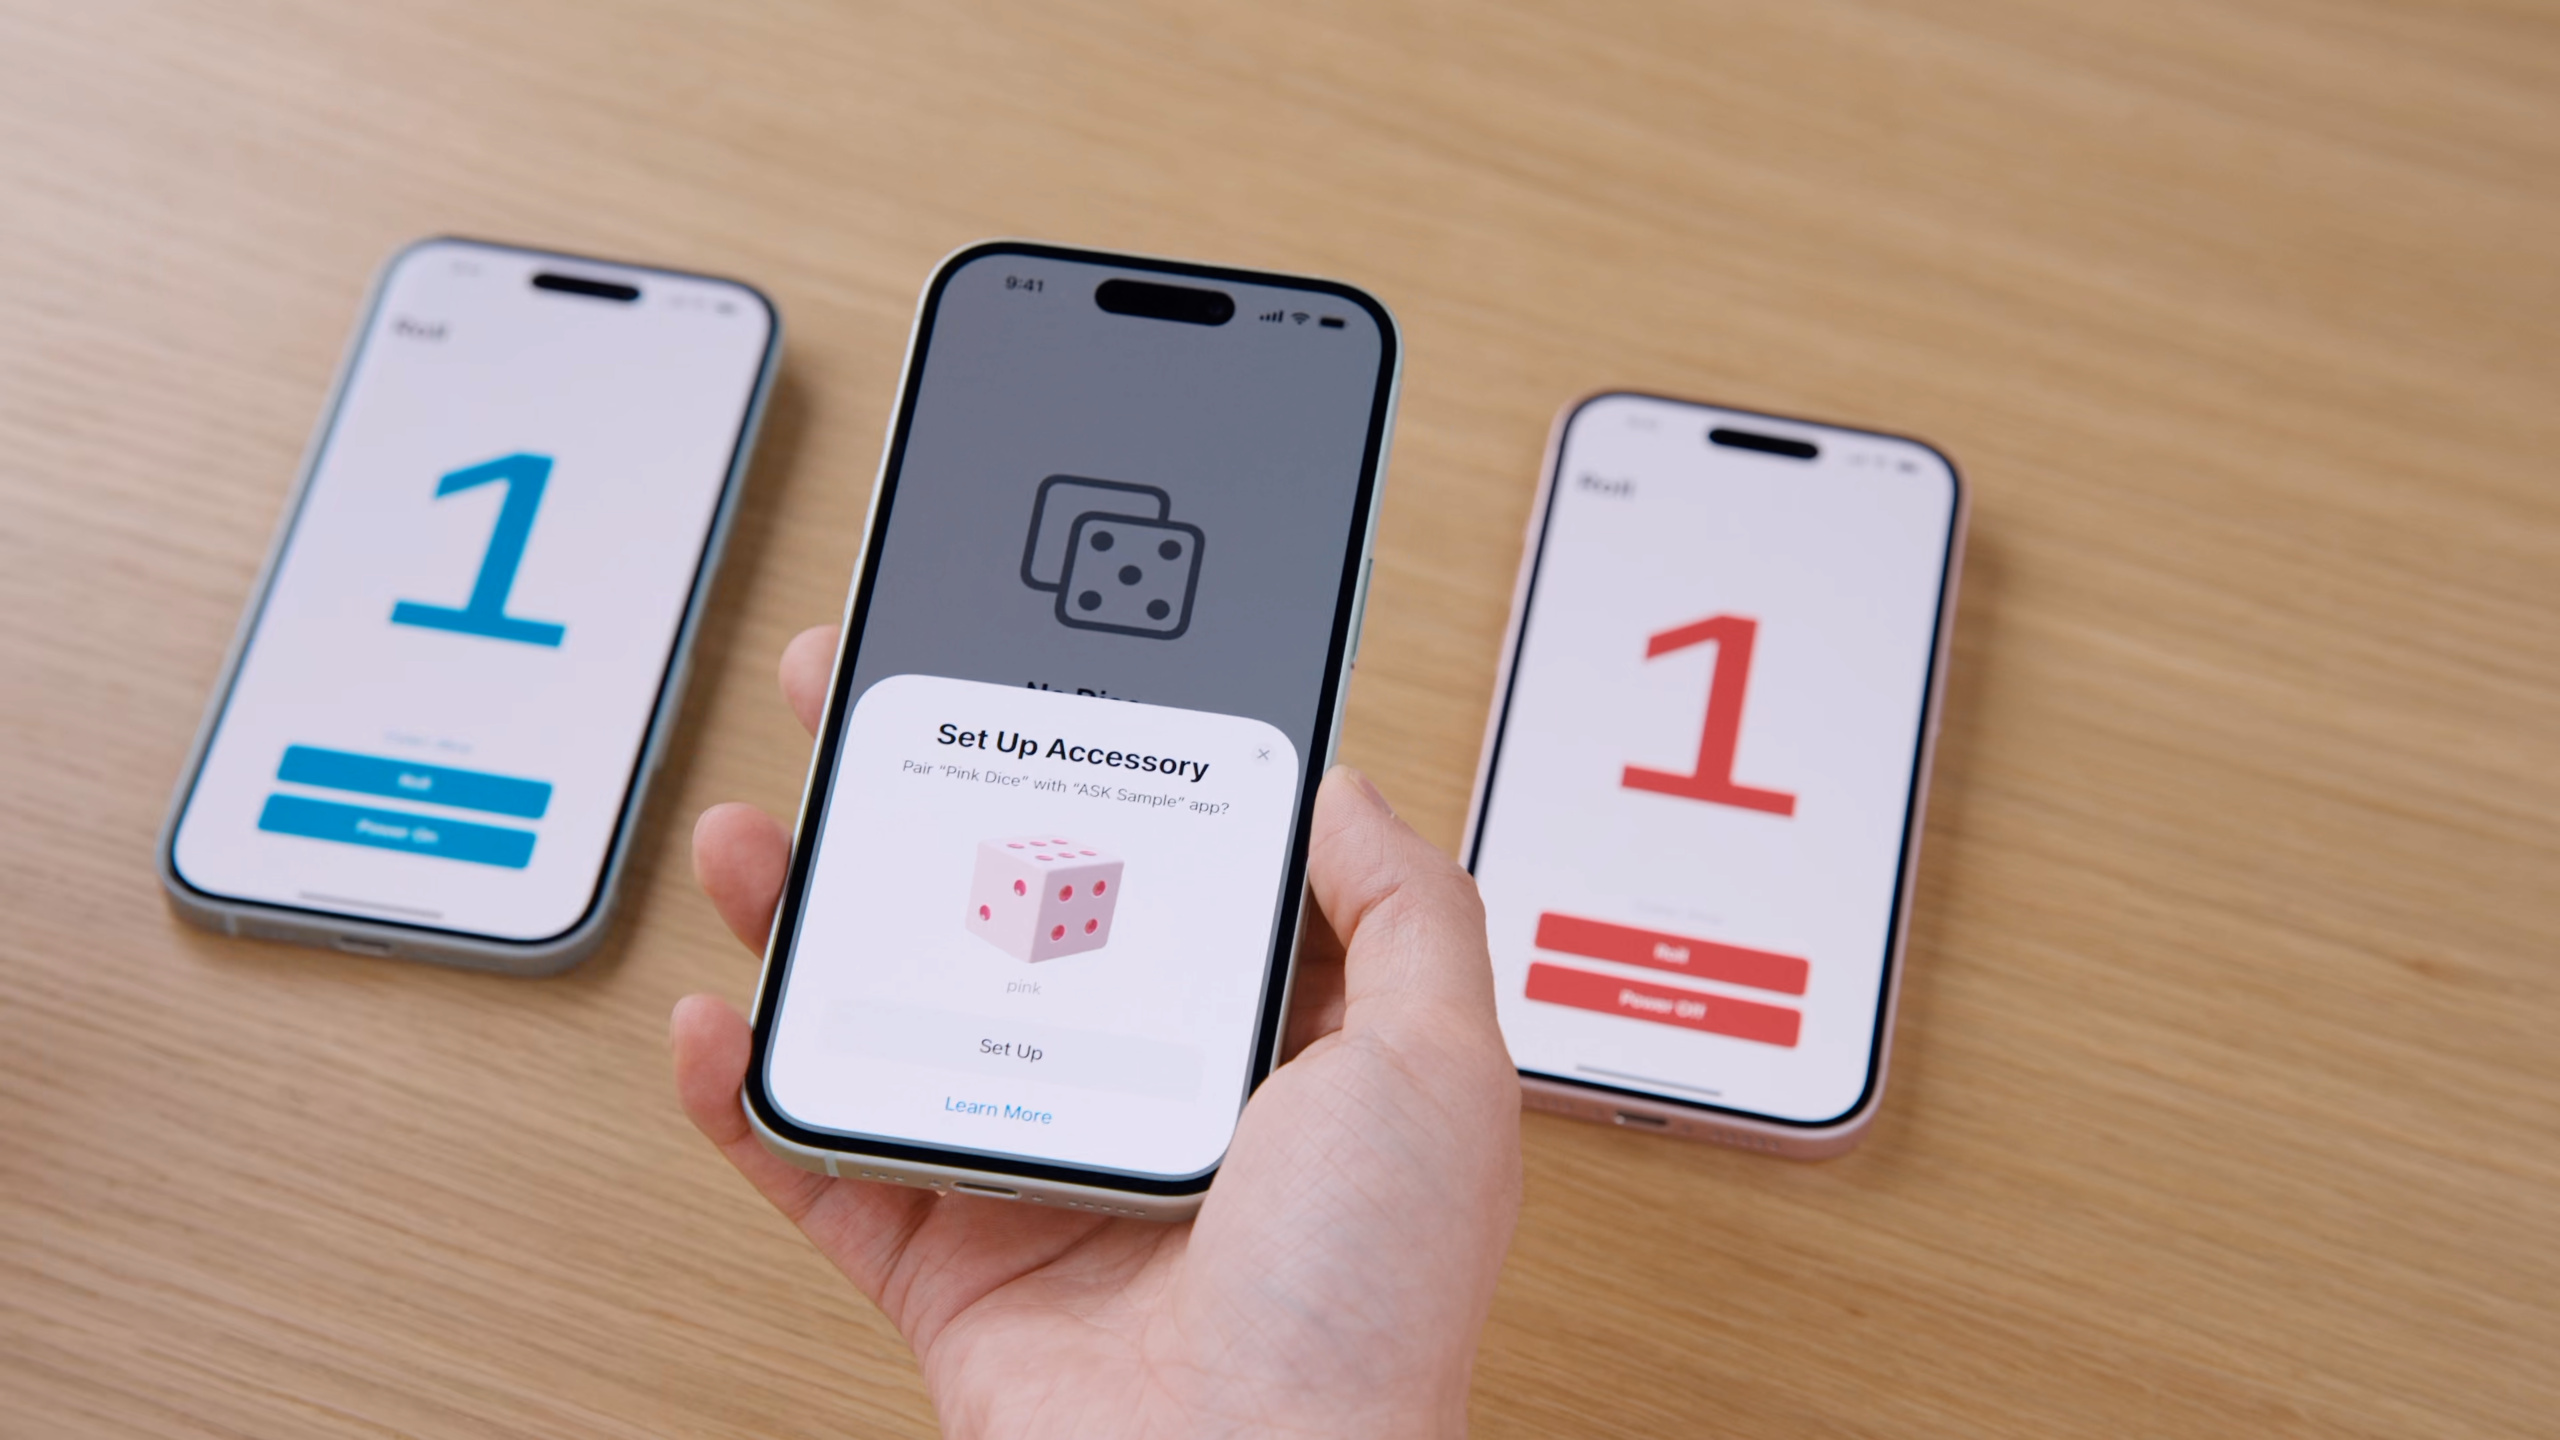
Accessory setup has long been a pain point. The old flow required Bluetooth permission, possibly joining the accessory’s Wi-Fi hotspot, then Bluetooth pairing—each step adding friction. iOS 18’s AccessorySetupKit compresses all of that into a single system picker.
Core Content
How many steps to pair a Bluetooth accessory? Before iOS 17: request Bluetooth permission, wait for the system dialog, user grants access, scan for devices, possibly join a Wi-Fi hotspot separately, then start Bluetooth pairing—each step can lose users. Apple’s own research shows friction during first-time accessory setup is the top reason users abandon the process.
iOS 18’s AccessorySetupKit compresses the flow to one tap. Your app calls showPicker(); the system scans nearby accessories in a separate process, displays them in the picker with your product image and name, and the user taps to complete pairing. Bluetooth and Wi-Fi access are granted in that single tap—no separate permission dialogs.
Privacy design is central. The picker runs in a separate process; your app sends only discovery rules and display assets, never touching Bluetooth scanning directly. The picker shows both your product name/image and the accessory’s broadcast hardware name so users can verify authenticity. After pairing, communication still uses standard CoreBluetooth and NetworkExtension APIs—no new communication model to learn.
Detailed Content
First, declare supported technologies and discovery rules in Info.plist. Add Bluetooth (or Wi-Fi) to the AccessorySetupKit - Supports array, then fill in the GATT service UUID your accessory advertises under Bluetooth Services (04:12).
The core API is ASAccessorySession. Create and activate the session, register an event callback (06:02):
import AccessorySetupKit

// Create a session
var session = ASAccessorySession()

// Activate session with event handler
session.activate(on: DispatchQueue.main, eventHandler: handleSessionEvent(event:))

// Handle event
func handleSessionEvent(event: ASAccessoryEvent) {
    switch event.eventType {
    case .activated:
        print("Session is activated and ready to use")
        print(session.accessories)
    default:
        print("Received event type \(event.eventType)")
    }
}
Key points:
ASAccessorySessionis the central object for showing the picker, receiving events, and managing accessoriesactivate(on:eventHandler:)requires a DispatchQueue and event callback- The
.activatedevent means the session is ready; you can read existingsession.accessoriesor start a new pairing flow
Next, create ASPickerDisplayItem for each accessory variant with name, image, and discovery rules (07:23):
// Create descriptor for pink dice
let pinkDescriptor = ASDiscoveryDescriptor()
pinkDescriptor.bluetoothServiceUUID = pinkUUID
// Create descriptor for blue dice
let blueDescriptor = ASDiscoveryDescriptor()
blueDescriptor.bluetoothServiceUUID = blueUUID

// Create picker display items
let pinkDisplayItem = ASPickerDisplayItem(
    name: "Pink Dice",
    productImage: UIImage(named: "pink")!,
    descriptor: pinkDescriptor
)
let blueDisplayItem = ASPickerDisplayItem(
    name: "Blue Dice",
    productImage: UIImage(named: "blue")!,
    descriptor: blueDescriptor
)
Key points:
ASDiscoveryDescriptorcombines discovery rules; the system matches all rules in a descriptor to filter target accessories- If an accessory supports both Bluetooth and Wi-Fi, configure both in one descriptor—one tap grants both
- Different variants (e.g., colors) need separate descriptors and display items
Call showPicker() to present the accessory picker (08:10):
// Invoke accessory picker
Button {
    session.showPicker(for: [pinkDisplayItem, blueDisplayItem]) { error in
        if let error {
            // Handle error
        }
    }
} label: {
    Text("Add Dice")
}
Key points:
showPicker(for:)accepts an array of display items; the picker scans for all matching descriptors- The picker runs in a separate process—your app never touches Bluetooth scanning directly
- Handle errors in the callback when the picker can’t be shown (e.g., system restrictions)
After the user selects an accessory, your app receives an accessoryAdded event (09:26):
// Handle event
func handleSessionEvent(event: ASAccessoryEvent) {
    switch event.eventType {

    case .accessoryAdded:
        let newDice: ASAccessory = event.accessory!

    case .accessoryChanged:
        print("Accessory properties changed")

    case .accessoryRemoved:
        print("Accessory removed from system")

    default:
        print("Received event with type: \(event.eventType)")
    }
}
Key points:
.accessoryAddedcarries anASAccessorywith all paired accessory info.accessoryChangedfires when accessory properties change, e.g., display name edited in Settings.accessoryRemovedfires when the user or app removes an accessory
After pairing, communicate with the accessory via CoreBluetooth (10:22):
// Connect to accessory using CoreBluetooth
let central = CBCentralManager(delegate: self, queue: nil)

func centralManagerDidUpdateState(_ central: CBCentralManager) {
    switch central.state {
    case .poweredOn:
        let peripheral = central.retrievePeripherals(withIdentifiers: [newDice.bluetoothIdentifier]).first
        central.connect(peripheral)
    default:
        print("Received event type \(event.eventType)")
    }
}

func centralManager(_ central: CBCentralManager, didConnect peripheral: CBPeripheral) {
    peripheral.delegate = self
    peripheral.discoverServices(pinkUUID)
}
Key points:
- Because you declared AccessorySetupKit support in Info.plist, users aren’t prompted for Bluetooth permission
CBCentralManagerstate becomes.poweredOnonly when your app has paired accessories- Get the CBPeripheral identifier from
bluetoothIdentifieronASAccessory, then useretrievePeripherals(withIdentifiers:) - Scan APIs still work but return only accessories paired with your app
For existing accessories, use ASMigrationDisplayItem (11:58):
// Create migration items
let pinkMigration = ASMigrationDisplayItem(name: "Pink Dice", productImage: UIImage(named: "pink")!, descriptor: pinkDescriptor)
pinkMigration.peripheralIdentifier = pinkPeripheral.identifier

// Present picker with migration items
session.showPicker(for: [pinkMigration]) { error in
    if let error {
        // Handle error
    }
}
Key points:
ASMigrationDisplayItemis a subclass ofASPickerDisplayItemfor migrating existing accessories to AccessorySetupKit management- Set
peripheralIdentifierto the existing CBPeripheral’s identifier - If
showPickercontains only migration items, the system shows an info page about migration; if mixed with non-migration items, migration happens only when the user selects and sets up a new accessory
Product image display follows design guidelines. The picker provides a 180×120 pt container; images should have transparent backgrounds for light/dark mode. Transparent border width affects scaling—wider borders make the accessory appear smaller (12:54).
Core Takeaways
-
What to do: Adopt AccessorySetupKit for Bluetooth/Wi-Fi accessory apps and replace the old Bluetooth permission flow. Why it’s worth it: Reduce pairing from multiple steps to one, lower drop-off, and improve privacy—your app no longer needs global Bluetooth permission. How to start: Add
AccessorySetupKit - Supportsand discovery rules to Info.plist, createASAccessorySession, configure display items withASPickerDisplayItem, callshowPicker(). -
What to do: Implement migration for shipped accessory apps, moving existing accessories from the old permission model to AccessorySetupKit. Why it’s worth it: Legacy users with Bluetooth permission won’t auto-migrate; without migration you lose fine-grained permission control. How to start: Use
ASMigrationDisplayItemwith existing peripheral identifiers and show migration inshowPicker. -
What to do: Optimize picker display assets so product images are clear in light and dark mode. Why it’s worth it: Product images are how users identify and verify accessories; poor images hurt completion rates. How to start: Prepare high-resolution images for the 180×120 pt container, transparent backgrounds, adjust border width for scaling, test both modes.
-
What to do: For accessories supporting both Bluetooth and Wi-Fi, configure both interface rules in one discovery descriptor. Why it’s worth it: One tap grants both Bluetooth and Wi-Fi access—no double pairing flow. How to start: Set both
bluetoothServiceUUIDand Wi-Fi SSID on the sameASDiscoveryDescriptor; the picker handles both technologies.
Related Sessions
- What’s new in privacy — iOS 18 permission flows and privacy improvements, closely tied to AccessorySetupKit’s permission model
- What’s new in location authorization — Location authorization improvements and best practices, part of iOS 18 permission flow optimization
- Meet the next generation of CarPlay architecture — CarPlay next-gen architecture accessory communication, in the same system services space
- Say hello to the next generation of CarPlay design system — CarPlay design system for in-vehicle accessory interaction reference
Comments
GitHub Issues · utterances