
Highlight
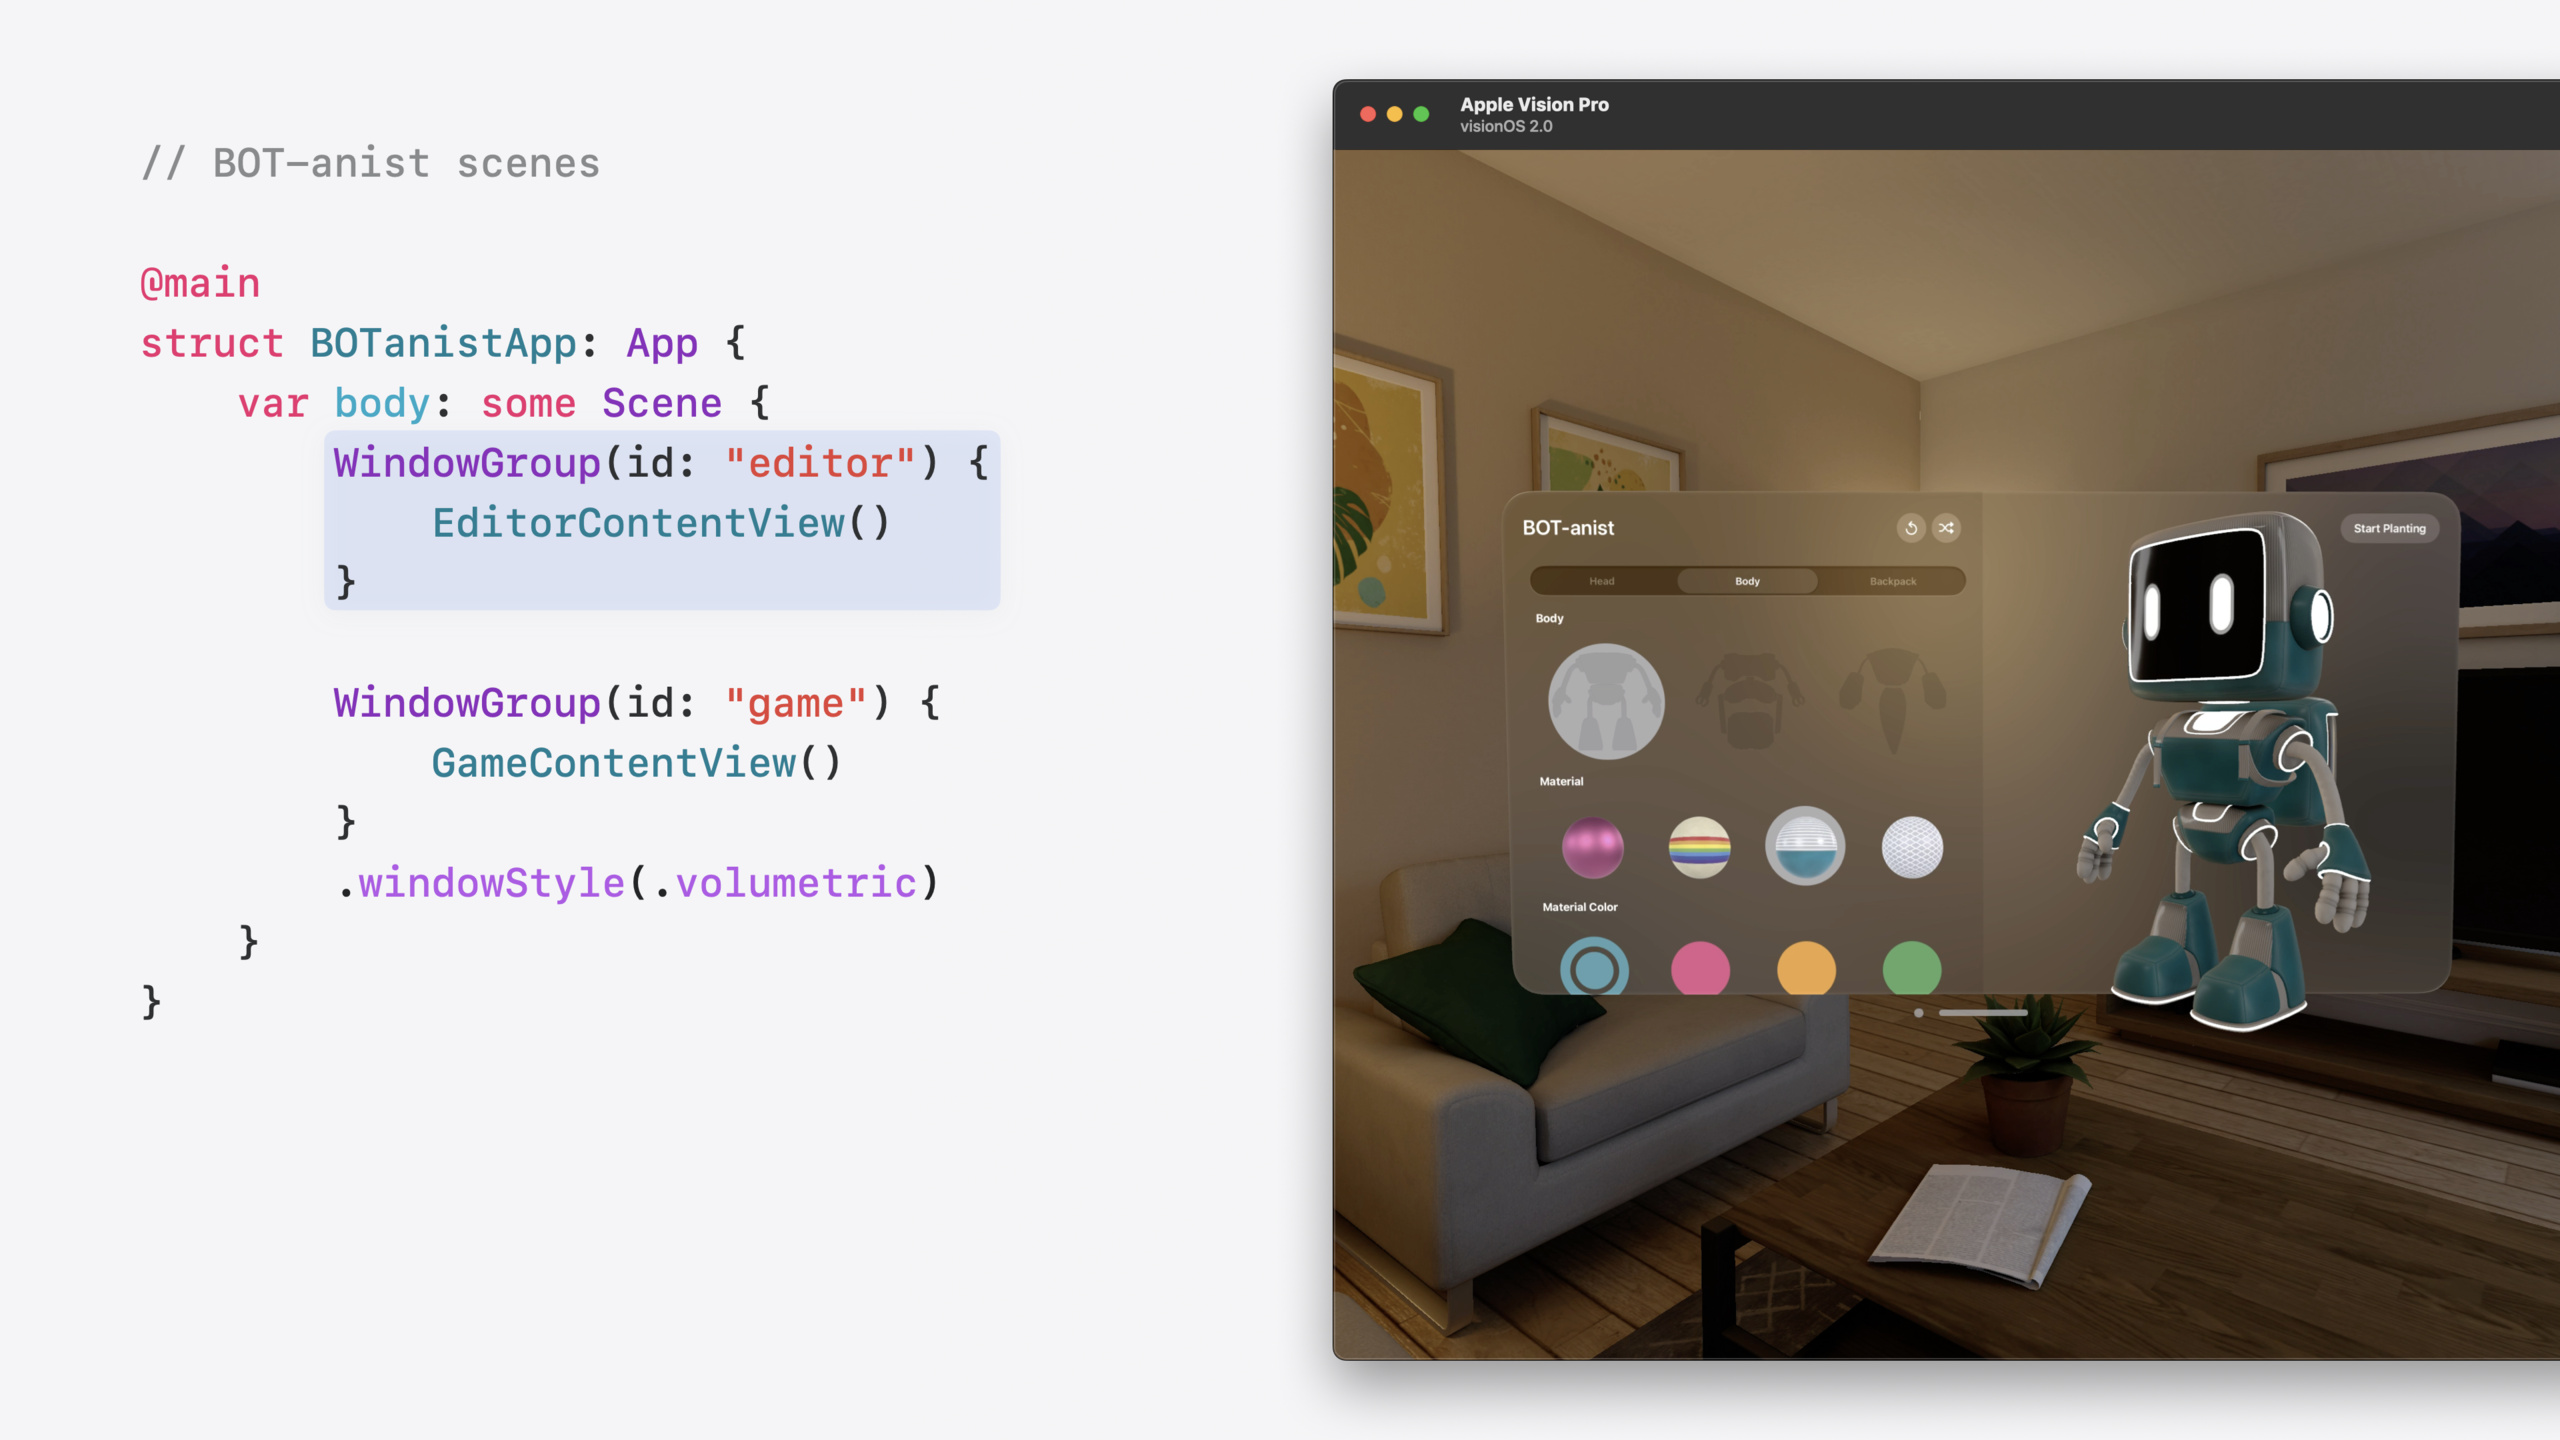
This session focuses on defining, opening, positioning, and sizing windows in SwiftUI, using a cross-platform game app called BOT-anist as the demo. BOT-anist has an editor window and a game Volume on visionOS; the session adds a movie playback window and a control panel window, demonstrating complete window management capabilities.
Core Content
On visionOS and macOS, if your app relies on a single WindowGroup for everything, auxiliary interfaces like control panels, detail pages, and media playback have to be crammed into TabView or NavigationStack. The problem: users cannot freely drag, resize, or place these interfaces side by side. Packing too much into one window makes poor use of space.
SwiftUI’s multi-window capabilities address this. You can define separate WindowGroups for different features, open new windows with openWindow, replace the current window with pushWindow, control initial placement with defaultWindowPlacement, and manage size with defaultSize and windowResizability. These APIs give each feature module its own window that users can move, resize, and close independently — a much better experience than stacking layers in a single window.
This session uses BOT-anist to walk through the full window management workflow. BOT-anist originally had only an editor window and a game Volume; the session adds a movie playback window and a control panel window, covering definition, opening, placement, and size constraints end to end.
Detailed Content
Defining and Opening Windows
BOT-anist’s original Scene definition includes two WindowGroups: editor and game. The game uses .windowStyle(.volumetric) to present as a 3D Volume on visionOS (02:36).
@main
struct BOTanistApp: App {
    var body: some Scene {
        WindowGroup(id: "editor") {
            EditorContentView()
        }

        WindowGroup(id: "game") {
            GameContentView()
        }
        .windowStyle(.volumetric)
    }
}- Each
WindowGroupis identified by anidfor later reference .windowStyle(.volumetric)presents the window as a 3D Volume on visionOS
Adding a movie window requires only a new WindowGroup (03:09):
WindowGroup(id: "movie") {
    MovieContentView()
}
The editor view opens the movie window via the openWindow action from the environment (03:55):
struct EditorContentView: View {
    @Environment(\.openWindow) private var openWindow

    var body: some View {
        Button("Open Movie", systemImage: "tv") {
            openWindow(id: "movie")
        }
    }
}@Environment(\.openWindow)retrieves the open-window action from the environmentopenWindow(id: "movie")passes the WindowGroup id to specify which window to open
pushWindow: Replace Instead of Stack
The movie window and editor do not need to be visible at the same time — pushWindow is a better fit (04:45):
struct EditorContentView: View {
    @Environment(\.pushWindow) private var pushWindow

    var body: some View {
        Button("Open Movie", systemImage: "tv") {
            pushWindow(id: "movie")
        }
    }
}pushWindowopens a new window while hiding the source window- When the new window closes, the source window reappears automatically — no extra logic needed
- Suitable when content does not need to be viewed alongside the source window
Initial Window Placement
New windows appear in front of the source window (visionOS) or at screen center (macOS) by default. Use defaultWindowPlacement to customize (07:46):
WindowGroup(id: "controller") {
    ControllerContentView()
}
.defaultWindowPlacement { content, context in
    #if os(visionOS)
    return WindowPlacement(.utilityPanel)
    #elseif os(macOS)
    let displayBounds = context.defaultDisplay.visibleRect
    let size = content.sizeThatFits(.unspecified)
    let position = CGPoint(
        x: displayBounds.midX - (size.width / 2),
        y: displayBounds.maxY - size.height - 20
    )
    return WindowPlacement(position, size: size)
    #endif
}WindowPlacement(.utilityPanel)places the window near the user within reach on visionOS- On macOS, use
context.defaultDisplay.visibleRectto get the safe area and compute position manually content.sizeThatFits(.unspecified)queries the content’s preferred size- The
contentclosure parameter is a proxy for the window content;contextcontains platform-specific display information
Window Size Strategy
defaultSize sets the initial window size (10:12):
WindowGroup(id: "movie") {
    MovieContentView()
}
.defaultSize(width: 1166, height: 680)- If
defaultWindowPlacementalso returns a size, or the scene restores from saved state,defaultSizeis ignored - A pushed window’s default size equals the source window’s size
Use windowResizability(.contentSize) to constrain resize range based on content min/max (10:49):
WindowGroup(id: "movie") {
    MovieContentView()
        .frame(
            minWidth: 680, maxWidth: 2720,
            minHeight: 680, maxHeight: 1020
        )
}
.windowResizability(.contentSize)- minWidth/maxWidth/minHeight/maxHeight in
.framedefine the content size range .windowResizability(.contentSize)makes the window size follow the content’s min/max constraints- The movie window can shrink to a 680×680 square at minimum, and grow up to 2720×1020 at maximum
The control panel window also uses .contentSize, but its content view has a fixed size (no min/max), so the window cannot be manually resized — it adjusts automatically when switching modes (11:37).
Platform-Specific Enhancements
On visionOS, .persistentSystemOverlays(.hidden) hides the window bar and close button so users can focus on content (05:48):
WindowGroup(id: "movie") {
    ...
}
.persistentSystemOverlays(.hidden)
Freeform-style toolbar ornaments and ToolbarTitleMenu are also common window enhancements on visionOS.
Core Takeaways
- What to do: Split auxiliary features into separate windows. Control panels, settings panels, detail previews, and media players are all candidates for multi-window. Why it’s worth doing: On visionOS and macOS, independent windows let users arrange and resize freely — far more efficient than stacking layers in one window. How to start: Create a new
WindowGroupwith anidfor the auxiliary feature, and open it withopenWindow(id:)from the main view. - What to do: Choose
pushWindoworopenWindowbased on whether content needs to be visible simultaneously. Why it’s worth doing:pushWindowautomatically manages hiding and restoring the source window, avoiding manual close/reopen logic and visual clutter from stacked windows. How to start: Replace@Environment(\.openWindow)with@Environment(\.pushWindow)— the call syntax is the same. - What to do: Set a sensible initial position for new windows with
defaultWindowPlacement. Why it’s worth doing: Default placement may obscure existing content or sit too far from the user; good initial placement reduces manual adjustment. How to start: Add a.defaultWindowPlacementmodifier to the WindowGroup — use.utilityPanelon visionOS, and compute position withcontext.defaultDisplay.visibleRecton macOS. - What to do: Control window resize range with
windowResizability(.contentSize)plus content min/max frame. Why it’s worth doing: Prevents windows from being shrunk until content is unusable, or enlarged to consume too much space. How to start: Set minWidth/maxWidth/minHeight/maxHeight in the content view’s.frame, then add.windowResizability(.contentSize)to the WindowGroup.
Related Sessions
- Bring your iOS or iPadOS game to visionOS — Complete guide to migrating iOS/iPadOS games to visionOS
- Create custom environments for your immersive apps in visionOS — Creating custom environments for immersive apps
- Create enhanced spatial computing experiences with ARKit — Building immersive spatial computing experiences with ARKit
- Design interactive experiences for visionOS — Designing interactive narrative experiences on visionOS
Comments
GitHub Issues · utterances