
Highlight
Automatic passkey upgrades create a passkey in the background after the user signs in with a password and notify them—without interrupting the sign-in flow.
Core Content
Today’s sign-in experience is often tedious: enter username, enter password, wait for an SMS code, enter the code—multi-step flows improve security but slow users down. Many apps show an upsell after sign-in asking “Want to create a passkey?” but users often ignore or decline it.
WWDC 2024 introduces automatic passkey upgrades, changing this entirely. After a normal password sign-in, the system creates a passkey in the background and shows a notification: “A passkey was created for you.” Next time, one tap is enough. There is no interruptive upsell UI anywhere in the process.
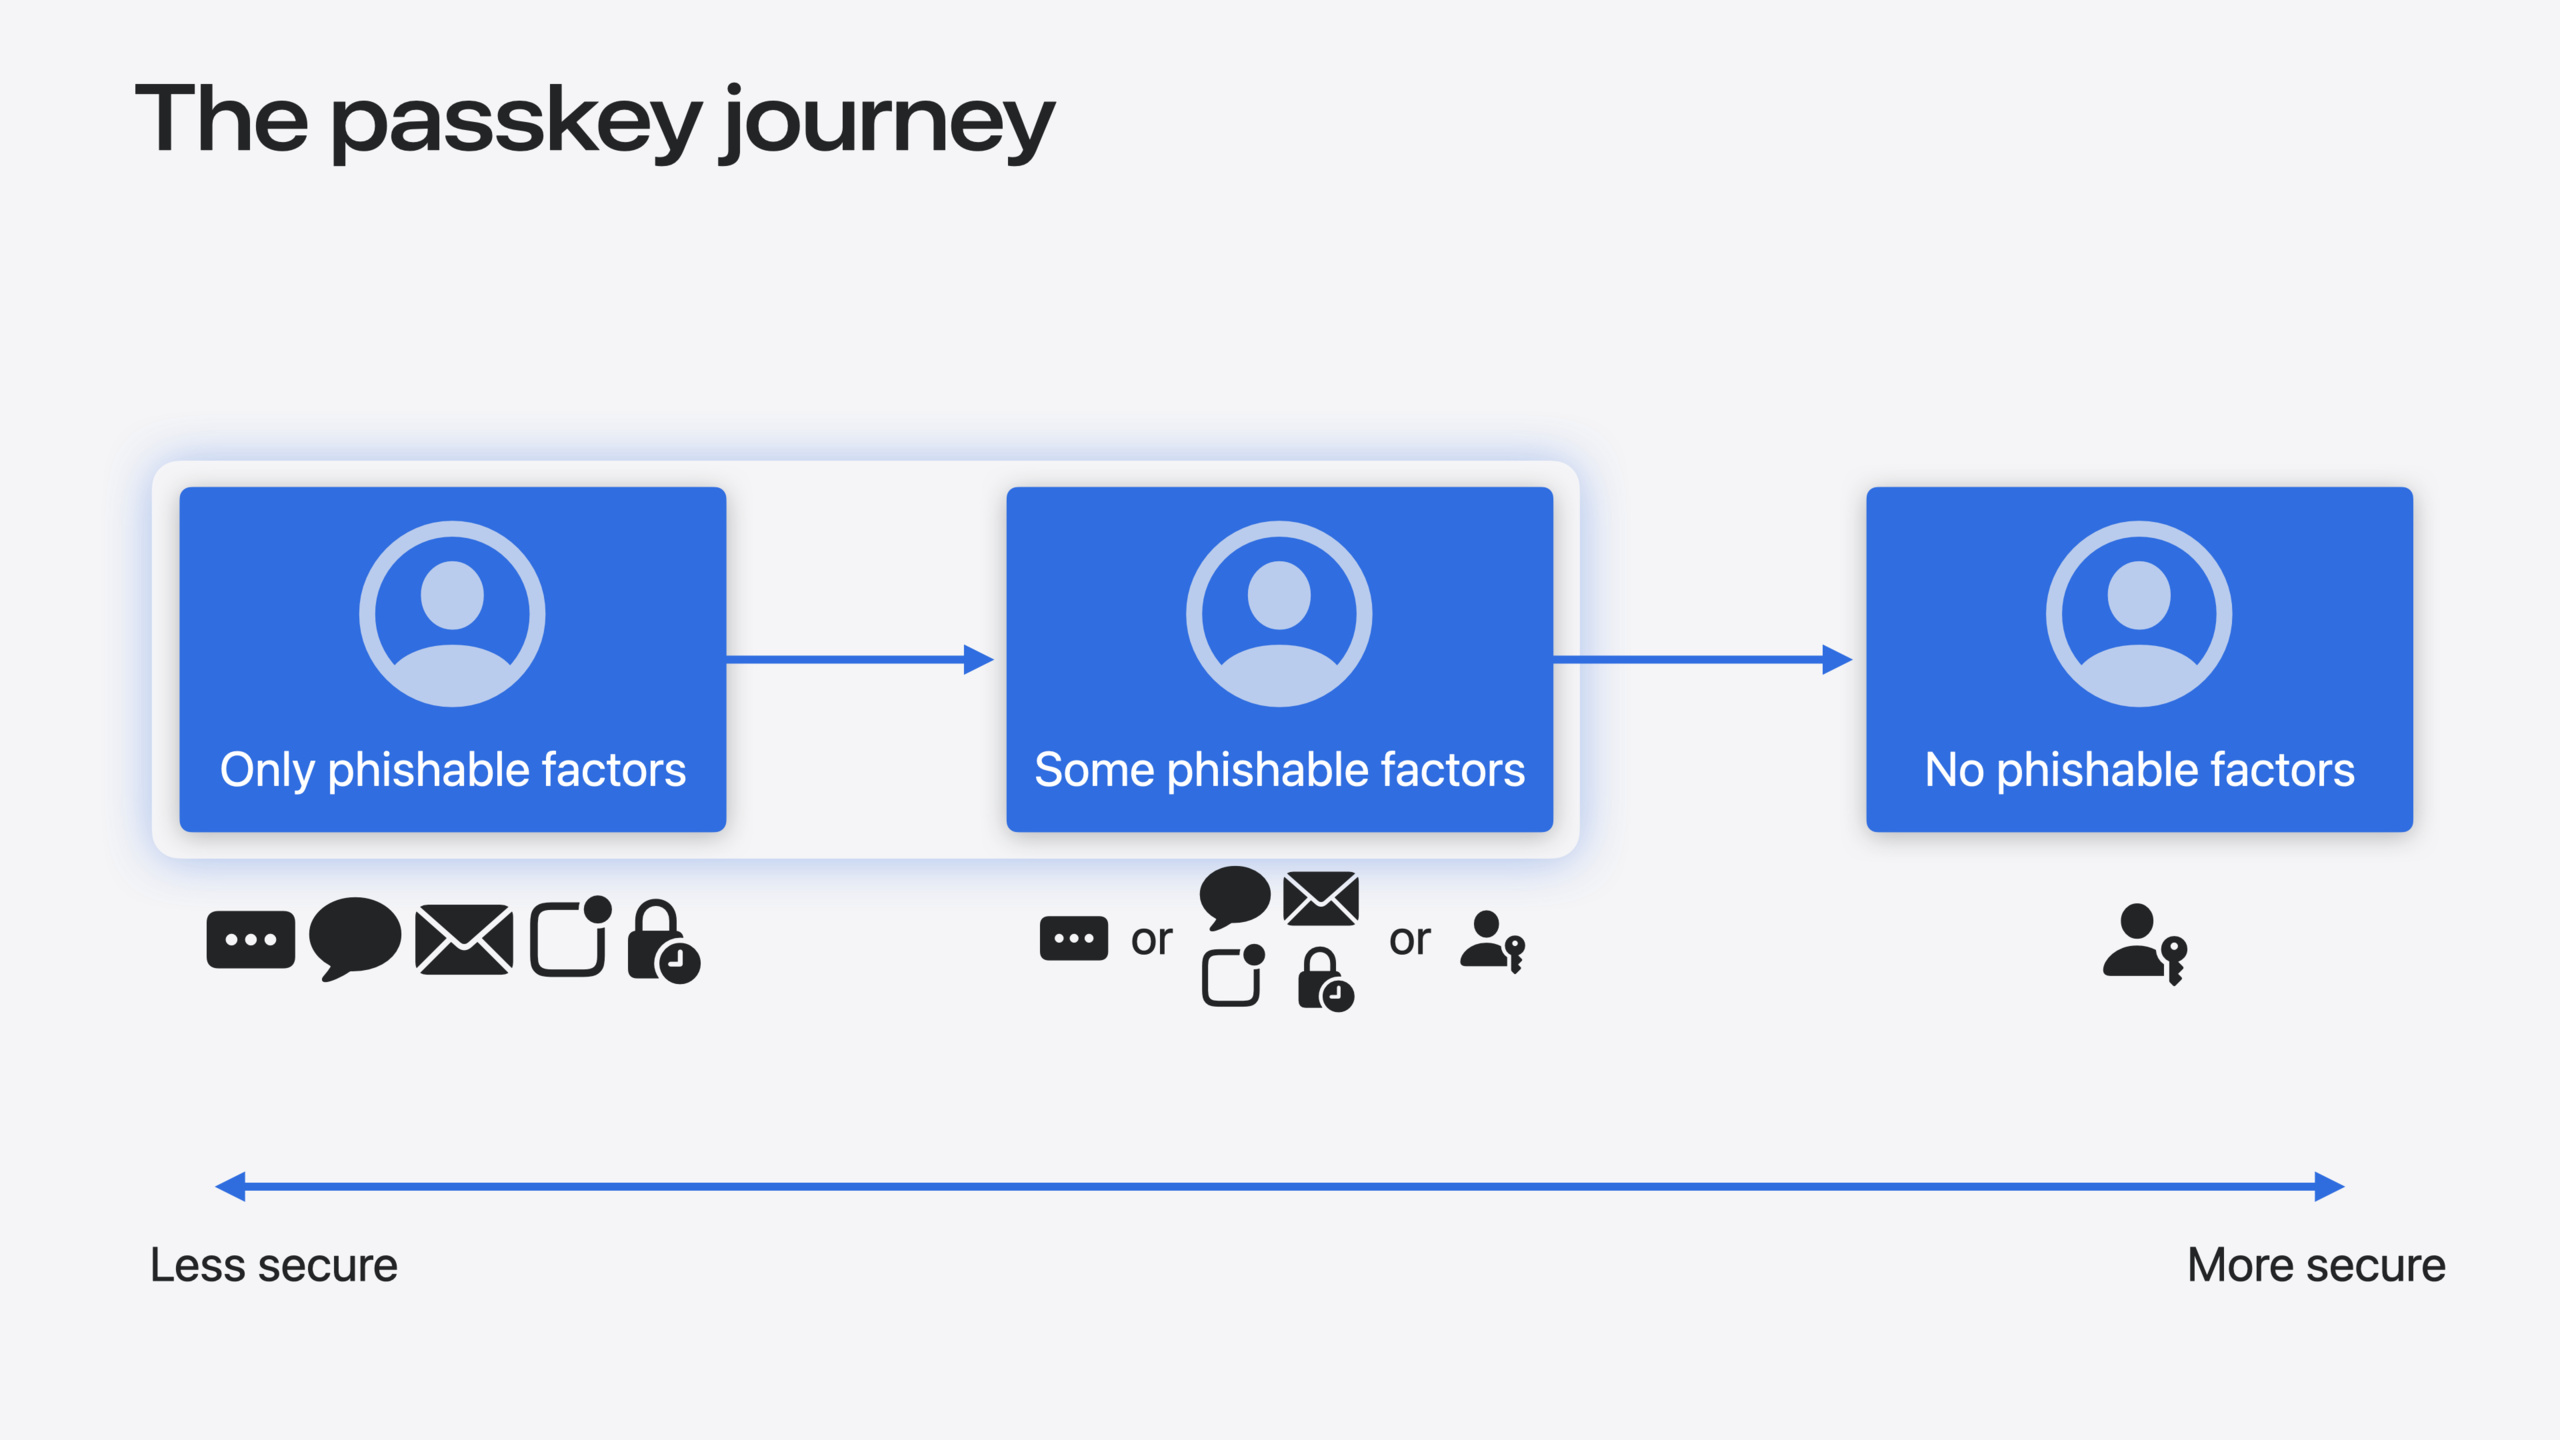
The session notes that the best defense against phishing is having no phishable authentication factors on the account. Passwords, SMS, email codes, push notifications, TOTP—all can be phished. The real goal is to eliminate every phishable factor, and passkeys are the first step toward that.
Detailed Content
How Automatic Passkey Upgrades Work
When handling an automatic upgrade request, the system runs a series of checks (04:18):
- System checks: Is a credential manager configured and does it support automatic upgrades? Is the device passcode set?
- Web-specific checks: Is this a non-private browsing tab?
- Credential manager condition: Most importantly—did that manager just autofill the username and password for this account?
If all conditions are met, the system returns the newly created passkey and the device shows a notification. If not, it returns an error with no UI shown.
iOS/macOS Implementation
The traditional upsell approach looks like this (01:19):
// Offering a passkey upsell

func signIn() async throws {
    let userInfo = try await signInWithPassword()
    guard !userInfo.hasPasskey else { return }
    let provider = ASAuthorizationPlatformPublicKeyCredentialProvider(
        relyingPartyIdentifier: "example.com")

    guard try offerPasskeyUpsell() else { return }
    let request = provider.createCredentialRegistrationRequest(
        challenge: try await fetchChallenge(),
        name: userInfo.user,
        userID: userInfo.accountID)

    do {
        let passkey = try await authorizationController.performRequest(request)
        // Save new passkey to the backend
    } catch { … }
}
With automatic passkey upgrades, set requestStyle to .conditional (02:18):
// Automatic passkey upgrade

func signIn() async throws {
    let userInfo = try await signInWithPassword()
    guard !userInfo.hasPasskey else { return }
    let provider = ASAuthorizationPlatformPublicKeyCredentialProvider(
        relyingPartyIdentifier: "example.com")

    let request = provider.createCredentialRegistrationRequest(
        challenge: try await fetchChallenge(),
        name: userInfo.user,
        userID: userInfo.accountID,
        requestStyle: .conditional)

    do {
        let passkey = try await authorizationController.performRequest(request)
        // Save new passkey to the backend
    } catch { … }
}
Key points:
requestStyle: .conditionalchanges the request from modal creation to conditional automatic creation- If system conditions aren’t met, an error is returned—you can show the original upsell dialog or try again later
- The process never blocks the user’s normal app usage
Web Implementation
Standard Web passkey registration is modal (03:15):
// Modal passkey creation

const options = {
    "publicKey": {
        "rp": { … },
        "user": {
            "name": userInfo.user,
            …
        },
        "challenge": …,
        "pubKeyCredParams": [ … ]
    },
};

await navigator.credentials.create(options);
Add mediation: "conditional" for automatic upgrades (04:03):
// Automatic passkey creation

let capabilities = await PublicKeyCredential.getClientCapabilities();
if (!capabilities.conditionalCreate) { return; }

const options = {
    "publicKey": {
        "rp": { … },
        "user": {
            "name": userInfo.user,
            …
        },
        "challenge": …,
        "pubKeyCredParams": [ … ]
    },
    "mediation": "conditional"
};

await navigator.credentials.create(options);
Key points:
- Use
getClientCapabilities()to check whether the browser supports conditional creation mediation: "conditional"changes the request from explicit user confirmation to system conditional evaluation- If unsupported, fall back to traditional modal registration
New Credential Manager Features
Credential manager extensions gain more capabilities (09:22):
- Support for time-based verification codes
- Can autofill usernames, passwords, or one-time codes into any text field
- Can select up to 3 apps for AutoFill
Declare these capabilities in Info.plist (05:04):
<dict>
	<key>NSExtensionAttributes</key>
	<dict>
		<key>ASCredentialProviderExtensionCapabilities</key>
		<dict>
			<key>ProvidesPasswords</key>
			<true/>
			<key>ProvidesPasskeys</key>
			<true/>
			<key>SupportsConditionalPasskeyRegistration</key>
			<true/>
			<key>ProvidesOneTimeCodes</key>
			<true/>
			<key>ProvidesTextToInsert</key>
			<true/>
		</dict>
	</dict>
</dict>
Key points:
ProvidesPasswordsandProvidesPasskeysdeclare supported credential typesSupportsConditionalPasskeyRegistrationindicates support for automatic passkey upgradesProvidesOneTimeCodesenables one-time code autofillProvidesTextToInsertallows filling any text field
Presentation in the Passwords App
iOS 18 and macOS Sequoia introduce the new Passwords app (10:17). To present your website and app well in it:
- Use OpenGraph metadata: The Passwords app reads
og:site_nameto display the site name - Provide high-resolution icons: Ensure your site has appropriate icon files
- Support otpauth:// links: Make verification code setup a one-tap experience
When an account has both a passkey and a password, the Passwords app merges them into a single entry (11:34), so users see all sign-in methods in one place.
Core Takeaways
1. Enable automatic passkey upgrades for existing accounts
- Why it’s worth it: Users get a more secure, faster sign-in method without changing habits. Apple’s system-level checks ensure passkeys are created only at the right moment, avoiding unnecessary prompts.
- How to start: Set
requestStyleto.conditionalon iOS/macOS andmediation: "conditional"on the Web. Keep your original upsell logic in the error callback as a fallback.
2. Use passkeys as the sole sign-in method for new projects
- Why it’s worth it: Accounts with passkeys only can’t be phished, forgotten, or reset as often. The session states this is the ultimate goal—eliminating every phishable authentication factor.
- How to start: Create a passkey at registration for new users and don’t offer a password option. Provide password only when compatibility truly requires it.
3. Optimize your website’s presentation in the Passwords app
- Why it’s worth it: The Passwords app is the password hub for iOS 18/macOS Sequoia users; good presentation improves brand recognition and makes accounts easier to manage.
- How to start: Ensure all pages and subdomains have correct OpenGraph metadata (
og:site_name) and high-resolution icons. For verification code services, supportotpauth://links for one-tap setup.
Related Sessions
- What’s new in privacy — Overview of privacy updates including permission flows and privacy-preserving data management
- What’s new in location authorization — Location authorization 2.0 and the new CLServiceSession authorization diagnostics system
- Q&A: Passkeys, iCloud Keychain, and authentication services — Written Q&A on passkeys, authentication services, and password autofill
- Deploy passkeys at work — Passkey deployment and management in enterprise environments
Comments
GitHub Issues · utterances