
Highlight
iOS 18 makes a fundamental change to contacts authorization: it introduces Limited Access. Users no longer have only “Allow” and “Deny”—they can choose to share only some contacts. The authorization dialog is now two steps: first asking whether to allow access, then letting users pick which contacts to share or open access to all.
Core Content
In the past, when an app requested contacts permission, users faced an all-or-nothing choice—share the entire address book or share nothing. That was a hard decision. A chat app might only need three or five contacts, but had to open the full list for that need. Many users hit “Deny” because of that choice.
iOS 18 changes this. Contacts authorization now supports Limited Access: the first dialog asks whether to share contacts; the second lets users pick specific contacts to share or choose full access. The confirmation page shows selected contacts and notes that choices can be changed later. Authorization levels expand from three (notDetermined / authorized / denied) to four, adding .limited. In limited state, the app can only read authorized contacts but can still modify or create contacts.
For this new model, Apple introduced two APIs. ContactAccessPicker is a full-screen modal picker suited for bulk adding contacts (such as friend matching in social apps). ContactAccessButton is more clever—a SwiftUI component embedded in your search results list that shows matching contacts your app doesn’t yet have permission to access; users authorize with one tap. It even works when the app is still in notDetermined state—tapping automatically shows a simplified authorization request. Because the request happens when the user is explicitly searching for a contact, they clearly understand why the app needs permission, so authorization rates are naturally higher.
Detailed Content
Four Authorization Levels
iOS 18 contacts authorization has four states (00:33):
- Full Access: Read and write any contact
- Limited Access: Read only user-selected contacts; can modify and create
- Not Determined: Not yet authorized; accessing CNContactStore automatically shows the authorization dialog
- Denied: Cannot read or write any contact data
ContactAccessButton Basic Usage
The official sample below shows embedding ContactAccessButton in a search results list (05:15):
@Binding var searchText: String
@State var authorizationStatus: CNAuthorizationStatus = .notDetermined

var body: some View {
    List {
        ForEach(searchResults(for: searchText)) { person in
            ResultRow(person)
        }
        if authorizationStatus == .limited || authorizationStatus == .notDetermined {
            ContactAccessButton(queryString: searchText) { identifiers in
                let contacts = await fetchContacts(withIdentifiers: identifiers)
                dismissSearch(withResult: contacts)
            }
        }
    }
}
Key points:
searchTextbinds to search field input; the Button uses it to match contacts- Show the button only in
.limitedor.notDeterminedstates—not needed for full access, useless when denied - Callback parameter
identifiersis a[String]of newly authorized contact identifiers - After getting identifiers, fetch full contact data through
CNContactStore
Appearance Customization
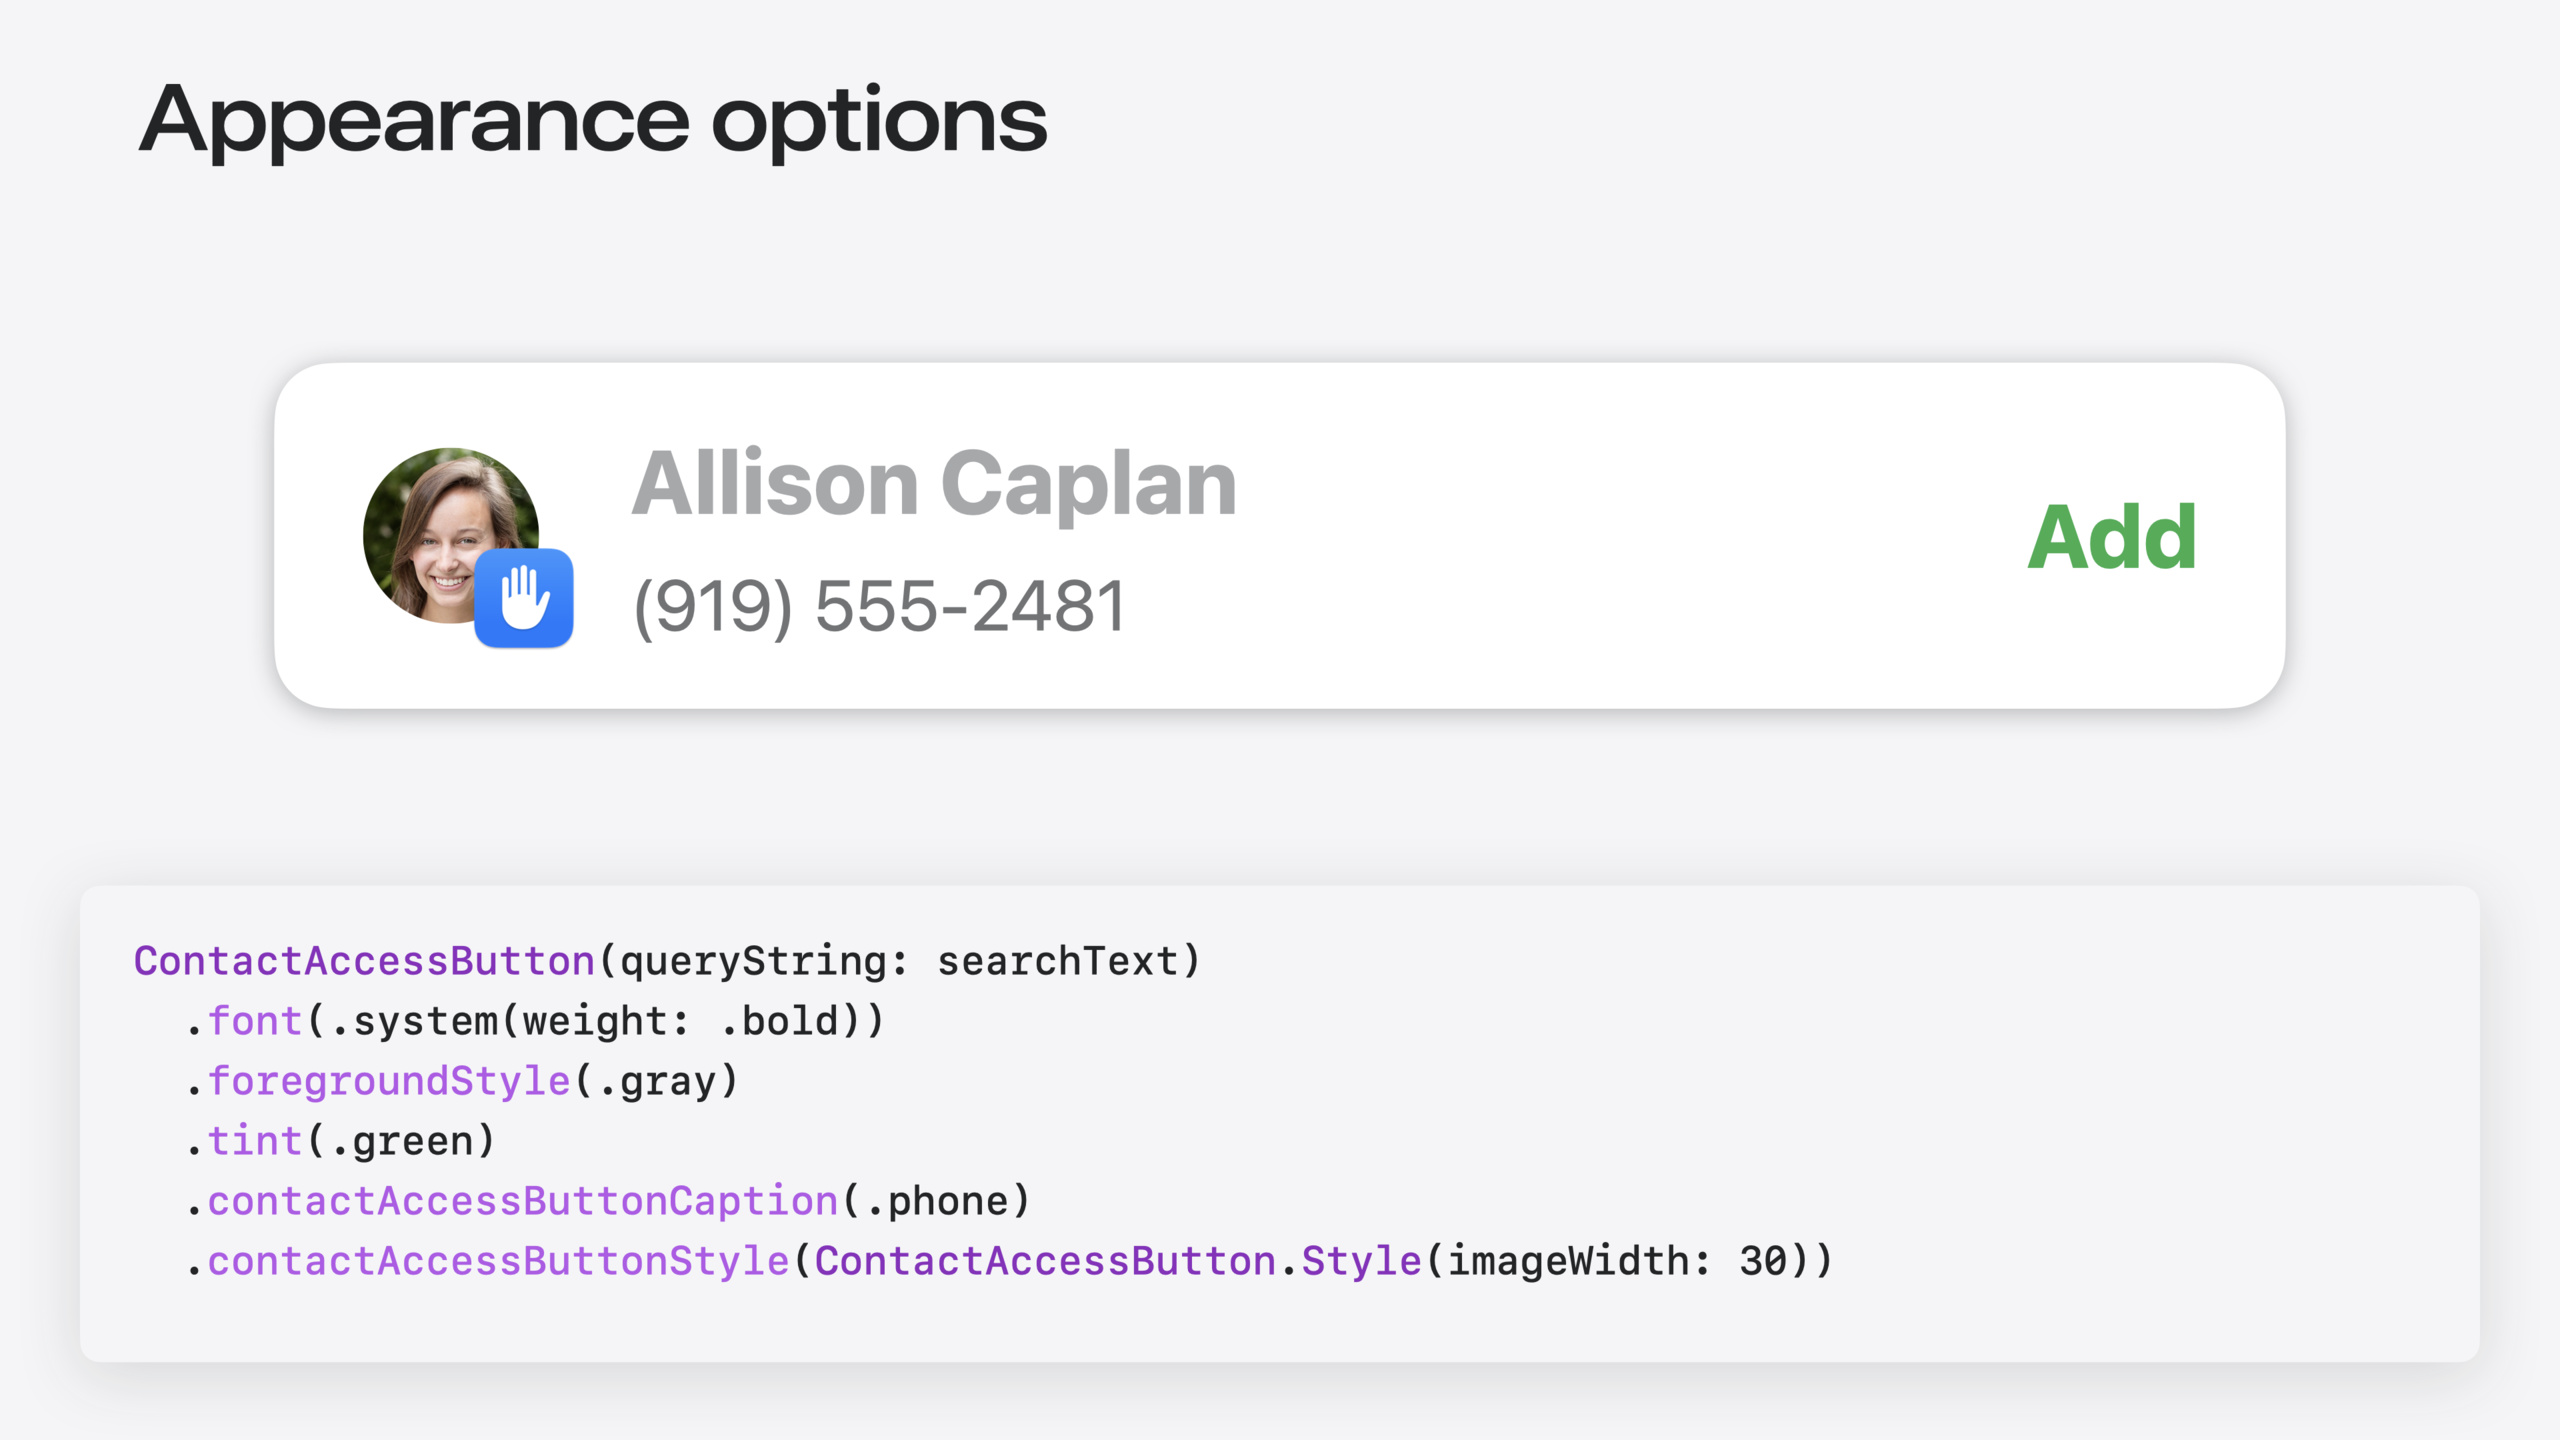
ContactAccessButton supports standard SwiftUI modifiers and two dedicated modifiers (06:10):
ContactAccessButton(queryString: searchText)
  .font(.system(weight: .bold))
  .foregroundStyle(.gray)
  .tint(.green)
  .contactAccessButtonCaption(.phone)
  .contactAccessButtonStyle(ContactAccessButton.Style(imageWidth: 30))
Key points:
.font()controls font for top text and action label.foregroundStyle()controls main text color.tint()controls action label color, following app theme.contactAccessButtonCaption(.phone)specifies which contact info to show when there’s a single match (such as phone number).contactAccessButtonStyle()controls contact avatar size
Privacy Protection
Contact info shown inside the Button is visible but private before the app gets permission (07:07). The Button only responds to verified interaction events. Authorization only takes effect when button content is clearly readable and unobstructed—if foreground and background contrast is too low, or the button is clipped or obscured, taps won’t grant any permission.
Fetching Contact Data with CNContactStore
ContactAccessButton’s callback only returns identifier arrays; fetch full data through CNContactStore (10:11):
func fetchContacts(withIdentifiers identifiers: [String]) async -> [CNContact] {
    return await Task {
        let keys = [CNContactFormatter.descriptorForRequiredKeys(for: .fullName)]
        let fetchRequest = CNContactFetchRequest(keysToFetch: keys)
        fetchRequest.predicate = CNContact.predicateForContacts(withIdentifiers: identifiers)
        var contacts: [CNContact] = []
        do {
            try CNContactStore().enumerateContacts(with: fetchRequest) { contact, _ in
                contacts.append(contact)
            }
        } catch {
            // ...
        }
        return contacts
    }.value
}
Key points:
- Wrap in
Taskto avoid blocking the main thread CNContactFetchRequestspecifies fields to fetch; here only name-related fieldsCNContact.predicateForContacts(withIdentifiers:)filters by identifiersenumerateContacts(with:)iterates results into an array
contactAccessPicker
When you need bulk adding rather than one-by-one authorization, use contactAccessPicker (12:47):
@State private var isPresented = false

var body: some View {
    Button("Show picker") {
        isPresented.toggle()
    }.contactAccessPicker(isPresented: $isPresented) { identifiers in
        let contacts = await fetchContacts(withIdentifiers: identifiers)
        // use the new contacts!
    }
}
Key points:
.contactAccessPicker()modifier binds to anisPresentedstate- Callback reports only newly added contact identifiers, not all authorized ones
- Suited for bulk scenarios like “add more friends” in social apps
- Unlike
CNContactPickerViewController—which is a one-time snapshot and doesn’t change app authorization scope
Choosing Among Four Contact Access Methods
| Method | Use Case | Affected by Authorization Level |
|---|---|---|
| CNContactPickerViewController | One-time selection (email, phone) | Not affected; always available |
| CNContactStore | Main entry for reading/writing contacts | Requires authorization; limited can only access authorized set |
| ContactAccessButton | Authorize one-by-one in search flow | Use in limited or notDetermined |
| contactAccessPicker | Bulk manage authorization scope | Use only in limited |
Core Takeaways
-
What to build: Embed ContactAccessButton in contact search results instead of requesting the entire address book at once. Why it’s worth doing: Users authorize when searching for a specific contact—clear context, higher authorization rates. How to start: Conditionally place
ContactAccessButtonat the bottom of search resultsList, shown only in.limitedor.notDeterminedstates. -
What to build: Adapt existing apps for
.limitedauthorization; provide a “Manage Contact Access” entry in Settings. Why it’s worth doing: iOS 18 users can choose limited access; if your app doesn’t handle this state, search results miss many contacts and experience degrades. How to start: Check ifCNContactStore.authorizationStatus()returns.limited; add a button in Settings callingcontactAccessPickerso users can expand authorization scope. -
What to build: Customize ContactAccessButton appearance with SwiftUI modifiers so it fits your UI. Why it’s worth doing: Default styling may clash with app style and feel jarring; insufficient contrast makes button taps invalid. How to start: Use
.font(),.foregroundStyle(),.tint()to match app theme; use.contactAccessButtonCaption(.phone)to show phone numbers on single match; ensure sufficient contrast.
Related Sessions
- Catch up on accessibility in SwiftUI — SwiftUI accessibility updates; ContactAccessButton readability requirements align with accessible design
- Demystify SwiftUI containers — Deep dive into SwiftUI container views; ContactAccessButton List integration relies on container mechanics
- Evolve your document launch experience — Document launch experience optimization, another example of “authorize on demand” design
- Bring expression to your app with Genmoji — Genmoji integration for personalized contact-related expression scenarios
Comments
GitHub Issues · utterances