
Highlight
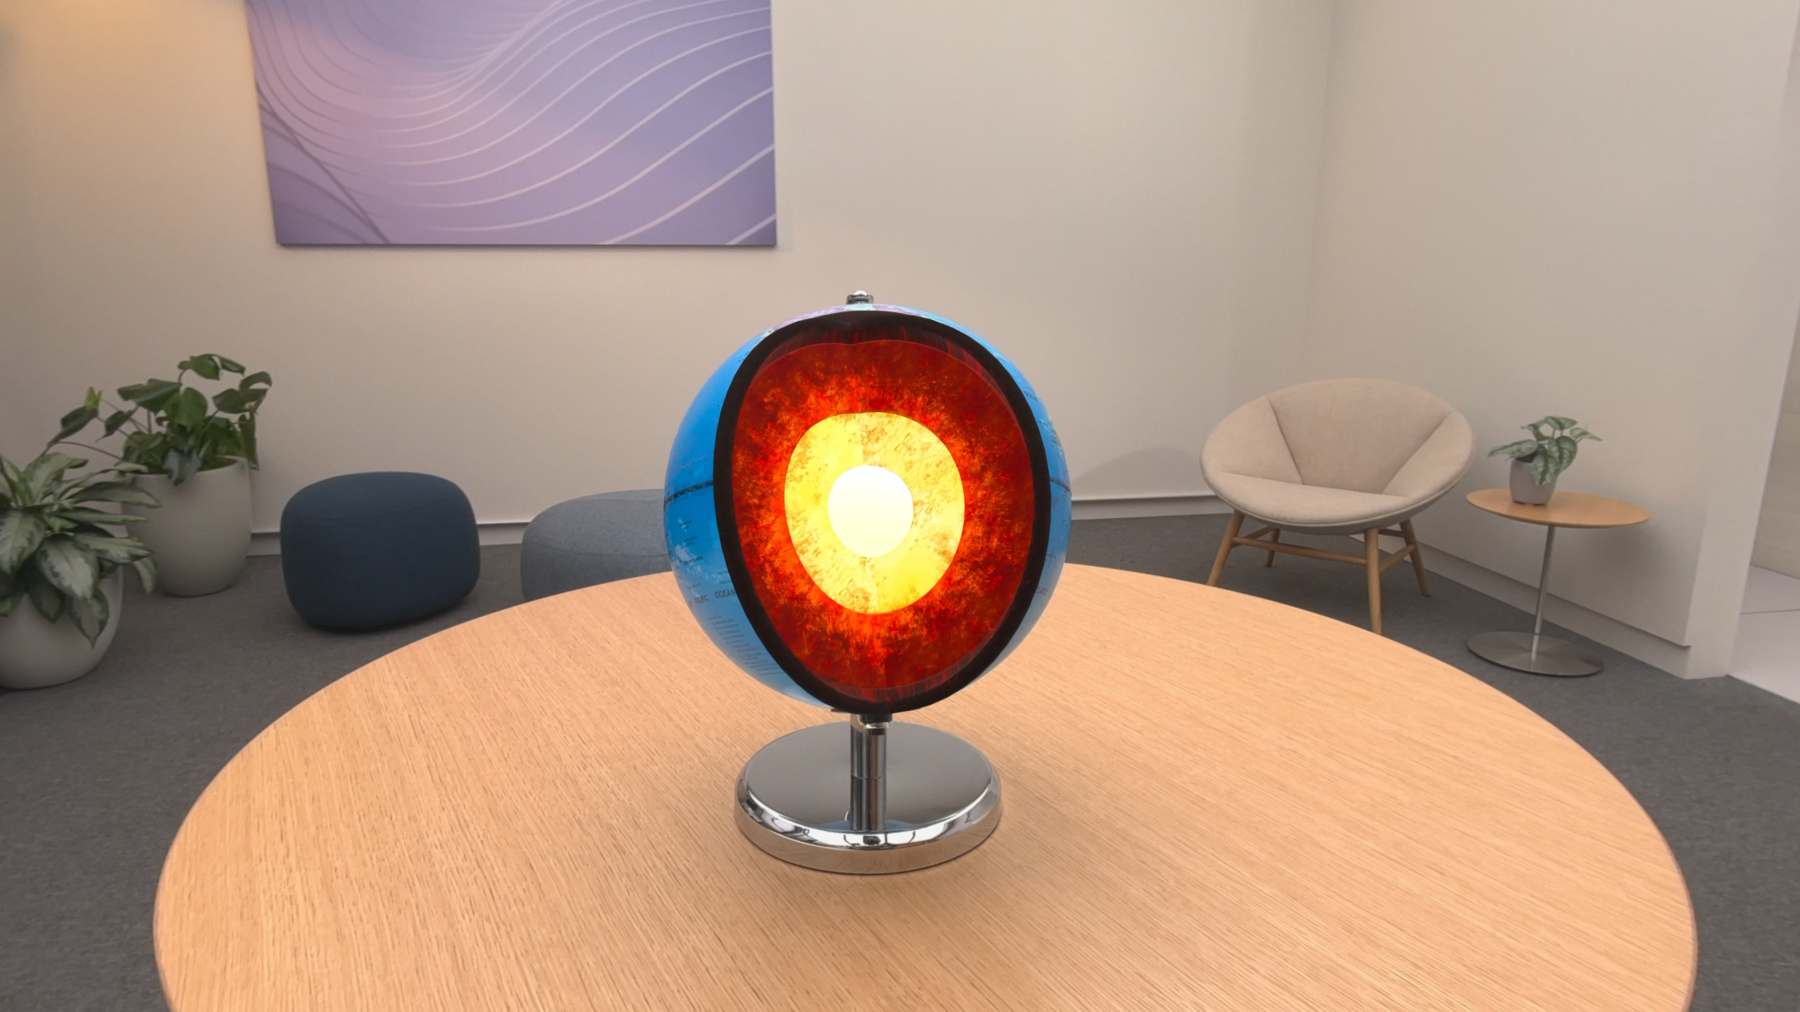
Object Tracking is a brand-new capability in visionOS this year, letting your app recognize and track specific real-world objects—the globe on your desk, that microscope—and anchor virtual content to them. Previous anchor types only supported planes, images, and hands; Object Tracking turns real objects themselves into anchors. In the demo, a real globe is orbited by virtual satellites; tap to see a cross-section of the core—virtual moon and space station disappear behind the real globe, creating strong immersion.
Core Content
When building spatial experiences on visionOS, what you could anchor was limited: planes, images, hands. If your virtual content needed to “attach” to a specific real object—such as satellites orbiting a real globe—you could only approximate with plane anchors, imprecise positioning, and no occlusion.
Object Tracking solves this. It turns real objects themselves into anchors. The system recognizes objects via machine learning models and continuously outputs position, orientation, and bounding box. Your virtual content can attach precisely to object surfaces and even be occluded by real objects—virtual satellites disappear behind the globe as if they really went around it.
The workflow has three steps: first, provide a USDZ 3D model of the target object (the more realistic, the better—you can generate one from iPhone scanning with Object Capture). Second, train a machine learning model in the Create ML app, outputting a .referenceobject file. Third, load the reference object in your visionOS app, start tracking, and anchor virtual content.
Apple designed this to be relatively approachable—Create ML provides a visual training interface; drag in a USDZ file to start training, all running locally on your Mac. But there are clear limits: objects must be rigid, asymmetric, and mostly stationary, and you need to train an ML model per object. Training can take hours and only supports Apple Silicon Mac.
Detailed Content
Creating a Reference Object
Training input is a USDZ 3D model. Apple recommends models close to the object’s real appearance—a “digital twin.” The simplest way is scanning the object with Object Capture on iPhone/iPad (03:47). For glossy or transparent parts, you can also provide multi-material USDZ assets (03:58).
Objects must meet three conditions (04:16):
- Mostly stationary
- Rigid shape and texture
- Asymmetric—looks different from every angle
In Create ML, a new Object Tracking template was added under the “Spatial” category this year. One critical configuration step: choose viewing angle (06:52). Three options:
- All Angles: Object visible from any angle (such as a rotatable globe), requiring unique appearance from every angle
- Upright: Object placed vertically on a table (such as a microscope), excluding bottom views
- Front: Object placed vertically without needing back tracking (such as an oscilloscope), excluding back and bottom
Choosing the correct viewing angle greatly affects tracking quality because it guides which perspectives ML training focuses on.
Anchoring Content in Reality Composer Pro
After training, create a Transform Entity in Reality Composer Pro, add AnchoringComponent, select the new “Object” target type, and associate your reference object (10:18). A semi-transparent USDZ model preview appears in the viewport to help precisely place virtual content—such as a space shuttle launch entity at Cape Canaveral on the globe.
To achieve “virtual occluded by real” effect, add a USDZ globe entity under the Anchor Entity as an occluder and apply Occlusion Material in the ShaderGraph editor (11:55). When Object Tracking updates the parent anchor’s transform, the occluder aligns with the real globe, and orbiting virtual objects naturally disappear behind it.
Coaching UI with RealityKit API
When users haven’t found the target object yet, the app needs a coaching interface. First, display the object’s preview model (13:55):
// Display object USDZ
struct ImmersiveView: View {
   @State var globeAnchor: Entity? = nil
    var body: some View {
        RealityView { content in
            // Load the reference object with ARKit API
            let refObjURL =
            Bundle.main.url(forResource: "globe", withExtension: ".referenceobject")
            let refObject = try? await ReferenceObject(from: refObjURL!)

            // Load the model entity with USDZ path extracted from reference object
            let globePreviewEntity =
            try? await Entity.init(contentsOf: (refObject?.usdzFile)!)

            // Set opacity to 0.5 and add to scene
            globePreviewEntity!.components.set(OpacityComponent(opacity: 0.5))
            content.add(globePreviewEntity!)
        }
    }
}
Key points:
ReferenceObject(from:)loads the.referenceobjectfile via ARKit APIrefObject?.usdzFileextracts the original USDZ path from the reference object for loading the preview modelOpacityComponent(opacity: 0.5)sets semi-transparency, indicating this is preview not actual tracking result
Second, listen for anchor state changes (14:13):
// Check anchor state
struct ImmersiveView: View {
   @State var globeAnchor: Entity? = nil
    var body: some View {
        RealityView { content in
            if let scene = try? await Entity(named: "Immersive", in: realityKitContentBundle) {
                globeAnchor = scene.findEntity(named: "GlobeAnchor")
                content.add(scene)
            }
            let updateSub = content.subscribe(to: SceneEvents.AnchoredStateChanged.self) { event in
                if let anchor = globeAnchor, event.anchor == anchor {
                    if event.isAnchored {
                        // Object anchor found, trigger transition animation
                    } else {
                        // Object anchor not found, display coaching UI
                    }
                }
            }
        }
    }
}
Key points:
SceneEvents.AnchoredStateChangedfires when anchor state changesevent.isAnchoredtrue means the object is tracked, false means lost- Switch between coaching UI and transition animation based on isAnchored state
Third, get the tracked object’s spatial transform for transition animation (14:31):
// Transform space
struct ImmersiveView: View {
   @State var globeAnchor: Entity? = nil
    var body: some View {
        RealityView { content in
            // Setup anchor transform space for object and world anchor
            let trackingSession = SpatialTrackingSession()
            let config = SpatialTrackingSession.Configuration(tracking: [.object, .world])
            if let result = await trackingSession.run(config) {
                if result.anchor.contains(.object) {
                    // Tracking not authorized, adjust experience accordingly
                }
            }
           // Get tracked object's world transform, identity if tracking not authorized
            let objectTransform = globeAnchor?.transformMatrix(relativeTo: nil)
            // Implement animation
            ...
        }
    }
}
Key points:
SpatialTrackingSession.Configuration(tracking: [.object, .world])requests object and world tracking authorizationresult.anchor.contains(.object)checks whether object tracking is authorizedtransformMatrix(relativeTo: nil)gets the anchor’s transform in world coordinates; returns identity if not authorized
New ARKit API
Apple also released companion ARKit Object Tracking API this year (15:45), providing access to tracked object bounding boxes and corresponding USDZ files, plus notifications for tracking-ready state and error events. A sample app is available from developer documentation.
Core Takeaways
-
What to build: Overlay virtual labels on teaching aids in education apps. Why it’s worth doing: When students view a real microscope with Apple Vision Pro, virtual labels can annotate part names and functions—far more intuitive than paper manuals. How to start: Scan teaching aids with Object Capture to generate USDZ, train a reference object in Create ML, anchor SwiftUI labels with RealityKit.
-
What to build: Trigger immersive experiences from physical products in retail displays. Why it’s worth doing: When consumers pick up a product in store, virtual animations and feature demos play directly on the product—more engaging than screen video. How to start: Train models with “Front” or “Upright” viewing angles (products usually stand vertically), use Occlusion Material so virtual content disappears behind the product.
-
What to build: Overlay virtual operation guides on equipment in industrial scenarios. Why it’s worth doing: Maintenance staff facing complex equipment get virtual arrows and highlights directly on the device, reducing manual lookup time. How to start: Use the Coaching UI pattern—show device preview to guide users to the target, switch to operation guide overlay after tracking, manage state via
AnchoredStateChangedevents.
Related Sessions
- Create enhanced spatial computing experiences with ARKit — Full introduction to ARKit’s new Room Tracking and Object Tracking APIs this year
- Discover area mode for Object Capture — Object Capture area scan mode for generating 3D models of more complex scenes
- What’s new in Create ML — Create ML’s new Object Tracking template and other updates this year
- Discover RealityKit APIs for iOS, macOS, and visionOS — Cross-platform RealityKit API new features
Comments
GitHub Issues · utterances