
Highlight
visionOS has two paths for 3D rendering: RealityKit and Metal. RealityKit suits Volume and ImmersiveSpace via Swift or Unity PolySpatial—Game Room and LEGO Builder’s Journey follow this pattern. But if your game already has a mature Metal pipeline, rendering directly with Metal is more practical.
Core Content
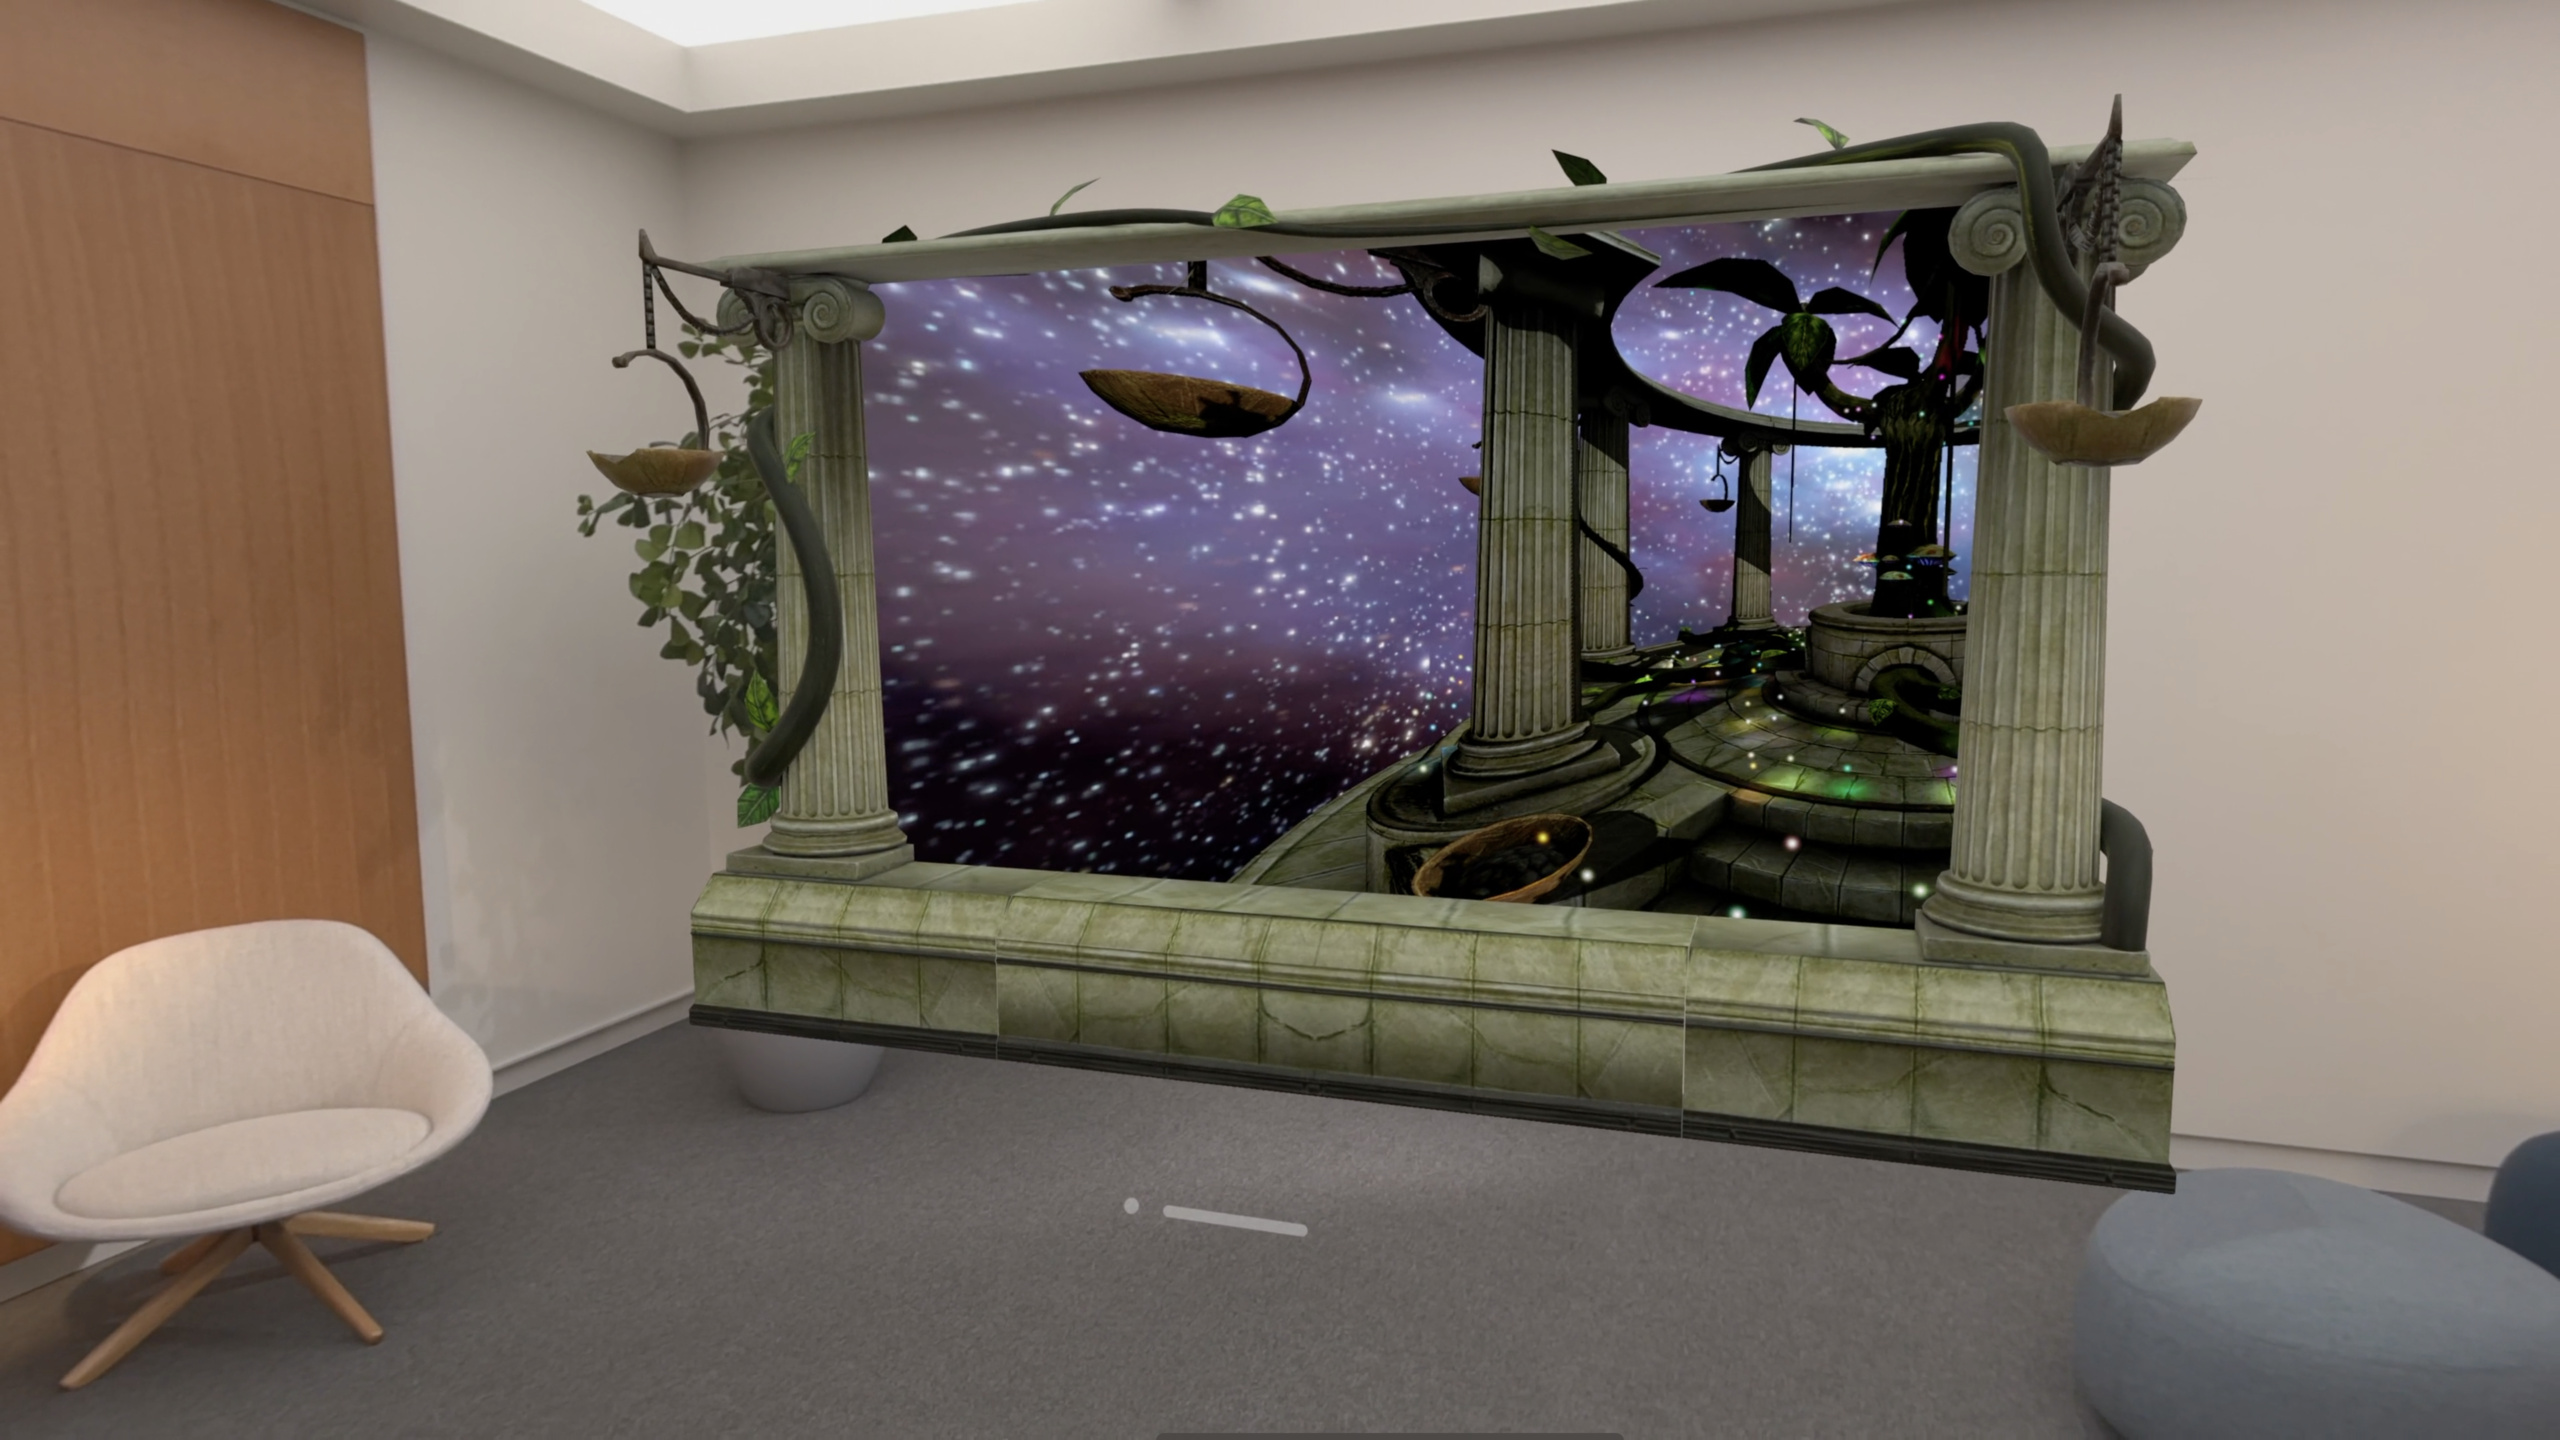
You have a Metal game running on iOS and want it on Vision Pro. The simplest approach is compiling with the iOS SDK as a Compatible App in a visionOS window—touch and controller input work out of the box, and the experience is similar to iPad. But that wastes Vision Pro’s stereoscopic display and spatial awareness.
Apple’s approach is progressive upgrade: start from a compatible app and add features step by step. Switch from iOS SDK to visionOS SDK compilation and fix a few build errors; migrate the render target from CAMetalLayer to RealityKit’s LowLevelTexture; then optionally add a 3D frame, ImmersiveSpace background, stereoscopy, head tracking, and variable refresh rate (VRR). Each step can ship independently—you don’t need to do everything at once.
Wylde Flowers is a real example of this path. After running the iPad version as a compatible app on visionOS, they gradually added a 3D window frame that changes with game scenes, a dandelion-falling immersive background, and stereoscopic depth rendering—becoming a completely different experience. Cut The Rope 3 used the same approach for dynamic frames; Void-X added rain, lightning, and 3D bullets behind the window.
Detailed Content
Migrating from CAMetalLayer to LowLevelTexture
Metal games on iOS typically render to CAMetalLayer. On visionOS you can keep doing that, but Apple recommends migrating to LowLevelTexture for more control—especially when adding stereoscopy and VRR later.
CAMetalLayer looks like this (05:44):
class CAMetalLayerBackedView: UIView, CAMetalDisplayLinkDelegate {

    var displayLink: CAMetalDisplayLink!

    override class var layerClass : AnyClass { return CAMetalLayer.self }

    func setup(device: MTLDevice) {
        let displayLink = CAMetalDisplayLink(metalLayer: self.layer as! CAMetalLayer)
        displayLink.add(to: .current, forMode: .default)
        self.displayLink.delegate = self
    }

    func metalDisplayLink(_ link: CAMetalDisplayLink,
              needsUpdate update: CAMetalDisplayLink.Update) {
        let drawable = update.drawable
        renderFunction?(drawable)
    }
}
Key points:
layerClassreturnsCAMetalLayer.self, making this UIView use a Metal layer as its backing layerCAMetalDisplayLinkis a new visionOS API replacing iOS’sCADisplayLink, providing per-frame render callbacks- In the callback, get the
drawableand pass it to your render function
Migration to LowLevelTexture (06:20):
let lowLevelTexture = try! LowLevelTexture(descriptor: .init(
    pixelFormat: .rgba8Unorm,
    width: resolutionX,
    height: resolutionY,
    depth: 1,
    mipmapLevelCount: 1,
    textureUsage: [.renderTarget]
))

let textureResource = try! TextureResource(
    from: lowLevelTexture
)
// assign textureResource to a material

let commandBuffer: MTLCommandBuffer = queue.makeCommandBuffer()!
let mtlTexture: MTLTexture = texture.replace(using: commandBuffer)
// Draw into the mtlTexture
Key points:
LowLevelTextureis created with pixel format and resolution, marked as.renderTarget- Wrap it with
TextureResource(from:)into a RealityKit texture resource assignable to any Material replace(using:)returns anMTLTexturewhere you execute Metal draw commands- Render results appear directly in the RealityKit scene—no extra copy needed
3D Frame + ImmersiveSpace Background
Stack Metal rendering and a RealityKit frame with ZStack (07:06):
struct ContentView: View {

    @State var game = Game()

    var body: some View {
        ZStack {
           CAMetalLayerView { drawable in
                             game.render(drawable) }

           RealityView { content in
                content.add(try! await
                            Entity(named: "Frame"))
            }.frame(depth: 0)
        }
    }
}
Key points:
CAMetalLayerViewhandles the game’s Metal renderingRealityViewloads a 3D model as a frame;.frame(depth: 0)keeps frame and game view on the same plane- The frame can switch dynamically via
@State—Cut The Rope 3 changes frames per level
ImmersiveSpace background (07:45):
@main
struct TestApp: App {

    @State private var appModel = AppModel()

    var body: some Scene {
        WindowGroup {
            // Metal render
            ContentView(appModel)
        }

        ImmersiveSpace(id: "ImmersiveSpace") {
            // RealityKit background
            ImmersiveView(appModel)
        }.immersionStyle(selection: .constant(.progressive),
                                    in: .progressive)
    }
}
Key points:
- Game content lives in
WindowGroup, background inImmersiveSpace—they communicate via shared@State .progressiveimmersion style gradually reveals the background without fully occluding the real environment
Stereoscopy
Stereoscopy means rendering one image per eye. Change your game loop from “render once” to “render twice” (13:11):
override func draw(provider: DrawableProviding) {

    encodeShadowMapPass()

    for viewIndex in 0..<provider.viewCount {
        scene.update(viewMatrix: provider.viewMatrix(viewIndex: viewIndex),
               projectionMatrix: provider.projectionMatrix(viewIndex: viewIndex))
        var commandBuffer = beginDrawableCommands()
        if let color = provider.colorTexture(viewIndex: viewIndex, for: commandBuffer),
           let depthStencil = provider.depthStencilTexture(viewIndex: viewIndex,
                                                                 for: commandBuffer)
        {
            encodePass(into: commandBuffer, color: color, depth: depth)
        }
        endFrame(commandBuffer)
    }
}
Key points:
- Shadow Map is encoded once, shared by both eyes
provider.viewCountis 2 when stereoscopy is enabled—one per eye- Each eye uses its own viewMatrix and projectionMatrix, rendering to separate color and depthStencil textures
- Vertex Amplification is recommended to reduce draw calls—one draw call outputs both eyes
Important parallax note: negative parallax makes objects float in front of the screen, positive parallax pushes them behind. If parallax exceeds inter-pupillary distance, light diverges and eyes can’t focus—worse than “beyond infinity.” Apple recommends rendering stereoscopic content on the infinity plane (similar to Spatial Photo portals), ensuring all content appears before infinity. Also add a slider in game settings so players can adjust stereoscopy strength.
Head Tracking
Head tracking makes your game look like a window into another world—the view shifts as you move your head. You need an ImmersiveSpace to get ARKit data (13:55):
import ARKit

let arSession = ARKitSession()
let worldTracking = WorldTrackingProvider()

try await arSession.run([worldTracking])

// Every frame

guard let deviceAnchor = worldTracking.queryDeviceAnchor(
    atTimestamp: CACurrentMediaTime() + presentationTime
) else { return }

let transform: simd_float4x4 = deviceAnchor
    .originFromAnchorTransform
Key points:
WorldTrackingProviderprovides device position, queried each frame- Pass
CACurrentMediaTime() + presentationTimefor prediction to compensate render latency—the example uses 33ms (3 frames at 90fps) - Returned
originFromAnchorTransformis the transform in ImmersiveSpace coordinates
ARKit returns head position in ImmersiveSpace coordinates—you need to convert to window coordinates (14:22):
let headPositionInImmersiveSpace: SIMD3<Float> = deviceAnchor
    .originFromAnchorTransform
    .position

let windowInImmersiveSpace: float4x4 = windowEntity
    .transformMatrix(relativeTo: .immersiveSpace)

let headPositionInWindow: SIMD3<Float> = windowInImmersiveSpace
    .inverse
    .transform(headPositionInImmersiveSpace)

renderer.setCameraPosition(headPositionInWindow)
Key points:
- Get head position in ImmersiveSpace from ARKit
transformMatrix(relativeTo: .immersiveSpace)is a new visionOS 2.0 API for the window entity’s transform in ImmersiveSpace- Invert and transform head position to window coordinates, pass to renderer
With head position, build an asymmetric projection matrix so the frustum precisely passes through window bounds (15:47):
let cameraPosition: SIMD3<Float>
let viewportBounds: BoundingBox

// Camera facing -Z
let cameraTransform = simd_float4x4(AffineTransform3D(translation: Size3D(cameraPosition)))

let zNear: Float = viewportBounds.max.z - cameraPosition.z
let l /* left */: Float = viewportBounds.min.x - cameraPosition.x
let r /* right */: Float = viewportBounds.max.x - cameraPosition.x
let b /* bottom */: Float = viewportBounds.min.y - cameraPosition.y
let t /* top */: Float = viewportBounds.max.y - cameraPosition.y

let cameraProjection = simd_float4x4(rows: [
    [2*zNear/(r-l),             0, (r+l)/(r-l),      0],
    [            0, 2*zNear/(t-b), (t+b)/(t-b),      0],
    [            0,             0,           1, -zNear],
    [            0,             0,           1,      0]
])
Key points:
- Near clip plane aligns with the window plane, preventing objects from clipping outside window edges
- Build asymmetric frustum from camera-to-window edge distances, mapping precisely to the window rectangle
- When the player views from off-center, the frustum naturally tilts, producing a “looking through the window from the side” effect
Variable Rate Rasterization (VRR)
Stereoscopy doubles fragment count. VRR lowers peripheral resolution, concentrating compute in the center of view. With head tracking, build a VRR map from head transforms. Without head position in Shared Space, use AdaptiveResolutionComponent—place it on a 2D grid over the game viewport and it reports how many pixels a 1-meter cube occupies at each position. Extract horizontal and vertical VRR maps from these values, interpolate, and pass to the Metal renderer. After rendering, invert the VRR map to remap content back to display resolution.
Core Takeaways
-
What to do: Add a 3D frame to an existing iPad game. Why it’s worth it: extremely low cost (one RealityView + 3D model), huge visual differentiation—Cut The Rope 3’s dynamic frames made the visionOS version instantly recognizable. How to start: ZStack Metal render view and RealityView, load a USDZ model as frame, switch via @State across game states.
-
What to do: Add an ImmersiveSpace background behind the game window. Why it’s worth it: no changes to game rendering code, yet players feel surrounded by the game world—Void-X did this with rain and 3D bullets. How to start: Add an ImmersiveSpace in the App body with
.progressiveimmersion style, share @State to link background and game state. -
What to do: Add stereoscopy and head tracking. Why it’s worth it: together they make the game window feel like a real window—view shifts when looking from the side, a qualitative leap over pure 2D rendering. How to start: Migrate render target to LowLevelTexture, loop over DrawableProviding’s viewCount for both eyes, open an ImmersiveSpace for ARKit head position, build asymmetric projection matrix.
-
What to do: Use VRR to offset stereoscopy performance cost. Why it’s worth it: stereoscopy doubles fragments; VRR lowers peripheral resolution to recover frame rate, barely noticeable to players. How to start: In Shared Space use AdaptiveResolutionComponent for 2D grid data, extract horizontal/vertical VRR maps, pass to Metal renderer; with head tracking, build a more precise map from transform matrices.
Related Sessions
- Create custom environments for your immersive apps in visionOS — Creating custom 3D environments for immersive apps, pairs with this session’s ImmersiveSpace background
- Create enhanced spatial computing experiences with ARKit — Deep dive into ARKit’s WorldTrackingProvider, which this session’s head tracking depends on
- Dive deep into volumes and immersive spaces — Detailed Volume and ImmersiveSpace capabilities, extending this session’s window + background architecture
- Discover RealityKit APIs for iOS, macOS and visionOS — Includes portal-crossing API mentioned here for objects crossing window boundaries
Comments
GitHub Issues · utterances