
Highlight
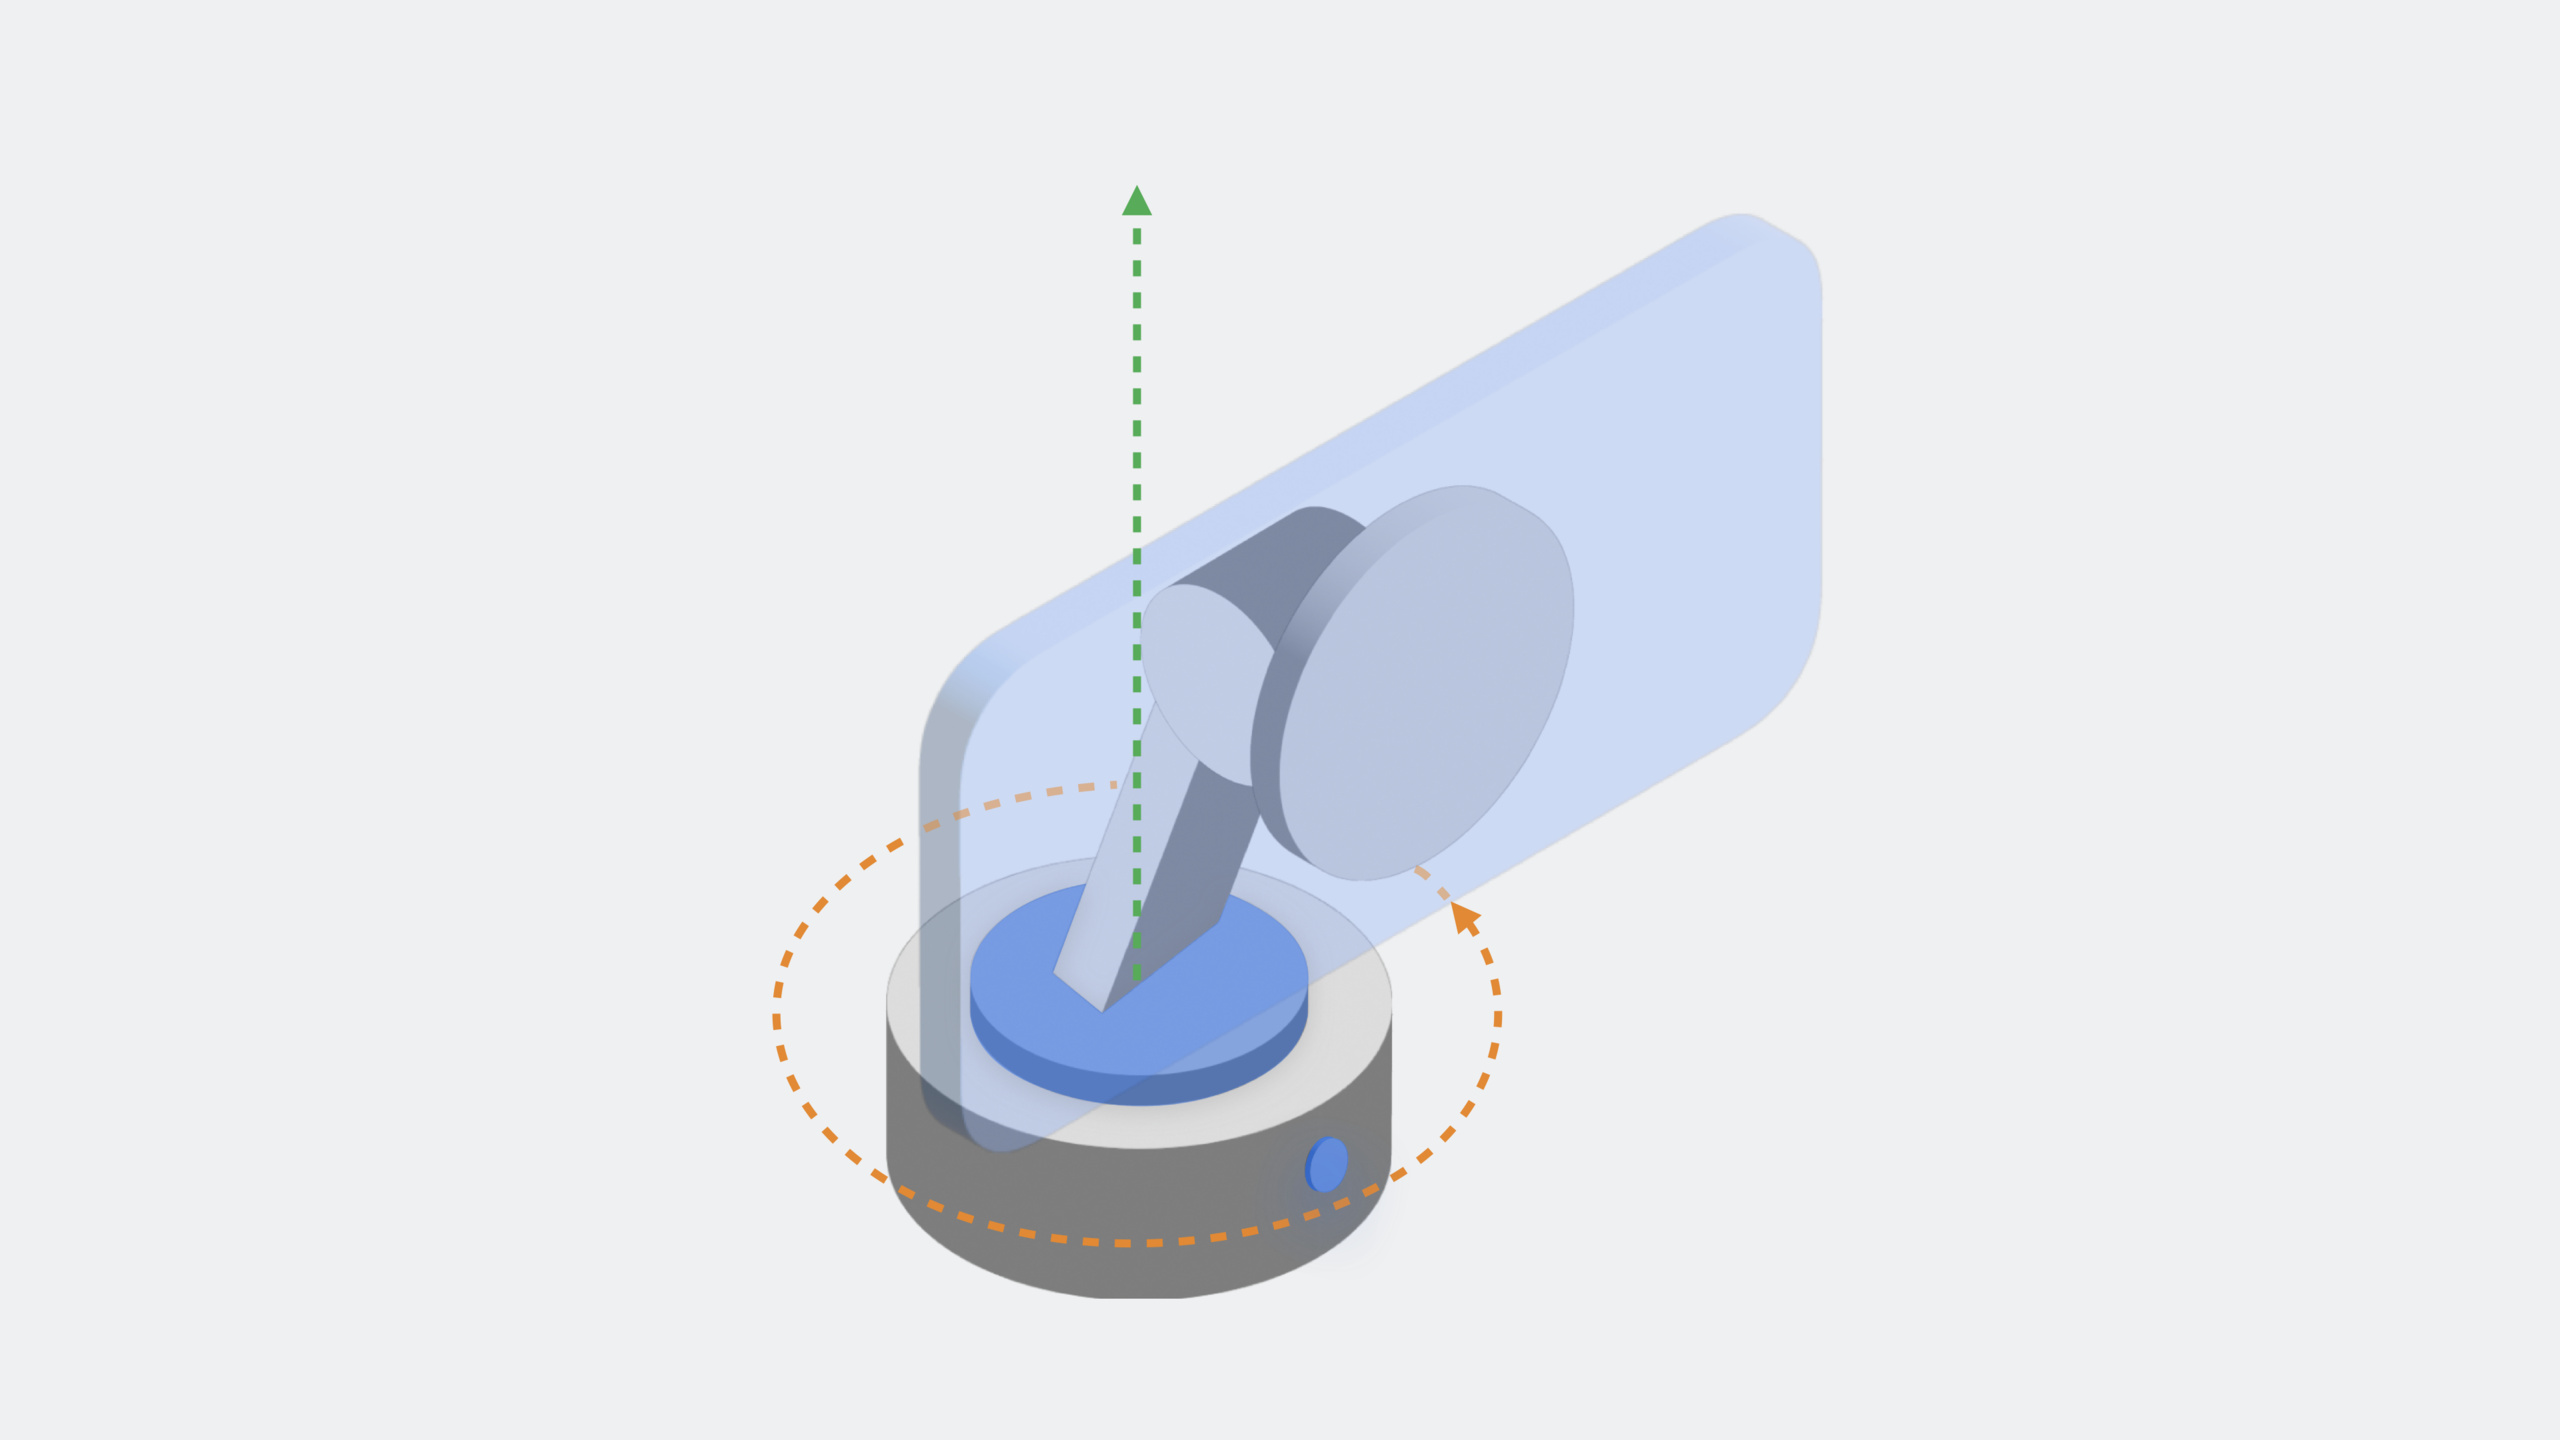
DockKit makes iPhone the central computing unit of a motorized camera mount, giving any app that uses the iOS camera API access to automatic subject tracking capabilities of 360-degree pan and 90-degree tilt right out of the box. Developers can also customize composition alignment, specify areas of interest, directly control motors through the DockKit API, or use the Vision framework to provide a custom inference model to track any object.
Core Content
System-level tracing out of the box
The DockKit mount extends the iPhone camera’s field of view to 360 degrees of pan (Yaw) and 90 degrees of tilt (Pitch). After the user pairs the phone with the holder, all functions are completed in the iPhone’s system services.
Key design: Motor control and subject tracking are handled at the system level, and any app that calls the iOS camera API automatically gains DockKit capabilities. Third-party apps such as the system camera and FiLMiC Pro can be used without modifying the code.
The stand has a simple power button, tracking switch, and LED indicator light. A blinking LED indicates tracking is active and the subject is in the frame.
(01:18)
How System Tracker works
The DockKit system tracker runs in the camera processing pipeline:
- Camera frames analyzed at 30fps via ISP inference
- Visual Understanding Framework generates face and body bounding boxes
- Multi-model system tracker generates tracking tracks for each person or object
- EKF (Extended Kalman Filter) smoothes gaps and errors in inference
- Tracking estimation combines motor position/speed feedback and mobile phone IMU data to generate final trajectory and drive instructions
In multi-player scenarios, the main subject (green bounding box mark) is tracked by default. The stat tracker corrects errors and keeps tracking even if other members block or cross paths.
(03:52)
Custom composition control
Apps can control the video cropping method through the DockKit API.
Alignment Mode: Choose left, center, or right alignment. Suitable for scenes with fixed UI overlays (such as logos) to avoid the subject being obscured by artwork.
Region of Interest (ROI): Specifies the cropping area using normalized coordinates. Suitable for scenes such as video conferencing that require a specific aspect ratio to ensure that the subject is not cut off.
(07:29)
Custom reasoning and motor control
Developers can:
- Disable system tracking and directly use speed vector to control the motor
- Provide inference results using the Vision framework or custom ML models
- Construct an Observation (a bounding box of normalized coordinates) from the inference output to feed the DockKit tracker
- Trigger built-in animations (Yes, No, Wakeup, Kapow) or create custom animations
(10:45)
Detailed Content
Register bracket status changes
(06:43)
import DockKit

// Listen for dock connection and disconnection state
DockAccessoryManager.shared.stateEvents
    .sink { state in
        switch state {
        case .docked:
            print("iPhone connected to the dock")
        case .undocked:
            print("iPhone removed from the dock")
        }
    }
    .store(in: &cancellables)
Key points:
DockAccessoryManager.sharedIs a singleton that manages DockKit accessories -stateEventsPublish the connection status change of the bracket -.dockedIndicates that the iPhone is connected to the dock via the DockKit protocol- Status monitoring is a prerequisite for modifying tracking behavior
Control composition alignment
(08:23)
// Get the currently connected dock accessory
guard let accessory = DockAccessoryManager.shared.connectedAccessory else { return }

// Align the subject to the right side of the frame, leaving room for the logo on the left
accessory.framingMode = .right
Key points:
connectedAccessoryReturns the currently connected DockKit accessory -framingModeThere are three options:.left、.center、.right- Default is.center, the subject is always in the center of the screen- Alignment mode is suitable for scenes with fixed UI overlays
###Specify area of interest
(09:02)
// Define a centered square ROI using normalized coordinates with the origin at the top left
let roi = CGRect(x: 0.25, y: 0.25, width: 0.5, height: 0.5)
accessory.regionOfInterest = roi
Key points:
- ROI uses normalized coordinates, ranging from 0.0 to 1.0
- The origin is in the upper left corner of the iPhone display
- Suitable for scenarios that require a specific aspect ratio, such as square cropping for video conferencing
- Once set up, DockKit will ensure that the subject is correctly framed within the ROI
Directly control the motor
(10:12)
// Disable system tracking to prepare for manual control
accessory.isSystemTrackingEnabled = false

// Define a velocity vector: yaw right at 0.2 rad/s and pitch down at 0.1 rad/s
let velocity = DockAccessoryVelocity(
    angularVelocity: .init(yaw: 0.2, pitch: -0.1)
)
accessory.move(withVelocity: velocity)

// Continue for 2 seconds
try? await Task.sleep(for: .seconds(2))

// Reverse motion: left at 0.2 rad/s and up at 0.1 rad/s
let reverseVelocity = DockAccessoryVelocity(
    angularVelocity: .init(yaw: -0.2, pitch: 0.1)
)
accessory.move(withVelocity: reverseVelocity)
Key points:
- Must be set first
isSystemTrackingEnabled = falseTo manually control the motor - Yaw controls horizontal rotation (left and right), Pitch controls pitch (up and down)
- Speed unit is rad/second
-
move(withVelocity:)Continue movement until a new command or stop command is received
Custom reasoning: Use hand tracking to replace face tracking
(13:17)
import Vision

// Create a hand pose detection request
let handPoseRequest = VNDetectHumanHandPoseRequest()
let handler = VNImageRequestHandler(cvPixelBuffer: pixelBuffer)

try? handler.perform([handPoseRequest])

// Build DockKit observations from the detection results
var observations: [DockKit.Observation] = []

if let results = handPoseRequest.results?.first,
   let thumbTip = try? results.recognizedPoint(.thumbTip) {

    // Build a bounding box from the thumb tip position
    let boundingBox = CGRect(
        x: thumbTip.location.x - 0.1,
        y: thumbTip.location.y - 0.1,
        width: 0.2,
        height: 0.2
    )

    let observation = DockKit.Observation(
        boundingBox: boundingBox,
        type: .object
    )
    observations.append(observation)
}

// Get camera information and pass it to DockKit
let cameraInfo = DockKit.CameraInformation(orientation: .corrected)
accessivity.track(observations: observations, cameraInfo: cameraInfo)
Key points:
VNDetectHumanHandPoseRequestDetect hand key points- The bounding box of the Observation uses normalized coordinates, with the origin at the lower left corner
-
type: .humanFaceSystem-level multi-player tracking optimization will be enabled -type: .objectfor custom object tracking - The coordinate system of the Vision frame is consistent with DockKit, no conversion is required
-
orientation: .correctedIndicates that the coordinates have been corrected relative to the lower left corner of the screen
Trigger built-in animation
(15:53)
// Disable system tracking
accessory.isSystemTrackingEnabled = false

// Trigger the Kapow animation
accessory.animate(.kapow)

// The animation runs asynchronously; re-enable system tracking when it completes
Task {
    try? await Task.sleep(for: .seconds(3))
    accessory.isSystemTrackingEnabled = true
}
Key points:
- There are four built-in animations:
.yes、.no、.wakeup、.kapow- The animation starts from the current position of the stand - Animation is asynchronous and does not block the main thread
- System tracking can be re-enabled during animation execution
Core Takeaways
1. Add automatic tracking to live streaming applications
What to do: Integrate DockKit in your live streaming/video conferencing app to allow the host or speaker to move freely while always staying in the frame.
Why it’s worth doing: Traditional live broadcast requires a dedicated person to operate the PTZ or the anchor is limited to a fixed position. DockKit’s 360-degree tracking allows one person to complete professional-level tracking shots.
How to get started: No need to modify the camera code, just add DockKit state listening and composition control. Choose based on the app’s UI layout.left、.centeror.rightAlignment mode.
2. Build a gesture-controlled interactive camera
What it does: Replace face tracking with gesture recognition, allowing the stand to follow the user’s hand movements.
Why it’s worth doing: Hand tracking can be used in teaching demonstrations (following the pointer), fitness guidance (correcting posture), game interaction and other scenarios, and is more flexible than face tracking.
How to start: UseVNDetectHumanHandPoseRequestDetect hand key points, build an Observation and pass it to DockKit. You can further use Create ML to train a gesture classification model and trigger built-in animations after recognizing specific gestures.
3. Create intelligent tracking for educational videos
What to do: Use the DockKit holder to automatically track the instructor in a classroom or training scenario, and the screen will automatically follow the instructor as he writes on the blackboard or moves around.
Why it’s worth doing: Recording instructional videos usually requires a videographer to follow you, which is expensive and easy to lose. DockKit turns your iPhone into an automatic videographer.
How to get started: Place your iPhone on the DockKit holder and use system-level tracking. If you need to adjust the composition when the instructor is close to the whiteboard, you can use ROI to limit the tracking area.
4. Use motor animation to enhance interactive feedback
What to do: Use the physical movement of the stand as interactive feedback in the app, such as confirming operations, expressing emotions, and guiding user attention.
Why it’s worth doing: Physical movement is a more intuitive way of feedback than on-screen animation. The stand’s “Yes”, “Shake your head” (No), “Wakeup” and other animations can convey clear semantics.
How to start: Called at key interaction points (such as the user completing settings and receiving important notifications)accessory.animate(.yes)Or customize motor motion sequences. Combined with gesture recognition, the fun interaction of “push” the stand to swing can be achieved.
Related Sessions
- Detect animal poses in Vision — Use Vision to detect animal poses, which can be used for custom tracking with DockKit
- Discover machine learning enhancements in Create ML — Machine learning enhancements in Create ML to train custom gesture classification models
- Explore 3D body pose and person segmentation in Vision — 3D body pose and person segmentation in Vision
Comments
GitHub Issues · utterances