
Highlight
The spatial computing platform of visionOS is based on three familiar frameworks: SwiftUI, RealityKit and ARKit. Through three containers: Window, Volume and Full Space, developers can use the same set of code to build applications from 2D windows to fully immersive experiences.
Core Content
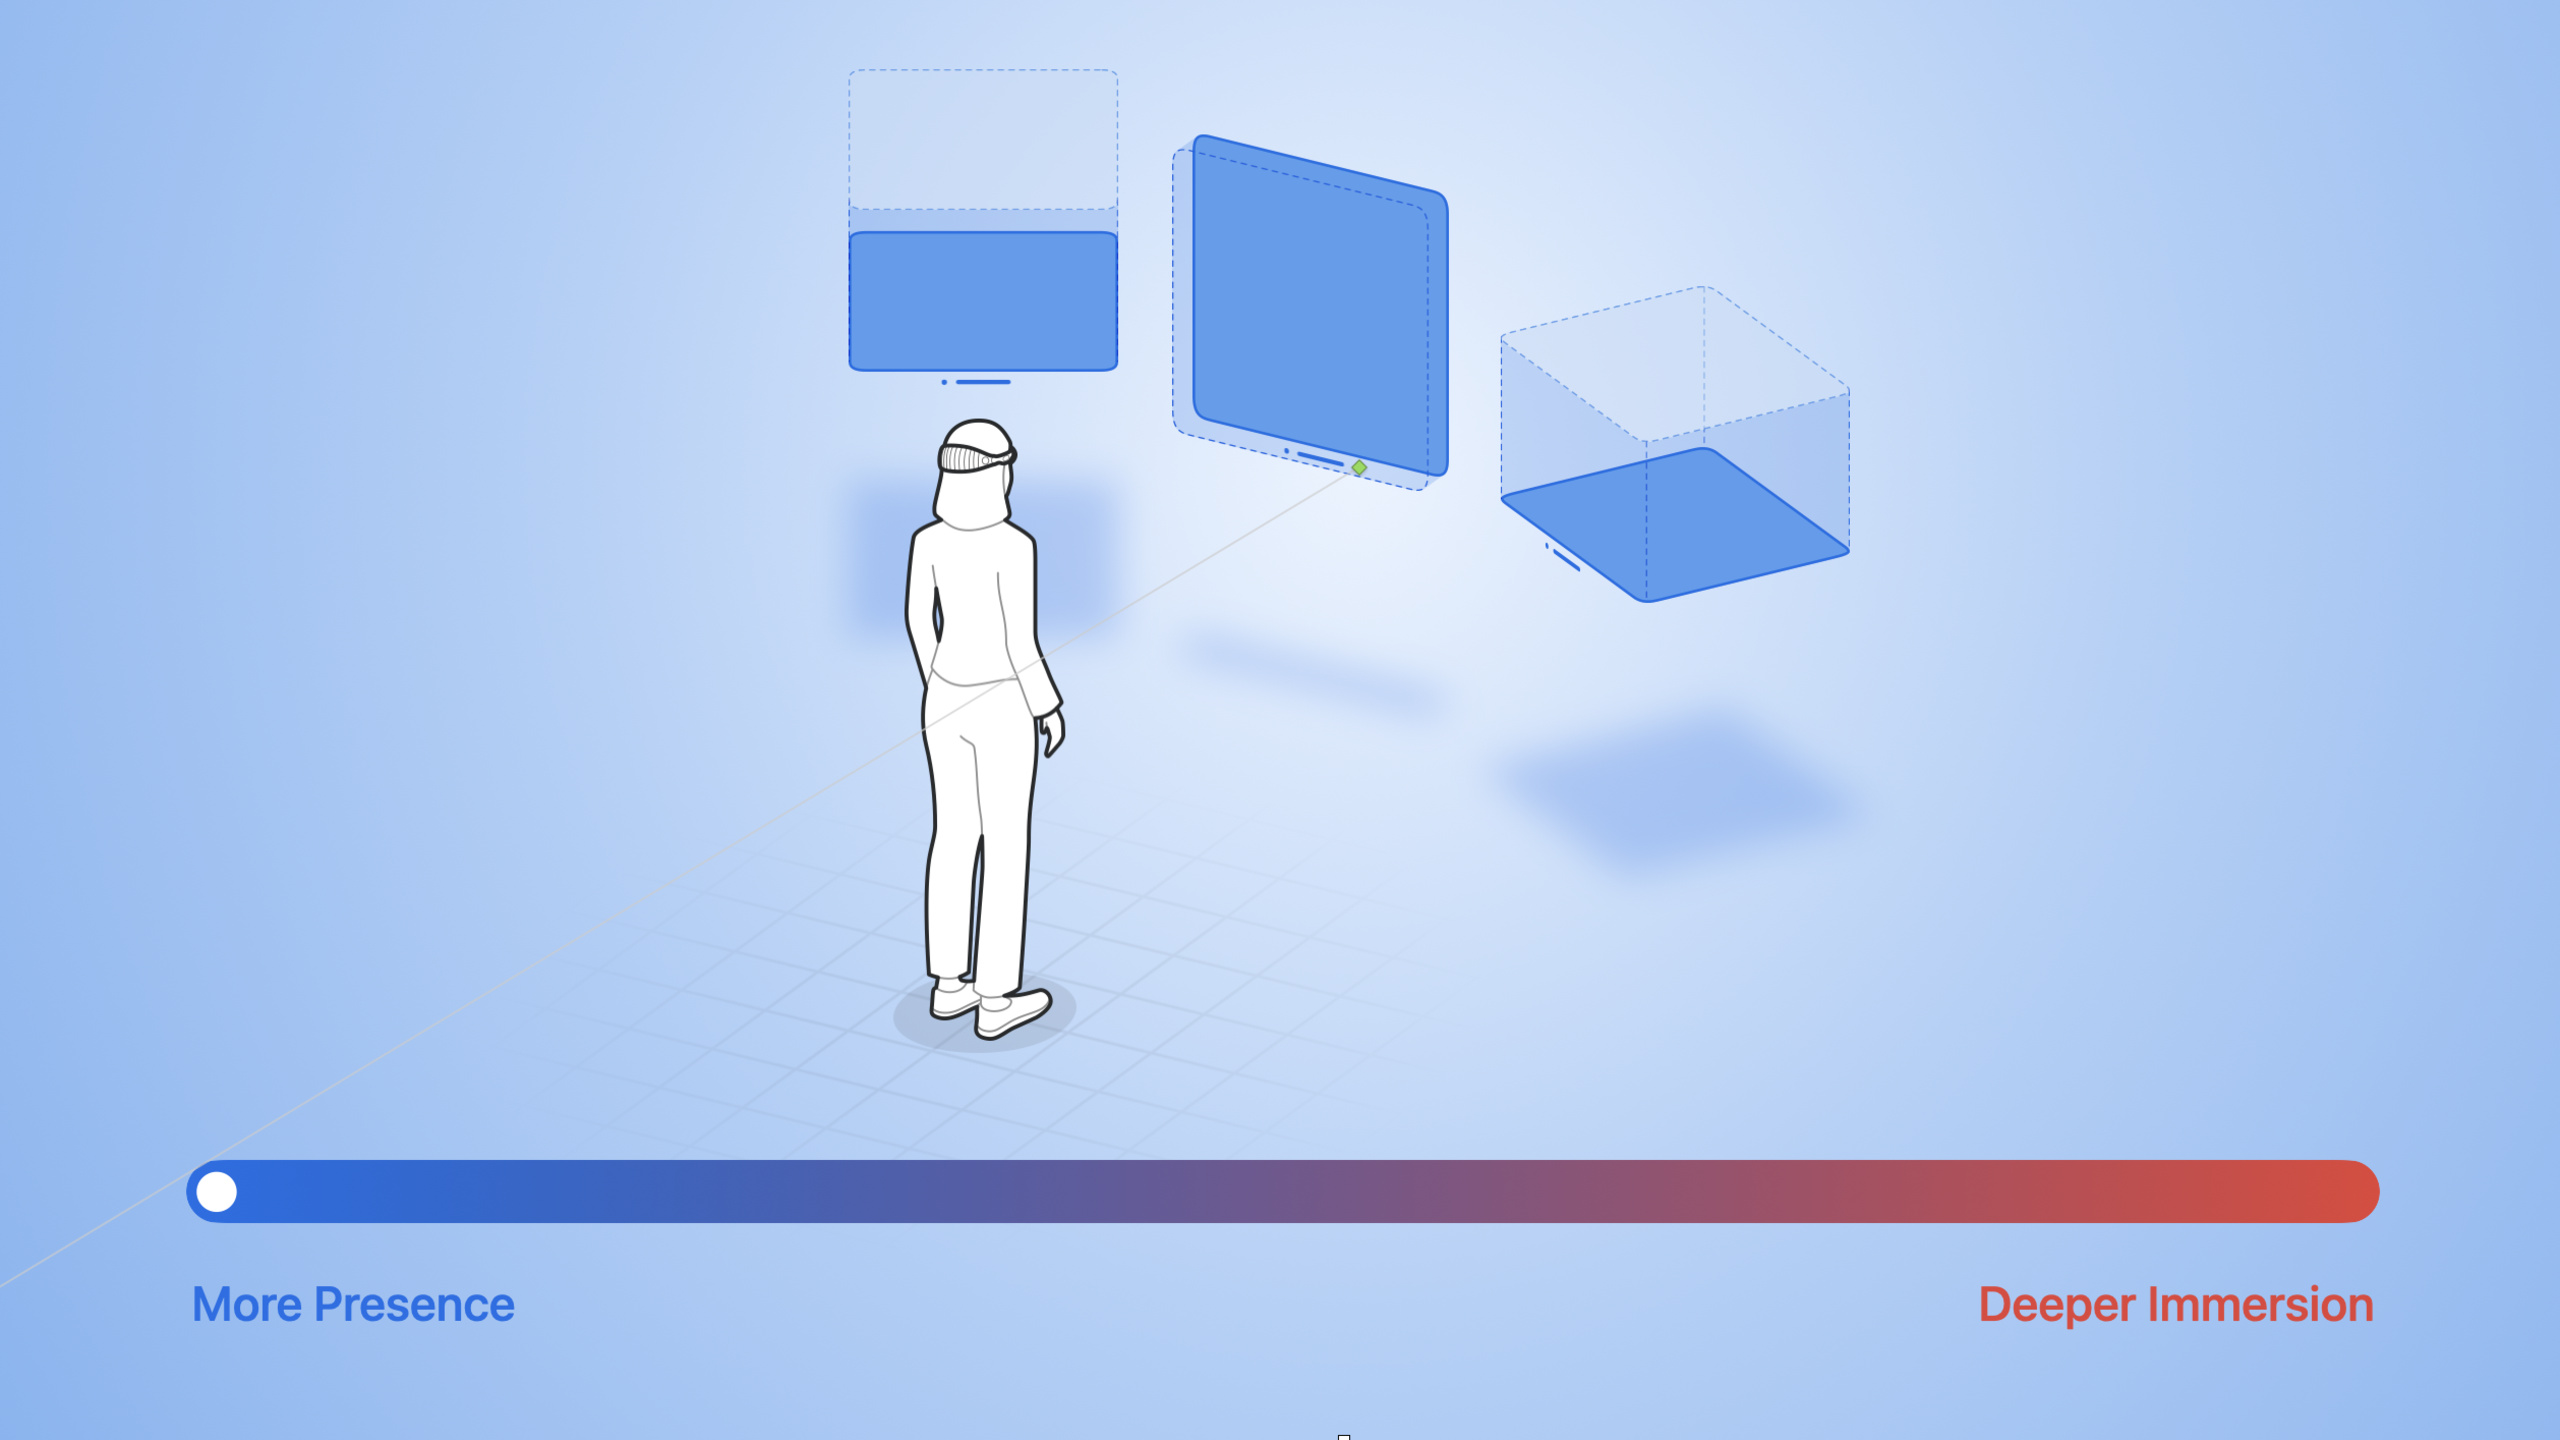
Three types of space containers
The core design of visionOS revolves around three types of containers (01:27):
Window
Window is the Scene of SwiftUI, which can be resized and rearranged, and behaves similarly to macOS windows. But it supports mixing 2D and 3D content, and you can put buttons and a 3D model in the same window.
Volume
Volume is a fixed-bounded container that displays 3D content in Shared Space (02:07). It is suitable for displaying 3D content such as chessboards and globes that can be viewed from different angles. Volume is also a SwiftUI Scene, using RealityKit to render 3D.
Full Space
Full Space allows your app to occupy the entire field of view and other apps are hidden (02:47). ARKit’s APIs can be used in Full Space, such as Skeletal Hand Tracking. Full Space has three immersion styles:
- Mixed: Superimpose virtual content on the real environment (passthrough)
- Full: Completely hide the real environment and only display virtual content
- Progressive: The real environment is initially displayed, and the user can adjust the immersion level through the digital crown
Natural interaction method
The interaction of visionOS is based on eyes and hands (04:30):
- Look at the button and tap it with your finger to select it
- Can reach out and touch buttons directly in 3D space
- The system supports tap, long press, drag, rotate, zoom and other gestures
- Seamless integration of SwiftUI’s gesture API and RealityKit Entity
ARKit’s skeletal hand tracking makes more complex gestures possible, such as turning the user’s hands into virtual clubs for bowling (05:36).
Privacy-first architecture
The privacy design of visionOS is very strict (07:47). Applications cannot directly access sensor data; the system converts raw data into events and visual cues before handing it over to the application. for example:
- The system knows the 3D position of the user’s eyes and hands, but only passes touch events to the application
- When the user looks at a view, the system renders a hover effect but does not tell the app where the user is looking
- When accessing scene understanding (detecting walls, furniture) or skeletal hand tracking is required, the system will first ask for user permission
Detailed Content
Development tool chain
Xcode provides complete development tools for visionOS (09:05):
Xcode Preview
Preview Canvas supports 3D preview, and you can see the rendering results of RealityKit scenes directly during code editing, including animation effects (09:34). Object Mode allows you to quickly preview 3D layouts and check whether content is within the bounds of the view.
Simulator
The Simulator supports moving and viewing the scene using a keyboard, mouse, or gamepad. It comes with three simulation scenes, each with day and night lighting (11:03).
RealityKit Trace
Instruments 15 adds a new RealityKit Trace template that can analyze GPU, CPU and system power consumption effects, track frame bottlenecks, view the total number of triangles submitted and the number of RealityKit Entities simulated (12:24).
Reality Composer Pro
New 3D content editing tools supporting:
- Particle system (clouds, rain, sparks, etc. effects)
- Spatial audio preview
- Physically based materials (PBR)
- MaterialX custom material node graph (14:32)
Create Window
Window passesWindowGroupCreate, you can mix 2D and 3D content:
import SwiftUI
import RealityKit

@main
struct HelloWorldApp: App {
    var body: some Scene {
        WindowGroup {
            ContentView()
        }
    }
}

struct ContentView: View {
    var body: some View {
        VStack {
            Text("Hello, World!")

            // Embed 3D content in the window
            Model3D(named: "Satellite") { model in
                model
                    .resizable()
                    .aspectRatio(contentMode: .fit)
            } placeholder: {
                ProgressView()
            }
        }
    }
}
Key points:
Model3DsimilarImage, loads and displays a 3D model rendered by RealityKit- 3D content in the window will protrude along the z-axis, increasing the sense of depth
- can be used
DragGestureDrag and drop 3D entities directly
Create Volume
Volume by settingwindowStylefor.volumetriccreate:
@main
struct EarthApp: App {
    var body: some Scene {
        WindowGroup(id: "earth") {
            EarthView()
        }
        .windowStyle(.volumetric)
        .defaultSize(width: 0.6, height: 0.6, depth: 0.6, in: .meters)
    }
}
Key points:
.windowStyle(.volumetric)Convert WindowGroup to Volume -defaultSizeSpecifies the width, height, and depth of the volume. The unit can be.pointsor.meters- Volume contents must remain within bounds- Suitable for Shared Space and can coexist with other windows
RealityView and Attachments
RealityView is the core view for managing RealityKit entities in SwiftUI:
import SwiftUI
import RealityKit

struct GlobeView: View {
    var body: some View {
        RealityView { content, attachments in
            // make closure: create an entity and add it to the root entity
            if let earth = try? await Entity(named: "Earth") {
                content.add(earth)
            }

            // Add the attachment to the scene
            if let pin = attachments.entity(for: "pin") {
                pin.position = [0, 0.5, 0]
                content.add(pin)
            }
        } update: { content, attachments in
            // update closure: called when state changes
        } attachments: {
            // attachments closure: define SwiftUI views
            Attachment(id: "pin") {
                Image(systemName: "mappin")
                    .font(.largeTitle)
                    .foregroundColor(.red)
            }
        }
    }
}
Key points:
makeclosure is executed once when the view is created to initialize the entity -updateclosure is called when SwiftUI state changes -attachmentsConvert SwiftUI views into entities that can be placed in a 3D scene- Each attachment requires a unique
id
Create Full Space
Full Space PassImmersiveSpaceScene type creation:
@main
struct SpaceApp: App {
    @State private var immersiveStyle: ImmersionStyle = .full

    var body: some Scene {
        WindowGroup {
            ContentView()
        }

        ImmersiveSpace(id: "outerSpace") {
            OuterSpaceView()
        }
        .immersionStyle(selection: $immersiveStyle, in: .full, .mixed, .progressive)
    }
}

struct ContentView: View {
    @Environment(\.openImmersiveSpace) var openImmersiveSpace
    @Environment(\.dismissImmersiveSpace) var dismissImmersiveSpace

    var body: some View {
        Button("Enter Space") {
            Task {
                await openImmersiveSpace(id: "outerSpace")
            }
        }
    }
}
Key points:
ImmersiveSpaceDefine an accessible full-space scene -.immersionStyleSet the immersion style, the default is.mixedopenImmersiveSpaceEnvironment values are used to open spaces -dismissImmersiveSpaceAmbient values are used to close spaces- It is recommended to give users a button to choose whether to enter the immersive experience
Gestures to interact with 3D entities
SwiftUI gestures can directly target RealityKit entities:
Model3D(named: "Satellite") { model in
    model
        .resizable()
        .aspectRatio(contentMode: .fit)
}
.placeholder {
    ProgressView()
}
.gesture(
    DragGesture()
        .targetedToEntity(named: "Satellite")
        .onChanged { value in
            // Move the entity based on the drag value
            value.entity.position = value.convert(value.location3D, from: .local, to: .parent)
        }
)
Key points:
.targetedToEntity(named:)Bind gestures to specific entities -value.location3DGet the drag position in 3D space -convert(_:from:to:)Convert positions between coordinate spaces
Migrate from existing app
visionOS supports three migration paths (15:40):
- Compatibility Mode: iPad/iPhone App can run without modification, the system will automatically handle window scaling and rotation
- Recompile: Add visionOS target in Xcode and get native spacing, size and reflow after recompiling
- New Design: Use the visionOS App template, start with Window or Volume, and make full use of spatial computing capabilities
Core Takeaways
Use Model3D to add depth to existing apps
- What to do: Add a view to an existing SwiftUI App
Model3D, showing a 3D product model - Why it’s worth it: No need to write any RealityKit code,
Model3Dlike usingImageJust as simple, but adds spatial depth to the interface - How to start: Drag the USDZ model into the Xcode project and use
Model3D(named: "ModelName")load
Make a 3D product display that can be rotated for viewing
- What to do: Use Volume to display a 3D product model that users can view from all angles
- Why it’s worth doing: Volume is naturally suitable for displaying 3D content. Users can use gestures to rotate and zoom, which is much more intuitive than 2D images.
- How to get started: Create
WindowGroup,set up.windowStyle(.volumetric), put insideRealityViewLoad product model
Design a progressively immersive meditation app
- What to do: Display the control panel in the Shared Space when the App starts, click Start to enter the Full Space, and use the Progressive immersion style to allow users to adjust the immersion level themselves
- Why it’s worth it: Progressive immersion gives users control, gradually transitioning from light immersion to full immersion, reducing discomfort.
- How to start: Use
ImmersiveSpaceCreate scenes, set up.immersionStyle(selection: $style, in: .progressive)
Use RealityView Attachments to make 3D map markers
- What to do: Use SwiftUI views as pins on a 3D globe or map
- Why it’s worth it: Attachments allow you to use familiar SwiftUI code to create UI elements in 3D scenes without having to learn a new UI framework.
- How to start: In
RealityViewofattachmentsDefine the markup view in closure, inmakeUsed in closureattachments.entity(for: "id")get and put
Related Sessions
- Build spatial experiences with RealityKit — Build spatial experiences with RealityKit
- Meet ARKit for spatial computing — Application of ARKit in spatial computing
- Develop your first immersive app — Develop your first immersive app
Comments
GitHub Issues · utterances