
Highlight
Xcode 15
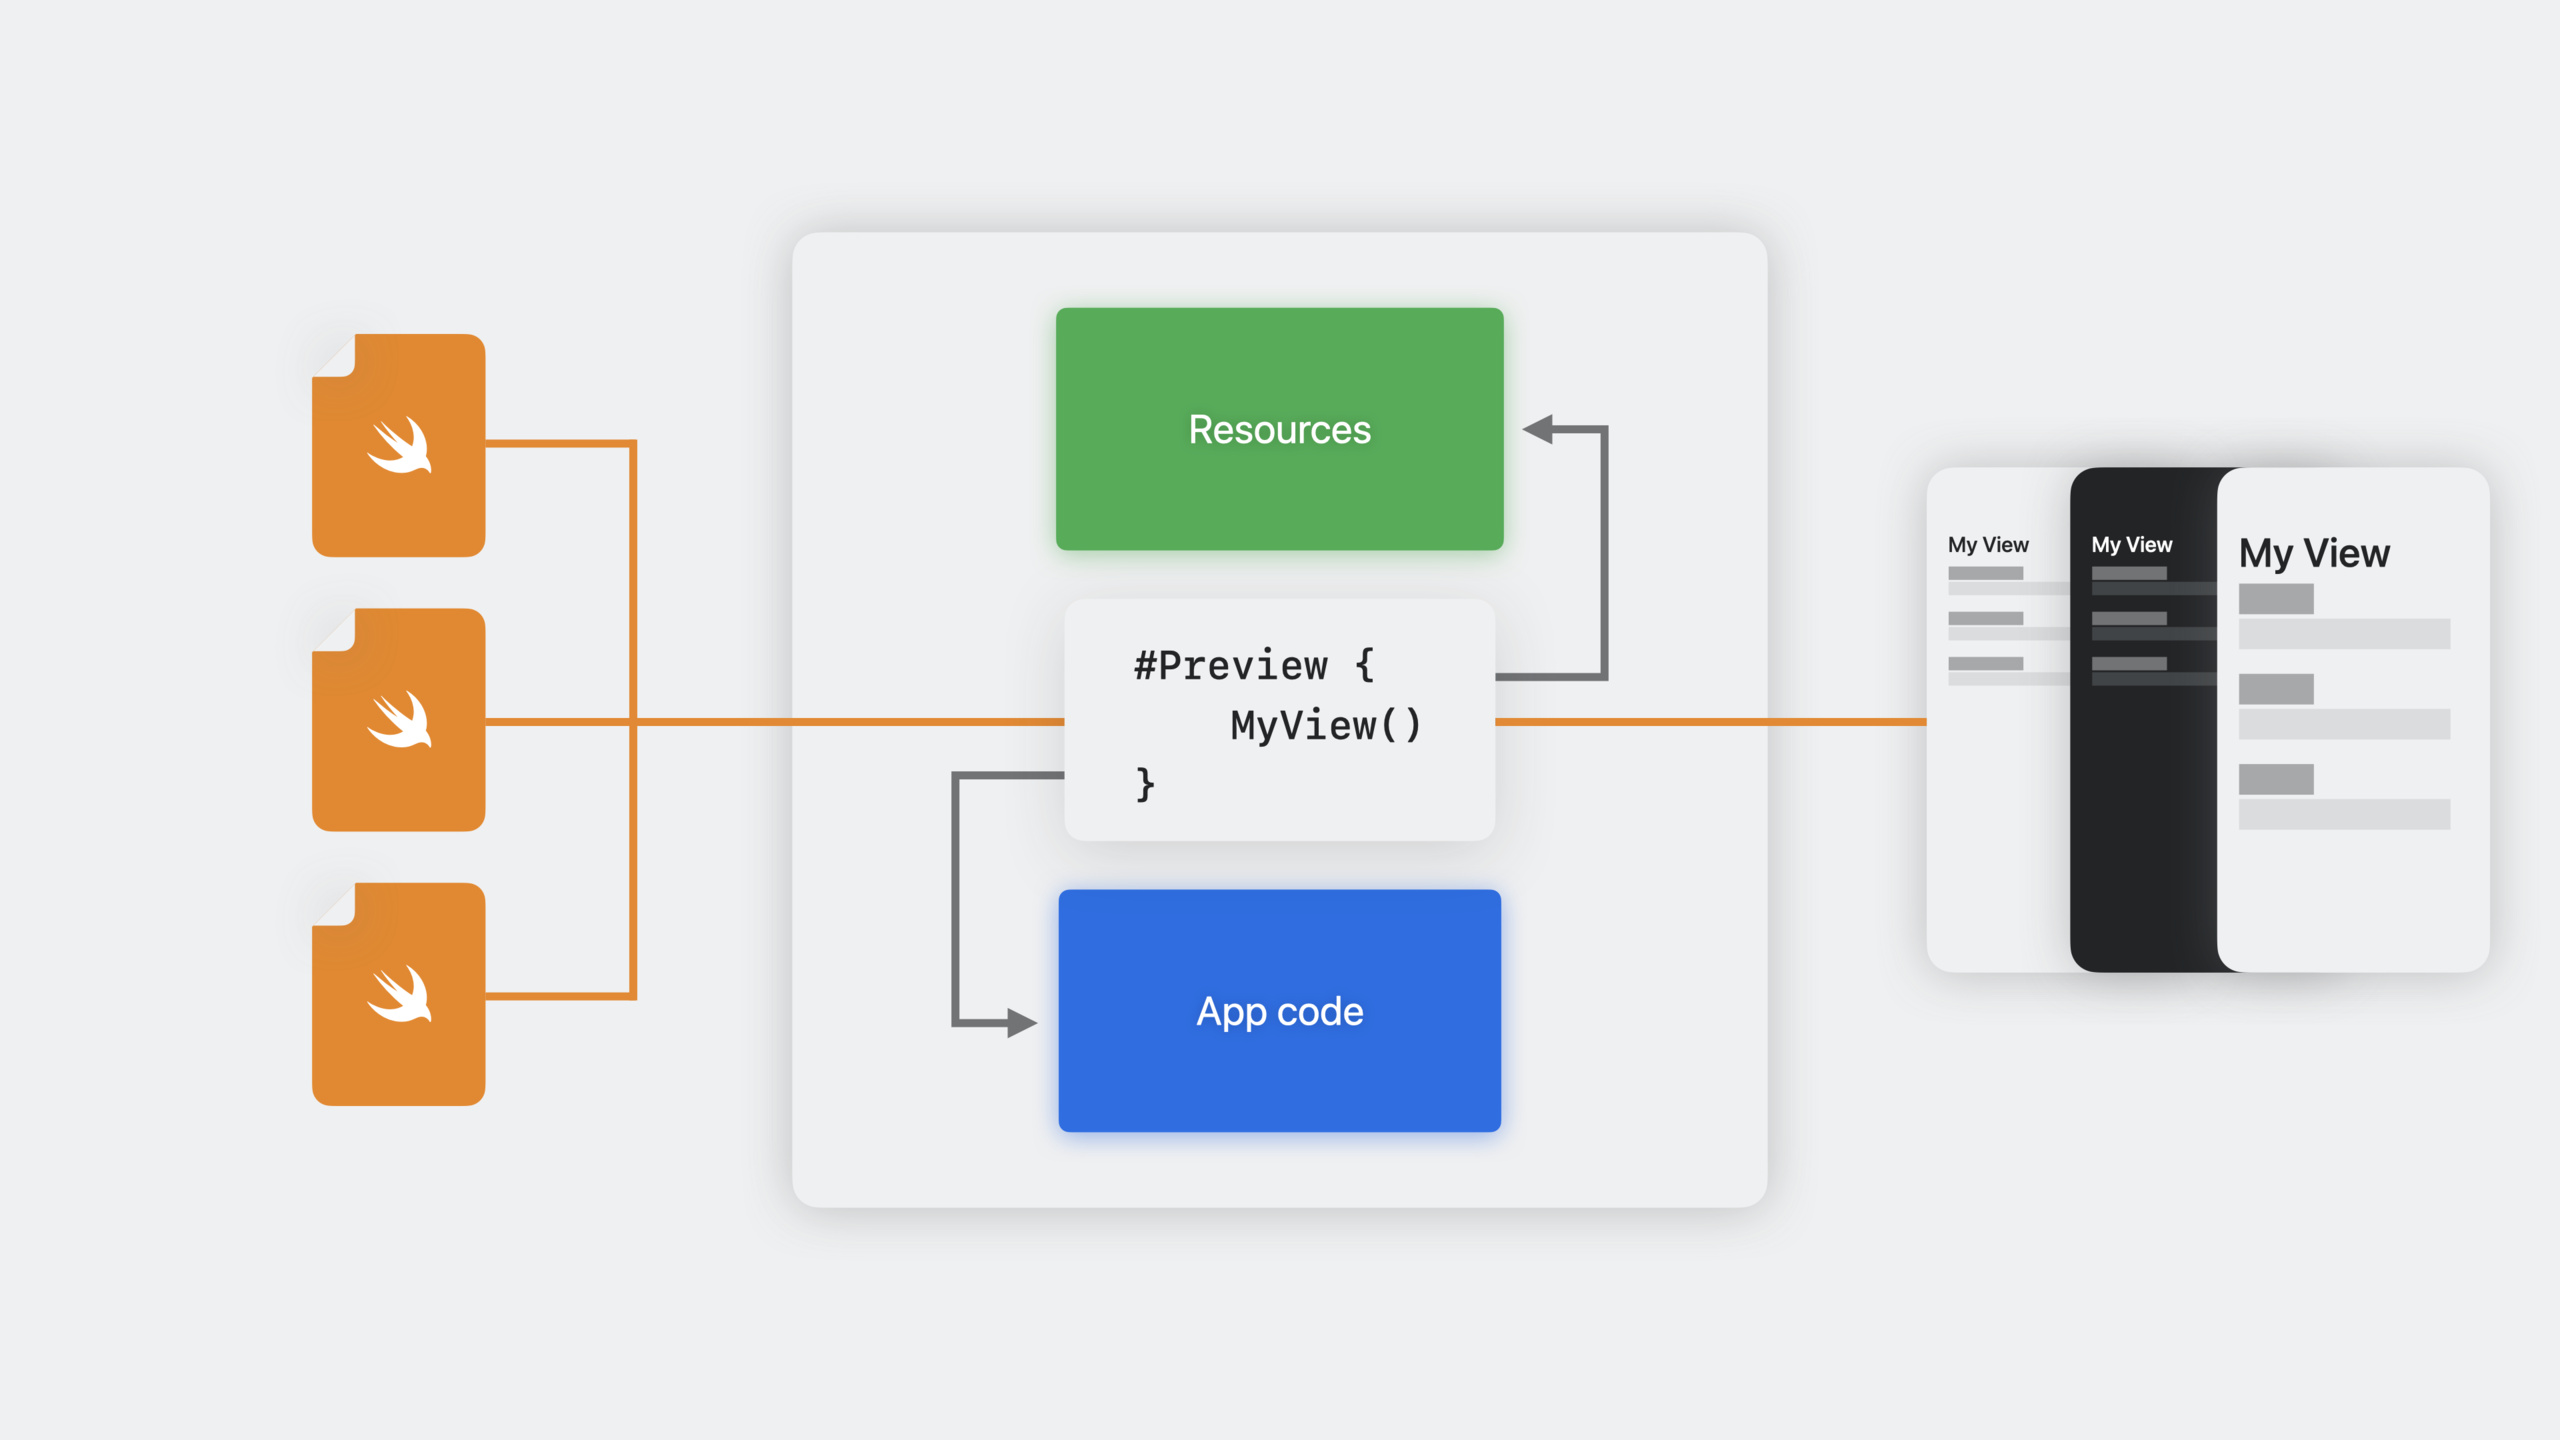
#PreviewMacros support SwiftUI, UIKit, AppKit and Widget previews. With the three canvas modes of Live/Selection/Variants, developers can iterate the UI in real time without running the app and preview it directly on the real device.
Core Content
You wrote a SwiftUI view and want to see the effect. Previously, you had to compile, start, and navigate to the corresponding page. Use now#PreviewFor macros, the code is written at the top level of the source file, and the Xcode canvas is refreshed in seconds.
(01:25) Preview is a piece of code compiled into the App and can access all symbols and resources in the project. When modifying Swift code, Xcode only does minimal incremental compilation and then reruns preview.
Basic usage
The simplest preview only requires one line:
#Preview {
    MyView()
}(05:05) If the view is usually placed in a List, put the List in the preview:
#Preview {
    List {
        CollageView(layout: .twoByTwoGrid)
    }
    .environment(CollageLayoutStore.sample)
}
Key points:
#PreviewWritten at the top level of the source file, not nested in any type or function- You can add environment modifiers and data dependencies, just like the scene entry of the App
- Name and configure traits passed in as optional parameters
(05:37) Add a name and direction to preview:
#Preview("2x2 Grid", traits: .landscapeLeft) {
    List {
        CollageView(layout: .twoByTwoGrid)
    }
    .environment(CollageLayoutStore.sample)
}
UIKit and AppKit support
(05:58)#PreviewAlso supports UIKit:
#Preview {
    var controller = SavedCollagesController()
    controller.dataSource = CollagesDataStore.sample
    controller.layoutMode = .grid
    return controller
}

#Preview("Filter View") {
    var view = CollageFilterDisplayView()
    view.filter = .bloom(amount: 15.0)
    view.imageData = ...
    return view
}
Key points:
- Return to UIViewController or UIView is fine
- use
varCreate an instance, configure properties, and return - Trait parameters are also valid for UIKit preview
(11:30) Set the initial orientation of UIKit preview:
#Preview("All Filters", traits: .landscapeLeft) {
    let viewController = FilterRenderingViewController()
    if let image = UIImage(named: "sample-001")?.cgImage {
        viewController.imageData = image
    }
    viewController.filter = Filter(
        bloomAmount: 1.0,
        vignetteAmount: 1.0,
        saturationAmount: 0.5
    )
    return viewController
}
Three canvas modes
(07:17) There are three modes in the lower left corner of the canvas:
- Live mode (default): interactive, supports animation and asynchronous code. You can drag the slider and test the animation.
- Selection mode: static snapshot. Click on a UI element and Xcode highlights the corresponding line of source code. Double-click the text view to jump directly to editing.
- Variants mode: Display variants of different device settings at the same time, such as all color schemes or all dynamic type sizes.
(08:29) The Device Settings panel is at the bottom of the canvas. You can quickly switch dark mode and dynamic type size without modifying the code.
Widget Preview
(12:20) Widget preview needs to specify widget family and timeline provider:
#Preview(as: .systemSmall) {
    FrameWidget()
} timelineProvider: {
    RandomCollageProvider()
}
Key points:
as:Parameters specify widget size (.systemSmall, .systemMedium, etc.) -timelineProvider:Provide timeline data- Xcode takes a snapshot of each timeline entry, which can be browsed using the arrow keys
- Click the play button to loop the timeline transition animation
(13:28) If you want to test a specific transition scenario, usetimelinereplacetimelineProvider:
#Preview(as: .systemSmall) {
    FrameWidget()
} timeline: {
    TimelineEntry(date: .now, collage: collageA)
    TimelineEntry(date: .now.addingTimeInterval(3600), collage: collageB)
}
Pin and Loop
(13:58) Click the pin button in the upper left corner of the canvas to keep the preview active when switching to other files. With the loop play button, you can continuously observe the transition effect of an animation and modify the code at the same time.
Detailed Content
Using Preview in Library Target
(16:15) Preview requires an executable file (App or Widget) to run. Xcode selects via the following rules:
- The target to which the currently edited source file belongs
- All dependencies of these targets
- Intersection with the current scheme
If there is no app, Xcode automatically creates the XCPreviewAgent. If the view requires a specific Info.plist key (such as album permissions), you can create a dedicated preview app target, add the required permissions, and embed the library in it.
Development Assets
(20:30) Images and other resources used for Preview can be placed in the Development Assets folder. These resources are used during development and are automatically removed when submitted to the App Store.
Setting method: Project Settings > Build Settings > Development Assets, add the folder path. When you create a new project, there is already a Preview Content folder by default.
Real machine preview
(23:25) The device selector at the bottom of the canvas allows you to select the connected real device. After selecting, Xcode will build and preview directly for the real device, bypassing the simulator.
Advantages of real device preview: -Access hardware such as cameras and sensors
- Use real data on the device (like photo library)
- Highest fidelity UI validation
(25:07) After modifying the code, the preview on the real machine is updated immediately:
.navigationTitle("Add Collage")Add a line of code and the real device will display the new title immediately.
Core Takeaways
-
What to do: Add to each custom view in the project
#Preview- Why is it worth doing: After modifying the view code, you can see the effect in seconds without compiling and running the entire app. UIKit projects can also enjoy this workflow -
How to start: Add at the top level of the view source file
#Preview { YourView() }, make sure canvas mode is on -
What: Use Variants mode to check layout for all dynamic type sizes
-
Why it’s worth doing: Accessibility requires support for the largest font size. Variants mode displays all sizes at once to quickly identify truncation or overlapping problems
-
How to get started: Click the Canvas Variants button, select Dynamic Type, and check the layout of each variant
-
What to do: Add timeline preview to Widget and test timeline transition animation
-
Why it’s worth doing: Widget’s animation only occurs when timeline entries are switched, which is usually difficult to test. Preview can loop through these transitions
-
How to start: Use
#Preview(as: .systemSmall) { MyWidget() } timelineProvider: { MyProvider() } -
What to do: Test views that rely on device data using real device preview
-
Why it’s worth it: The simulator has no real photos, contacts, health data. The real machine preview can be directly verified using these real data.
-
How to start: Use the device selector to select the connected real device and make sure there are the required test resources in Development Assets
Related Sessions
- Prototype with Xcode Playgrounds — Use Playground to prototype algorithms, complementing Preview’s UI iteration
- Bring widgets to life — In-depth explanation of Widget animation and interaction
- What’s new in SwiftUI — New features of SwiftUI, many views can be verified directly with Preview
Comments
GitHub Issues · utterances