
Highlight
Object Capture has changed from a macOS-exclusive feature to a complete end-to-end experience on iOS: users scan objects with iPhone or iPad, and the system automatically captures, guides in real-time, reconstructs on the device side, and outputs 3D models in USDZ format within minutes. LiDAR support allows low-texture objects to be reconstructed with high quality.
Core Content
In the past, the process of scanning 3D objects was very cumbersome: take a bunch of photos with iPhone, transfer them to Mac, and use Object Capture API to reconstruct the model. The whole process is cross-device and time-consuming, making it difficult for ordinary users to get started.
WWDC23 brings it all to iOS. Now that both shooting and reconstruction are done on the same device, Apple also provides a complete Sample App as a starting point.
LiDAR allows low-texture objects to be scanned
(03:02) Object Capture previously worked best on objects with rich textures - such as vases with complex patterns and finely carved wood carvings. However, the effect is poor on low-texture objects (solid-color chairs, smooth tabletops) because it is difficult for purely visual algorithms to extract feature points from monotonous surfaces.
That changed this year with the addition of LiDAR point cloud data. During scanning, the system collects RGB photos and LiDAR point clouds at the same time, and the two are fused and reconstructed. RGB is responsible for color and fine texture, and LiDAR is responsible for geometry and depth information. A solid-colored chair that might have been reconstructed with missing faces and corners can now be restored to its full 3D shape.
Of course, some objects are still not suitable for scanning: reflective surfaces, transparent materials, extremely fine structures. These restrictions remain in place for now.
Guided shooting
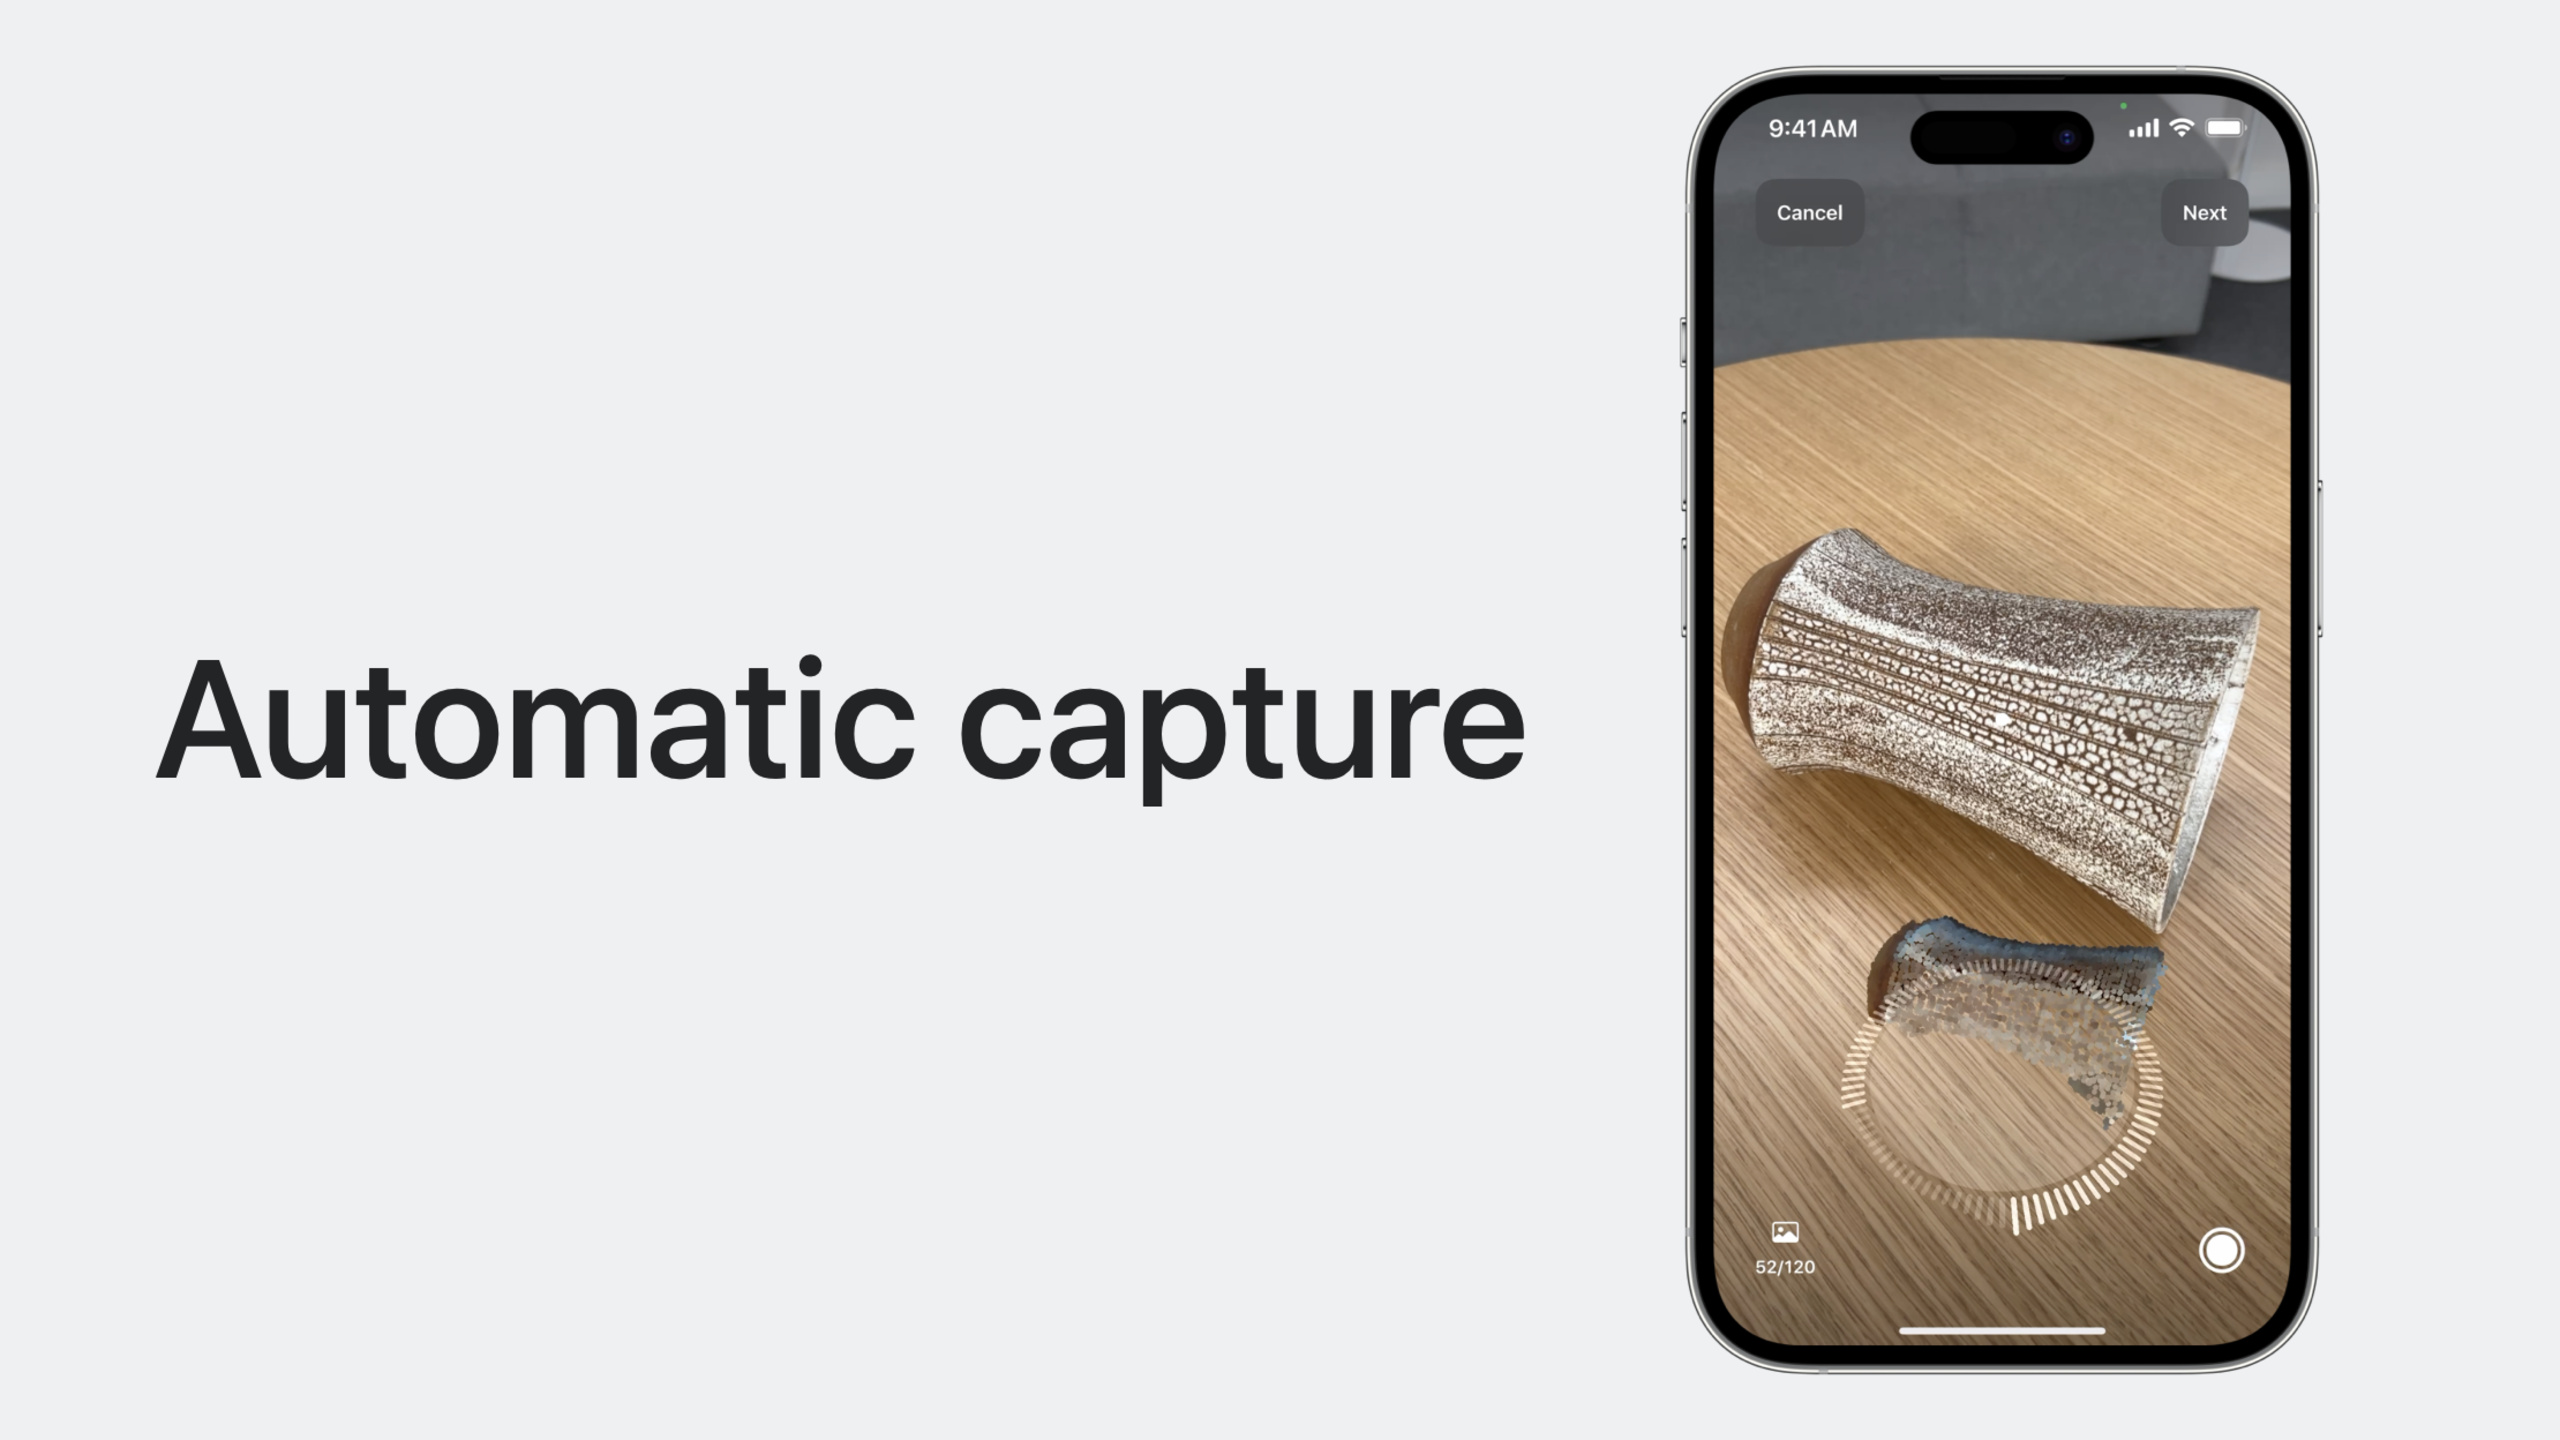
(04:36) Manual photography is prone to problems: the angle is not enough, the light is too poor, and the hand is shaking and blurry. Guided Capture automates these hassles.
The system automatically selects the shooting time: press the “shutter” when the picture clarity, exposure, and composition are all up to standard. The user only needs to hold the device and circle around the object, and the system will automatically collect it at the appropriate angle.
The Capture Dial is a core UI element. It shows how much of the object has been covered from all angles, guiding the user to fill up the turntable. Missed areas are color-coded so users know at a glance where they still need to scan.
Real-time feedback covers common error scenarios:
- Insufficient light: Reminder to adjust the lighting, it is recommended to use diffuse light source
- Moving too fast: Automatically pause shooting and remind you to slow down
- Inappropriate distance: Too far or too close will prompt
- Object out of frame: Arrow indicates the adjustment direction
Flip strategy
(06:45) To obtain a complete model, it is usually necessary to flip the object and scan the bottom surface. But not all objects are suitable for flipping:
- Rigid objects can be flipped, deformable objects are not recommended
- Objects with rich textures are suitable for flipping, objects with symmetrical or repeated textures are not suitable
- Low texture objects After flipping, the system has difficulty aligning different scan segments
The system provides an API to determine whether the object has enough texture to support flip scanning. When flipping, it is recommended to scan in three directions and keep the image overlap between each direction.
For objects that cannot be flipped, it is recommended to shoot from three different heights.
Detailed Content
State machine driven shooting process
(09:30) Object Capture uses a state machine to manage the entire shooting process:
initializing → ready → detecting → capturing → finishing → completedEach state corresponds to different UI and operations:
- initializing: session has just been created
- ready: Display the camera screen and wait for the user to select an object
- detecting: Automatically detect object bounding boxes
- capturing: Automatically capture, display the shooting dial
- finishing: save data
- completed: The session can be dismantled and entered into the reconstruction phase.
When an error occurs, it enters the failed state and the session needs to be re-created.
Code implementation
(10:03) Create session:
import RealityKit
import SwiftUI

var session = ObjectCaptureSession()(10:25) Start session:
var configuration = ObjectCaptureSession.Configuration()
configuration.checkpointDirectory = getDocumentsDir().appendingPathComponent("Snapshots/")

session.start(
    imagesDirectory: getDocumentsDir().appendingPathComponent("Images/"),
    configuration: configuration
)
Key points:
imagesDirectorySave photos taken -checkpointDirectoryStore checkpoint data to speed up reconstruction- After the session is started, it enters the ready state
(10:50) Create a shooting view:
import RealityKit
import SwiftUI

struct CapturePrimaryView: View {
    var body: some View {
        ZStack {
            ObjectCaptureView(session: session)
        }
    }
}
Key points:
ObjectCaptureViewAutomatically display the corresponding UI according to the session status- Does not contain any 2D text or buttons for easy customization of appearance
- Can be embedded into the SwiftUI interface of existing applications
(11:20) UI control of state switching:
var body: some View {
    ZStack {
        ObjectCaptureView(session: session)

        if case .ready = session.state {
            CreateButton(label: "Continue") {
                session.startDetecting()
            }
        } else if case .detecting = session.state {
            CreateButton(label: "Start Capture") {
                session.startCapturing()
            }
        }
    }
}
Key points:
- The ready status displays the Continue button and calls
startDetecting()- detecting status displays Start Capture button, callingstartCapturing()- You can also provide a Reset button to return to the ready state and reselect the object
(12:50) After completing a round of scanning:
var body: some View {
    if session.userCompletedScanPass {
        VStack {
            CreateButton(label: "Finish") {
                session.finish()
            }
        }
    } else {
        ZStack {
            ObjectCaptureView(session: session)
        }
    }
}
Key points:
userCompletedScanPassIndicates the shooting dial is full- You can Finish to end shooting, or continue to the next round of scanning
- It is recommended to complete three rounds of scanning for best results
Point cloud preview
(15:00) It can be usedObjectCapturePointCloudViewPreview the scanned portion:
var body: some View {
    if session.userCompletedScanPass {
        VStack {
            ObjectCapturePointCloudView(session: session)
            CreateButton(label: "Finish") {
                session.finish()
            }
        }
    } else {
        ZStack {
            ObjectCaptureView(session: session)
        }
    }
}
Key points:
- Point cloud view will pause shooting to allow users to view interactively
- Can be displayed in full screen or combined with buttons
- Help users determine whether the scan is complete
Rebuild API
(15:50) After the shooting is completed, usePhotogrammetrySessionRebuild the model:
var body: some View {
    ReconstructionProgressView()
        .task {
            var configuration = PhotogrammetrySession.Configuration()
            configuration.checkpointDirectory = getDocumentsDir()
                .appendingPathComponent("Snapshots/")

            let session = try PhotogrammetrySession(
                input: getDocumentsDir().appendingPathComponent("Images/"),
                configuration: configuration
            )

            try session.process(requests: [
                .modelFile(url: getDocumentsDir().appendingPathComponent("model.usdz"))
            ])

            for try await output in session.outputs {
                switch output {
                case .processingComplete:
                    handleComplete()
                // Handle other output messages
                default:
                    break
                }
            }
        }
}
Key points:
- Uses the same asynchronous API as macOS
- iOS only supports reduced level of detail
- Output includes diffuse, ambient occlusion and normal maps
- Rebuilding is done on-device, no network or Mac required
Collect more data for Mac rebuild
(17:02) If you want a higher quality reconstruction on your Mac, you can enable overacquisition:
var configuration = ObjectCaptureSession.Configuration()
configuration.isOverCaptureEnabled = true

session.start(
    imagesDirectory: getDocumentsDir().appendingPathComponent("Images/"),
    configuration: configuration
)
Key points:
isOverCaptureEnabled = trueAllows collection of more photos than required for iOS reconstruction- Additional photos are stored in the Images folder
- Can be imported into Reality Composer Pro for reconstruction on Mac
- No need to write code, just import it directly in Reality Composer Pro
New rebuild features
(18:40) This year’s reconstruction of the API adds two new functions:
Pose output: Get the camera pose of each photo
try session.process(requests: [
    .poses,
    .modelFile(url: modelURL)
])

for try await output in session.outputs {
    switch output {
    case .poses(let poses):
        handlePoses(poses)
    case .processingComplete:
        handleComplete()
    }
}
Key points:
- Each pose contains the position and orientation of the camera
- will be returned before the model is generated
- Can be used to customize processing flow
Custom Level of Detail (macOS): Controls mesh simplification, texture resolution, format, and which maps are included.
Core Takeaways
1. Make a 3D display tool for e-commerce products
- What to do: Allow merchants to scan products with iPhone, automatically generate 3D models and embed them into product details pages
- Why it’s worth doing: Object Capture makes 3D modeling zero-threshold and does not require professional equipment or skills.
- How to start: Modify the UI based on the Sample App, upload USDZ to the server after scanning, and display it on the web page using Quick Look
2. Make an AR furniture placement application
- What to do: Users scan their own furniture and preview the placement in AR
- Why it’s worth doing: LiDAR supports low-texture furniture to obtain good model quality
- How to start: Integrate Object Capture scanning process, use RealityKit to display the model, support scaling and rotation
3. Make a 3D asset management system
- What to do: Manage 3D model library for designers and developers, supporting scanning, annotation, classification, and export
- Why it’s worth doing: Scanning + reconstruction + preview are all done on the device side, no backend required
- How to get started: Use SwiftData to store model metadata, use Object Capture to scan, and use Quick Look to preview
4. Make an educational 3D museum application
- What to do: Students scan museum exhibits, view 3D models and learn about them in the app
- Why it’s worth it: Guided Capture’s guidance allows non-professional users to obtain high-quality scans
- How to start: Encapsulate Object Capture into a simple process, associate educational content with scanning, and support AR viewing
Related Sessions
- Create 3D models for Quick Look spatial experiences — Best practices for creating 3D content for visionOS Quick Look
- Meet Reality Composer Pro — Apple’s 3D content creation tool that supports importing Object Capture data
- Work with Reality Composer Pro content in Xcode — Work with Reality Composer Pro content in Xcode
- Explore object tracking for visionOS — Object tracking on visionOS, used in conjunction with the Object Capture model
Comments
GitHub Issues · utterances