
Highlight
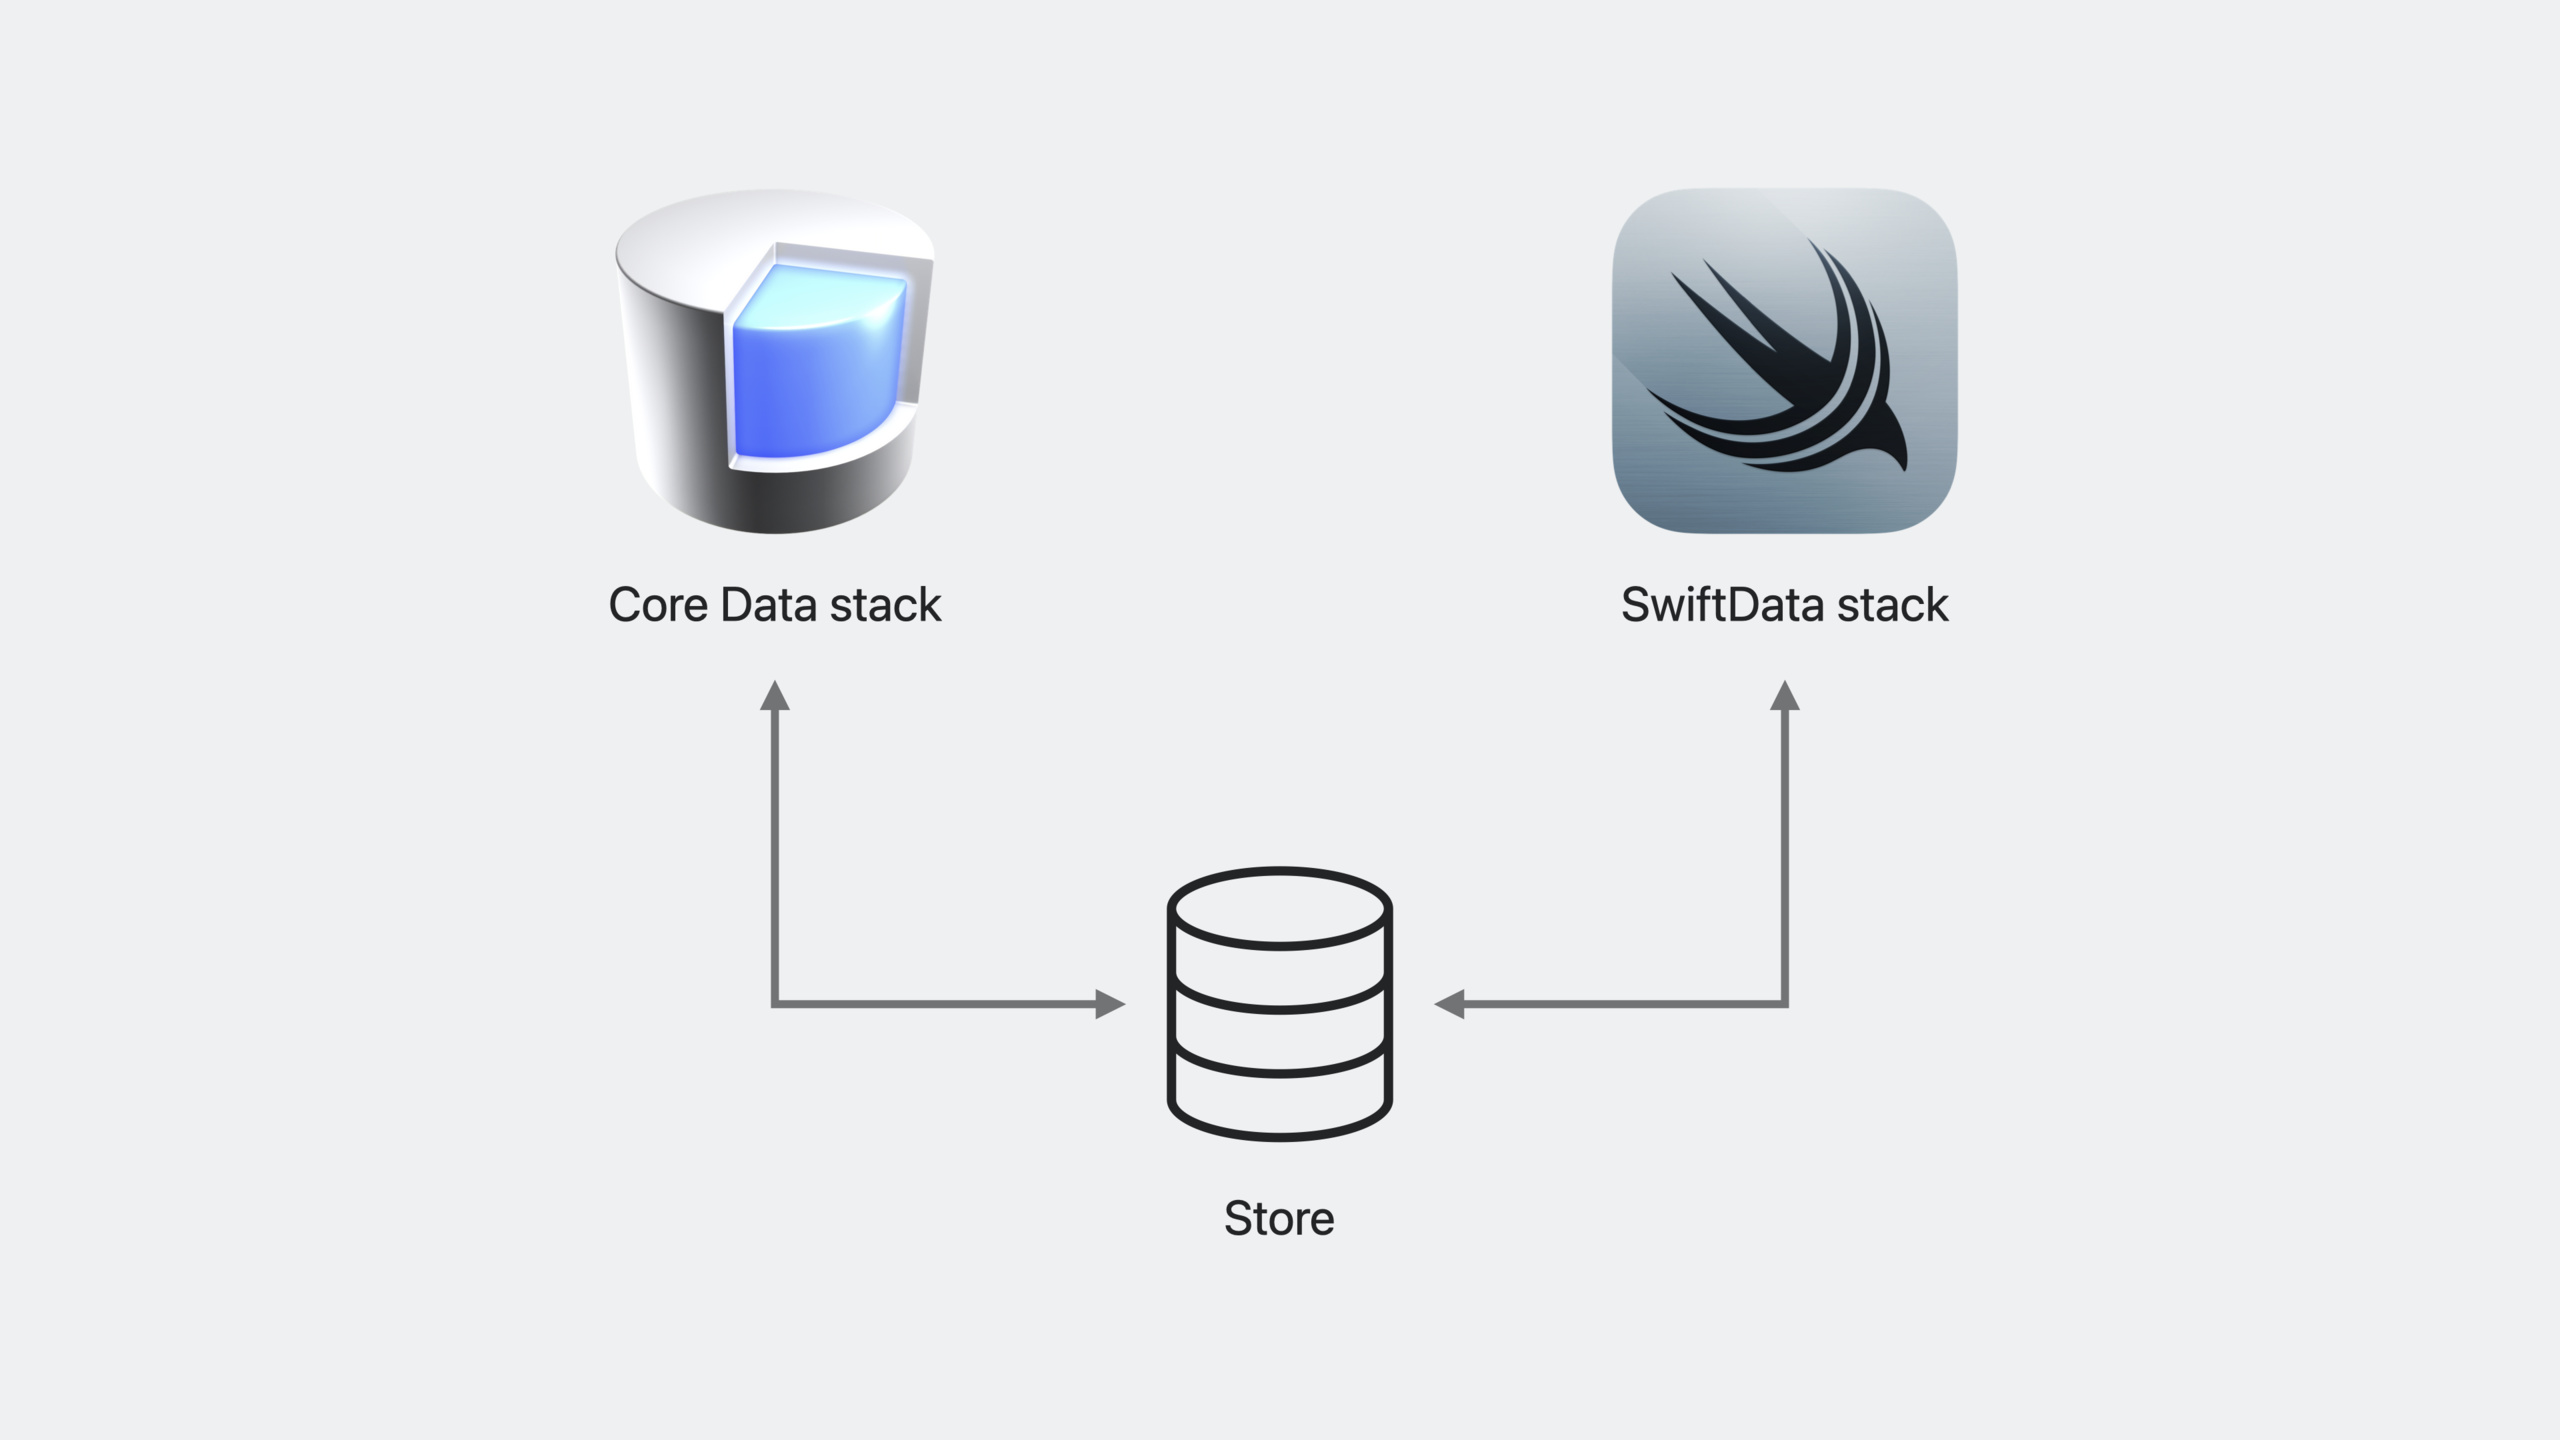
SwiftData can coexist with Core Data in the same application. Developers can use the Xcode Assistant to generate a SwiftData model class with one click to complete the complete migration, or the two persistence stacks can share the same storage file to achieve a gradual transition without rewriting all the code at once.
Core Content
Many applications have been running on Core Data for many years, with complex data models and large amounts of code. After the launch of SwiftData at WWDC23, developers of these applications faced a practical question: Should they migrate? How to migrate?
This session gives three options: full migration, coexistence mode, and a quick entry to automatically generate model classes from Xcode. The core idea is flexibility - choose the most suitable path based on your team resources, version compatibility requirements, and code complexity.
Automatically generate SwiftData model class
(01:05) If you already have Core Data.xcdatamodeldfile, Xcode can help you automatically generate the corresponding SwiftData model class.
Operation steps:
- Select the model file in Xcode
- Select Editor > Create SwiftData Code from the menu bar
- Generate corresponding Swift files for each entity
The generated SwiftData model looks like this:
import SwiftData

@Model
class Trip {
    var name: String
    var destination: String
    var startDate: Date
    var endDate: Date
    var livingAccommodation: LivingAccommodation?
    var bucketList: [BucketListItem]?
}
Key points:
- Generated classes are automatically added
@ModelMacro - Properties and relationships correspond to Core Data entities one-to-one
- If you create a new SwiftData application from scratch, you don’t need this assistant, just write it directly
@ModelJust type
Full migration
(03:09) A full migration means removing all traces of Core Data and replacing it with SwiftData.
Pre-migration checklist:
- Each Core Data entity must have a corresponding SwiftData model class
- Entity names must match exactly
- All properties and relationships must have corresponding definitions in SwiftData
- Confirmed that all Core Data features are supported in SwiftData
Migration steps:
- Use Xcode Assistant to generate SwiftData model class
- Delete
.xcdatamodeldFile - Delete the original Persistence file (the code that sets up the Core Data stack)
- use
.modelContainer()Set up SwiftData stack
(04:37) Set ModelContainer in SwiftUI:
@main
struct TripsApp: App {
    var body: some Scene {
        WindowGroup {
            ContentView()
        }
        .modelContainer(
            for: [Trip.self, BucketListItem.self, LivingAccommodation.self]
        )
    }
}
Key points:
.modelContainer()Create container and context at the same time- Context is automatically injected into the SwiftUI environment
- No need to manually manage NSPersistentContainer
(04:57) Comparison of object creation:
Core Data method:
@Environment(\.managedObjectContext) private var viewContext

let newTrip = Trip(context: viewContext)
newTrip.name = name
newTrip.destination = destination
newTrip.startDate = startDate
newTrip.endDate = endDate
SwiftData way:
@Environment(\.modelContext) private var modelContext

let trip = Trip(
    name: name,
    destination: destination,
    startDate: startDate,
    endDate: endDate
)

modelContext.insert(object: trip)
Key points:
- SwiftData uses a normal initializer to create objects without passing context.
- Called after creation
insert()Marked for persistence - Code is simpler and type safer
(05:51) The saving mechanism has also changed. SwiftData supports implicit saving:
- UI life cycle events trigger saving
- Automatically save regularly after Context changes
- Explicit calls in Core Data can be removed
save()code
(06:16) Data is obtained fromFetchRequestbecome@Query:
@Query(sort: \.startDate, order: .forward)
var trips: [Trip]
Key points:
@QueryReturn directly[Trip], does not need to be packaged asFetchedResults- Support sorting and predicate- Automatically refresh UI in response to data changes
Coexistence mode
(06:51) A complete migration is not always possible. If your app needs to support iOS 16 and below, or the amount of code is too large to be rewritten at once, coexistence mode is a better choice.
Coexistence mode allows two independent persistence stacks of Core Data and SwiftData to point to the same storage file. You can continue to use Core Data in your old code and use SwiftData in new features.
(07:30) Set key configurations for coexistence:
let url = URL(fileURLWithPath: "/path/to/Trips.store")

if let description = container.persistentStoreDescriptions.first {
    description.url = url
    description.setOption(true as NSNumber, forKey: NSPersistentHistoryTrackingKey)
}
Key points:
- Both stacks must point to the same storage URL
- Persistent History Tracking must be turned on
- SwiftData automatically turns on this function, Core Data needs to be set manually
- If not enabled, storage will be set to read-only mode
(08:51) Handling of class name conflicts:
// Core Data class
class CDTrip: NSManagedObject {
    // ...
}

// SwiftData class
@Model final class Trip {
    // ...
}
Key points:
- Core Data and SwiftData classes cannot have the same name
- You can add prefixes to Core Data classes (such as CDTrip)
- The class name has changed, but the entity name remains the same
- You can also modify the class name in the Managed Object Model Editor
Additional requirements for coexistence mode:
- The two schemas must be kept in sync and cannot diverge
- New attributes and relationships must be added to both models in the same way
- Entity version hashes must match, otherwise an unexpected migration will be triggered
- Multi-version schema requires correct management of version differences
What to do with UIKit / AppKit apps
(10:25) Although SwiftData is deeply integrated with SwiftUI, UIKit and AppKit applications can also be used:
- Coexistence solution: UIKit code continues to bind Core Data, and SwiftData is used in parallel new features
- Packaging solution: Treat the SwiftData class as an ordinary Swift class and wrap it with UIKit code.
Detailed Content
Migrate decision tree
Which migration strategy to choose depends on several factors:
| Factors | Full Migration | Coexistence Mode |
|---|---|---|
| Minimum supported version | iOS 17+ | iOS 16 or earlier |
| Code rewrite cost | High (one-time) | Low (incremental) |
| Team resources | Sufficient | Limited |
| Data model complexity | Simple to moderate | Complex |
| Long-term maintenance | More concise | Need to maintain two sets of codes |
Schema compatibility check
Must verify before migrating:
- Entity name: Core Data entity name == SwiftData class name
- Attribute name and type: exact match
- Relationship: Bidirectional relationship is used in SwiftData
@Relationshipmark - Constraint: Used for uniqueness constraints
@Attribute(.unique)5. Unsupported features: such as fetched properties, fetch requests, etc.
Version management
In coexistence mode, schema changes require updating both models at the same time:
- In Core Data
.xcdatamodeldAdd new properties in - In SwiftData
@ModelAdd corresponding attributes to the class - Ensure that the entity version hashes of the two models are consistent
- Use versioned schema to manage SwiftData model versions
Core Takeaways
1. Gradually introduce SwiftData to existing Core Data applications
- What to do: Do not change the old functionality, use SwiftData in the new module, and share data through coexistence mode
- Why it’s worth doing: Try SwiftData with zero risk, the team can learn and use it at the same time, no large-scale refactoring is required
- How to start: Configure the coexistence stack, add prefixes to the Core Data class to avoid naming conflicts, and use it in new functions
@Queryand@Model
2. Use Xcode Assistant to quickly generate SwiftData model
- What to do: Put existing
.xcdatamodeldConvert to SwiftData class - Why it’s worth doing: Avoid handwritten mapping errors and automatically keep property names and types consistent
- How to start: Select the model file > Editor > Create SwiftData Code and check whether the generated class meets expectations
3. Make a cross-version note-taking application
- What to do: Note-taking app that supports iOS 16 and iOS 17+, iOS 16 uses Core Data, iOS 17 uses SwiftData
- Why it’s worth doing: Coexistence mode allows the same storage file to be accessed by two stacks, and user data transitions seamlessly
- How to start: Determine the system version at runtime, choose to initialize Core Data stack or SwiftData stack, and share the same storage URL
4. Refactor legacy Core Data code
- What: Gradually replace bloated Core Data code with SwiftData
- Why it’s worth it: Reduce boilerplate code, gain type safety and better SwiftUI integration
- How to start: Start migrating from the simplest entities, and then gradually expand the scope after verifying data consistency. Use
@QueryreplaceFetchRequest
Related Sessions
- Meet SwiftData — An introductory introduction to SwiftData, including basic concepts and API usage
- Model your schema with SwiftData — Learn more about data modeling with SwiftData, including versioned schema
- Dive deeper into SwiftData — Advanced usage and performance optimization of SwiftData
- Build an app with SwiftData — Build a complete app from scratch with SwiftData
Comments
GitHub Issues · utterances