
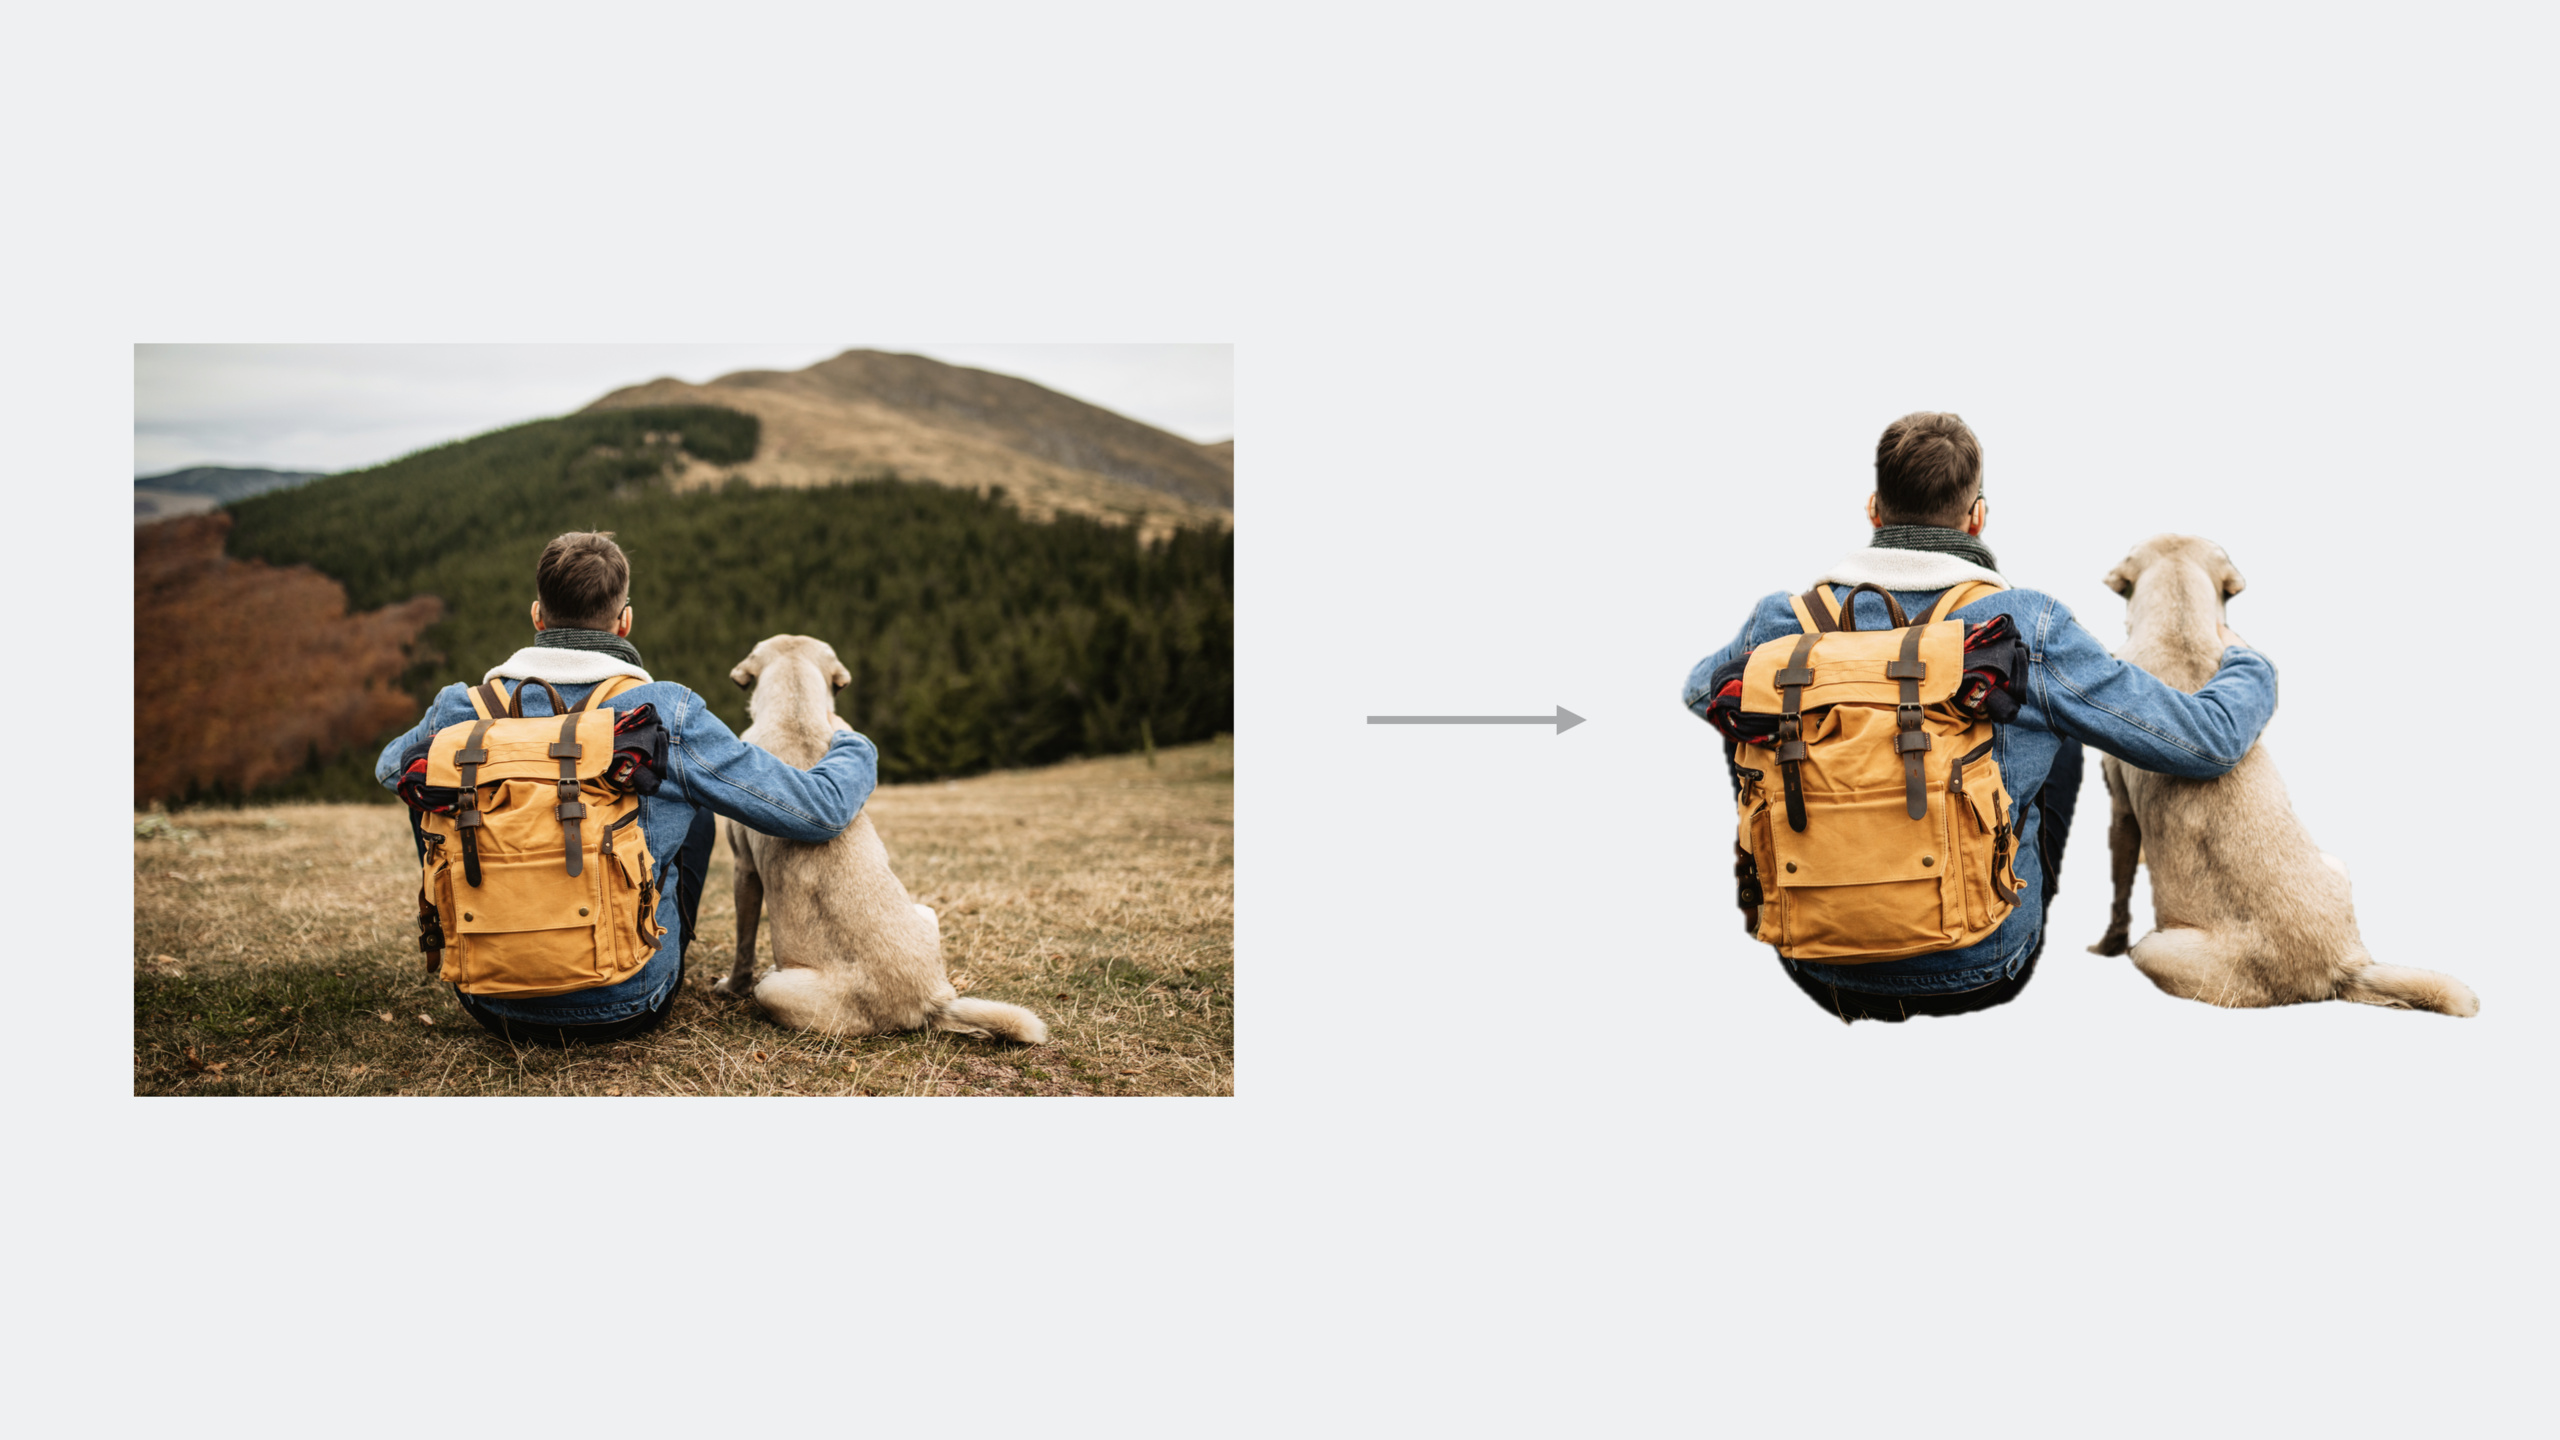
Highlight
iOS 17 and macOS Sonoma open system-level image subject extraction capabilities, VisionKit provides an out-of-the-box interactive cutout UI, and the Vision framework provides underlying segmentation masks. Both can be combined with Core Image to implement complex image special effects pipelines.
Core Content
In iOS 16, long-pressing a picture in the photo album can pull out the subject. This ability is now open to developers. You can choose two paths: VisionKit quickly accesses system-level interactions, or the Vision framework obtains the underlying segmentation data for customized processing.
VisionKit: Get system-level cutout interaction with a few lines of code
(02:28) VisionKit processing is executed out of process and has little impact on the main thread, but the image resolution is limited.
Created on iOSImageAnalysisInteractionand add to picture view:
let interaction = ImageAnalysisInteraction()
interaction.preferredInteractionTypes = .imageSubject
imageView.addInteraction(interaction)
Corresponding use on macOSImageAnalysisOverlayView:
let overlayView = ImageAnalysisOverlayView()
overlayView.preferredInteractionTypes = .imageSubject
imageContainerView.addSubview(overlayView)
Key points:
.automaticIncludes cutouts, live text and data detectors, fully mirroring system behavior -.imageSubjectOnly enable cutout, suitable for scenarios that do not require text interaction- support
UIImageViewAny view other than
Programmatic access to subject data
(03:27) In addition to UI interaction, VisionKit also supports code to obtain subject information:
let analyzer = ImageAnalyzer()
let analysis = try await analyzer.analyze(image, configuration: .init([.imageSubject]))

// Get all subjects
let allSubjects = analysis.subjects

// Query the subject at a coordinate
if let subject = try await analysis.subject(at: tapPoint) {
    // There is a subject at the user's tap location
}

// Get highlighted (selected) subjects
let highlighted = analysis.highlightedSubjects

// Generate an image containing the specified subjects
let compositeImage = try await analysis.image(for: highlighted)
Key points:
SubjectThe structure containsimage(subject image) andbounds(bounding box) -subject(at:)Return nil to indicate that the coordinate has no body -highlightedSubjectsReadable and writable, supports code control of selected status -image(for:)Combine multiple subjects into one image with a transparent background
Vision: Low-level segmentation API and Core Image combination
(07:32) Vision frameworkVNGenerateForegroundInstanceMaskRequestProvides lower-level control capabilities. Processing is performed in-process and is not resolution-restricted.
Comparison with VisionKit:
| Features | VisionKit | Vision |
|---|---|---|
| UI | Built-in system-level interaction | None, need to build it yourself |
| Processing location | Out-of-process | In-process |
| Resolution Limitation | Yes | No |
| Applicable scenarios | Quick access | Advanced image processing pipeline |
(08:30) Vision’s segmentation is class agnostic. Unlike portrait segmentation, which only deals with people, subject extraction can segment any foreground object - buildings, food, vehicles.
Detailed Content
Vision subject extraction complete process
(09:50) Vision’s requests follow a standard pattern:
import Vision
import CoreImage

// 1. Create the request
let request = VNGenerateForegroundInstanceMaskRequest()

// 2. Create the request handler
let handler = VNImageRequestHandler(cgImage: sourceCGImage)

// 3. Execute on a background queue
DispatchQueue.global(qos: .userInitiated).async {
    try? handler.perform([request])

    guard let observation = request.results?.first else { return }

    // 4. Get the mask for all foreground instances
    let mask = try? observation.generateScaledMask(
        for: observation.allInstances,
        from: handler,
        croppedToInstancesExtent: false
    )
}
Key points:
- Subject detection is a computationally intensive task and must be performed on a background thread
-
resultsThere is only one observation in the array, which contains all instance information -allInstancesReturns a list containing all foreground instance indicesIndexSet, background index 0 is not included
Instance mask and click test
(09:14) Vision provides pixel-level instance masks. Each pixel value corresponds to an instance index: 0 is the background, 1, 2, 3… are foreground instances. Index order is not guaranteed, but is numbered consecutively.
Implementation of click test:
func instanceAtPoint(_ point: CGPoint, instanceMask: VNPixelBufferObservation) -> IndexSet {
    // point is normalized to [0, 1], with the origin at the upper-left corner (UIKit coordinate system)
    let pixelX = Int(point.x * CGFloat(instanceMask.width))
    let pixelY = Int(point.y * CGFloat(instanceMask.height))

    instanceMask.lockPixelBuffer()
    defer { instanceMask.unlockPixelBuffer() }

    let bytesPerRow = CVPixelBufferGetBytesPerRow(instanceMask.pixelBuffer)
    let baseAddress = CVPixelBufferGetBaseAddress(instanceMask.pixelBuffer)!

    // Single-channel UInt8, calculate the pixel offset
    let offset = pixelY * bytesPerRow + pixelX
    let label = baseAddress.load(fromByteOffset: offset, as: UInt8.self)

    // 0 is the background; return all instances, otherwise return the selected single instance
    return label == 0 ? observation.allInstances : IndexSet(integer: Int(label))
}
Key points:
- The rows of the pixel buffer may have padding, which must be used
bytesPerRowCalculate offset - Required before accessing the pixel buffer
lockPixelBuffer(), after the endunlockPixelBuffer()- The coordinate system is consistent with UIKit, the upper left corner is the origin, no additional conversion is required
Combined with Core Image to achieve special effects
(12:23) The mask output by Vision can be directly used in Core ImageCIBlendWithMaskFilter:
func applyEffect(
    sourceImage: CIImage,
    mask: CIImage,
    backgroundImage: CIImage,
    effect: Effect
) -> CIImage {
    // Apply effects to the background, such as darkening or blurring
    let processedBackground = applyBackgroundEffect(backgroundImage, effect: effect)

    // Use CIBlendWithMask to composite the subject onto the new background
    let blendFilter = CIFilter.blendWithMask()
    blendFilter.inputImage = sourceImage
    blendFilter.backgroundImage = processedBackground
    blendFilter.maskImage = mask

    return blendFilter.outputImage!
}
Key points:
- Vision outputs SDR images, Core Image processing preserves HDR information
-
croppedToInstancesExtent: falseKeep output at the same resolution as input for easy compositing -croppedToInstancesExtent: trueOutputs a cropped image that hugs the subject
Speaker’s special effects pipeline
(13:48) The speaker demonstrated a complete special effects App. The process is as follows:
- Perform a Vision subject extraction request on the source image
- Optional: User clicks to select a specific instance
- Generate a mask for the selected instance
- Apply selected special effects to the background (darkening, blurring, halo, etc.)
- Use Core Image to composite the subject onto the processed background.
Techniques for achieving the halo effect: use a pure white image as the main body and black as the background, blur it first and then combine it with the original mask to produce a glowing effect around the main body.
Core Takeaways
1. Drag and drop the main body of puzzle/sticker apps
- What it does: Allow users to cut out any object from a photo and drag it to use as a puzzle piece or sticker
- Why it’s worth doing: VisionKit
ImageAnalysisInteractionGet system-level cutout interaction with just a few lines of code, no need to train a custom model - How to start: Give
UIImageViewAdd toImageAnalysisInteraction,set up.imageSubject, handle drag gesture deliverySubject.image
2. One-click background replacement for photo editing apps
- What: After the user selects the photo, automatically extract the subject and replace the background (solid color, gradient, custom picture)
- Why it’s worth doing: Vision’s
VNGenerateForegroundInstanceMaskRequestOutput is seamless with Core Image and preserves HDR information - How to start: Vision request to get mask →
CIBlendWithMaskSynthesize new backgrounds → Support click selection of specific instances
3. Generate product white background images for e-commerce apps
- What to do: Users upload product photos, and the background is automatically removed to generate a white background product image.
- Why is it worth doing: Subject extraction is category-independent. Clothes, shoes, and furniture can all be segmented, eliminating the need for manual cutout.
- How to get started: VisionKit
ImageAnalyzerAsynchronous analysis, settings.imageSubjectConfiguration, obtain the subject image and then synthesize a white background
4. AR sticker production for social apps
- What: Extract subjects from photos and generate transparent PNGs for message stickers or AR scenes
- Why it’s worth doing:
image(for:)The method directly outputs a synthetic image with a transparent background, and the format is ready to use. - How to get started: User selects photo →
ImageAnalyzer.analyze()→ Select subject →analysis.image(for: subjects)→ Save as PNG
Related Sessions
- What’s new in VisionKit — Overview of new features in VisionKit, including more context for subject extraction
- Add HDR content to your app — Core Image’s detailed method of processing HDR images
- Person segmentation in Vision — Vision portrait segmentation API, in contrast to subject extraction
- Create a more responsive camera experience — Camera shooting and photo processing process
Comments
GitHub Issues · utterances