
Highlight
ScreenCaptureKit in macOS 14 adds Presenter Overlay speaker overlay effect, SCContentSharingPicker system-level content selector, and SCScreenshotManager high-definition screenshot API, allowing screen sharing applications to obtain a consistent experience with the system without building a self-built UI.
Core Content
Screen Sharing UI Dilemma
When making a video conferencing or screen recording tool, the content selection interface can be a hassle. To enumerate all windows and applications, draw a selection panel to handle various edge cases. The selection interface of different applications looks different, and users have to learn it again every time.
SCContentSharingPicker takes over this burden. It is a system-level singleton that provides a window/application/display selection experience consistent with macOS native, which can be triggered by users from the Video menu bar, in-app buttons, or directly clicking on the window.
Presenter Overlay: Automatic speaker effect
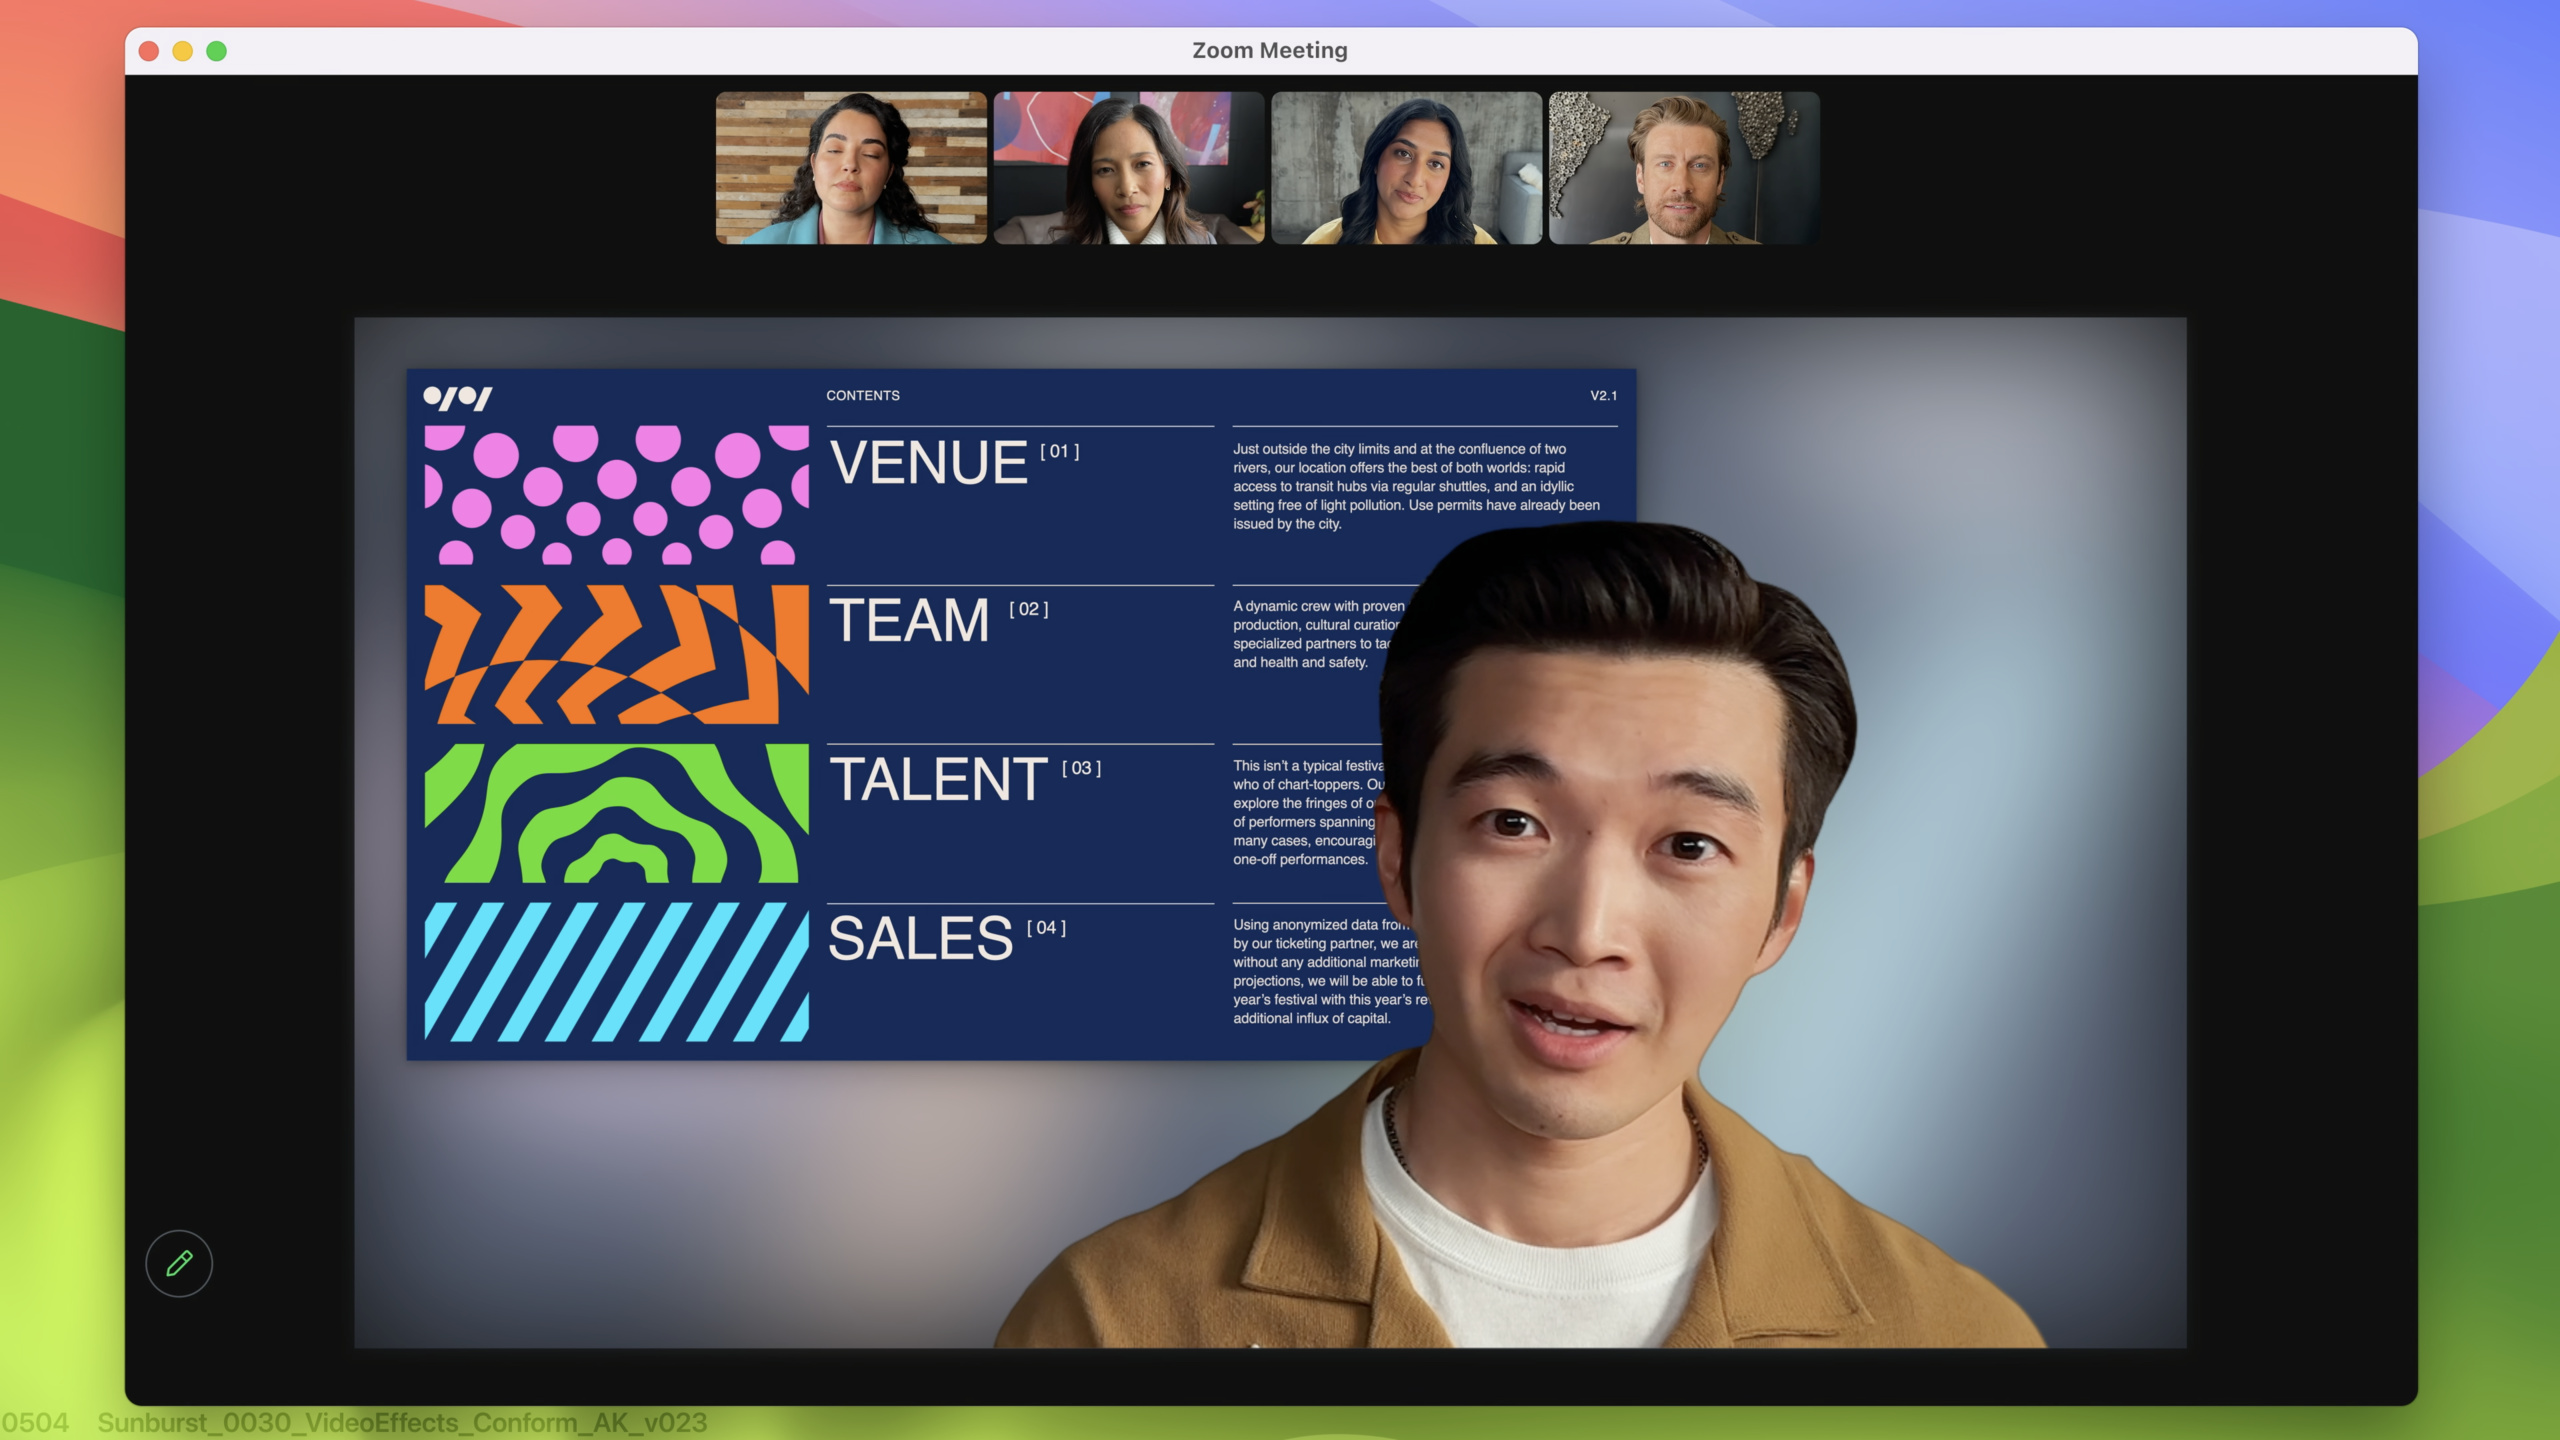
When sharing the screen in a remote meeting, the speaker’s portrait and content are separated. Presenter Overlay embeds speakers onto shared content through advanced segmentation algorithms.
Small overlay mode places the speaker in a movable circular window. The large overlay mode separates the speaker from the background and places the screen content between the speaker and the background, creating an immersive effect similar to a weather forecast.
The key is that this effect automatically takes effect for applications using ScreenCaptureKit. As long as your app uses both a camera and a screen capture stream, controls will appear in the Video menu bar, and ScreenCaptureKit will push the synthesized frames directly into your stream.
Capture frames from video stream to native screenshots
In the past, to capture screen content, you had to either grab a frame from SCStream or use CGWindowListCreateImage. The former requires maintaining a stream, while the latter has limited functionality.
SCScreenshotManager provides an asynchronous screenshot API, supports two output formats, CGImage and CMSampleBuffer, and reuses the filtering and configuration capabilities of ScreenCaptureKit.
Detailed Content
Presenter Overlay status detection
(03:32)
The app needs to know when the Presenter Overlay is enabled so it can adjust the UI:
let stream = SCStream(filter: filter, configuration: config, delegate: self)

// Implement SCStreamDelegate callbacks
func stream(_ stream: SCStream, outputEffectDidStart didStart: Bool) {
    if didStart {
        presentBanner()
        turnOffCamera() // Hide the local camera tile
    } else {
        turnOnCamera()
    }
}
Key points:
outputEffectDidStarttriggers when Presenter Overlay is enabled/disabled- After enabling, AVCaptureSession no longer outputs regular camera streams because the camera is used directly by overlay
- Video calling applications should adjust audio and video synchronization and hide the speaker’s local camera tile
- It is recommended to optimize to a higher frame rate because overlay involves real-time split rendering
System-level content selector
(06:48)
SCContentSharingPicker replaces the self-built content selection interface:
let picker = SCContentSharingPicker.shared()
picker.addObserver(self)
picker.isActive = true

// In-app button triggers the system picker
func showSystemPicker(sender: UIButton) {
    picker.present(for: nil, using: .window)
}

// Selection completion callback
func contentSharingPicker(_ picker: SCContentSharingPicker,
                          didUpdateWith filter: SCContentFilter,
                          for stream: SCStream?) {
    if let stream = stream {
        stream.updateContentFilter(filter)
    } else {
        let newStream = SCStream(filter: filter, configuration: config, delegate: self)
        // Start a new stream
    }
}

// Failure and cancellation callbacks
func contentSharingPicker(_ picker: SCContentSharingPicker,
                          didCancelFor stream: SCStream?) {
    if let stream = stream {
        resetStateForStream(stream: stream)
    }
}

func contentSharingPickerStartDidFailWithError(_ error: Error) {
    presentNotification(error: error)
}
Key points:
isActive = truemust be set before the system will include this app in the Video menu barcontentStyleofpresent(for:using:)optional.window,.application,.display- The
SCContentFilterreturned by the callback can be used directly to create or update the stream - Selector behavior can be configured independently for each stream
Configure selector by stream
(08:41)
let pickerConfig = SCContentSharingPickerConfiguration()
pickerConfig.allowedPickingModes = [.window, .application]
pickerConfig.excludedBundleIDs = ["com.foo.myApp", "com.foo.myApp2"]
pickerConfig.allowsRepicking = false

picker.setConfiguration(pickerConfig, for: stream)
Key points:
allowedPickingModeslimits the content types that users can choose fromexcludedBundleIDsandexcludedWindowIDshide sensitive apps or windowsallowsRepicking = falseprevents users from changing selected content- Each stream can have different configurations
HD Screenshot API
(12:26)
// Approach 1: CGImage output
if let screenshot = try? await SCScreenshotManager.captureImage(
    contentFilter: myContentFilter,
    configuration: myConfiguration
) {
    // screenshot is a CGImage and can be used directly with NSImage/UIImage
}

// Approach 2: CMSampleBuffer output
if let sampleBuffer = try? await SCScreenshotManager.captureSampleBuffer(
    contentFilter: myContentFilter,
    configuration: myConfiguration
) {
    // Supports more pixel formats and fits video processing workflows
}
Complete usage process:
// 1. Get shareable content
let content = try await SCShareableContent.current

// 2. Create a content filter (with the picker or manually)
let filter = SCContentFilter(display: content.displays.first!,
                             excludingApplications: [],
                             exceptingWindows: [])

// 3. Configure screenshot parameters
let configuration = SCStreamConfiguration()
configuration.width = 1920
configuration.height = 1080
configuration.showsCursor = true

// 4. Call the screenshot API
if let screenshot = try? await SCScreenshotManager.captureImage(
    contentFilter: filter,
    configuration: configuration
) {
    print("Screenshot succeeded, size: \(screenshot.width) x \(screenshot.height)")
}
Key points:
captureImagereturns a CGImage, suitable for direct display or savingcaptureSampleBufferreturns CMSampleBuffer, supports more pixel formats- Configuration options are basically the same as SCStream, including cursor display, resolution, color space, etc.
- Window hierarchy options are obtained in SCShareableContent when migrating from CGWindowListCreateImage
Core Takeaways
-
One-click screen recording tool
- What to build: Make a menu bar widget. When clicked, the system selector will pop up. After selecting the window, start recording GIF/video
- Why it’s worth doing: SCContentSharingPicker provides a complete selection UI, no need to build it yourself, just a few lines of code can achieve professional-level screen recording
- How to start: Use
SCContentSharingPicker.shared()to get the selector, createSCStreamin the callback and output it toAVAssetWriter
-
Smart screenshot note application
- What to build: Automatically recognize text with OCR after taking screenshots, and archive them by application category
- Why it’s worth doing:
SCScreenshotManagercan accurately intercept specific windows and cooperate withexcludedBundleIDsto filter private content - How to start: Use
SCShareableContentto get the window list, createSCContentFilterto specify the target window, and callcaptureImage
-
Remote collaboration whiteboard
- What to build: Automatically overlay speaker gestures and laser pointer marks when sharing screen
- Why it’s worth doing: Presenter Overlay has already handled speaker segmentation, and the application only needs to overlay a custom annotation layer on the receiving end.
- How to start: Detect
outputEffectDidStartcallback, adjust UI layout, and overlay CAShapeLayer drawing markers on the shared screen
-
Application Usage Analysis Tool
- What to build: regularly intercept user active windows and generate a visual report of daily application usage time
- Why it’s worth doing: The screenshot API can accurately filter by application, with the window level information of
SCShareableContent - How to start: Use
SCShareableContent.currentto obtain the application list, create a filter for each application, and callcaptureSampleBufferregularly to analyze pixel changes to determine activity.
Related Sessions
- Meet ScreenCaptureKit — ScreenCaptureKit Basics 2022
- Take ScreenCaptureKit to the next level — Advanced Tips for 2022
- Add SharePlay to your app — Combine screen sharing with SharePlay for a collaborative experience
- Discover Continuity Camera for tvOS — Cross-device camera sharing technology
Comments
GitHub Issues · utterances