
Highlight
SwiftUI introduces the ImmersiveSpace scene type on visionOS, alongside WindowGroup and Volume, allowing application content to break through the window boundaries and control entry and exit through openImmersiveSpace/dismissImmersiveSpace environmental actions. It works with RealityView and ARKit to achieve multiple experience levels from mixed reality to full immersion.
Core Content
Three containers, three experience levels
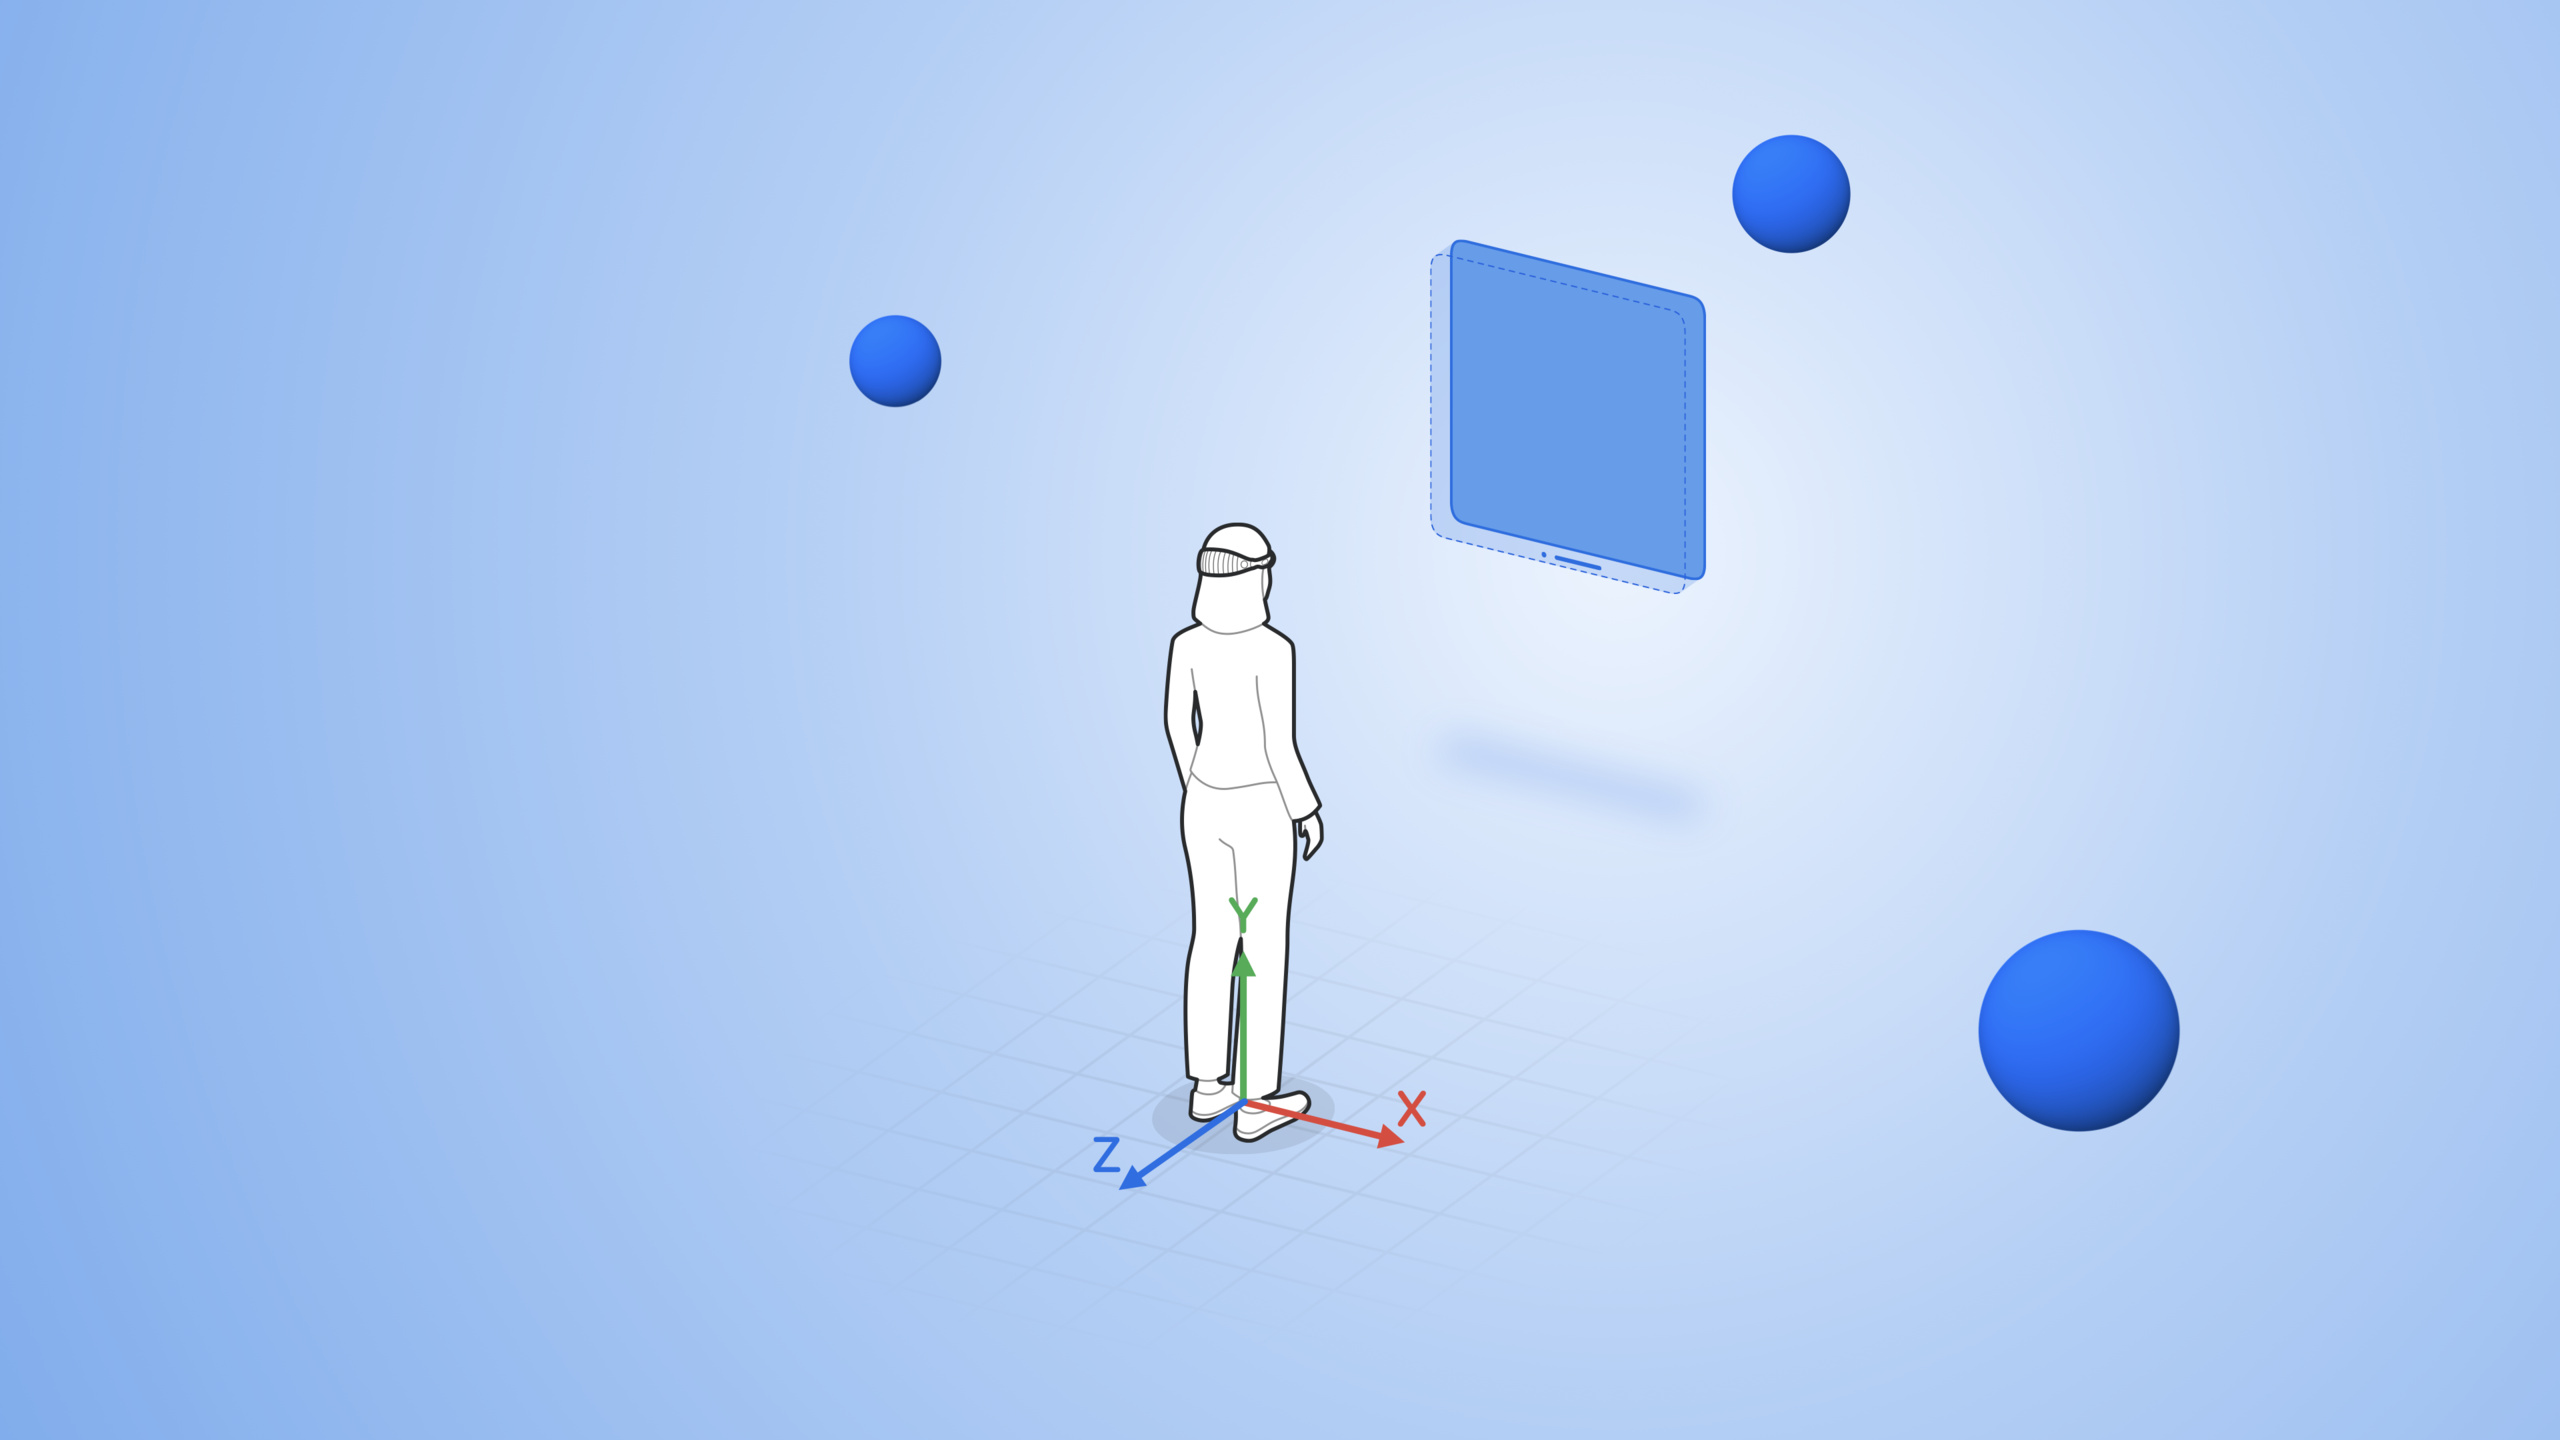
SwiftUI on visionOS provides three scene containers: WindowGroup for traditional windows, Volume for bounded 3D content, and ImmersiveSpace for borderless space experience. The first two confine content within a container, while ImmersiveSpace allows your content to appear anywhere around the user.
When an app opens ImmersiveSpace, it enters Full Space mode. Hide all other apps to make room for your content. After closing, other applications automatically resume. The app can only have one Space open at the same time.
(03:00)
Define and open ImmersiveSpace
Defining an ImmersiveSpace only requires a few lines of code:
@main
struct WorldApp: App {
    var body: some Scene {
        ImmersiveSpace(id: "solar") {
            SolarSystem()
        }
    }
}
Key points:
ImmersiveSpaceis a new scene type, similar toWindowGroup- Name the Space through the
idparameter, and subsequently open it through this identifier - The origin of Space is at the user’s feet, and content placement needs to be considered relative to this position.
Opening a Space from a window requires an environment action:
struct SpaceControl: View {
    @Environment(\.openImmersiveSpace) private var openImmersiveSpace
    @Environment(\.dismissImmersiveSpace) private var dismissImmersiveSpace
    @State private var isSpaceHidden: Bool = true

    var body: some View {
        Button(isSpaceHidden ? "View Outer Space" : "Exit the solar system") {
            Task {
                if isSpaceHidden {
                    let result = await openImmersiveSpace(id: "solar")
                    switch result {
                    case .opened:
                        isSpaceHidden = false
                    case .error:
                        // Handle open failure
                        break
                    default:
                        break
                    }
                } else {
                    await dismissImmersiveSpace()
                    isSpaceHidden = true
                }
            }
        }
    }
}
Key points:
openImmersiveSpaceanddismissImmersiveSpaceare environment values, obtained through@EnvironmentopenImmersiveSpace(id:)returns asynchronous results and needs to handle both success and failure situations.dismissImmersiveSpace()requires no parameters because only one Space can be open at the same time- These actions are async and the system will return after the Space entry/exit animation is completed
(09:11)
Cooperation between RealityView and ImmersiveSpace
ImmersiveSpace and RealityView are designed to work together. RealityView provides asynchronous loading, ARKit anchor point placement, hand and head posture data access and other capabilities:
ImmersiveSpace {
    RealityView { content in
        let starfield = await loadStarfield()
        content.add(starfield)
    }
}
Key points:
- RealityView’s closure supports async and can load 3D resources asynchronously
- Add entities to the scene through
content.add()after loading is complete - RealityView uses RealityKit for rendering, and the coordinate system is different from SwiftUI
Note the differences in coordinate systems:
- In SwiftUI, the y-axis is downward and the z-axis is toward the user.
- y-axis upward in RealityKit
- Follow RealityKit’s coordinate conventions when positioning entities in RealityView
(06:53)
Detailed Content
Multi-scenario application structure
A typical visionOS application contains both windows and spaces:
@main
struct WorldApp: App {
    var body: some Scene {
        // The first scene is the window shown at launch
        WindowGroup {
            VStack {
                Text("The Solar System")
                    .font(.largeTitle)
                SpaceControl()
            }
        }

        // ImmersiveSpace is not shown by default and must be opened manually
        ImmersiveSpace(id: "solar") {
            SolarSystem()
        }
    }
}
Key points:
- The first scene in the scene list is automatically displayed when the app starts
- ImmersiveSpace is hidden by default and can be opened through interaction triggers such as buttons.
- You can also configure the app to launch directly into Space (see below)
(10:44)
Asynchronous loading of 3D models
Loading 3D resources takes time, and Model3D provides loading status management:
Model3D(named: "Earth") { phase in
    switch phase {
    case .empty:
        Text("Waiting")
    case .failure(let error):
        Text("Error \(error.localizedDescription)")
    case .success(let model):
        model.resizable()
    }
}
Key points:
phaseparameters reflect loading status: empty, failure, success- Display loading instructions in empty state, and error message in failure state
- Get the loaded model when success, you can apply modifiers such as
.resizable()
(11:32)
Scene Phase Management
ImmersiveSpace supports SwiftUI’s scene phase and can respond to active state changes:
@main
struct WorldApp: App {
    @EnvironmentObject private var model: ViewModel
    @Environment(\.scenePhase) private var scenePhase

    var body: some Scene {
        ImmersiveSpace(id: "solar") {
            SolarSystem()
                .onChange(of: scenePhase) {
                    switch scenePhase {
                    case .inactive, .background:
                        model.solarEarth.scale = 0.5
                    case .active:
                        model.solarEarth.scale = 1.0
                    default:
                        break
                    }
                }
        }
    }
}
Key points:
- Space will enter the inactive state when the user walks out of the boundary or the system alert pops up
- The user returns to the active state after returning to the experience area
- Use scene phase changes to give visual feedback, such as shrinking content to prompt status changes
(13:04)
Coordinate conversion
Window and Space each have independent coordinate systems. SwiftUI provides the ImmersiveSpace coordinate space for conversion:
GeometryReader3D { proxy in
    Earth()
        .onTapGesture {
            if let translation = proxy.transform(in: .immersiveSpace)?.translation {
                model.solarEarth.position = Point3D(translation)
            }
        }
}
Key points:
GeometryReader3Dprovides 3D geometry informationproxy.transform(in: .immersiveSpace)Gets the transformation of the current view in the ImmersiveSpace coordinate system- The click position in the window can be mapped to the entity position in Space through conversion
(14:21)
Three Immersion Styles
visionOS offers three immersion styles that control how content takes over the surrounding environment:
@main
struct WorldApp: App {
    @State private var currentStyle: ImmersionStyle = .mixed

    var body: some Scene {
        ImmersiveSpace(id: "solar") {
            SolarSystem()
                .simultaneousGesture(
                    MagnifyGesture()
                        .onChanged { value in
                            let scale = value.magnification
                            if scale > 10 {
                                currentStyle = .full
                            } else if scale > 5 {
                                currentStyle = .progressive
                            } else {
                                currentStyle = .mixed
                            }
                        }
                )
        }
        .immersionStyle(selection: $currentStyle, in: .mixed, .progressive, .full)
    }
}
Key points:
.mixed(default): The content coexists with the real environment, and everything around you can be seen.progressive: Content displayed in a forward portal, immersion adjustable via Digital Crown.full: Completely taking over the field of view, the user is completely immersed in the virtual content- List of styles supported by
.immersionStyle(selection:in:)modifier declaration - Users can adjust the passthrough ratio in progressive style through Digital Crown
(16:34)
Environmental effects and hand hiding
In progressive and full styles, the experience can be further tuned:
ImmersiveSpace(id: "solar") {
    SolarSystem()
        .preferredSurroundingsEffect(.systemDark)
}
.immersionStyle(selection: $currentStyle, in: .progressive)
Key points:
.preferredSurroundingsEffect(.systemDark)darkens the surrounding environment and highlights the Space content- Only valid in progressive and full styles
Hide real hands and show virtual hands in full style:
ImmersiveSpace(id: "solar") {
    SolarSystem()
}
.immersionStyle(selection: $currentStyle, in: .full)
.upperLimbVisibility(.hidden)
Key points:
.upperLimbVisibility(.hidden)Hide real hands in full immersion- Used with ARKit hand tracking to display virtual hand models
(20:08)
ARKit hand tracking and virtual gloves
Obtain hand skeleton data through ARKit to drive the virtual glove model:
struct SpaceGloves: View {
    let arSession = ARKitSession()
    let handTracking = HandTrackingProvider()

    var body: some View {
        RealityView { content in
            let root = Entity()
            content.add(root)

            let leftGlove = try! Entity.loadModel(named: "assets/gloves/LeftGlove_v001.usdz")
            root.addChild(leftGlove)

            let rightGlove = try! Entity.loadModel(named: "assets/gloves/RightGlove_v001.usdz")
            root.addChild(rightGlove)

            Task {
                do {
                    try await arSession.run([handTracking])
                } catch let error as ProviderError {
                    print("Provider error: \(error.localizedDescription)")
                } catch {
                    print("Unexpected error: \(error.localizedDescription)")
                }

                for await anchorUpdate in handTracking.anchorUpdates {
                    let anchor = anchorUpdate.anchor
                    switch anchor.chirality {
                    case .left:
                        leftGlove.transform = Transform(matrix: anchor.transform)
                        for (index, jointName) in anchor.skeleton.definition.jointNames.enumerated() {
                            leftGlove.jointTransforms[index].rotation = simd_quatf(
                                anchor.skeleton.joint(named: jointName).localTransform
                            )
                        }
                    case .right:
                        rightGlove.transform = Transform(matrix: anchor.transform)
                        for (index, jointName) in anchor.skeleton.definition.jointNames.enumerated() {
                            rightGlove.jointTransforms[index].rotation = simd_quatf(
                                anchor.skeleton.joint(named: jointName).localTransform
                            )
                        }
                    }
                }
            }
        }
    }
}
Key points:
ARKitSessionandHandTrackingProviderare core types of ARKitarSession.run([handTracking])Activate hand trackinghandTracking.anchorUpdatesprovides asynchronous hand anchor point update streamanchor.chiralityDistinguish between left and right handsanchor.skeleton.jointNamesandjoint(named:).localTransformget the transformation of each finger joint- Synchronize joint rotation to
jointTransformsof the virtual model to enable gloves to follow real hand movements
(20:52)
Start directly into Space
For fully immersive applications (such as games), you can configure the application to enter Space directly when it starts:
@main
struct WorldApp: App {
    var body: some Scene {
        ImmersiveSpace(id: "solar") {
            SolarSystem()
        }
        .immersionStyle(selection: .constant(.full), in: .full)
    }
}
You need to configure UIApplicationSceneManifest in Info.plist and set ImmersiveSpace as the startup scene.
(19:33)
Core Takeaways
-
What to build: Create a stargazing app that provides an immersive space experience from the window
- Why it’s worth doing: ImmersiveSpace allows applications to smoothly transition from ordinary 2D windows to 360-degree starry sky environments. Users first browse astronomical information, and then click to enter the immersive mode to explore the solar system.
- How to start: Define WindowGroup as the entrance, define ImmersiveSpace to store 3D content, and use
openImmersiveSpace(id:)to trigger switching
-
What to build: Add a progressive immersive mode virtual training ground to fitness applications
- Why it’s worth doing: Progressive style allows users to enjoy immersive training while maintaining environmental awareness. Adjust immersion with the Digital Crown, from “seeing a virtual trainer in your living room” to “fully entering a virtual gym”
- How to start: Use
.immersionStyle(selection:in:)to support mixed and progressive, use MagnifyGesture or buttons to switch styles
-
What to build: Develop a virtual instrument playing application that supports hand tracking
- Why it’s worth doing: ARKit hand tracking provides precise data on each finger joint to detect playing movements. Combined with
.upperLimbVisibility(.hidden)and virtual hand models, create a realistic playing feel - How to start: Use
HandTrackingProviderto obtain the hand anchor point and map the joint transformation to the interaction area of the virtual instrument model
- Why it’s worth doing: ARKit hand tracking provides precise data on each finger joint to detect playing movements. Combined with
-
What to build: Build a multi-person collaboration 3D whiteboard application
- Why it’s worth doing: ImmersiveSpace supports SharePlay, so multiple users can see and operate the same content in the same space. The coordinate conversion API allows 2D content in the window to be accurately positioned in 3D space
- How to start: Integrate the GroupActivities framework and use
GeometryReader3Dand.immersiveSpacecoordinate spaces for position conversion
-
What to build: Make a direct launch meditation/relaxation app
- Why it’s worth doing: full immersion style can completely block external interference and create a focused atmosphere with
.preferredSurroundingsEffect(.systemDark). The experience starts immediately after the application is launched, without any additional operations by the user. - How to start: Only keep ImmersiveSpace in the App declaration, set immersionStyle to full, configure scene manifest to start directly
- Why it’s worth doing: full immersion style can completely block external interference and create a focused atmosphere with
Related Sessions
- Meet SwiftUI for spatial computing — Getting started with SwiftUI spatial computing, understanding the basic concepts of windows and Volumes
- Take SwiftUI to the next dimension — More ways to use 3D content, Model3D, and RealityView in SwiftUI
- Build spatial experiences with RealityKit — In-depth analysis of RealityKit, detailed explanation of entities, components, and animation systems
- Evolve your ARKit app for spatial experiences — ARKit for hand tracking, plane detection and spatial positioning on visionOS
Comments
GitHub Issues · utterances