
Highlight
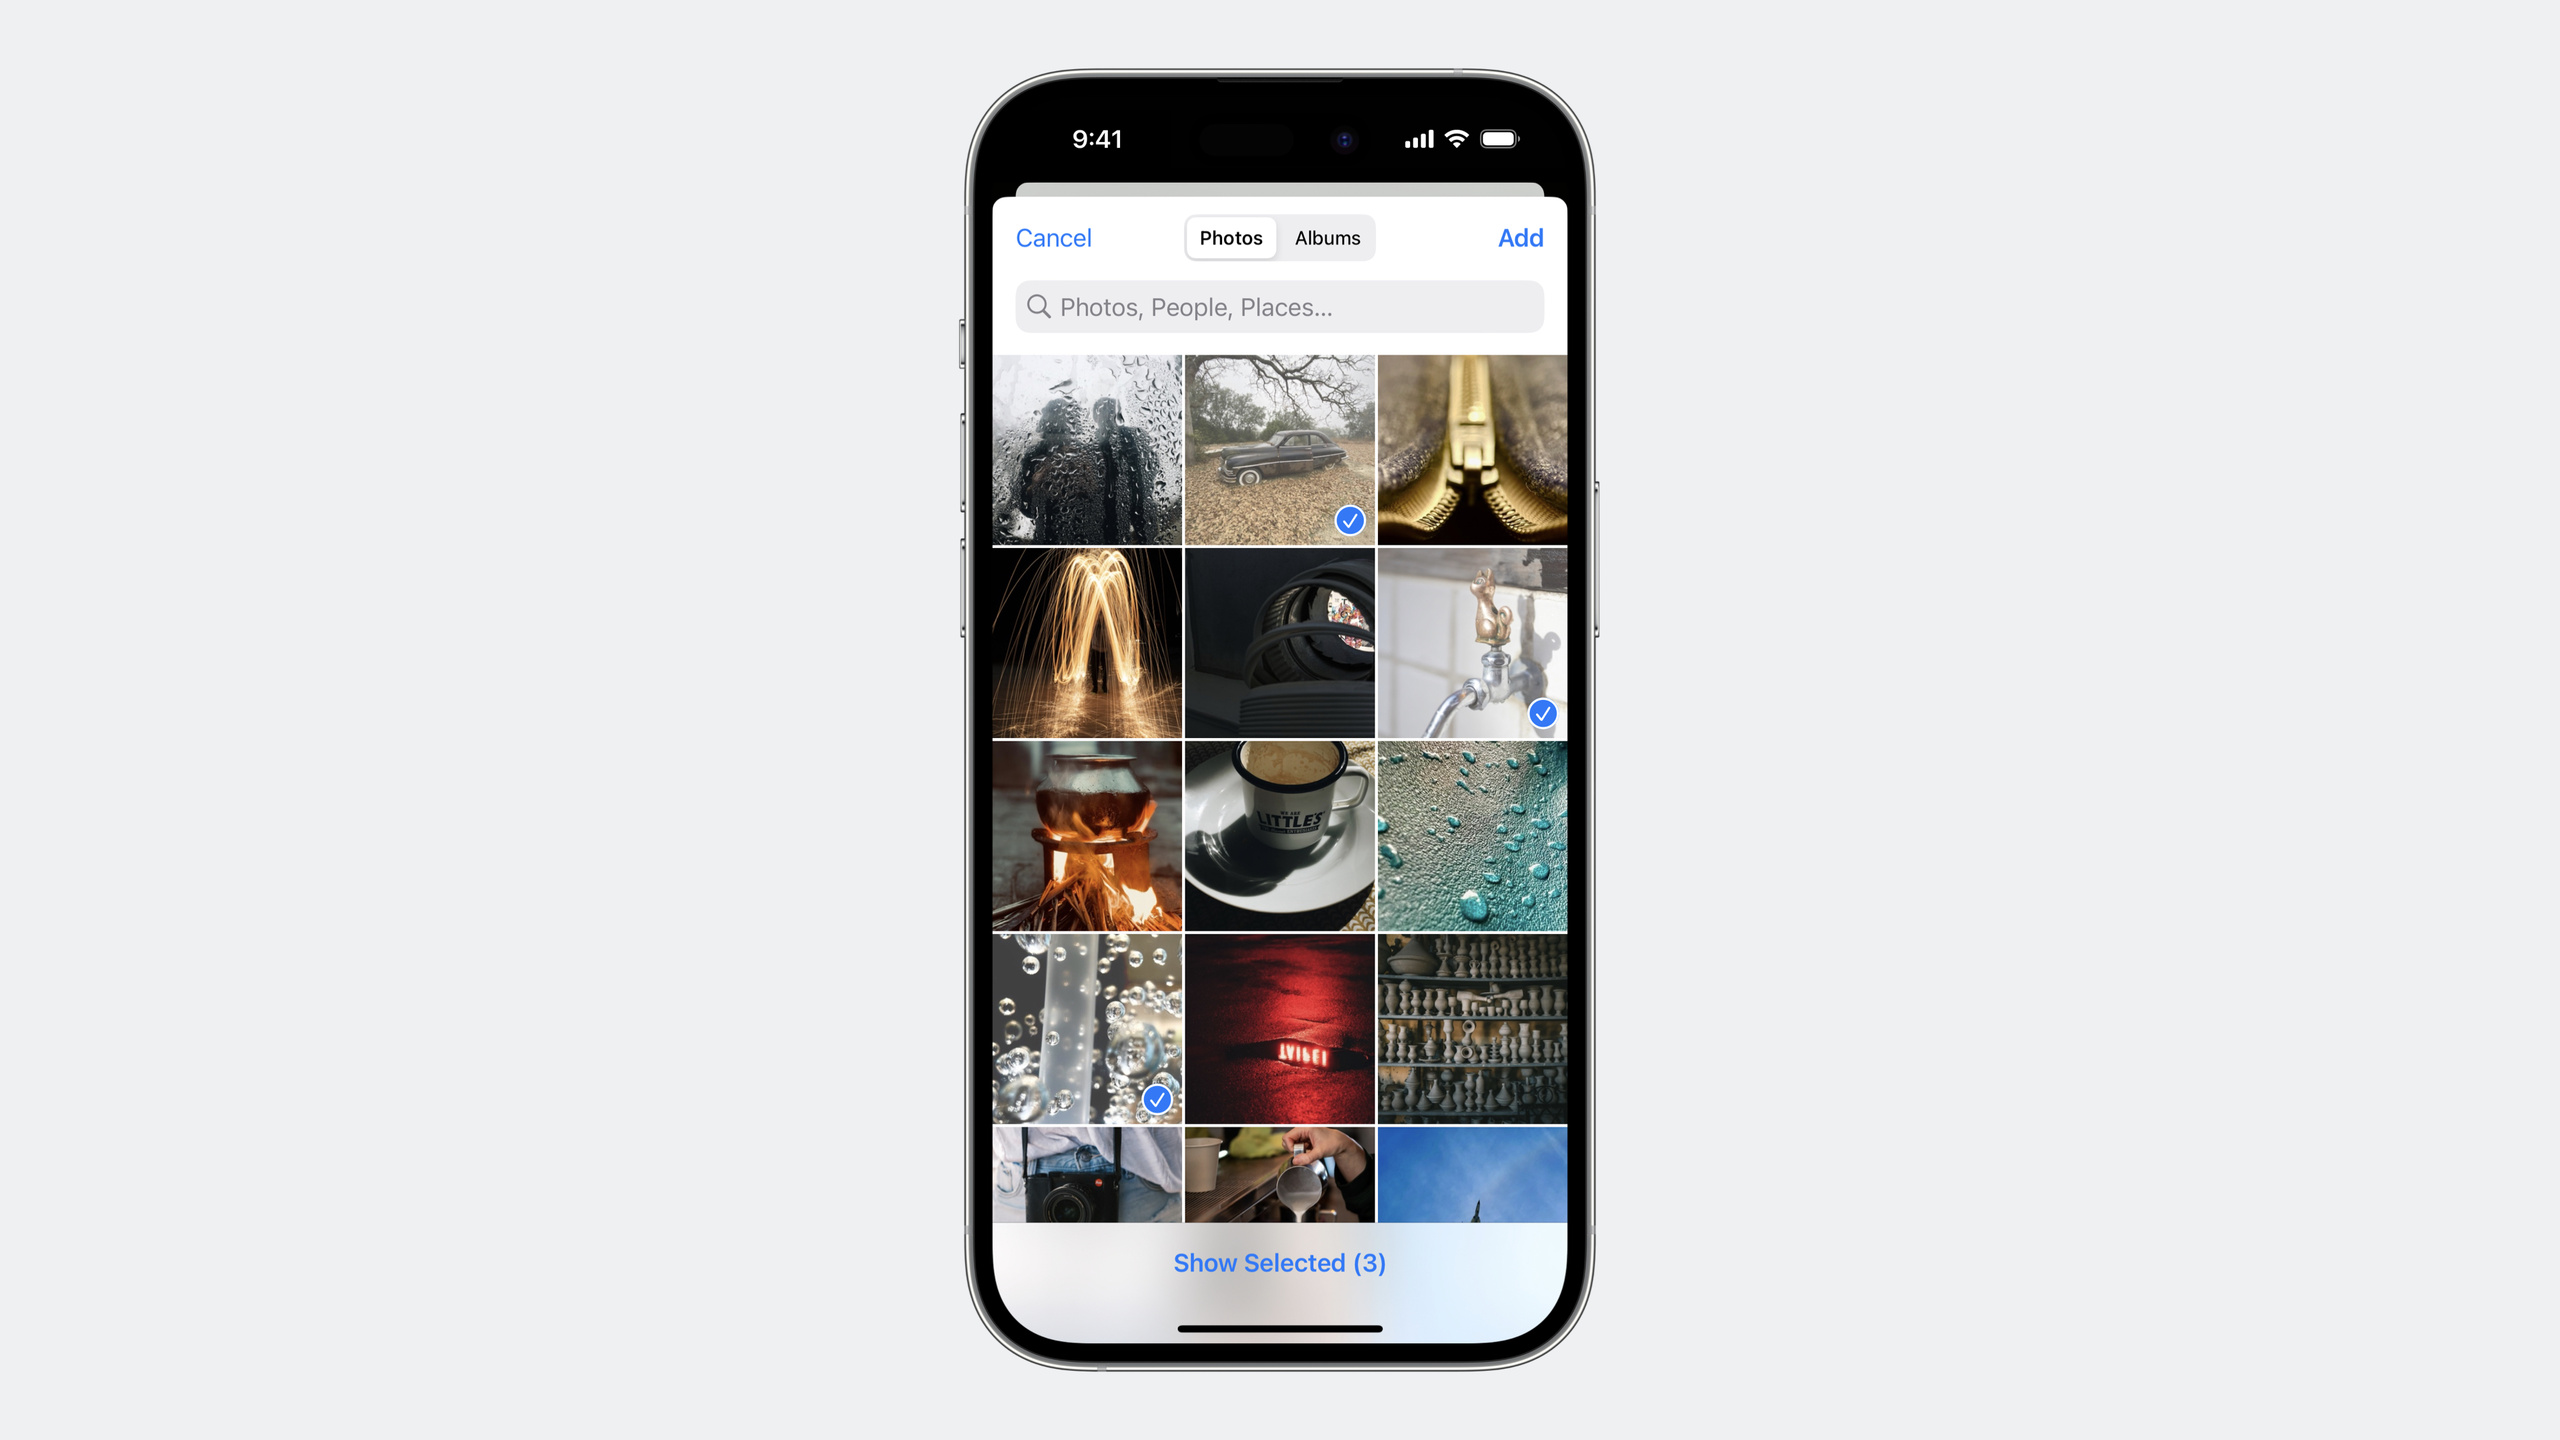
iOS 17’s Photos Picker adds inline style, continuous selection, and accessory visibility controls, letting developers seamlessly integrate the system photo picker into their app UI without requesting photo library permission.
Core Content
Building your own photo picker is thankless work. You have to handle album browsing, search, zoomable grids, permission requests, and reassure users you aren’t snooping on their photos.
(00:22)The system Photos Picker introduced in iOS 14 solved these problems. It runs in a separate process, and your app only gets photos the user actually selects—no photo library access permission required.
But the previous Picker could only be presented as a modal sheet. iOS 17 lets the Picker embed directly in your app’s SwiftUI view hierarchy.
Embedded Picker
(02:47).photosPickerStyle(.inline) embeds the Picker in your app UI. It still runs in a separate process, but visually blends with your app.
The first time you show an embedded picker, the system automatically displays onboarding UI telling users the app can only access selected photos. The picker also shows a privacy badge.
Three Styles
(06:11)
.presentation: Default modal sheet style.inline: Embedded style that fills the specified area.compact: Single-row horizontal scroll, ideal for space-constrained UIs
Continuous Selection
(02:40)selectionBehavior: .continuous notifies your app in real time as selections change. Each select or deselect immediately updates your app. In embedded mode, you no longer need an “Add” button.
Accessory Controls
(02:11).photosPickerAccessoryVisibility controls navigation bar, toolbar, and sidebar visibility. .photosPickerDisabledCapabilities can disable search, album navigation, staging area, and more—replace them with your own UI.
Options Menu
(11:21)The new Options menu lets users choose whether to share sensitive metadata (like location). Apps using PhotosPicker or PHPickerViewController get this automatically—no extra work needed.
Detailed Content
Embedded Photos Picker (SwiftUI)
(02:47)Embed the Picker in your app UI:
import SwiftUI
import PhotosUI

struct ContentView: View {
    @State private var selectedItems: [PhotosPickerItem] = []

    var body: some View {
        VStack {
            // Embedded picker
            PhotosPicker(selection: $selectedItems,
                        selectionBehavior: .continuous) {
                // Do not show a label because the picker renders its own content
            }
            .photosPickerStyle(.inline)
            .photosPickerAccessoryVisibility(.hidden, edges: .all)
            .photosPickerDisabledCapabilities([.search, .selectionActions])
            .frame(height: 300)
            .ignoresSafeArea(.container, edges: .bottom)

            // Show selected photos
            SelectedPhotosList(items: selectedItems)
        }
    }
}
Key points:
.photosPickerStyle(.inline)switches to embedded mode.photosPickerAccessoryVisibility(.hidden, edges: .all)hides the navigation bar and toolbar.photosPickerDisabledCapabilities([.search, .selectionActions])disables search and selection buttonsselectionBehavior: .continuousenables real-time selection updates.ignoresSafeArealets the Picker extend to the bottom of the screen
Embedded Picker in UIKit/AppKit
(10:02)Use embedded mode in UIKit:
import PhotosUI

class ViewController: UIViewController {
    func setupEmbeddedPicker() {
        var configuration = PHPickerConfiguration(photoLibrary: .shared())
        configuration.selection = .continuous
        configuration.mode = .compact // or .default
        configuration.edgesWithoutContentMargins = [.top, .bottom]
        configuration.disabledCapabilities = [.search]

        let picker = PHPickerViewController(configuration: configuration)
        addChild(picker)
        view.addSubview(picker.view)

        // Position with Auto Layout
        picker.view.translatesAutoresizingMaskIntoConstraints = false
        NSLayoutConstraint.activate([
            picker.view.topAnchor.constraint(equalTo: view.topAnchor),
            picker.view.leadingAnchor.constraint(equalTo: view.leadingAnchor),
            picker.view.trailingAnchor.constraint(equalTo: view.trailingAnchor),
            picker.view.heightAnchor.constraint(equalToConstant: 300)
        ])

        picker.didMove(toParent: self)
    }
}
Key points:
- Set
PHPickerConfiguration.selectionto.continuousfor continuous selection - Set
modeto.compactfor single-row layout edgesWithoutContentMarginshides accessories on specified edges- Add as a child view controller
Dynamically Updating Picker Configuration
(11:04)Use PHPickerConfiguration.Update to update configuration while the Picker is displayed:
// Update the selection limit
var update = PHPickerConfiguration.Update()
update.selectionLimit = 5
picker.update(with: update)

// Deselect an asset
picker.deselectAsset(withIdentifier: assetIdentifier)

// Reorder selected assets
picker.moveAsset(withIdentifier: identifier, toIndex: newIndex)
Key points:
PHPickerConfiguration.Updateallows runtime configuration changesdeselectAssetandmoveAssetmanage selected assets
Receiving HDR and Original Format Photos
(12:16)Get photos in original format to avoid automatic transcoding:
import UniformTypeIdentifiers

struct PhotoPicker: View {
    @State private var selectedItems: [PhotosPickerItem] = []

    var body: some View {
        PhotosPicker(selection: $selectedItems,
                    matching: .images) {
            Text("Select Photos")
        }
        .onChange(of: selectedItems) { items in
            for item in items {
                // Request the original format
                item.loadTransferable(type: .image,
                                     preferredItemEncoding: .current) { result in
                    switch result {
                    case .success(let data):
                        // data contains image data in the original format
                        break
                    case .failure(let error):
                        print(error)
                    }
                }
            }
        }
    }
}
Key points:
preferredItemEncoding: .currentavoids automatic JPEG transcoding- Request
.imagetype to get original format - Requesting a specific type like
.jpegmay still trigger transcoding
Handling Cinematic Mode Video
(13:24)The Picker returns rendered Cinematic videos by default (depth effects baked in). To get editable decision points, you need photo library permission and PhotoKit:
// The picker returns the rendered video
// To get the original Cinematic data, use PhotoKit:

let fetchOptions = PHFetchOptions()
let assets = PHAsset.fetchAssets(withLocalIdentifiers: [identifier], options: fetchOptions)

if let asset = assets.firstObject {
    // Check whether it is a Cinematic video
    if asset.mediaSubtypes.contains(.videoCinematic) {
        // Request the original video asset through PHImageManager
    }
}
Key points:
- Cinematic videos from the Picker are rendered versions
- Editable versions require PhotoKit permission
- See the “Support Cinematic mode videos in your app” session
Accessory Visibility Control
(04:52)Control Picker UI elements:
// Hide all accessories
.photosPickerAccessoryVisibility(.hidden, edges: .all)

// Hide only the bottom toolbar
.photosPickerAccessoryVisibility(.hidden, edges: .bottom)

// Hide the sidebar on iPadOS/macOS
.photosPickerAccessoryVisibility(.hidden, edges: .leading)
Accessory definitions:
- iOS: top is navigation bar, bottom is toolbar
- iPadOS/macOS: leading is sidebar, top and bottom same as iOS
Disabling Picker Capabilities
(05:12)Disable specific features:
.photosPickerDisabledCapabilities([.search, .collectionNavigation, .stagingArea])Disableable capabilities:
.search: Hide search bar.collectionNavigation: Hide album tabs and sidebar.stagingArea: Replace toolbar buttons with status labels.selectionActions: Hide “Cancel” and “Add” buttons (use with.continuousselection)
Core Takeaways
1. Build a seamless photo selection experience for social apps
What to build: Embed the Photos Picker directly in your post or comment UI, showing selected photos in real time below the input area.
Why it’s worth doing: Traditional sheet mode interrupts the posting flow. An embedded Picker lets users keep editing text while selecting photos for a smoother experience.
How to start: Use .photosPickerStyle(.inline) to embed the Picker, set selectionBehavior: .continuous for real-time updates, and hide the navigation bar and toolbar so the Picker fits your app design.
2. Add a compact selection strip for photo editing apps
What to build: Add a compact horizontal photo strip above the editing toolbar so users can quickly switch between photos to edit.
Why it’s worth doing: The .compact style takes only one row of height—ideal for space-constrained tool UIs. Users can pick new photos without leaving the editing screen.
How to start: Use PHPickerConfiguration with mode: .compact, set a small fixed height, and listen for selection changes to load new images.
3. Build a privacy-first photo management app
What to build: Use the Photos Picker exclusively instead of requesting full photo library permission, letting users precisely control which photos to share.
Why it’s worth doing: The Options menu lets users strip sensitive metadata like location. The Picker’s separate-process design ensures your app only accesses selected photos, building user trust.
How to start: Use the Photos Picker Transferable API to receive images, set preferredItemEncoding: .current to preserve original format and HDR info. Avoid UIImagePickerController or requesting full photo library permission.
4. Add custom album navigation for gallery apps
What to build: Disable the Picker’s built-in album navigation and use your own sidebar or dropdown to switch albums while keeping the Picker’s grid and search.
Why it’s worth doing: Your app may have special album organization (by project, timeline, etc.), and custom navigation fits better into your overall information architecture.
How to start: Use .photosPickerDisabledCapabilities(.collectionNavigation) to hide built-in album navigation, place your custom album list beside the Picker, and pass album content via PhotoKit.
Related Sessions
- Create a more responsive camera experience — iOS 17 camera responsiveness APIs: deferred processing, zero shutter lag, responsive capture
- Support external cameras in your iPadOS app — Use external cameras like Apple Studio Display in iPadOS apps
- What’s new in Background Assets — Background asset downloads to reduce user wait time
- Meet SwiftUI for spatial computing — SwiftUI’s new capabilities on spatial computing platforms
Comments
GitHub Issues · utterances