
Highlight
Video playback on visionOS fully reuses existing AVFoundation + AVKit code. AVPlayerViewController delivers spatial immersion through RealityKit rendering, supporting 3D video, spatial audio, and automatic environment dimming. Developers only need to build with the visionOS SDK and let the player fill the window.
Core Content
Your existing code works as-is
Already using AVPlayerViewController to play video on iOS? You barely need to change any code on visionOS.
(00:42) AVFoundation handles all the low-level work: streaming, parsing, decoding, and synchronization. AVKit’s AVPlayerViewController is enhanced on visionOS to render with RealityKit, so video blends seamlessly into the space around the user and audio responds to spatial position.
Compatible iOS apps (built with the iOS SDK) get an iOS-compatible playback experience. For the full spatial enhancements, your Xcode project must be built with the visionOS SDK.
Three lines of code to launch a spatial theater
(02:23) Usage is identical to iOS/tvOS:
import AVFoundation
import AVKit

let playerViewController = AVPlayerViewController()
playerViewController.player = AVPlayer(url: videoURL)
present(playerViewController, animated: true)
Key points:
- Set the player on the view controller before creating the player item, so the player knows how to display content before loading media, improving performance
- Let AVPlayerViewController fill the window for the best immersive experience
- Wrap it with UIViewControllerRepresentable in SwiftUI
Spatial playback experience
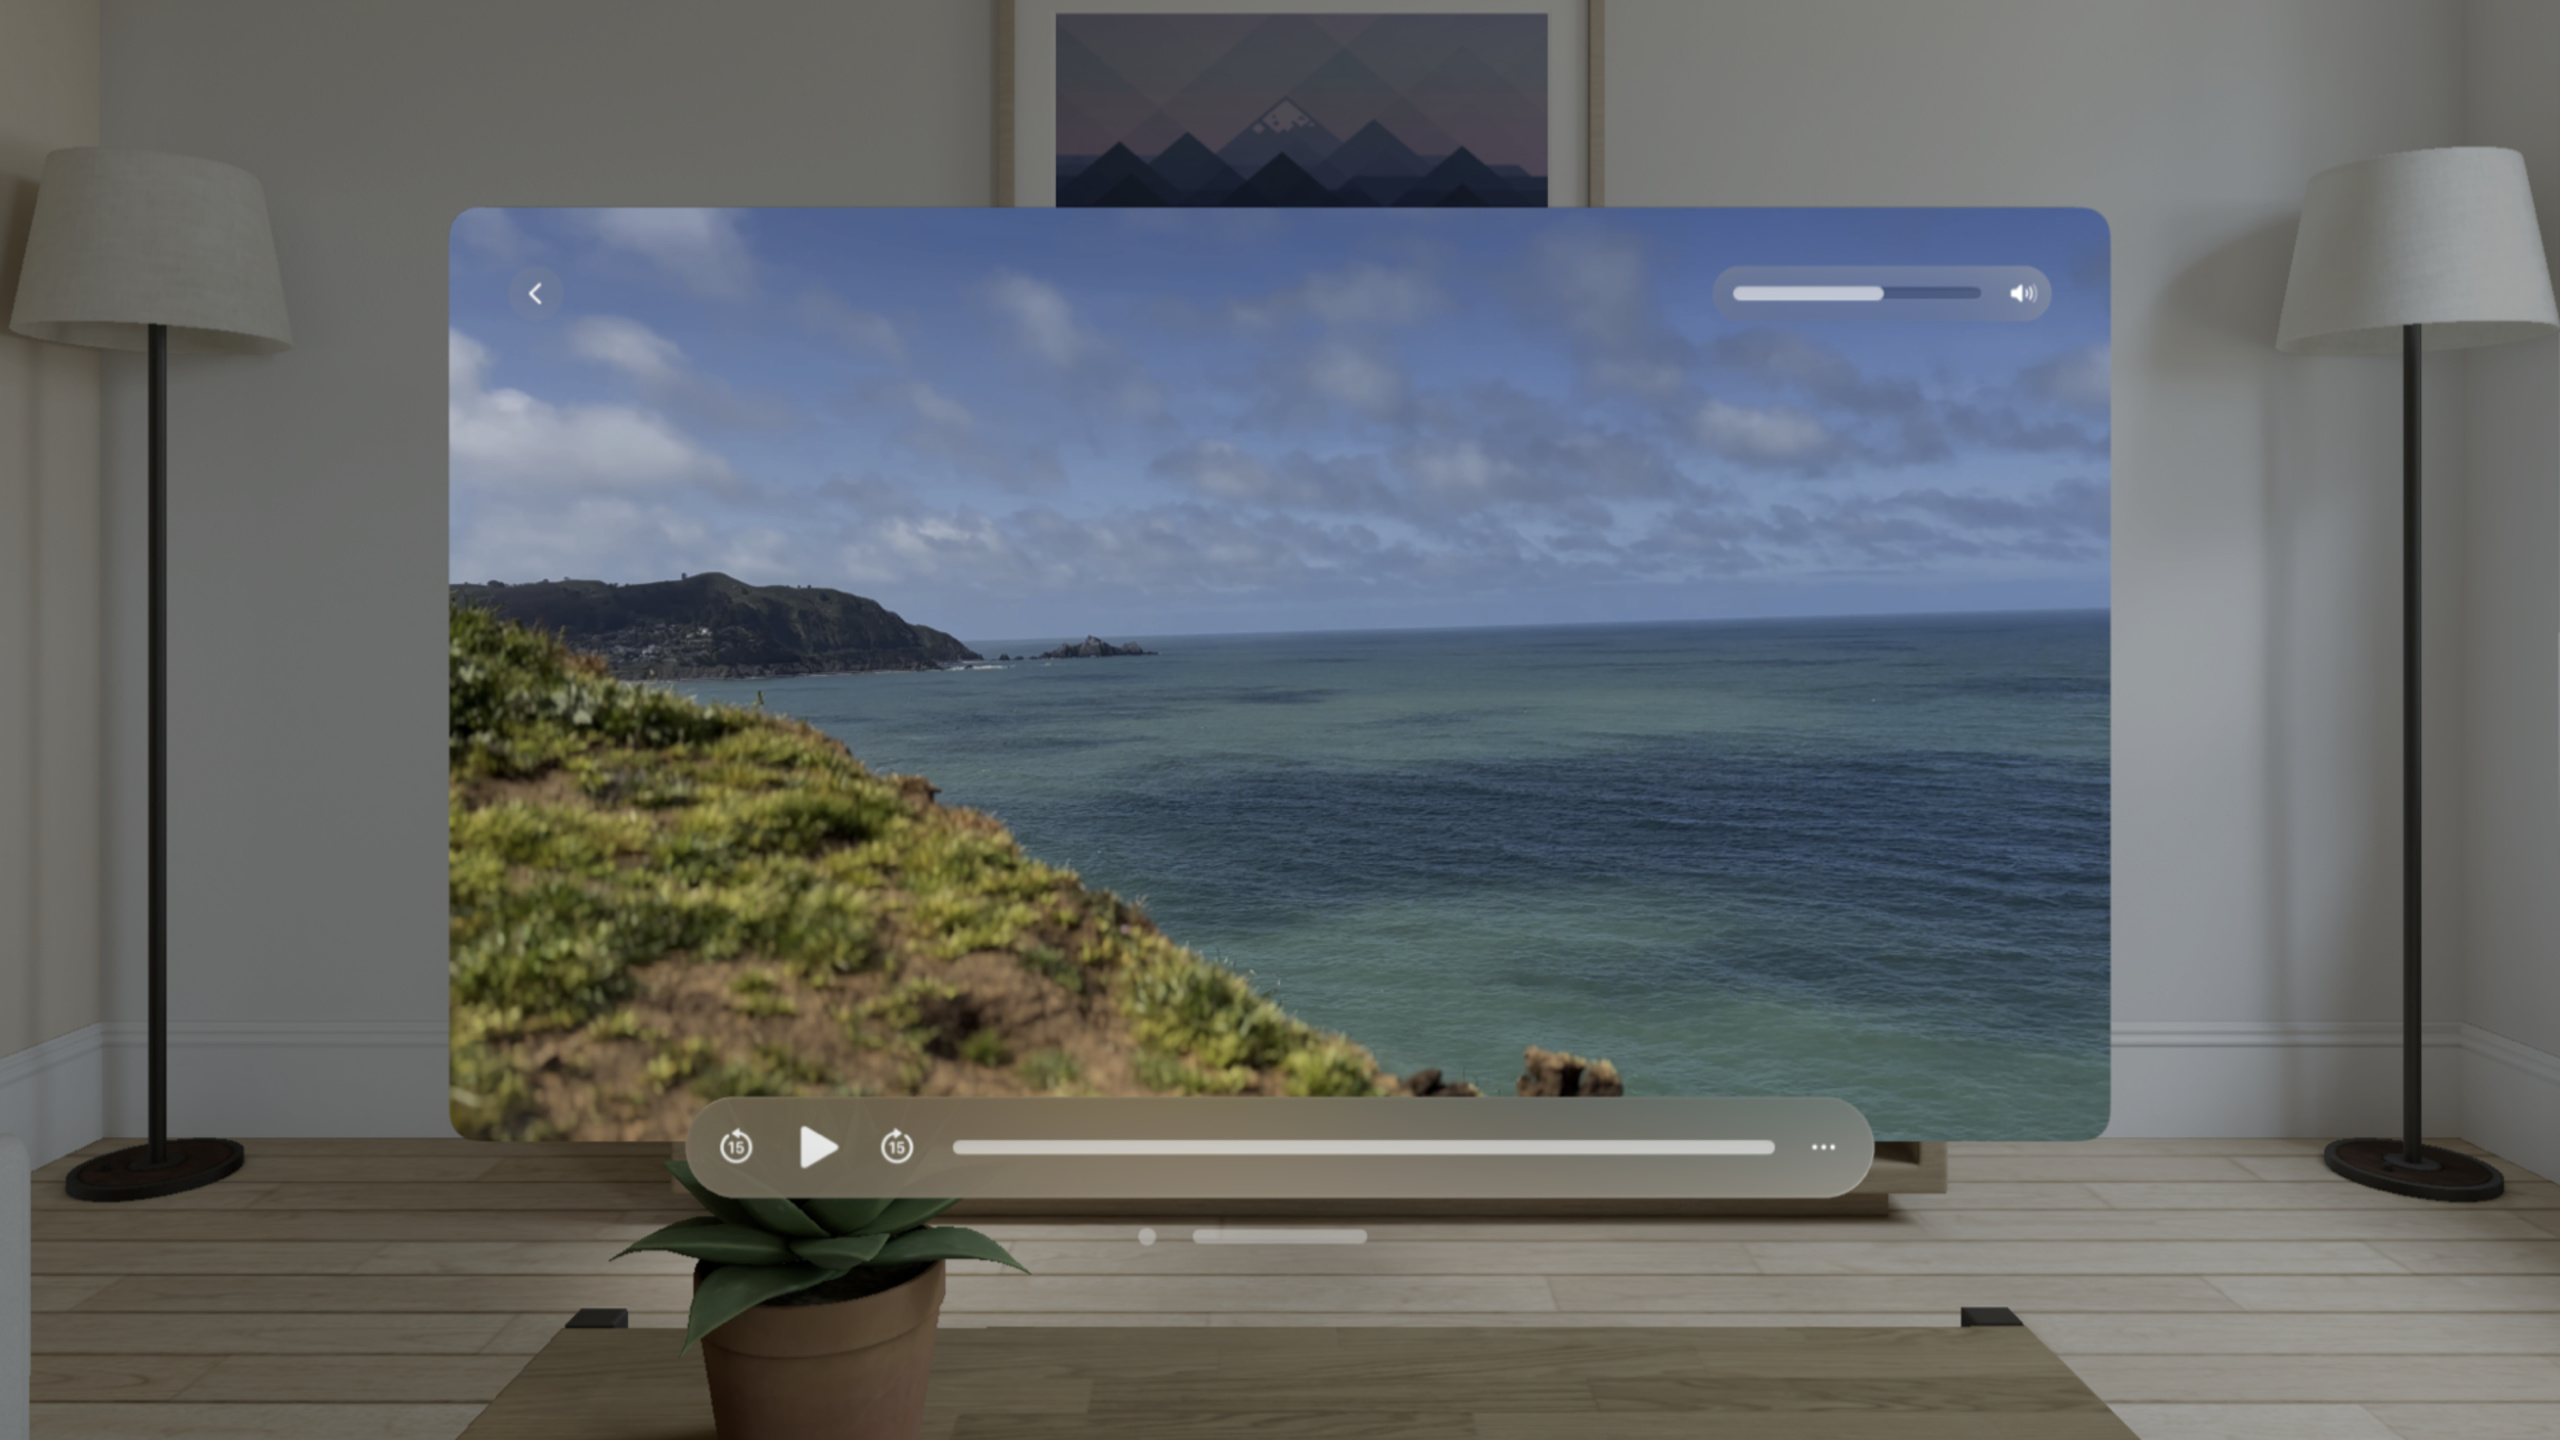
(03:27) After your app launches, a large screen appears in front of the user and the room automatically dims to set a cinematic mood. The screen stays in place as the user moves, with audio anchored to the screen. Look at the screen and pinch to show playback controls floating in front of the video. Use the Digital Crown to adjust volume, or open an immersive environment (such as a theater environment).
Playback controls in detail
(04:48) visionOS playback controls include:
- Top right: volume control (also adjustable via Digital Crown)
- Bottom left: play/pause, rewind/fast-forward
- Bottom center: scrub bar
- Bottom right: more options (playback speed, audio track selection, subtitles, dimming effect)
The dimming effect can be turned off so users can see their surroundings while watching video.
Advanced features
(05:49)
Thumbnail scrubbing: When an HLS stream includes an I-frame only playlist (Trick Play track), dragging the progress bar automatically shows thumbnails. A small Trick Play track at 145 pixels wide is recommended.
Interstitials: Support inserting logos, recaps, or ads into the timeline. Configure programmatically via AVPlayerInterstitialEventController, or describe them in the HLS stream.
Contextual actions: Add custom buttons such as “Skip intro” or “Play next episode.”
Custom info panel: Display content metadata or recommend related content.
Immersive Space
(07:13) Your app can create an Immersive Space. The video screen automatically moves into that space, anchored at a fixed size and position for the best viewing angle. Controls detach from the screen and move closer for easier interaction.
@main
struct MoviePlayingApp: App {
    @State private var immersionStyle: ImmersionStyle = .full

    var body: some Scene {
        WindowGroup {
            ContentView()
        }

        ImmersiveSpace(id: "theater") {
            TheaterView()
        }
        .immersionStyle(selection: $immersionStyle, in: .full)
    }
}

struct ContentView: View {
    @Environment(\.openImmersiveSpace) var openImmersiveSpace

    var body: some View {
        PlayerView()
            .onAppear {
                Task {
                    await openImmersiveSpace(id: "theater")
                }
            }
    }
}
Key points:
ImmersiveSpacedefines the 3D content scene- After
openImmersiveSpaceopens the space, AVPlayerViewController automatically moves the video screen into it - Make sure your Immersive Space design can accommodate the player docking
Detailed Content
Video presentation options compared
(12:32) visionOS offers multiple ways to present video, each suited to different scenarios:
| Method | API | Use case | 3D video | Playback controls | System integration |
|---|---|---|---|---|---|
| Full-screen player | AVPlayerViewController (fills window) | Movie watching | Supported | Full | Complete |
| Inline player | AVPlayerViewController (does not fill window) | Embedded in documents, previews | Not supported | Simplified | Partial |
| 3D scene entity | VideoPlayerComponent | Splash screens, video transitions | Supported | None | None |
| Custom geometry | VideoMaterial | Effects, artistic display | Supported | None | None |
Using VideoPlayerComponent
(09:56) When you need to display video as an entity in a 3D scene (such as a splash screen or video transition), use RealityKit’s VideoPlayerComponent:
import RealityKit
import AVFoundation

// Create a video entity
let videoEntity = Entity()

// Create AVPlayer
let player = AVPlayer(url: videoURL)

// Attach VideoPlayerComponent
videoEntity.components[VideoPlayerComponent.self] = VideoPlayerComponent(
    avPlayer: player
)

// Position it like a normal entity
videoEntity.position = [0, 1.5, -2]
videoEntity.scale = [2, 1.125, 1]

// Add to the scene
scene.addChild(videoEntity)

// Play
player.play()
Key points:
VideoPlayerComponentautomatically creates a video mesh with the correct aspect ratio- Supports subtitle display
- Better performance than AVPlayerLayer, supports 3D video formats
- Best for scenarios that don’t need playback controls or system integration
Using VideoMaterial
(10:46) When you need more control (such as displaying video on custom geometry), use VideoMaterial:
import RealityKit
import AVFoundation

// Create custom geometry
let mesh = MeshResource.generatePlane(width: 2, height: 1.125)

// Create VideoMaterial
let player = AVPlayer(url: videoURL)
let videoMaterial = VideoMaterial(avPlayer: player)

// Apply to the entity
let videoEntity = ModelEntity(mesh: mesh, materials: [videoMaterial])
scene.addChild(videoEntity)
Key points:
VideoMaterialcan display video on any geometry- Does not preserve the original aspect ratio
- Does not support subtitle display
- Best for scenarios where video is used as a visual effect
Complete SwiftUI integration example
import SwiftUI
import AVKit
import AVFoundation

struct PlayerView: UIViewControllerRepresentable {
    let videoURL: URL

    func makeUIViewController(context: Context) -> AVPlayerViewController {
        let controller = AVPlayerViewController()
        let player = AVPlayer()
        controller.player = player

        // Set the player first, then load content to improve performance
        let item = AVPlayerItem(url: videoURL)
        player.replaceCurrentItem(with: item)

        return controller
    }

    func updateUIViewController(_ uiViewController: AVPlayerViewController, context: Context) {}
}

struct ContentView: View {
    let videoURL = URL(string: "https://example.com/movie.m3u8")!

    var body: some View {
        PlayerView(videoURL: videoURL)
            .ignoresSafeArea()
    }
}
Key points:
ignoresSafeArea()ensures the player fills the entire window- Set
controller.playerbefore creatingAVPlayerItem, so the player knows the display mode in advance - No extra configuration needed for spatial audio and automatic environment dimming
Core Takeaways
-
Migrate your existing video app to visionOS
- What to do: Rebuild your existing iOS video playback app with the visionOS SDK
- Why it’s worth it: Zero code changes unlock spatial immersive playback, including a large screen, spatial audio, and environment dimming
- How to start: Create a visionOS target in Xcode and reuse your existing AVPlayerViewController code
-
Add an Immersive Space to your video app
- What to do: Automatically open an Immersive Space when playing video, bringing users into a virtual theater
- Why it’s worth it: The video screen stays fixed at the best viewing position, controls move closer for easier interaction, delivering a theater-grade experience
- How to start: Use the
openImmersiveSpaceAPI, triggered inPlayerView’sonAppear
-
Implement thumbnail scrub preview
- What to do: Add a Trick Play track to HLS streams so users see frame previews when scrubbing the progress bar
- Why it’s worth it: visionOS lacks precise touch scrubbing; thumbnails help users navigate quickly
- How to start: Add an I-frame only playlist when packaging HLS, 145 pixels wide
-
Add a “Skip intro” contextual action
- What to do: Use AVPlayerViewController’s contextual actions API to add smart skip buttons
- Why it’s worth it: Long-form video on visionOS benefits from convenient navigation; contextual actions appear when needed
- How to start: Implement
AVPlayerViewControllerDelegate’splayerViewController(_:contextualActionsFor:)method
-
Use video as an environmental element in 3D scenes
- What to do: Use VideoPlayerComponent to add dynamic video elements in RealityKit scenes
- Why it’s worth it: Add dynamic backgrounds, information displays, or transition effects to spatial experience apps
- How to start: Create a RealityKit entity, attach VideoPlayerComponent, and position it in the scene
Related Sessions
- Deliver video content for spatial experiences — Learn how to prepare and deliver 3D video streaming content for visionOS
- Design for spatial user interfaces — UI design principles for spatial computing platforms
- Meet SwiftUI for spatial computing — Build interfaces with SwiftUI on visionOS
Comments
GitHub Issues · utterances