
Highlight
MapKit engineer Jeff builds a complete Boston trip-planning app from scratch in under 30 minutes, demonstrating how MapKit for SwiftUI dramatically lowers the barrier to map integration through MapContentBuilder closures and declarative APIs.
Core Content
Using maps in SwiftUI used to be painful. The UIKit-era MKMapView required bridging, custom annotations and overlays needed lots of delegate code, and camera control meant manually calculating regions and zoom levels.
(01:42) Jeff’s demo starts from an empty SwiftUI project. Import MapKit, add one line Map(), and an interactive map appears. No delegates, no configuration, no bridging.
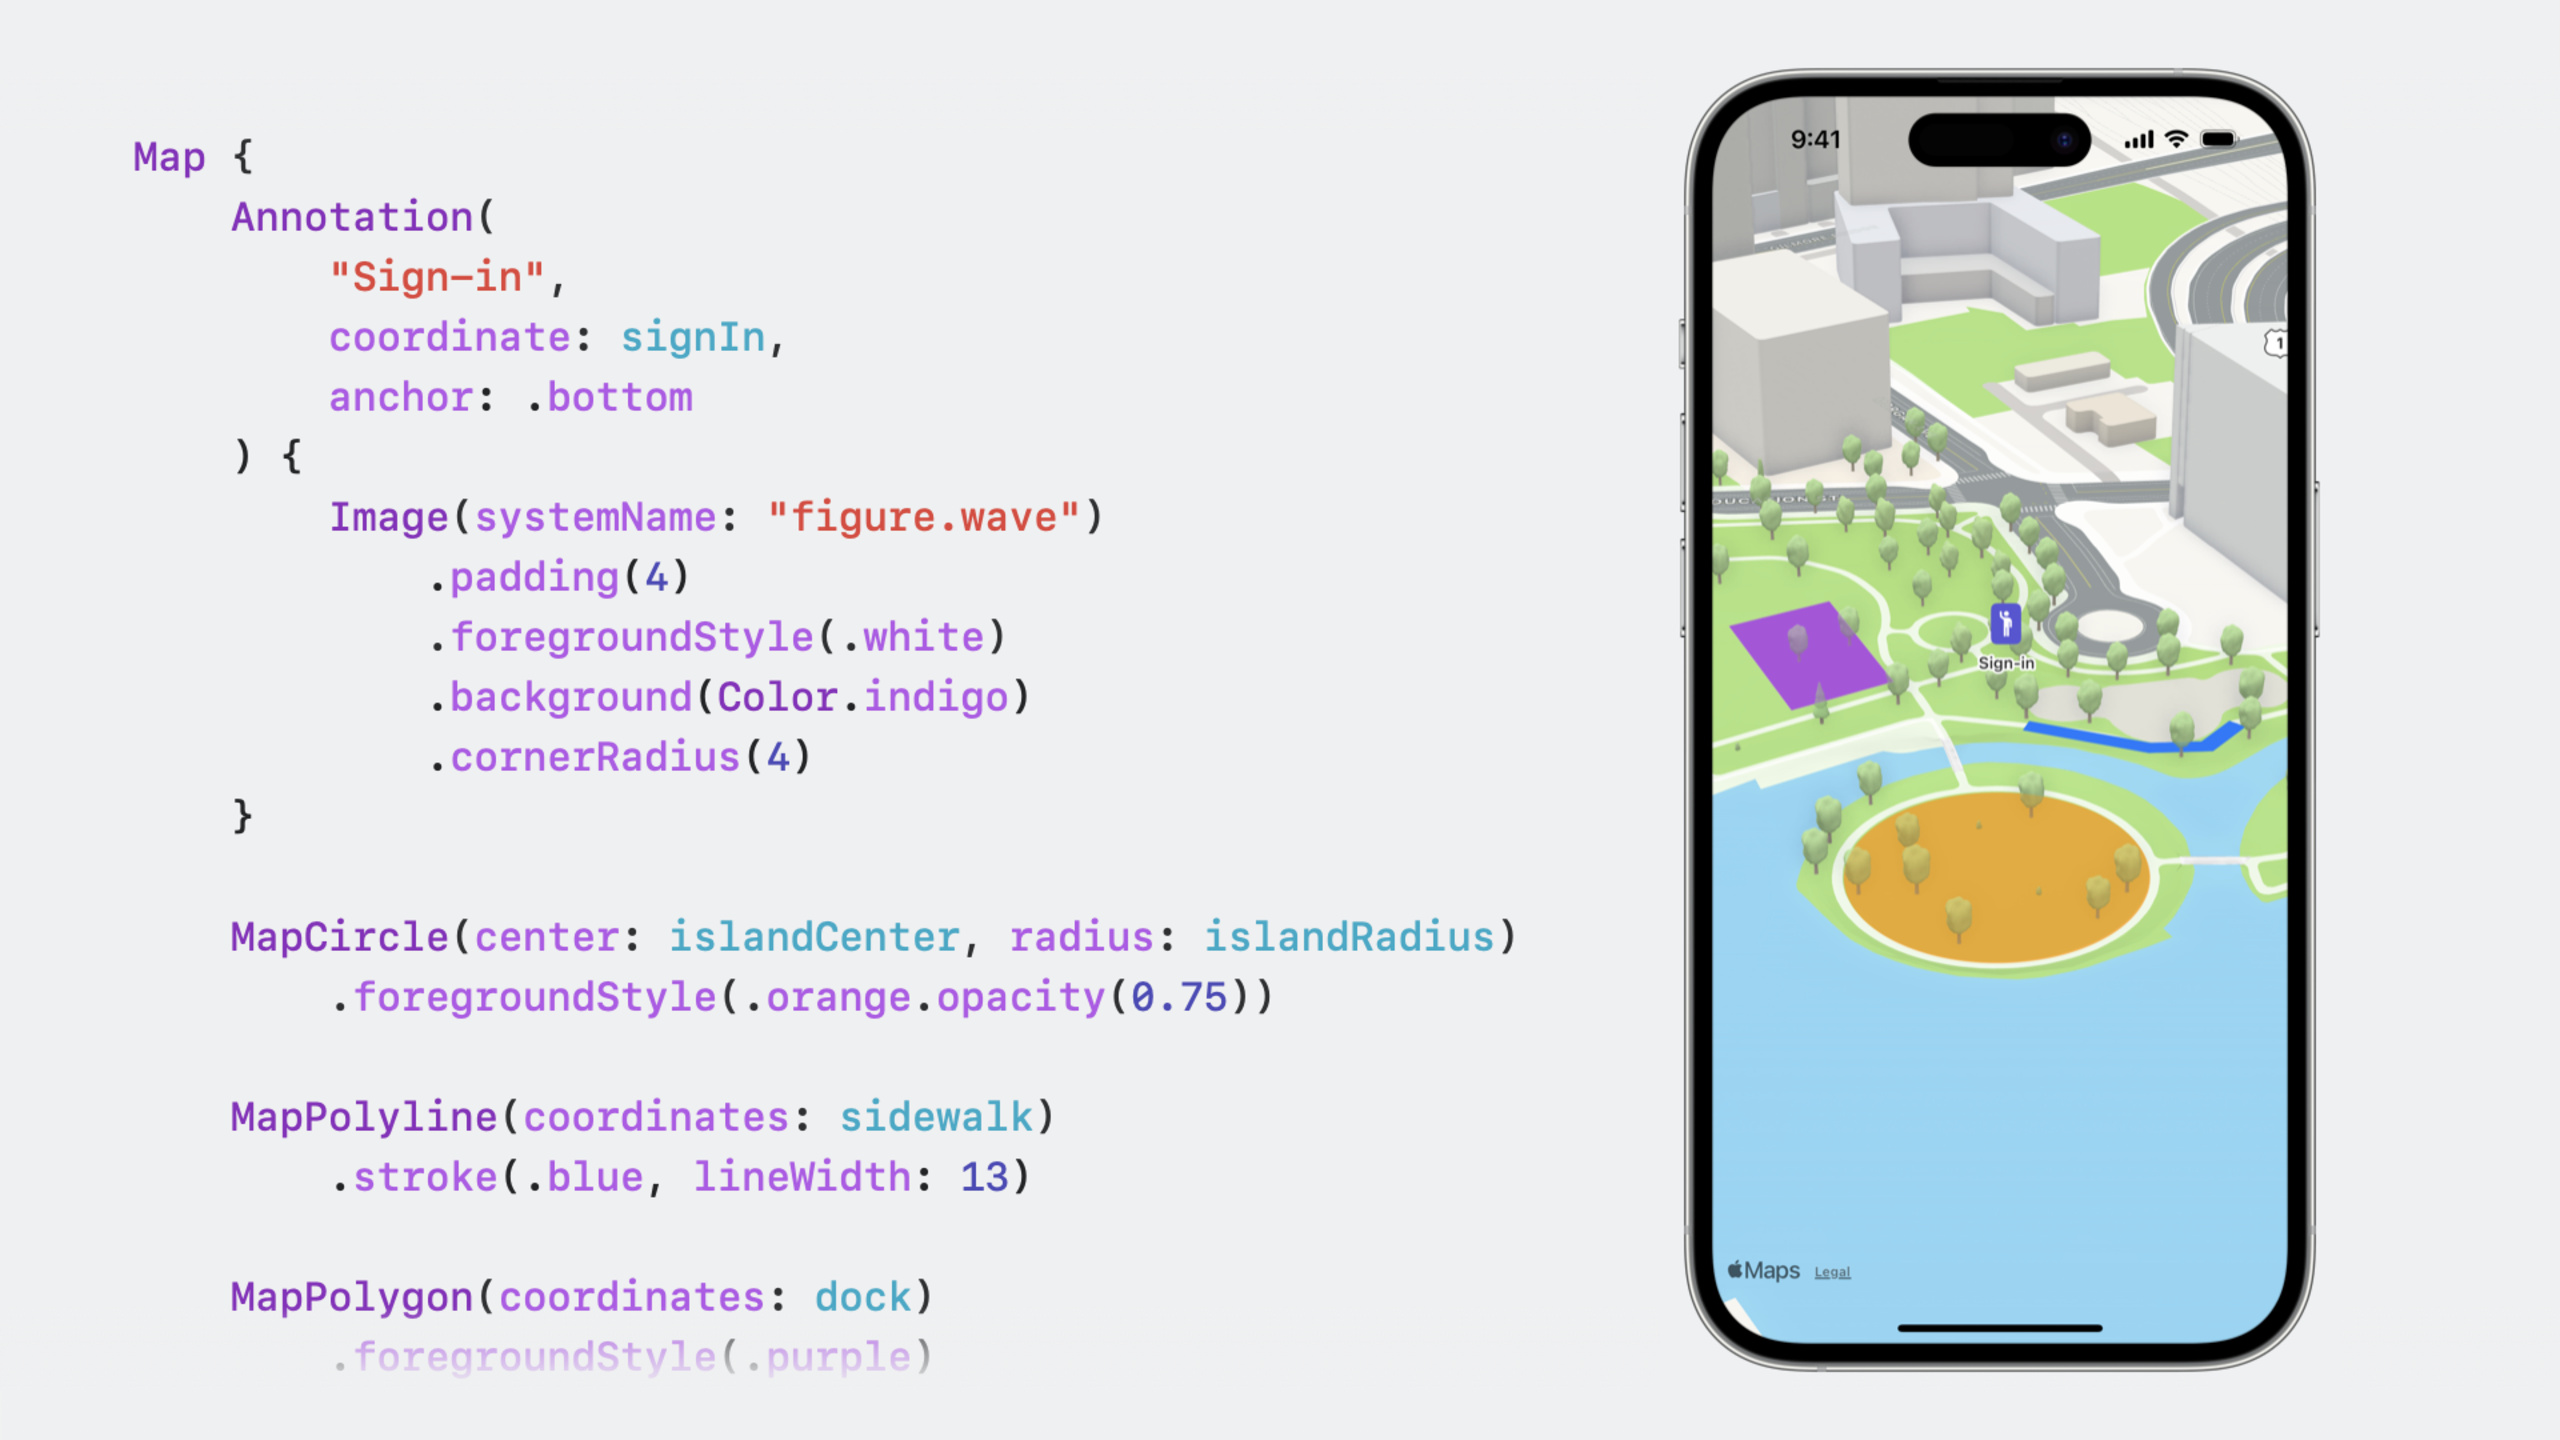
(02:41) Annotation content is added through a MapContentBuilder closure—the syntax is almost identical to adding views to a List. Marker shows the standard balloon icon; Annotation can hold any SwiftUI View. The map automatically adjusts its viewport to frame all content—default behavior, no manual calculation needed.
(04:36) Map style switches via the mapStyle modifier. The standard map is flat by default; adding .standard(elevation: .realistic) gives terrain real elevation—bridges and lakes immediately gain depth. You can also switch to satellite or hybrid modes.
(09:10) Camera control uses MapCameraPosition state. automatic lets the map frame content automatically; region shows a specified area; item focuses on a location; userLocation follows the user. After the user manually drags the map, the state becomes positionedByUser—your app can detect this and decide whether to re-center.
(17:33) Selection interaction only requires adding a selection binding to Map. Markers automatically show a selection animation. Combined with onChange, you can fetch routes and show Look Around street-level previews on selection.
(21:54) Overlays are added through the content builder too. MapPolyline shows routes; MapPolygon and MapCircle mark areas. Each overlay can specify aboveRoads or aboveLabels level to control stacking with map labels.
(23:47) Map controls include MapUserLocationButton, MapCompass, and MapScaleView, auto-laid out via the mapControls modifier. You can also place them manually as regular Views—in that case use mapScope to associate with a specific map instance.
Detailed Content
Minimal viable map
import MapKit
import SwiftUI

struct ContentView: View {
    var body: some View {
        Map()
    }
}
Key points:
- One line of code gives you an interactive map with pan, zoom, and rotate
- Automatically handles user location authorization and compass heading
Adding annotations and custom views
struct ContentView: View {
    var body: some View {
        Map {
            // Standard Marker, balloon icon
            Marker("Parking", coordinate: .parkingGarage)

            // Custom Annotation, containing any SwiftUI View
            Annotation("Custom Spot", coordinate: .customSpot) {
                ZStack {
                    Circle().fill(.blue)
                    Image(systemName: "car.fill")
                }
            }
        }
    }
}
Key points:
Markersuits simple location pins—the system handles icon and color- The
Annotationclosure can contain a full SwiftUI view hierarchy - Use
anchor: .bottomto align the view’s bottom to the coordinate, not its center
Dynamic annotations from search results
struct ContentView: View {
    @State private var searchResults: [MKMapItem] = []
    @State private var position: MapCameraPosition = .automatic

    var body: some View {
        Map(position: $position) {
            ForEach(searchResults, id: \.self) { item in
                Marker(item: item)
            }
        }
        .onChange(of: searchResults) {
            position = .automatic
        }
    }

    func search(for query: String) {
        let request = MKLocalSearch.Request()
        request.naturalLanguageQuery = query
        request.region = visibleRegion

        MKLocalSearch(request: request).start { response, _ in
            searchResults = response?.mapItems ?? []
        }
    }
}
Key points:
Marker(item:)automatically uses the MKMapItem’s name, icon, and tint- Searching for beaches shows umbrella icons; playgrounds show slide icons
position = .automaticzooms the map to show all results- After the user drags the map, you need to manually reset position to re-frame on new searches
Camera position state
@State private var position: MapCameraPosition = .region(.boston)

// Show a specified region
position = .region(MKCoordinateRegion(
    center: CLLocationCoordinate2D(latitude: 42.36, longitude: -71.06),
    span: MKCoordinateSpan(latitudeDelta: 0.1, longitudeDelta: 0.1)
))

// Follow the user location, falling back to a specified region when unauthorized
position = .userLocation(fallback: .region(.boston))

// Show a place and automatically compute a suitable zoom level
position = .item(MKMapItem(placemark: MKPlacemark(coordinate: .beach)))
Key points:
MapCameraPositionis a value type, bidirectionally synced with Map via binding- After user interaction the state becomes
positionedByUser—your app can detect and respond onMapCameraChangegets the current visible region, supporting continuous updates or only on interaction end
Route overlays
Map {
    if let route {
        MapPolyline(route.polyline)
            .stroke(.blue, lineWidth: 5)
    }
}

// Get directions
func getRoute(from source: MKMapItem, to destination: MKMapItem) {
    let request = MKDirections.Request()
    request.source = source
    request.destination = destination

    MKDirections(request: request).calculate { response, _ in
        route = response?.routes.first
    }
}
Key points:
MapPolylineacceptsMKPolylinedirectly—no coordinate conversion neededStrokeStylesupports dashed lines, gradients, and moreMapPolygonandMapCirclemark areas; useaboveRoads/aboveLabelsto control stacking with roads and labels—aboveRoadsputs map labels above the overlay,aboveLabelsputs the overlay above labels
Map controls
Map {
    // Content
}
.mapControls {
    MapUserLocationButton()
    MapCompass()
    MapScaleView()
}
Key points:
mapControlsautomatically lays out controls in appropriate positions- For manual placement use
mapScopeassociation:.mapScope(mapScope) - macOS additionally provides
MapZoomStepperandMapPitchSlider
Core Takeaways
-
Add an interactive map to local lifestyle apps: Restaurant, hotel, and event apps can quickly implement “nearby recommendations” with MapKit for SwiftUI. Markers automatically show category icons, Look Around provides street-level previews—users can judge a place without leaving the app.
-
Use maps for data visualization: If your app has location-related data (delivery routes, workout paths, travel footprints), display it directly on the map with
MapPolylineand custom Annotations—more intuitive than a list. Combined withonMapCameraChange, you can load only data points in the current viewport. -
Build a trip planning tool: Follow the Boston itinerary approach from the session—search for attractions, mark with Markers, connect with routes, preview with Look Around. SwiftUI’s declarative syntax dramatically reduces the implementation cost of this multi-step interaction.
Related Sessions
- What’s new in SwiftUI — This year’s SwiftUI improvements in animation, data flow, and previews
- Q&A: Maps technologies — Engineering Q&A on MapKit, MapKit for SwiftUI, and map technologies
- Meet the Presenter: Meet MapKit for SwiftUI — Watch party and Q&A for this MapKit for SwiftUI session
Comments
GitHub Issues · utterances