
Highlight
ScreenCaptureKit Advanced: In-depth understanding of the five modes of Content Filter, interpretation of frame metadata (dirty rects, contentRect, contentScale, scaleFactor), dynamic adjustment of stream configuration (real-time switching between 4K 60FPS and 720p 15FPS), and the construction method of the Window Picker.
Core Content
ScreenCaptureKit debuted in macOS 13, replacing the old CGDisplay family of APIs. Basics Session “Meet ScreenCaptureKit” introduces the basic process of creating streams and capturing screens and windows. This session focuses on more complex practical needs: how to precisely control what content is captured, how to understand the metadata of each frame, how to adjust flow parameters at runtime, and how to build a window selector with real-time preview.
Screen capture has many subtle scenarios in real applications. Zoom and Google Meet need to share a single window but exclude specific prompt bars; OBS needs to capture the entire display but skip certain application windows; Twitch streamers need to adjust resolution and frame rate when switching game scenes. ScreenCaptureKit turns these problems into API calls instead of hacks through five types of ContentFilter and frame metadata mechanisms.
This lecture starts with single-window capture, and gradually expands to multi-window filtering of displays, dynamic adjustment of stream configuration, use of frame metadata, and finally ends with an OBS Studio integration case.
Detailed Content
Single window independent capture
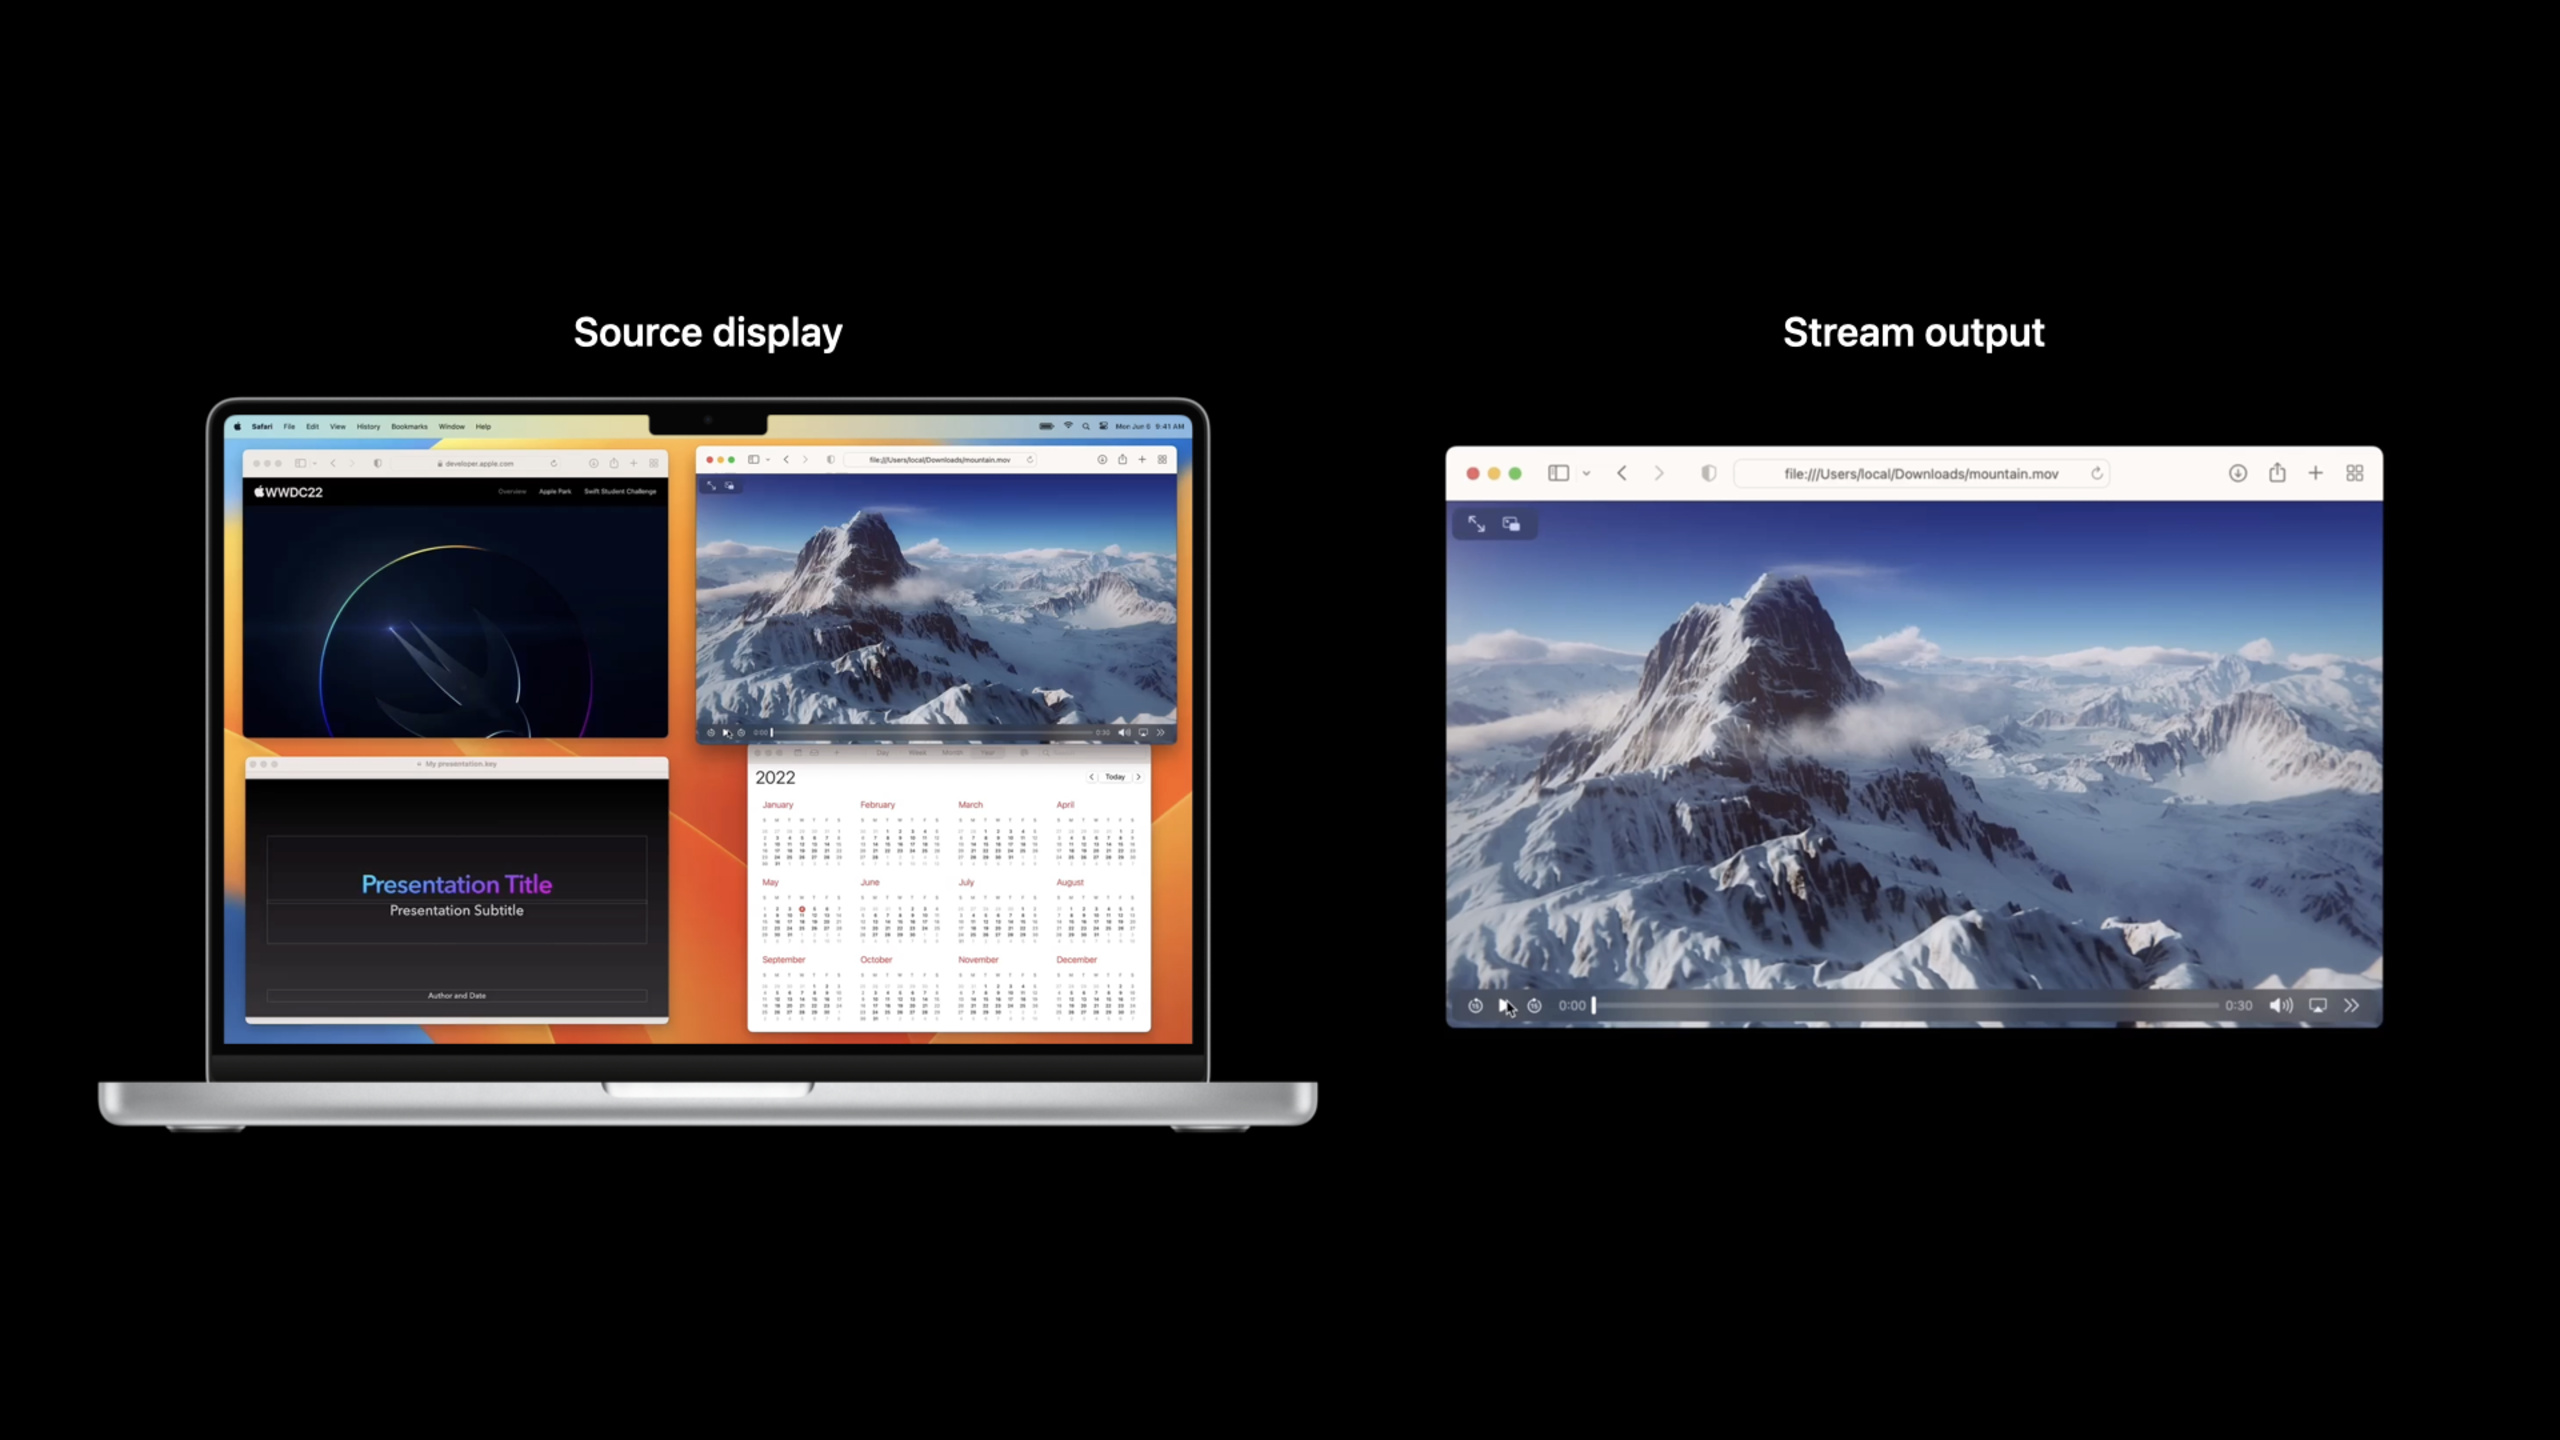
(04:36)SCContentFilterofdesktopIndependentWindowInitialization mode creates a monitor-independent single-window capture. In this way, the output frame only contains the contents of the target window. Even if the window is blocked by other windows, the complete window can still be seen in the captured frame.
// Get all available content to share via SCShareableContent
let shareableContent = try await SCShareableContent.excludingDesktopWindows(false,
       onScreenWindowsOnly: false)

// Get window you want to share from SCShareableContent
guard let window: [SCWindow] = shareableContent.windows.first(where:
                                    { $0.windowID == windowID }) else { return }

// Create SCContentFilter for Independent Window
let contentFilter = SCContentFilter(desktopIndependentWindow: window)

// Create SCStreamConfiguration object and enable audio capture
let streamConfig = SCStreamConfiguration()
streamConfig.capturesAudio = true

// Create stream with config and filter
stream = SCStream(filter: contentFilter, configuration: streamConfig, delegate: self)
stream.addStreamOutput(self, type: .screen, sampleHandlerQueue: serialQueue)
stream.startCapture()
Key Points:
-excludingDesktopWindows(false, onScreenWindowsOnly: false)Get all windows, including desktop and off-screen windows
-SCContentFilter(desktopIndependentWindow:)Create monitor-independent window filters
-capturesAudio = trueEnable audio capture - note that audio is at the app level, not at the window level
-addStreamOutputBind callback queue and output type
Frame metadata: Dirty Rects
(09:38) per frameCMSampleBufferComes with a metadata dictionary, whichdirtyRectsMarks the areas where the current frame has changed relative to the previous frame. Most frame changes in screen captures only involve small areas (mouse movement, input cursor blinking, notification pop-ups), and using dirty rects to encode only the changed areas can significantly reduce bandwidth.
// Get dirty rects from CMSampleBuffer dictionary metadata

func streamUpdateHandler(_ stream: SCStream, sampleBuffer: CMSampleBuffer) {
    guard let attachmentsArray = CMSampleBufferGetSampleAttachmentsArray(sampleBuffer,
                                                          createIfNecessary: false) as?
                                                         [[SCStreamFrameInfo, Any]],
        let attachments = attachmentsArray.first else { return }

        let dirtyRects = attachments[.dirtyRects]
    }
}

// Only encode and transmit the content within dirty rects
Key Points:
-CMSampleBufferGetSampleAttachmentsArrayGet frame attachment array
-SCStreamFrameInfois an enumeration type of metadata key
-.dirtyRectsreturnCGRectArray, marking the change area of this frame
- Only the pixel data in dirty rects are processed when encoding
Frame metadata: Content Rect and scaling
(13:34) Three key metadata fields work together:contentRectMark the valid content area,contentScaleis the logical to physical scaling ratio,scaleFactoris the pixel density. The combination of the three can restore the captured frame to the size and pixel density of the original window.
/* Get and use contentRect, contentScale and scaleFactor (pixel density) to convert the captured window back to its native size and pixel density */

func streamUpdateHandler(_ stream: SCStream, sampleBuffer: CMSampleBuffer) {

    guard let attachmentsArray = CMSampleBufferGetSampleAttachmentsArray(sampleBuffer,
                                                          createIfNecessary: false) as?
                                                         [[SCStreamFrameInfo, Any]],
        let attachments = attachmentsArray.first else { return }

        let contentRect = attachments[.contentRect]
        let contentScale = attachments[.contentScale]
        let scaleFactor = attachments[.scaleFactor]

        /* Use contentRect to crop the frame, and then contentScale and
        scaleFactor to scale it */

    }
}
Key Points:
-contentRectIdentifies the rectangular area of the frame that actually contains content
-contentScaleIs the scaling ratio from the window logical coordinates to the capture frame coordinates
-scaleFactoris the Retina pixel density (e.g. 2.0)
- Restore formula: original size = contentRect.size / contentScale * scaleFactor
Monitor capture: Contains the specified window
(15:37) When capturing the entire display, you canincludingParameters specify that certain windows be additionally included (even if they are obscured by other content). Ensure key windows are always visible when suitable for screen sharing.
// Get all available content to share via SCShareableContent
let shareableContent = try await SCShareableContent.excludingDesktopWindows(false,
                                                            onScreenWindowsOnly: false)

// Create SCWindow list using SCShareableContent and the window IDs to capture
let includingWindows = shareableContent.windows.filter { windowIDs.contains($0.windowID)}

// Create SCContentFilter for Full Display Including Windows
let contentFilter = SCContentFilter(display: display, including: includingWindows)

// Create SCStreamConfiguration object and enable audio
let streamConfig = SCStreamConfiguration()
streamConfig.capturesAudio = true

// Create stream
stream = SCStream(filter: contentFilter, configuration: streamConfig, delegate: self)
stream.addStreamOutput(self, type: .screen, sampleHandlerQueue: serialQueue)
stream.startCapture()
Key Points:
-SCContentFilter(display:including:)Captures the display while also including the specified window
- Suitable for presentation scenarios: capture full-screen PPT but make sure the barrage/annotation window is also visible
- The contents of the occluded window are synthesized into the frame by the system
Monitor capture: include apps, exclude windows
(18:13) A more granular mode is to include all windows of a specified app while excluding certain windows. For example, capture the entire display, but only include Xcode and Safari, while excluding the Notification Center window.
// Get all available content to share via SCShareableContent
let shareableContent = try await SCShareableContent.excludingDesktopWindows(false, onScreenWindowsOnly: false)

/* Create list of SCRunningApplications using SCShareableContent and the application
IDs you'd like to capture */
let includingApplications = shareableContent.applications.filter {
    appBundleIDs.contains($0.bundleIdentifier)
}

// Create SCWindow list using SCShareableContent and the window IDs to except
let exceptingWindows = shareableContent.windows.filter { windowIDs.contains($0.windowID) }

// Create SCContentFilter for Full Display Including Apps, Excepting Windows
let contentFilter = SCContentFilter(display: display, including: includingApplications,
                           exceptingWindows: exceptingWindows)
Key Points:
-includingApplicationsSpecify a list of apps to include
-exceptingWindowsExclude specific windows in these apps
- Suitable for teaching scenarios: only display teaching-related applications, exclude notifications and private windows
Monitor Capture: Exclude Apps
(20:46) Opposite of the previous mode: captures the entire display, but excludes certain apps and their windows. This is the most common screen sharing scenario - sharing the entire desktop but hiding private apps such as email and messages.
// Get all available content to share via SCShareableContent
let shareableContent = try await SCShareableContent.excludingDesktopWindows(false,
                                         onScreenWindowsOnly: false)

/* Create list of SCRunningApplications using SCShareableContent and the app IDs
you'd like to exclude */
let excludingApplications = shareableContent.applications.filter {
    appBundleIDs.contains($0.bundleIdentifier)
}

// Create SCWindow list using SCShareableContent and the window IDs to except
let exceptingWindows = shareableContent.windows.filter { windowIDs.contains($0.windowID) }

// Create SCContentFilter for Full Display Excluding Windows
let contentFilter = SCContentFilter(display: display,
                        excludingApplications: excludingApplications,
                        exceptingWindows: exceptingWindows)
Key Points:
-excludingApplicationsSpecify apps to exclude
-exceptingWindowsAdditional exclusion of specific windows in these apps
- Excluded app windows appear blurred or have their background color replaced in captured frames
Streaming Configuration: 4K 60FPS High Quality Capture
(28:46) Configuring high-quality streaming requires setting the resolution, frame rate, pixel format, and queue depth at the same time.queueDepthControls the number of buffered frames, with a value of 3-8. The larger the value, the higher the delay but the fewer frames lost.
let streamConfiguration = SCStreamConfiguration()

// 4K output size
streamConfiguration.width  = 3840
streamConfiguration.height = 2160

// 60 FPS
streamConfiguration.minimumFrameInterval = CMTime(value: 1, timescale: CMTimeScale(60))

// 420v output pixel format for encoding
streamConfiguration.pixelFormat = kCVPixelFormatType_420YpCbCr8BiPlanarVideoRange

// Source rect(optional)
streamConfiguration.sourceRect = CGRectMake(100, 200, 3940, 2360)

// Set background fill color to black
streamConfiguration.backgroundColor = CGColor.black

// Include cursor in capture
streamConfiguration.showsCursor = true

// Valid queue depth is between 3 to 8
streamConfiguration.queueDepth = 5

// Include audio in capture
streamConfiguration.capturesAudio = true
Key Points:
-width/heightSet output resolution
-minimumFrameIntervalUse CMTime to control the frame interval, 60FPS = 1/60 second
-pixelFormatchoose420vThe format is directly connected to the video encoder to avoid color space conversion.
-sourceRectCrop source area
-queueDepth = 5Strike a balance between latency and smoothness
Stream configuration: dynamic downgrade at runtime
(30:08) When network bandwidth drops or the user switches to a low-performance scenario, you can callupdateConfigurationReduce resolution and frame rate in real time without rebuilding the stream.
// Update output dimension down to 720p
streamConfiguration.width  = 1280
streamConfiguration.height = 720

// 15FPS
streamConfiguration.minimumFrameInterval = CMTime(value: 1, timescale: CMTimeScale(15))

// Update the configuration
try await stream.updateConfiguration(streamConfiguration)
Key Points:
- Downgraded from 4K 60FPS to 720p 15FPS, one line
updateConfigurationComplete - No need to stop streaming and rebuild
SCStreamor rebind the output - Suitable for dynamically adjusting quality levels based on network quality
Window selector: with live preview
(31:57) Build a UI similar to the system screen sharing selector: create an independent small resolution preview stream (284x182, 5FPS, BGRA format) for each window, and display real-time thumbnails on the interface for users to click and select.
// Get all available content to share via SCShareableContent
let shareableContent = try await SCShareableContent.excludingDesktopWindows(false,
                                        onScreenWindowsOnly: true)

// Create a SCContentFilter for each shareable SCWindows
let contentFilters = shareableContent.windows.map {
    SCContentFilter(desktopIndependentWindow: $0)
}

// Stream configuration
let streamConfiguration = SCStreamConfiguration()

// 284x182 frame output
streamConfiguration.width  = 284
streamConfiguration.height = 182
// 5 FPS
streamConfiguration.minimumFrameInterval = CMTime(value: 1, timescale: CMTimeScale(5))
// BGRA pixel format for on screen display
streamConfiguration.pixelFormat = kCVPixelFormatType_32BGRA
// No audio
streamConfiguration.capturesAudio = false
// Does not include cursor in capture
streamConfiguration.showsCursor = false
// Valid queue depth is between 3 to 8

// Create a SCStream with each SCContentFilter
var streams: [SCStream] = []
for contentFilter in contentFilters {
    let stream = SCStream(filter: contentFilter, streamConfiguration: streamConfig,
                        delegate: self)
    try stream.addStreamOutput(self, type: .screen, sampleHandlerQueue: serialQueue)
    try await stream.startCapture()
    streams.append(stream)
}
Key Points:
-onScreenWindowsOnly: trueGet only the windows on the screen
- Preview stream with 284x182 small size + 5FPS low frame rate to save resources
-
BGRAPixel format suitable for display directly on the screen -showsCursor = falseNo cursor required for preview - Create independent streams for each window and stop other preview streams after user selection
Core Takeaways
-
Incremental encoding with dirty rects: in
streamUpdateHandlerextracted fromdirtyRects, only encoding the changed areas. In screen sharing where a large number of frame changes are concentrated in a small area (mouse, cursor, notifications), incremental encoding can save more than 70% of bandwidth. -
Build a five-layer ContentFilter strategy: Single window independent capture → Display includes window → Display includes application → Display excludes application → Display excludes application including exception window. Choose the corresponding level based on user intent (demonstration, teaching, privacy protection) to avoid one-size-fits-all full-screen capture.
-
Dynamic adjustment of flow parameters at runtime: Use
updateConfigurationSwitch between 4K 60FPS and 720p 15FPS. High quality when the network is good, and automatically downgrades when the network is bad, without stopping the flow - this is a necessity for real-time communication applications. -
Build preview stream pool for window selector: Create lightweight preview stream for each window in 284x182 / 5FPS / BGRA format. After the user selects the target window, other preview streams are stopped and switched to the official capture stream. This dual-stream architecture (preview stream + official stream) is the core pattern of the system screen sharing selector.
-
Distinguish between window-level and app-level audio:
capturesAudio = trueWhat is captured is the audio of the entire app, not the audio of a single window. Clearly inform users in the UI that “all the sounds of this app will be shared” to avoid users mistakenly thinking that only the sounds of a certain window are shared.
Related Sessions
- What’s new in SwiftUI — The latest update to SwiftUI that can be used to build window selectors and settings interfaces
- Create a more responsive media app — AVFoundation’s responsive design in media applications
- Explore HLS variants in AVFoundation — Learn how to handle HLS variant streams with AVFoundation
- Discover Metal 3 — New features in Metal 3, working with GPU memory buffered screen capture
Comments
GitHub Issues · utterances