
Highlight
Core Data can infer many schema migrations from source and destination models automatically, while CloudKit-backed stores still require additive schema design, Development initialization, and Production promotion.
Core Content
Once the data model of Core Data changes, the storage structure on the disk must also change.
(01:00) Session uses aAircraftEntity description problem: there are in the modeltypeandnumberOfEngines, there are also corresponding columns in the SQLite storage; when you addnumberOfPassengers, the underlying storage must also add corresponding structures.
Without migration, Core Data refuses to open the old store. The error code isNSPersistentStoreIncompatibleVersionHashError(01:36). This error indicates that the current model does not match the model when the store was created.
Apple recommends using lightweight migration first. It will compare the source managed object model and the destination managed object model, automatically generate a mapping model, and put the model changes into the database schema (01:59).
The focus of this speech is three things:
- Which Core Data model changes can be handed over to lightweight migration.
- How to break complex changes into multiple lightweight migrations.
- What are the restrictions on schema migration when Core Data is synchronized with CloudKit.
Detailed Content
1. What changes can lightweight migration handle?
(02:54) Attribute changes covered by lightweight migration include: adding new attributes, deleting attributes, changing non-optional attributes to optional, changing optional attributes to non-optional and providing default values, and renaming attributes.
To rename, set the renaming identifier. For example, putAircraft.colorChange toAircraft.paintColor, in destination modelpaintColorYou need to set the renaming identifier to the one in the source modelcolor(03:11). Core Data uses this identifier to establish stable canonical names, supporting cross-version paths from version 1 to version 3.
Relationships and entities can also be migrated. Relationships can be added, deleted, renamed, or cardinality can be changed between to-one / to-many, ordered / unordered (04:00). Entities can be added, deleted, and renamed, and attributes can be moved up and down the inheritance hierarchy, or entities can be moved in and out of the hierarchy (04:29).
One limitation to remember: existing entities in two source models that do not have a common parent entity cannot be merged under the same parent entity in the destination model (04:53).
The two key options for lightweight migration are:
NSMigratePersistentStoresAutomaticallyOption
NSInferMappingModelAutomaticallyOption
Key points:
NSMigratePersistentStoresAutomaticallyOption: Allows Core Data to perform migrations when it finds a mismatch between the store and the current model. -NSInferMappingModelAutomaticallyOption: Allows Core Data to infer mapping models based on model differences.- if used
NSPersistentContainerorNSPersistentStoreDescription, these two options will be set automatically (05:31). - If used directly
NSPersistentStoreCoordinator.addPersistentStore(...), you need to manually pass in the options dictionary.
2. How to enable lightweight migration when manually opening the store
(06:16) The code given by Session shows the third approach: continue to useNSPersistentStoreCoordinator, but pass in the migration options when adding the persistent store.
import CoreData

let storeURL = NSURL.fileURL(withPath: "/path/to/store")
let momURL = NSURL.fileURL(withPath: "/path/to/model")
guard let mom = NSManagedObjectModel(contentsOf: momURL) else {
    fatalError("Error initializing managed object model for URL: \(momURL)")
}
let coordinator = NSPersistentStoreCoordinator(managedObjectModel: mom)
do {
    let opts = [NSMigratePersistentStoresAutomaticallyOption: true,
                NSInferMappingModelAutomaticallyOption: true]

    try coordinator.addPersistentStore(ofType: NSSQLiteStoreType,
                                       configurationName: Optional<String>.none,
                                       at: storeURL,
                                       options: opts)
} catch {
    fatalError("Error configuring persistent store: \(error)")
}
Key points:
import CoreData: Use Core Data’s managed object model, coordinator, and store options. -storeURL: Points to the path of an existing persistent store. -momURL: Points to the managed object model to be used by the current application. -NSManagedObjectModel(contentsOf:): Load the destination model from the model file; stop directly when the loading fails, because there is no model basis for subsequent migrations. -NSPersistentStoreCoordinator(managedObjectModel:):Create a coordinator using the current model. -NSMigratePersistentStoresAutomaticallyOption: true: Turn on automatic migration. -NSInferMappingModelAutomaticallyOption: true: Allows Core Data to infer mapping models. -addPersistentStore(...): actually opens the store; if the store’s model version does not match, migration will occur here. -catch: Capture errors when opening the store or when migration fails.
If you want to check in advance whether Core Data can infer the mapping model, you can callNSMappingModel.inferredMappingModel(06:56). It returns the mapping model if it can be inferred, and returns if it cannot be inferred.nil。
3. Split complex changes into multiple lightweight migrations
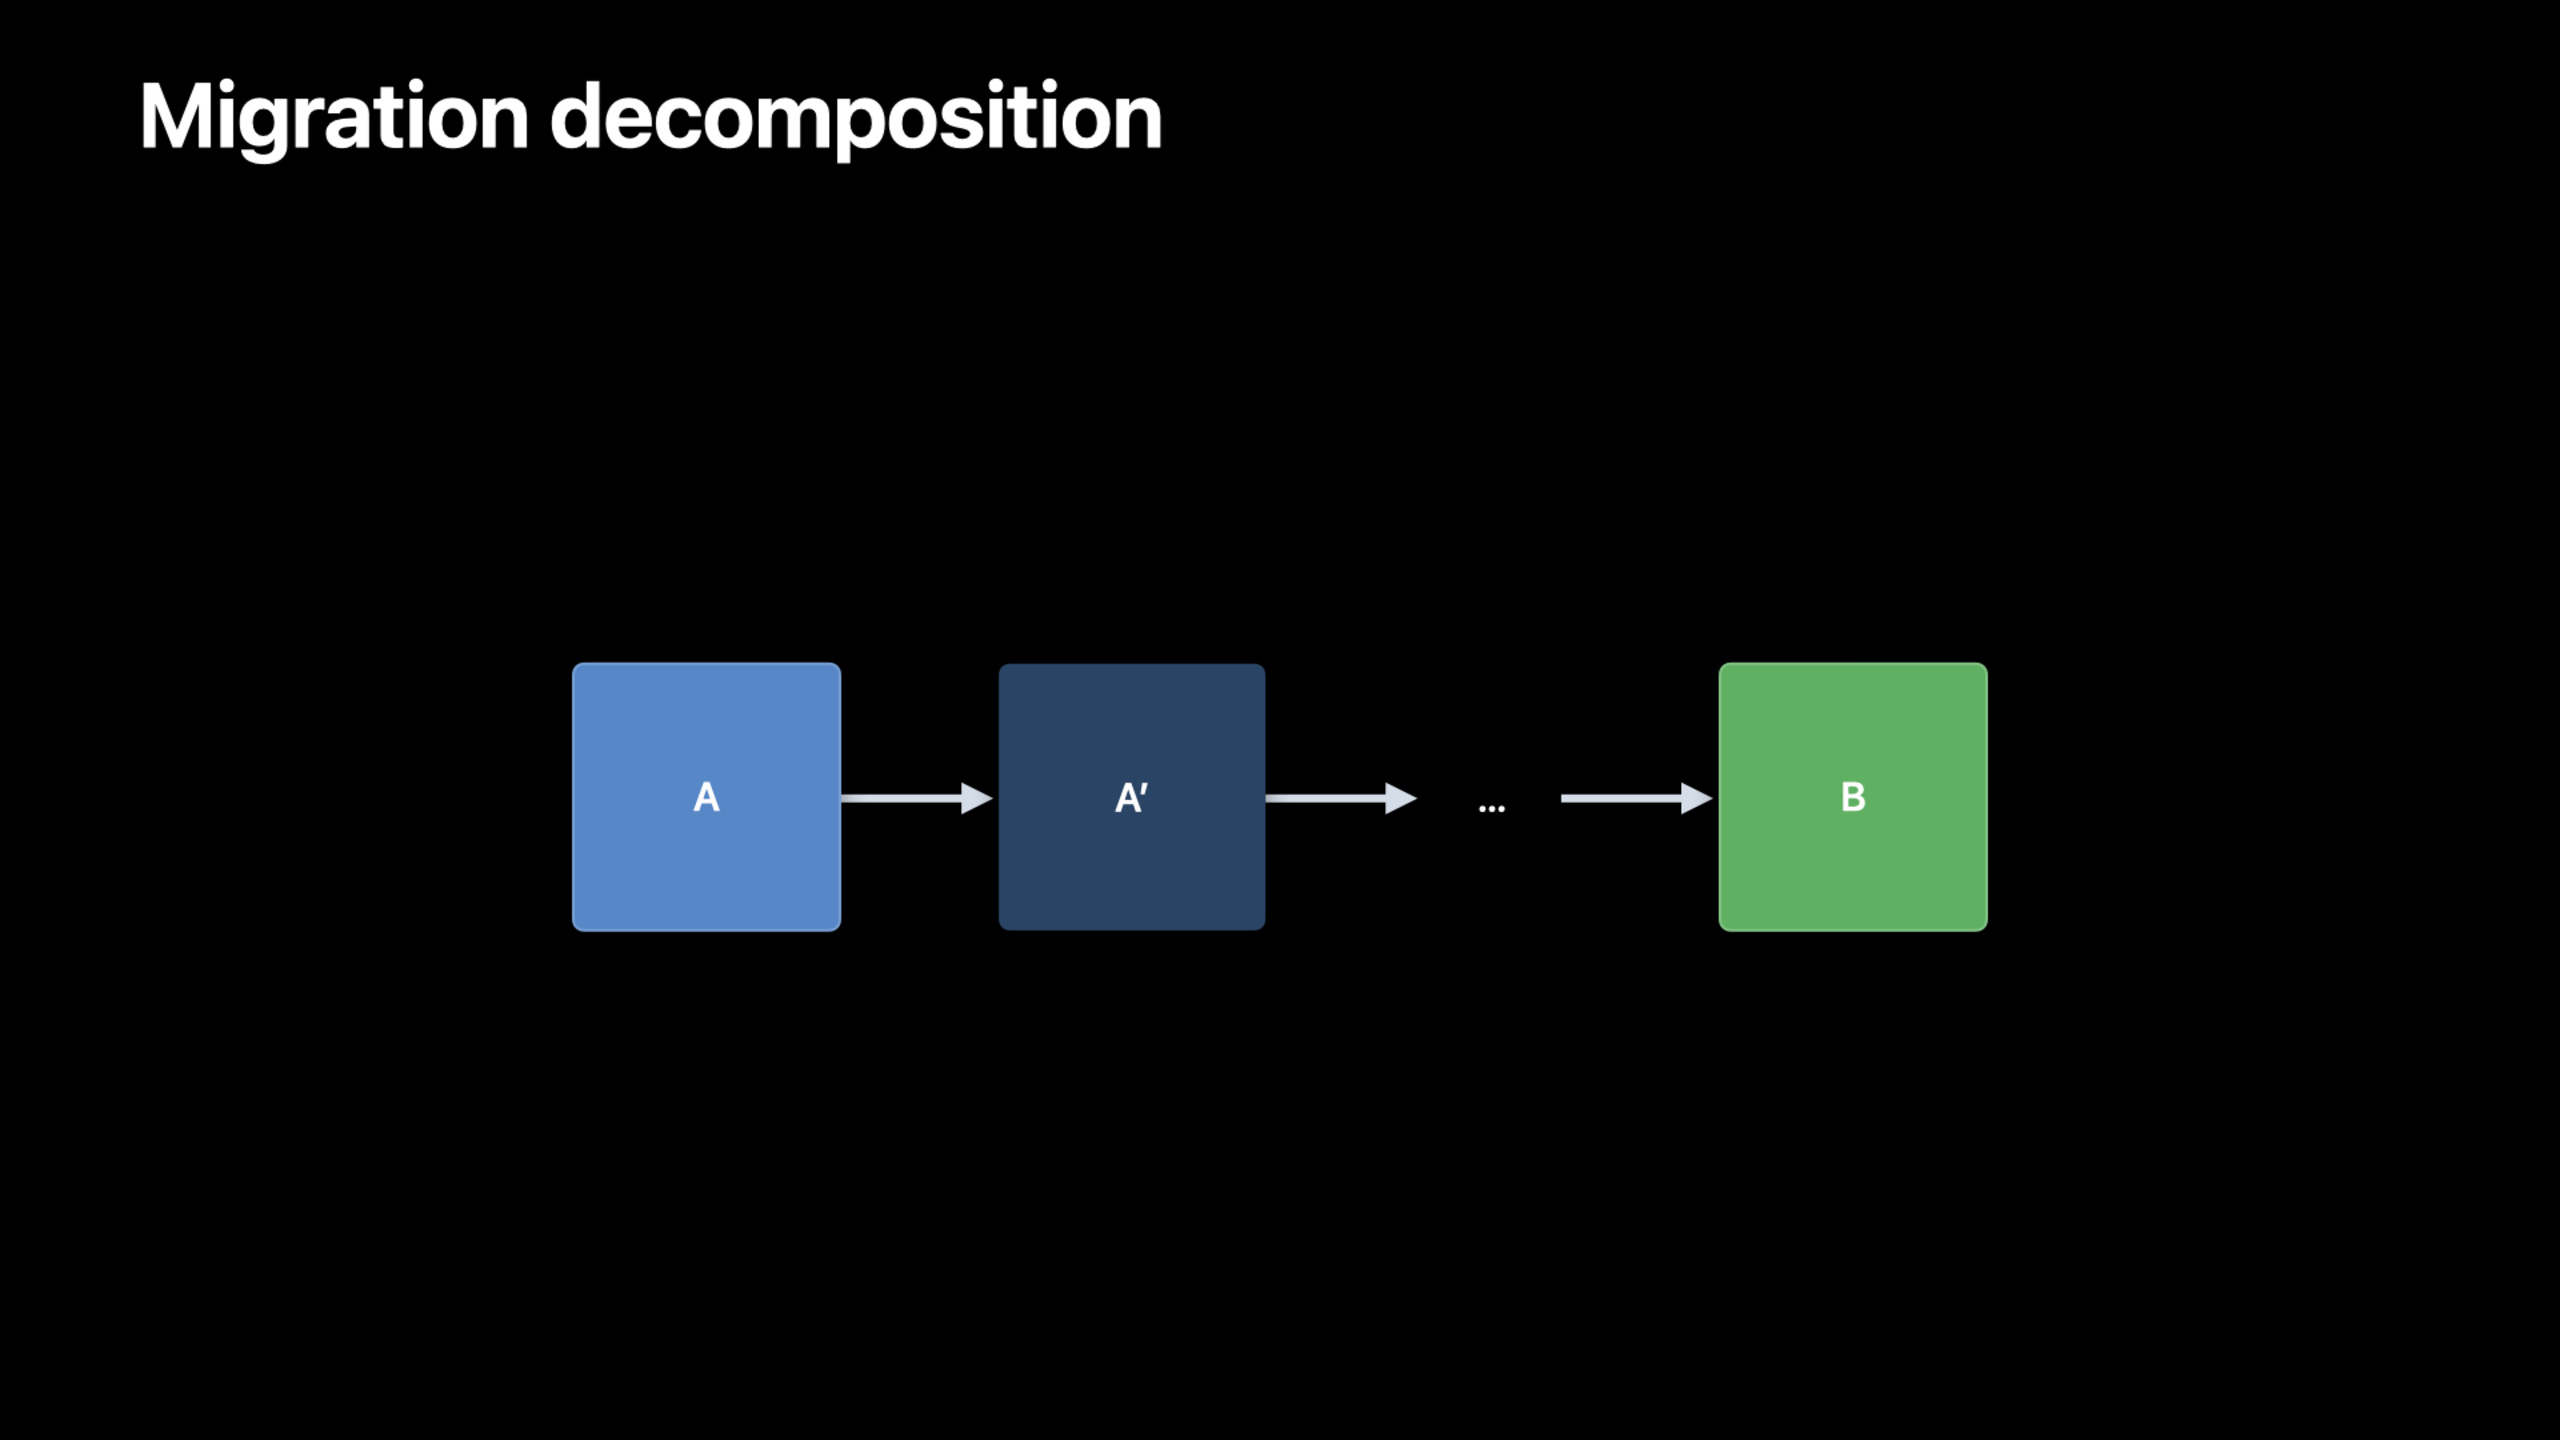
(07:19) Some combinational changes exceed lightweight migration capabilities. for speechflightDataFor example: I originally used external storage for binary data, but later I wanted to change it to internal storage and delete the external file path. Directly migrating from model A to model B does not comply with the lightweight migration rules.
The approach is to introduce a bridging model and split a complex migration into multiple steps that Core Data can understand (08:16).
The disassembly method of Session is:
- Create A’ from model A and add temporary attributes
tmpStorage. - Run the application’s own import logic between migrations to write external file data
tmpStorage. - Create A” from A’, delete the old external storage property, and rename the new property to its final name.
Each step falls within lightweight migration capabilities. Core Data is responsible for schema migration, and the business logic of external file import is executed by the application itself (09:26).
Key points:
- The goal of the bridging model is to break down non-migrable changes into smaller pieces rather than retaining them for long-term use by users.
- Application-specific import logic should be placed between two lightweight migrations.
- If the migration process may be terminated by the system, the import logic must be restartable (10:19).
- You can build a loop to open unprocessed models in serial order and let Core Data migrate the store step by step (10:04).
4. Migration limitations during CloudKit synchronization
(10:34) When Core Data synchronizes with CloudKit, both parties need to share an understanding of the data model. The model defined in the Core Data model editor is used to generate the CloudKit schema. The schema is first generated into the Development environment and then promoted to Production.
CloudKit does not support all capabilities in the Core Data model (11:07). Session clearly lists several types of restrictions:
- unique constraints of entity are not supported.
-
UndefinedandobjectIDattribute type is not supported. - relationship must be optional, and there must be an inverse relationship.
- deny deletion rule is not supported.
Production schema also has harder constraints. After CloudKit schema is promoted to Production, record types and fields are immutable (11:43). CloudKit supports new fields and new record types; existing record types or fields cannot be modified or deleted (12:07).
This affects the boundaries of Core Data migrations. Light migration will only change the local store file and will not automatically modify the CloudKit schema (12:26). If the model is used in CloudKit, you also need to run the schema initializer, write the changes to the Development database, and then use the CloudKit Console to upgrade to Production.
Session gives three CloudKit schema evolution strategies (13:33):
- Incrementally add new fields to existing record types.
- Add the version attribute to the entity and use fetch request to fetch only records compatible with the current app version.
- Use
NSPersistentCloudKitContainerOptionsAssociate the new store to the new container.
Key points:
- The first strategy allows older versions of the app to still access user-created records, but not see all fields.
- The second strategy allows older versions of the app to hide incompatible records created by newer versions.
- The third strategy will re-upload the data set; if the user data is large, the upload may take a long time.
- Any strategy should test the coexistence of different app versions with different data model versions (14:33).
5. Debugging the migration process
(15:21) The demo section opens two environment variables:com.apple.CoreData.SQLDebugandcom.apple.CoreData.MigrationDebug. Core Data will output steps such as creating files, writing store metadata, materialize schema, and performing migrations.
Still availablesqlite3Command line tool to inspect the SQLite store. Confirm in the demo firstZLOGENTRYThe table contains the columns corresponding to the original model, then modify the model, enable migration, re-run the application, and finally check that the new schema has been automatically downloaded by Core Data (15:52).
Key points:
NSPersistentStoreIncompatibleVersionHashErrorIt is the migration entry signal. -SQLDebugHelps you confirm whether the underlying schema is created or updated as expected. -MigrationDebugHelp you observe whether Core Data actually performs migration. -sqlite3Tables and columns in store files can be independently verified.
Core Takeaways
1. Make a model migration pre-checking tool
- What to do: In a development build, run a migration capability check on the current model and the historical model.
- Why it’s worth doing:
NSMappingModel.inferredMappingModelYou can determine whether Core Data can infer the mapping model before actual migration. - How to start: Collect historical managed object models in the app bundle and call them pair by pair
NSMappingModel.inferredMappingModel, marking the specific version in CI or the local debug panel when it fails.
2. Add compatibility check to CloudKit-backed model
- What to do: Check for Core Data designs that are not supported by CloudKit in the model review script.
- Why it’s worth doing: CloudKit does not support unique constraints,
Undefined、objectID, lack of inverse relationship, deny deletion rule. - How to start: Traversal
NSManagedObjectModelentities, attributes, relationships, and deletion rules, and output incompatibilities as build warnings.
3. Design restartable data import migration
- What to do: Make migration steps such as importing external files and filling in fields into repeatable tasks.
- Why is it worth doing: Session explicitly requires that the application of specific migration logic can be restarted after the process is terminated.
- How to start: Record the migration status of each object to be processed, and then mark it as completed after the import is successful; only unfinished objects will be processed at the next startup.
4. Create a CloudKit regression dataset for multi-version apps
- What to do: Access the same CloudKit Development container with both the old and new versions of the app and verify the record type, field and version attribute policies.
- Why it’s worth doing: User devices will run both old and new versions of the app at the same time, and the Production schema is additive.
- How to start: First add a field or record type in the Development environment, run the old version app to create and read records, then run the new version app to write new fields, and check the display and fetch results of the old version.
Related Sessions
- Optimize your use of Core Data and CloudKit — Continue to talk about testing, data set generation and workflow optimization of Core Data and CloudKit synchronization.
- What’s new in CloudKit Console — Introduces the capabilities in CloudKit Console for viewing, debugging, and managing containers.
- Meet CKTool JS — Shows how to use CKTool JS to automate the CloudKit schema and record management process.
Comments
GitHub Issues · utterances