
Highlight
TextKit 2 becomes the default layout engine for UIKit and AppKit text controls in iOS 16 and macOS Ventura, and UITextView and NSTextView get automatic migration paths, TextKit 1 compatibility mode, and strategies for migrating from glyph/NSRange code to NSTextLayoutManager/NSTextRange.
Core Content
Many applications do not directly write text engine code, but always rely onUITextView、NSTextView、UILabelSuch system controls.Changes at WWDC 2022: The default text layout engine behind these controls is switching to TextKit 2 (01:56).
This is very worry-free for ordinary applications.Most applications without special modifications to the text view can get TextKit 2 with zero code.Apple completes UIKit migration in iOS 16,UITextViewTextKit 2 is used by default; in macOS Ventura, AppKit’s text control also uses TextKit 2 by default (03:08).
Trouble arises with applications that deeply customize text.Old code is often accessedlayoutManager, and then use the glyph API to count rows, rectangles, or selections.TextKit 2 no longer provides a glyph API because the continuous mapping of characters to glyphs does not hold for some text systems (15:33).This type of code needs to be changed from “operating glyphs” to “operating layout fragments, line fragments and text ranges”.
Apple has given two transition paths.In the short term,UITextViewandNSTextViewYou can enter TextKit 1 compatibility mode to ensure that existing applications continue to work (09:03).In the long term, applications should avoid accidental rollbacks, because once the text view switches from TextKit 2 to TextKit 1, the system will not automatically switch back (11:54).
Detailed Content
Text controls use TextKit 2 by default
(03:08) TextKit 2 enters UIKit first in iOS 15UITextField.After iOS 16, all text controls in UIKit use TextKit 2 by default, includingUITextView.AppKit also makes text controls use TextKit 2 by default in macOS Ventura.
When you need to explicitly select an engine, you can specify it during initialization.usingTextLayoutManager.This is suitable for two scenarios: new code is forced to use TextKit 2; text view that must be compatible with the old implementation directly selects TextKit 1 when creating it.
let textView = UITextView(usingTextLayoutManager: true)
let compatibilityTextView = UITextView(usingTextLayoutManager: false)
Key points:
UITextView(usingTextLayoutManager: true): Create a text view using TextKit 2.UITextView(usingTextLayoutManager: false): Create a text view using TextKit 1.- Selecting the engine during initialization is safer than replacing the layout manager after creation; the speech mentioned that runtime replacement may cause focus loss and input interruption (11:03).
Check NSTextLayoutManager first, then access layoutManager
(13:20) The most common reason for accidentally entering compatibility mode is accessing the text viewlayoutManagerproperty.When cross-system version code cannot directly delete the TextKit 1 branch, Apple recommends checking firsttextLayoutManager。
if let textLayoutManager = textView.textLayoutManager {
    // TextKit 2 code goes here
}
else {
    let layoutManager = textView.layoutManager
    // TextKit 1 code goes here
}
Key points:
textView.textLayoutManager: Returns when TextKit 2 is availableNSTextLayoutManager。if let textLayoutManager: Put TextKit 2 code in this branch to avoid accessing the old layout manager first.else: Only falls into the old path if TextKit 2 is unavailable.textView.layoutManager: This access will trigger TextKit 1 compatibility mode, so it must be placed in the TextKit 1 branch.
Use layout fragment instead of glyph traversal
(16:24) The glyph API in TextKit 1 is very low-level.The example in the lecture is to count the number of lines after line breaks in the text view.The old idea would traverse the glyph and then checklineFragmentRect(forGlyphAt:).The idea behind TextKit 2 is enumerationNSTextLayoutFragment, and then count theNSTextLineFragment。
// Example: Updating glyph-based code

var numberOfLines = 0
let textLayoutManager = textView.textLayoutManager

textLayoutManager.enumerateTextLayoutFragments(from:
                                               textLayoutManager.documentRange.location,
                                               options: [.ensuresLayout]) { layoutFragment in
        numberOfLines += layoutFragment.textLineFragments.count
}
Key points:
numberOfLines: Save statistical results.textView.textLayoutManager: Get the TextKit 2 layout manager.enumerateTextLayoutFragments(from:options:): Enumerate layout fragments starting from the beginning of the document.textLayoutManager.documentRange.location: The starting position of the enumeration..ensuresLayout: Make sure the required layout has been generated before enumeration.layoutFragment.textLineFragments.count: The number of line fragments in each layout fragment. After accumulation, the total number of lines after line wrapping is obtained.
Convert between NSRange and NSTextRange
(18:09) TextKit 1 commonly uses NSRange to index strings. TextKit 2 introduced NSTextLocation and NSTextRange, which represent more structured text content. Text views still have NSRange APIs such as selectedRange and scrollRangeToVisible, so migration code often needs conversion.
fromNSRangeGo toNSTextRange:
let textContentManager = textLayoutManager.textContentManager

let startLocation = textContentManager.location(textContentManager.documentRange.location,
                                                offsetBy: nsRange.location)!

let endLocation = textContentManager.location(startLocation,
                                              offsetBy: nsRange.length)

let nsTextRange = NSTextRange(location: startLocation, end: endLocation)
Key points:
textLayoutManager.textContentManager: Converting the position needs to be done through the content manager.documentRange.location: Position object at the beginning of the document.offsetBy: nsRange.location: Move from the beginning of the document toNSRangestarting point.offsetBy: nsRange.length: Move from the starting point toNSRangethe end point.NSTextRange(location:end:): Constructs a TextKit 2 range with a start and end point.
fromNSTextRangetransfer backNSRange:
let textContentManager = textLayoutManager.textContentManager

let location = textContentManager.offset(from: textContentManager.documentRange.location,
                                         to: nsTextRange!.location)

let length = textContentManager.offset(from: nsTextRange!.location,
                                       to: nsTextRange!.endLocation)

let nsRange = NSRange(location: location, length: length)
Key points:
offset(from:to:): Count twoNSTextLocationlinear offset between.location: The beginning of the document toNSTextRangeThe offset from the starting point.length:NSTextRangeOffset from start point to end point.NSRange(location:length:): Reassemble two integers into a range available to the text view API.
UITextRange is transferred through offset
(22:01)UITextViewandUITextFieldobeyUITextInput, will useUITextPositionandUITextRange.In most cases there is no need to convert directly toNSTextRange.When really needed, Apple recommends using an integer offset as an intermediate layer.
let offset = textView.offset(from: textview.beginningOfDocument, to: uiTextRange.start)

let startLocation = textContentManager.location(textContentManager.documentRange.location,
                                                offsetBy: offset)!

let nsTextRange = NSTextRange(location: startLocation)
Key points:
textView.offset(from:to:):BundleUITextRange.startConvert to an integer offset relative to the beginning of the document.textContentManager.documentRange.location: TextKit 2 documentation starting point.location(_:offsetBy:):Convert integer offset toNSTextLocation。NSTextRange(location:): Creates a TextKit 2 range starting at this position.- Speech reminder,
UITextPositionOnly valid for the view that created it, do not reuse across views (22:51).
Core Takeaways
-
Make a TextKit 2 migration check page: list all the
UITextViewandNSTextViewThe creation method, first change the instance that can directly use TextKit 2 tousingTextLayoutManager: true.This allows for early detection of unexpected TextKit 1 fallbacks; the entry point istextView.textLayoutManagerand compatibility mode logs. -
Add line count to rich text editor: Change glyph-based line count to enumeration
NSTextLayoutFragment.This can avoid the character-to-glyph mapping problem and is consistent with the layout model of TextKit 2; the entry isenumerateTextLayoutFragments(from:options:)。 -
Write a range conversion tool:
NSRange、NSTextRange、UITextRangeThe conversion is concentrated into a small module.Selection, scrolling, and annotation highlighting in the editor all require range conversion; the entrance isNSTextContentManager.location(_:offsetBy:)andoffset(from:to:)。 -
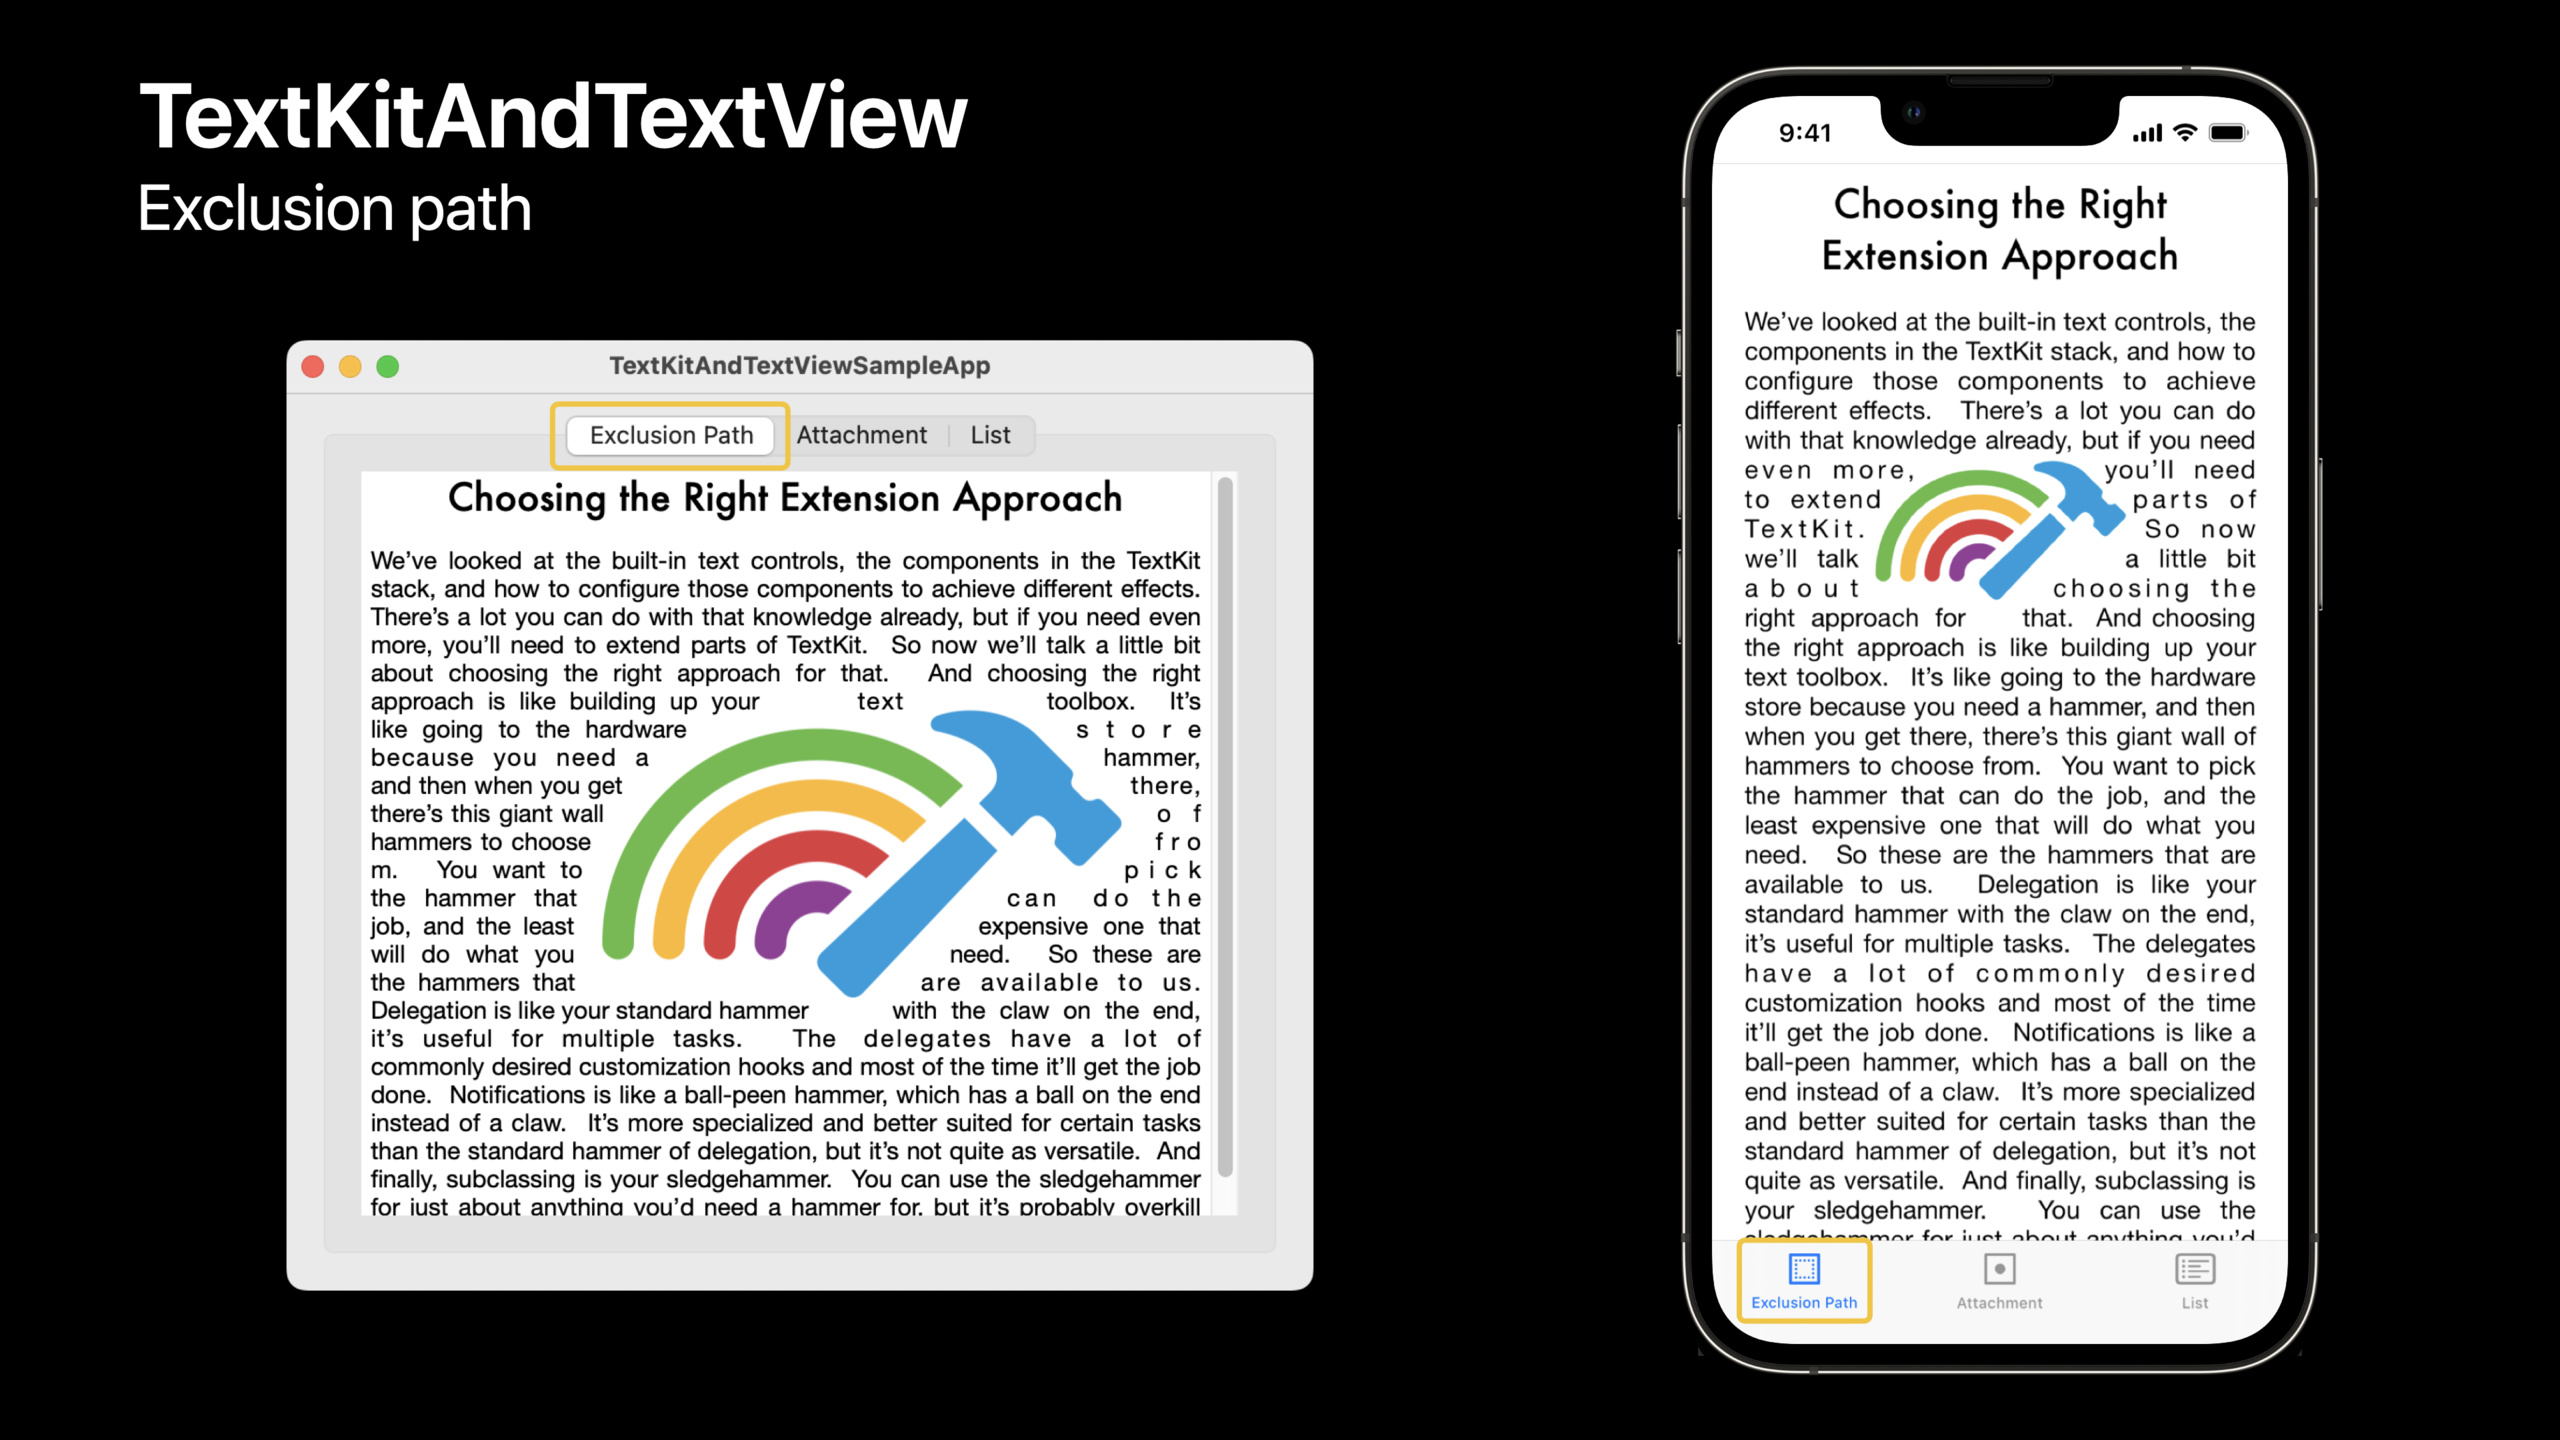
Make text cards with mixed graphics and text: TextKit 2 supports non-simple text container, which can be
NSTextContainer.exclusionPathsKeep the text away from the image area.Suitable for embedded image layout in news, notes, and long text readers. -
Make interactive inline attachments: TextKit 2’s text attachment view provider API allows
UIVieworNSViewas a text attachment and handle the event directly.Start with small features like inline polls, task checkboxes, and code block action buttons.
Related Sessions
- Meet TextKit 2 — Explains the underlying architecture of TextKit 2, suitable for completing basic concepts before reading the migration strategy.
- What’s new in UIKit — UIKit updates covering iOS 16, available with
UITextViewLet’s look at the default migration together. - What’s new in AppKit — AppKit update covering macOS Ventura that works with
NSTextViewLet’s look at the default migration together. - What’s new in PDFKit — PDFKit handles document text, forms, and annotations, and is suitable for reading in conjunction with TextKit’s text layout updates.
- Adopt desktop-class editing interactions — Talk about editing menu and search interactions, which are directly related to the selection, search, and editing experience of text view.
Comments
GitHub Issues · utterances