
Highlight
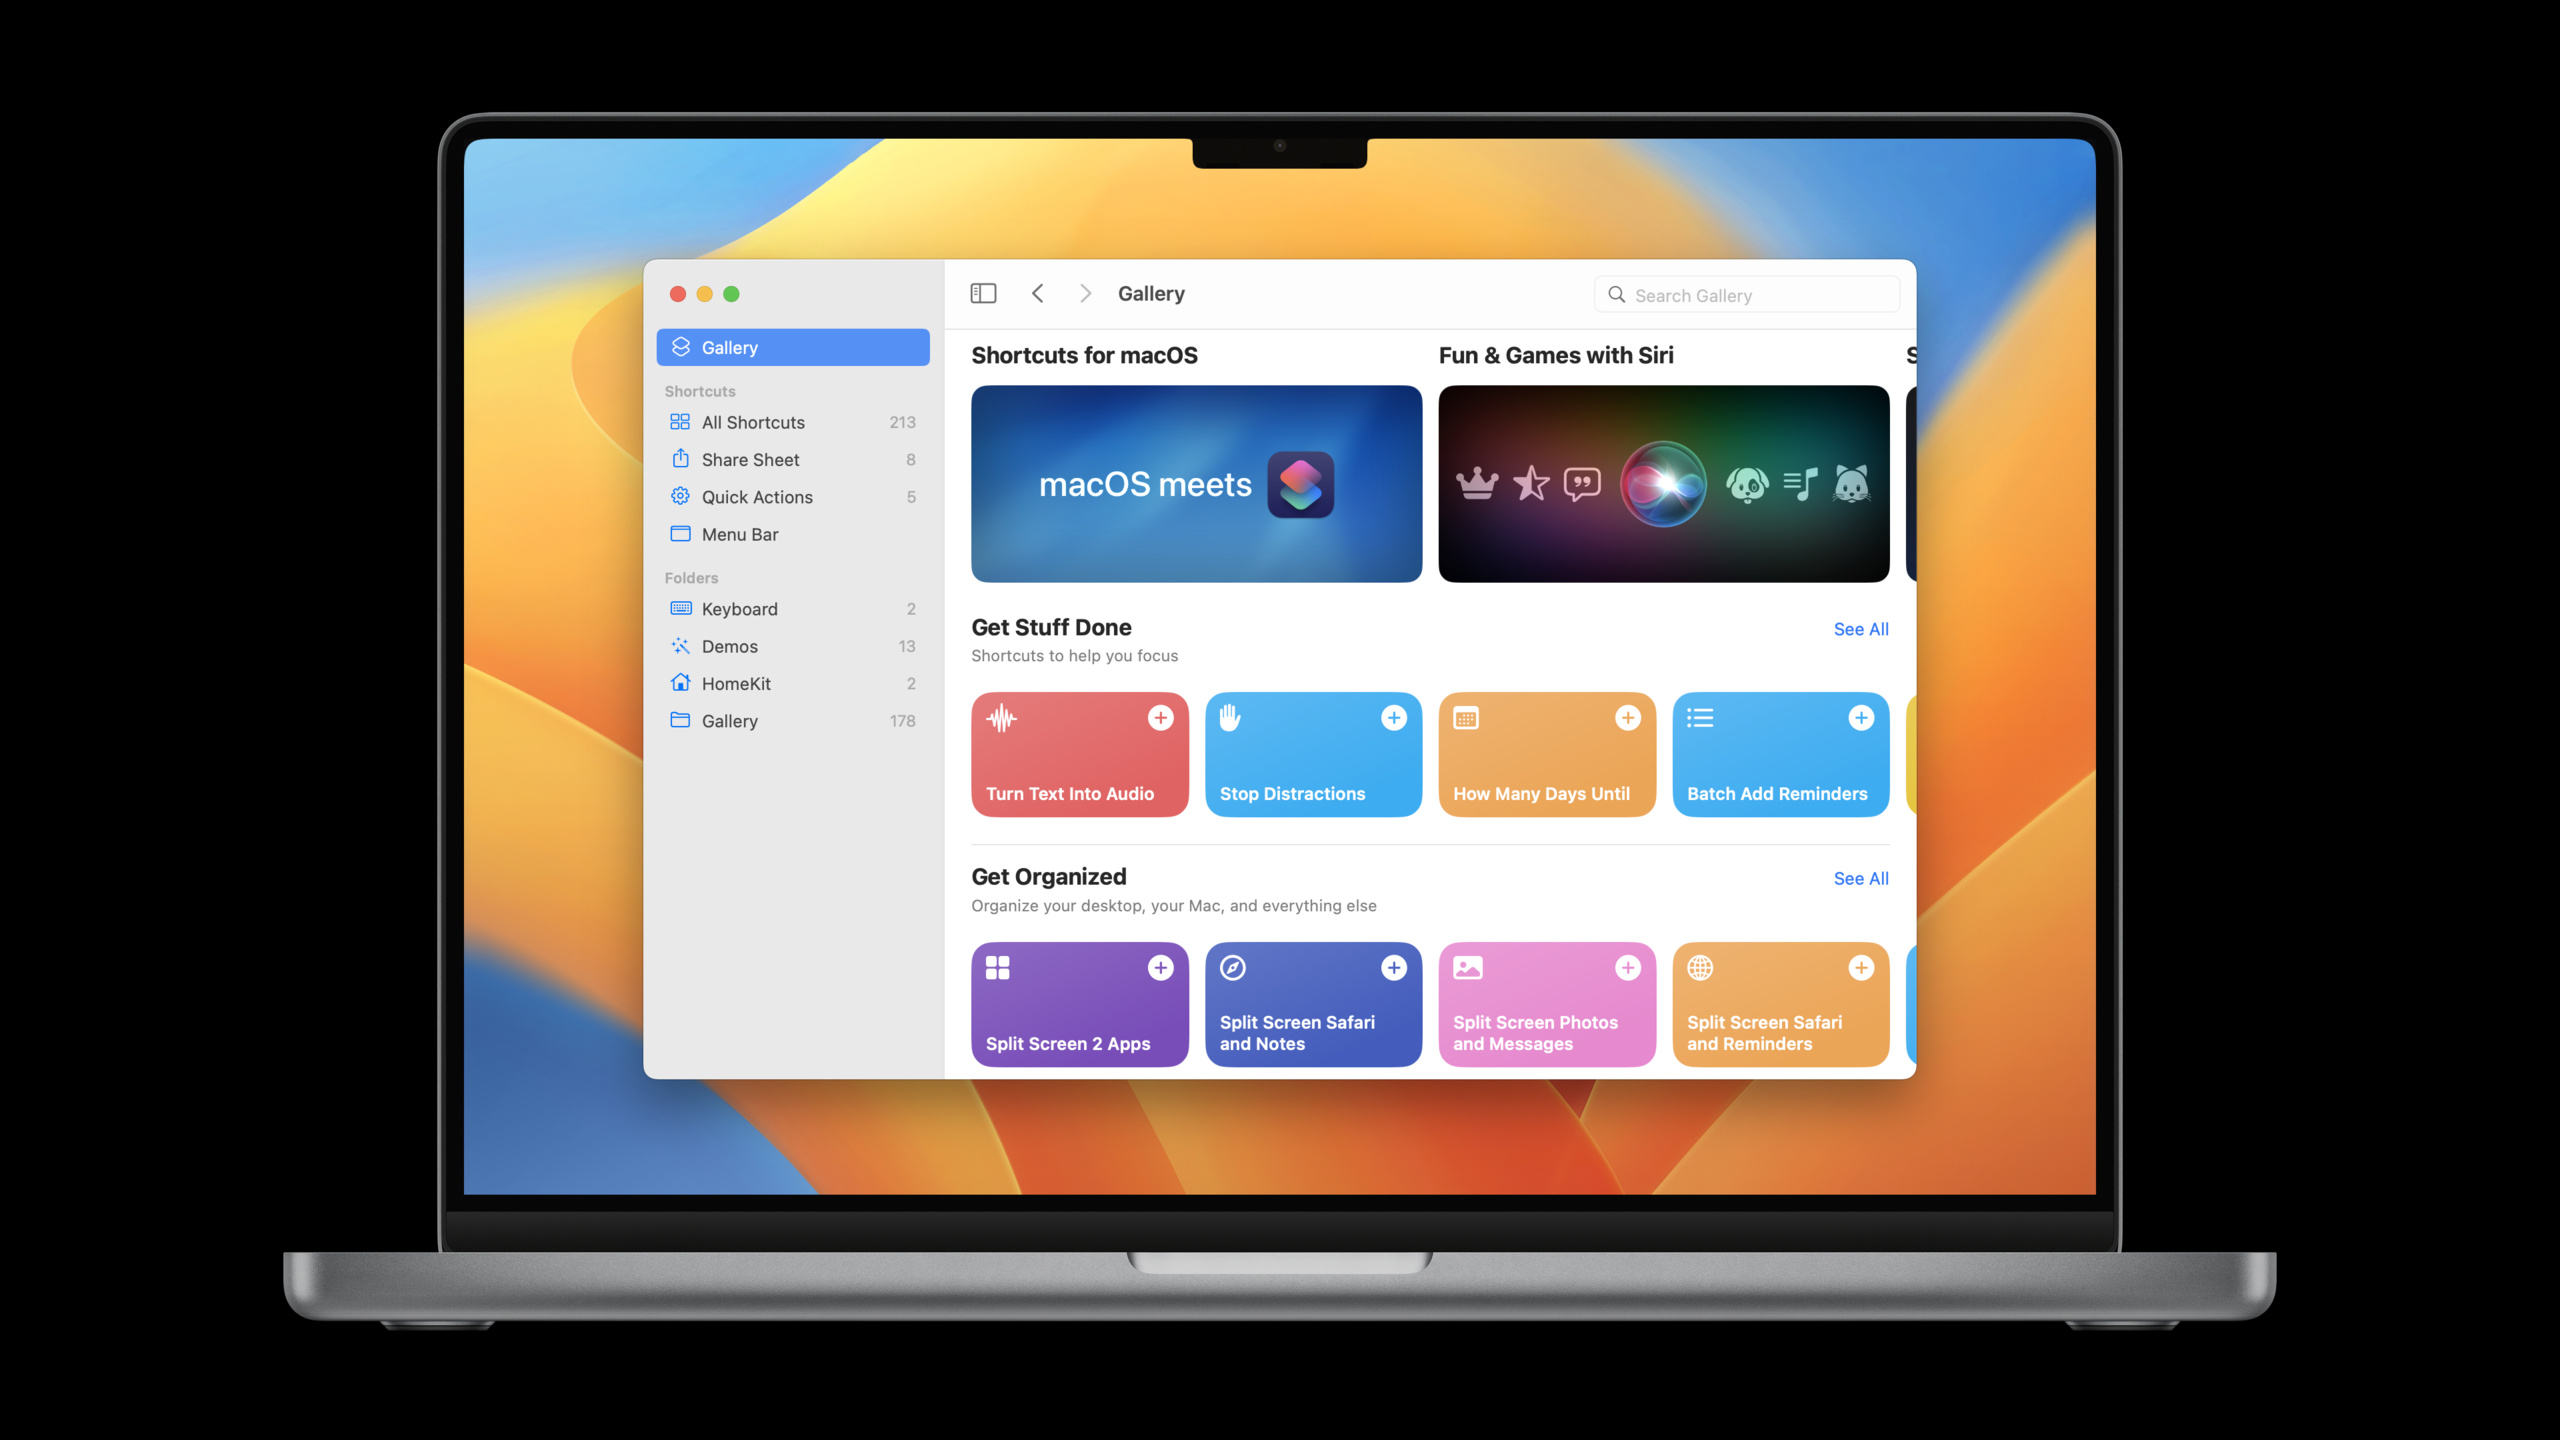
Ian from the Shortcuts team used Shortcuts App as a practical case to systematically explain various scenarios of mixing SwiftUI and AppKit in macOS Apps.
Core Content
After Shortcuts arrived on macOS, the team faced a common problem: the Mac App already had AppKit windows, split views, collection views, menus, and response chains, but many cross-platform interfaces had already been written in SwiftUI.Rewriting everything is expensive, and embedding directly will encounter state, layout, focus, and performance issues.
Ian’s approach is to take apart the actual interface of Shortcuts and talk about it.The left sidebar is SwiftUIList, the outer window is stillNSSplitViewController.Using the shortcut gridNSCollectionView, hosting SwiftUI shortcut cards in a single cell.The editor is a SwiftUI View, but it responds to the cut, copy, paste, and custom commands in the AppKit main menu.Finally, the AppleScript editor is still AppKitNSView, need to be put into SwiftUI layout.
The core of this session is not to require you to migrate your entire Mac App at once.It gives a set of seams:NSHostingController、NSHostingView、ObservableObject、NSViewRepresentable, coordinator, Responder Chain and Focus.Each seam corresponds to a migration scenario, and SwiftUI can be adopted piece by piece.
Detailed Content
Host SwiftUI sidebar in AppKit split view
(01:29) The outer layer of the Shortcuts main window is AppKit split view, and the left sidebar uses SwiftUIListaccomplish.The selected items are maintained inside the sidebar, and the options areSidebarItemEnumeration representation.
struct SidebarView: View {
    @State private var selectedItem: SidebarItem

    var body: some View {
        List(selection: $selectedItem) {
            ...
            Section("Shortcuts") { ... }
            Section("Folders") { ... }
        }
    }
}

enum SidebarItem: Hashable {
    case gallery
    case allShortcuts
    ...
    case folder(Folder)
}
Key points:
SidebarViewIt is an ordinary SwiftUI View, which can describe the sidebar interface independently.@State private var selectedItemSave the currently selected position.List(selection:)Bind list selection to state.Section("Shortcuts")andSection("Folders")Navigation grouping corresponding to Shortcuts.SidebarItem: HashableMake each navigation target available as a list selection value.
(01:53) Put this SwiftUI sidebar into AppKit, the entrance isNSHostingController.It is used like a normal view controller, so it can be wrapped directly asNSSplitViewItem。
let splitViewController = NSSplitViewController()

let sidebar = NSHostingController(rootView: SidebarView(...))
let splitViewItem = NSSplitViewItem(viewController: sidebar)
splitViewController.addSplitViewItem(splitViewItem)
Key points:
NSSplitViewController()AppKit still manages the window structure.NSHostingController(rootView:)Put SwiftUISidebarViewBecomes a view controller available to AppKit.NSSplitViewItem(viewController:)Receives a managed controller, no additional bridging layer is required.addSplitViewItemAdd SwiftUI sidebar to split view.
Use shared models to pass selection status back to AppKit
(03:06) Sidebar selections initially only existed inside SwiftUI.The details page on the right is managed by AppKit split view, and you need to know the selected item.Ian’s solution is to move the state outside SwiftUIObservableObject。
class SelectionModel: ObservableObject {

    @Published var selectedItem: SidebarItem = .allShortcuts

}

// AppKit Window Controller
cancellable = selectionModel.$selectedItem.sink { newItem in
    // update the NSSplitViewController detail
}
Key points:
SelectionModelIt is a reference type and can be held by AppKit and SwiftUI at the same time.ObservableObjectLet SwiftUI refresh the view when the model changes.@Published var selectedItemExposes the current selection and spawns a Combine publisher.- AppKit window controller subscription
$selectedItem。 sinkinnewItemused to updateNSSplitViewControllerdetails area.
This pattern is suitable for existing AppKit architecture.State is not locked in the SwiftUI view tree, and AppKit controllers can continue to handle window coordination.
Reuse NSHostingView in collection view cell
(04:37) The cells of collection view and table view will be reused.Repeatedly adding and removing subviews while scrolling will slow down the interface.The official recommendation is: create each cell onceNSHostingView, then only replace itsrootView。
class ShortcutItemView: NSCollectionViewItem {
    private var hostingView: NSHostingView<ShortcutView>?

    func displayShortcut(_ shortcut: Shortcut) {
        let shortcutView = ShortcutView(shortcut: shortcut)

        if let hostingView = hostingView {
            hostingView.rootView = shortcutView
        } else {
            let newHostingView = NSHostingView(rootView: shortcutView)
            view.addSubview(newHostingView)
            setupConstraints(for: newHostingView)
            self.hostingView = newHostingView
        }
    }
}
Key points:
ShortcutItemViewStill AppKitNSCollectionViewItem。hostingViewCache the SwiftUI managed view within the current cell.displayShortcut(_:)Called by the data source when configuring the cell.ShortcutView(shortcut:)Generate a new SwiftUI description for the current model.- already
hostingViewUpdate only whenrootView, to avoid rebuilding the entire managed view hierarchy. - Created when content is displayed for the first time
NSHostingView, add cell, and set Auto Layout constraints.
(06:08) When the cell rolls off the screen and then displays another shortcut, SwiftUI will reuse the original structure and only update the changed images, text, and background.This detail is important: reuseNSHostingViewLet AppKit’s cell reuse and SwiftUI’s view update model cooperate.
Let SwiftUI managed views participate in AppKit layout and window size
(06:35)NSHostingControllerandNSHostingViewThe intrinsic size will be generated based on the ideal width and ideal height of the SwiftUI view.SwiftUI also generates constraints for minimum size and maximum size, which are used by AppKit Auto Layout.
This brings up two practical rules.
First, embedNSHostingViewFinally, you still have to add constraints to it and the parent view on the AppKit side.Internal to SwiftUIframeLayout modifications such as this change the constraints imposed by the managed view, such as fixed width.
Second, ifHostingViewis the top-level of the windowcontentView, SwiftUI updates the minimum and maximum size of the window based on the content.Whether the window can be scaled horizontally or vertically will change with the SwiftUI content.
(07:55) Modal display can also use the hosting controller directly.Popover, sheet and modal window all use AppKit API, and the content size is provided by SwiftUI.
viewController.present(NSHostingController(rootView: ...),
    asPopoverRelativeTo: rect, of: view,
    preferredEdge: .maxY, behavior: .transient)
Key points:
NSHostingController(rootView:)Directly as the popover’s content controller.asPopoverRelativeTo: rectSpecify which area the popover will pop up from.of: viewSpecify the reference view.preferredEdge: .maxYSpecify the preferred popup direction.behavior: .transientUse AppKit’s transient popover behavior.
(08:15) The sheet is shorter, you only need to pass the hosting controllerpresentAsSheet。
viewController.presentAsSheet(NSHostingController(rootView: ...))Key points:
presentAsSheetIt is the sheet display method of AppKit.- SwiftUI view passed
NSHostingControllerEnter sheet. - The sheet’s content dimensions are determined by the hosted SwiftUI content.
(08:22) modal window can set the title and then callpresentAsModalWindow。
let hostingController = NSHostingController(rootView: ModalView())
hostingController.title = "Window Title"
viewController.presentAsModalWindow(hostingController)
Key points:
ModalView()is SwiftUI content.hostingController.titleWill become the window title of the modal window.presentAsModalWindowDisplays a modal window that blocks interaction.- Window size will adapt to SwiftUI content.
(08:45) macOS Ventura has a new API to control automatic constraints.Minimum, intrinsic, and maximum size constraints are created by default.You can adjust it as neededsizingOptions。
hostingController.sizingOptions = [.minSize, .intrinsicContentSize, .maxSize]Key points:
sizingOptionsControls which size constraints are automatically created by the hosting controller..minSizeCorresponds to the minimum size..intrinsicContentSizeCorresponds to the ideal content size..maxSizeCorresponds to the maximum size.- If the outer AppKit already provides constraints, or you want the view to always be elastic, you can reduce these options.
Let SwiftUI View enter the responsive chain and focus system
(10:47) The editor of Shortcuts is SwiftUI View, but the main menu is in AppKit.After the menu item is triggered, the selector is passed along the response chain from the first responder.The concept corresponding to first responder in SwiftUI is focused view.
Image(...)
    .focusable()
    .copyable { ... }
    .cuttable { ... }
    .pasteDestination(payloadType: Image.self) { ... }
Key points:
Image(...)Is a SwiftUI View that needs to receive keyboard and menu commands..focusable()Make this view the focus target..copyableProvides processing for copying data to pasteboard..cuttableProvides shear processing..pasteDestination(payloadType:)Declare the types of paste data that can be received.
(11:02) In addition to copy, cut, and paste, SwiftUI can also handle arrow keys, Escape, AppKit standard selectors, and custom selectors.
struct ShortcutsEditorView: View {
    var body: some View {
        ScrollView { ... }
            .onMoveCommand { moveSelection(direction: $0) }
            .onExitCommand { cancelOperations() }
            .onCommand(#selector(NSResponder.selectAll(_:)) { selectAllActions() }
            .onCommand(#selector(moveActionUp(_:)) { moveSelectedAction(.up) }
            .onCommand(#selector(moveActionDown(_:)) { moveSelectedAction(.down) }
    }
}
Key points:
ScrollView { ... }Is the Shortcuts editor body..onMoveCommandHandles arrow key movement selection..onExitCommandHandles exit commands such as Escape.#selector(NSResponder.selectAll(_:))Accepts AppKit’s select all standard command.#selector(moveActionUp(_:))and#selector(moveActionDown(_:))Receives Shortcuts custom menu commands.- The code snippet comes from the official video. The example omits the specific implementation and some closing symbols, focusing on the location of the command mount.
(11:28) When testing keyboard navigation, turn Full Keyboard Navigation on and off in Keyboard System Settings.Many controls are only focusable when this setting is on.
Hosting AppKit NSView in SwiftUI
(12:37) The migration direction can also be reversed.Shortcuts’ AppleScript editor is an AppKit control that is placed into a SwiftUI editor layout.SwiftUI providesNSViewRepresentableandNSViewControllerRepresentable, used to describe an AppKit view or view controller as a SwiftUI view.
(15:18) Original AppKit controls have their own properties and delegates.
class ScriptEditorView: NSView {
    var sourceCode: String
    var isEditable: Bool
    weak var delegate: ScriptEditorViewDelegate?
}

protocol ScriptEditorViewDelegate: AnyObject {
    func sourceCodeDidChange(in view: ScriptEditorView) -> Void
}
Key points:
ScriptEditorViewInherited fromNSView, indicating that it is an existing AppKit control.sourceCodeSave editor text.isEditableControls whether editing is allowed.delegateResponsible for notifying AppKit side changes.sourceCodeDidChangeCalled when the source code changes.
(15:40) The SwiftUI container puts the source code status in@State, the Compile button reads the same status.
struct ScriptEditorContainerView: View {
    @State var sourceCode: String = ""

    var body: some View {
        VStack {
            CompileButton { compile(code: sourceCode) }
            Divider()
            ScriptEditorRepresentable(sourceCode: $sourceCode)
        }
    }
}
Key points:
@State var sourceCodeIs a single source of state on the SwiftUI side.CompileButtonThe handler uses the currentsourceCodeCompile the code.Divider()Separate button and editor.ScriptEditorRepresentable(sourceCode: $sourceCode)Pass the binding into the AppKit wrapper.
(16:13)NSViewRepresentableResponsible for creating, updating, and coordinating AppKit views.The coordinator receives the delegate callback and writes back the SwiftUI binding.
struct ScriptEditorRepresentable: NSViewRepresentable {
    @Binding var sourceCode: String

    func makeNSView(context: Context) -> ScriptEditorView {
        let scriptEditor = ScriptEditorView(frame: .zero)
        scriptEditor.delegate = context.coordinator
        return scriptEditor
    }

    func updateNSView(_ nsView: ScriptEditorView, context: Context) {
        if sourceCode != scriptEditor.sourceCode {
            scriptEditor.sourceCode = sourceCode
        }
        scriptEditor.isEditable = context.environment.isEnabled
        // Make sure coordinator has a reference to the current value
        // of the binding:
        context.coordinator.representable = self
    }

    func makeCoordinator() -> Coordinator {
        Coordinator(representable: self)
    }
}

class Coordinator: NSObject, ScriptEditorViewDelegate {
    var representable: ScriptEditorRepresentable

    init(representable: ScriptEditorRepresentable) { ... }

    func sourceCodeDidChange(in view: ScriptEditorView) {
        representable.sourceCode = view.sourceCode
    }
}
Key points:
@Binding var sourceCodeLet the wrapper read and write SwiftUI container state.makeNSViewcreateScriptEditorView, suitable for one-time setup.scriptEditor.delegate = context.coordinatorHand off AppKit delegate events to the coordinator.updateNSViewCalled when SwiftUI state or environment changes.if sourceCode != scriptEditor.sourceCodeAvoid setting properties repeatedly because setting the source code triggers extra work.context.environment.isEnabledMaps to AppKitisEditable。context.coordinator.representable = selfKeep the binding in coordinator to the latest value.sourceCodeDidChangeWrite AppKit editing results back to SwiftUI.
In the official clipupdateNSViewThe parameter name isnsView, appeared in the conditionscriptEditor.The original text of the video clip is retained here; in actual projects, the AppKit view instance obtained by the current method should be used.
Core Takeaways
-
Make a hybrid Mac sidebar: Keep the AppKit window and split view, and only change the sidebar to SwiftUI
List.Why it’s worth doing: The navigation structure is often best migrated first because it has clear boundaries.How to start: UseNSHostingController(rootView:)Wrap the SwiftUI sidebar and put the shared selection state insideObservableObject。 -
Migrate complex cells to SwiftUI: in
NSCollectionViewItemorNSTableCellViewFor internal useNSHostingViewDisplay the card interface.Why it’s worth doing: Writing card layouts in SwiftUI is more straightforward, and AppKit is still responsible for high-performance list containers.How to start: cache one per cellNSHostingView, only replace therootView。 -
Connect Mac menu commands to SwiftUI editor: Make SwiftUI editor respond to select all, arrow keys, Escape and custom menu items.Why it’s worth it: Mac users expect menu bars and keyboard shortcuts to be available.How to start: Add interactive views
.focusable(), then use.onCommand、.onMoveCommand、.onExitCommandReceive commands. -
Put existing AppKit controls into SwiftUI pages: Keep script editors, image editors, complex text controls, etc. mature
NSView.Why it’s worth doing: Some controls have had behaviors and delegate ecosystems for many years, and the risk of rewriting is high.How to get started: CreateNSViewRepresentable,usemakeNSViewTo initialize, useupdateNSViewTo synchronize state and environment, use coordinator to connect delegate.
Related Sessions
- Use SwiftUI with UIKit — The same talk about hybrid UI framework, but the object is replaced by UIKit, suitable for comparison
UIHostingControllerand cell integration methods. - Bring your iOS app to the Mac — Introducing the path to bringing your iOS app to the Mac, which can be read in conjunction with the AppKit/SwiftUI hybrid migration strategy.
- The SwiftUI cookbook for navigation — Talk about SwiftUI’s navigation model, suitable for supplementing understanding of sidebars, columns, and navigation states.
- Compose custom layouts with SwiftUI — Talk about SwiftUI layout capabilities, suitable for in-depth understanding of managed view size and layout behavior.
Comments
GitHub Issues · utterances