
Highlight
Sara Frederixon from the Health app team explains from first-hand experience how to gradually introduce SwiftUI into an existing UIKit app.Session covers four aspects: updating UIHostingController, connecting SwiftUI views with existing data sources, using SwiftUI to build Collection View and Table View cells, and data flow management when mixed.
Core Content
Many iOS apps have been written in UIKit for years.Data model, view controller, collection view, table view are all working.When the team wants to use SwiftUI to write a new interface, the biggest fear is that the migration scope will get out of control: for a new cell, the entire page structure will be affected.
The Health app also suffers from this problem.It has a lot of health data visualizations, and the UIKit code already hosts the existing models and navigation.Sara Frederixon explained at the beginning that the goal of this session is to put SwiftUI into existing UIKit applications without requiring rewriting the application structure (00:18).
The path given by Apple is divided into three steps: useUIHostingControllerUse SwiftUI views as view controllers; useObservableObjectBridge the existing data on the UIKit side to SwiftUI; use the new one in iOS 16UIHostingConfigurationWrite SwiftUI directly in the collection view and table view cell (00:50).
Detailed Content
UIHostingController is still the entrance
UIHostingControllerIs a view hierarchy that contains SwiftUIUIViewController.It can appear anywhere in UIKit where a view controller is required, such as modal, popover, and child view controller (01:33).
// Presenting a UIHostingController

let heartRateView = HeartRateView() // a SwiftUI view
let hostingController = UIHostingController(rootView: heartRateView)

// Present the hosting controller modally
self.present(hostingController, animated: true)
Key points:
HeartRateView()is a SwiftUI view, UIKit does not need to know how it is laid out internally.UIHostingController(rootView:)Wrap SwiftUI views into UIKit view controllers.present(_:animated:)It is still a standard UIKit API, and the calling method has not changed.
If the page needs to be embedded instead of pop-up, you can add the hosting controller to the child view controller (02:31).
// Embedding a UIHostingController

let heartRateView = HeartRateView() // a SwiftUI view
let hostingController = UIHostingController(rootView: heartRateView)

// Add the hosting controller as a child view controller
self.addChild(hostingController)
self.view.addSubview(hostingController.view)
hostingController.didMove(toParent: self)

// Now position & size the hosting controller’s view as desired…
Key points:
addChild(_:)Connect the SwiftUI hosting controller to UIKit’s view controller hierarchy.addSubview(_:)It is only responsible for placing the hosting view into the current view.didMove(toParent:)Complete child view controller lifecycle notifications.- The last line reminds developers to continue using UIKit’s layout method to position and constrain this view.
iOS 16 givesUIHostingControlleraddedsizingOptions.When SwiftUI content changes, the hosting controller can automatically updatepreferredContentSizeOr the intrinsic content size of the view.Scenarios such as popover that rely on content size will directly benefit (02:43).
// Presenting UIHostingController as a popover

let heartRateView = HeartRateView() // a SwiftUI view
let hostingController = UIHostingController(rootView: heartRateView)

// Enable automatic preferredContentSize updates on the hosting controller
hostingController.sizingOptions = .preferredContentSize

hostingController.modalPresentationStyle = .popover
self.present(hostingController, animated: true)
Key points:
sizingOptions = .preferredContentSizeAsk the hosting controller to update the preferred content size based on SwiftUI content.modalPresentationStyle = .popoverLet UIKit present it as a popover.- After the SwiftUI content size is changed, the popover can continue to fit the content.
External data is first passed in by value, and then automatically updated using ObservableObject
Data in UIKit applications is usually held by existing model layers.The SwiftUI view is just a newly added interface layer, so@Stateand@StateObjectThis kind of data created and owned by SwiftUI doesn’t fit here.Session first gives the most direct method: pass the value to the SwiftUI view, and then manually update the hosting controller on the UIKit side.rootView(05:06)。
// Passing data to SwiftUI with manual UIHostingController updates

struct HeartRateView: View {
    var beatsPerMinute: Int

    var body: some View {
        Text("\(beatsPerMinute) BPM")
    }
}

class HeartRateViewController: UIViewController {
    let hostingController: UIHostingController< HeartRateView >
    var beatsPerMinute: Int {
        didSet { update() }
    }

    func update() {
        hostingController.rootView = HeartRateView(beatsPerMinute: beatsPerMinute)
    }
}
Key points:
HeartRateViewOnly receive oneInt, which itself does not own the data source.Text("\(beatsPerMinute) BPM")Generate the interface using the passed values.beatsPerMinuteSave in UIKit view controller.didSet { update() }Indicates that the refresh must be actively triggered after the data on the UIKit side changes.hostingController.rootView = ...Re-create the SwiftUI root view and send the latest values into it.
This method is simple, but it must be updated manually every time the data changes.session then recommends changing the existing model toObservableObject, mark the attributes that will change as@Published, and then let the SwiftUI view use@ObservedObjectRead it (06:49).
// Passing an ObservableObject to automatically update SwiftUI views

class HeartData: ObservableObject {
    @Published var beatsPerMinute: Int

    init(beatsPerMinute: Int) {
       self.beatsPerMinute = beatsPerMinute
    }
}

struct HeartRateView: View {
    @ObservedObject var data: HeartData

    var body: some View {
        Text("\(data.beatsPerMinute) BPM")
    }
}
Key points:
HeartData: ObservableObjectMake this external model observable to SwiftUI.@Published var beatsPerMinuteIs the attribute that triggers the refresh signal.@ObservedObject var dataConnect external models into SwiftUI views.Text("\(data.beatsPerMinute) BPM")Read model properties directly.- After the attribute changes, SwiftUI automatically refreshes the relevant view, and UIKit does not need to change it again.
rootView。
When initializing the UIKit view controller, you only need to save the same model and pass it to the SwiftUI view (08:30).
// Passing an ObservableObject to automatically update SwiftUI views

class HeartRateViewController: UIViewController {
    let data: HeartData
    let hostingController: UIHostingController<HeartRateView>

    init(data: HeartData) {
        self.data = data
        let heartRateView = HeartRateView(data: data)
        self.hostingController = UIHostingController(rootView: heartRateView)
    }
}
Key points:
datais the same one held by the UIKit sideHeartDataExample.HeartRateView(data: data)Give the model reference to SwiftUI.UIHostingController(rootView:)Only wrap SwiftUI views during initialization.- When subsequent heart rate samples change from 78 to 94,
@PublishedWill drive SwiftUI update interface (09:14).
UIHostingConfiguration Put SwiftUI into cell
New in iOS 16UIHostingConfiguration, it is a cell content configuration.The developer assigns it toUICollectionViewCellorUITableViewCellofcontentConfiguration, you can write SwiftUI directly in the cell.There is no need to embed additional views or view controllers here (09:52).
cell.contentConfiguration = UIHostingConfiguration {
  // Start writing SwiftUI here!
}
Key points:
contentConfigurationIt is the modern configuration entry point for UIKit cells.UIHostingConfiguration { ... }Receive SwiftUIViewBuilder。- Write SwiftUI view directly inside the curly braces.
The session uses the heart rate cell to show the migration benefits.The original complex custom cell layout can be split into several SwiftUI small views (11:02).
// Building a custom cell using SwiftUI with UIHostingConfiguration

cell.contentConfiguration = UIHostingConfiguration {
    HeartRateTitleView()
}

struct HeartRateTitleView: View {
    var body: some View {
        HStack {
            Label("Heart Rate", systemImage: "heart.fill")
                .foregroundStyle(.pink)
                .font(.system(.subheadline, weight: .bold))
            Spacer()
            Text(Date(), style: .time)
                .foregroundStyle(.secondary)
                .font(.footnote)
        }
    }
}
Key points:
HeartRateTitleView()be put inUIHostingConfiguration, becomes the cell content.Label("Heart Rate", systemImage:)Display title and system icon..foregroundStyle(.pink)and.font(...)Adjust styles using standard SwiftUI modifiers.Spacer()Push the title to the left and the time to the right.Text(Date(), style: .time)Display the current time using SwiftUI’s date text.
When continuing to expand, just combine in configurationVStack、HStackand other SwiftUI views.session also puts Swift ChartsChartPut it into cell and useLineMarkDisplay heart rate curve (13:25).
// Building a custom cell using SwiftUI with UIHostingConfiguration

cell.contentConfiguration = UIHostingConfiguration {
    VStack(alignment: .leading) {
        HeartRateTitleView()
        Spacer()
        HStack(alignment: .bottom) {
            HeartRateBPMView()
            Spacer()
            Chart(heartRateSamples) { sample in
                LineMark(x: .value("Time", sample.time),
                         y: .value("BPM", sample.beatsPerMinute))
                   .symbol(Circle().strokeBorder(lineWidth: 2))
                   .foregroundStyle(.pink)
            }
        }
    }
}
Key points:
VStack(alignment: .leading)Organize the vertical contents of a cell.HeartRateTitleView()Reuse the previously extracted title view.HeartRateBPMView()Displays current heart rate digits.Chart(heartRateSamples)Drive charts with sample collections.LineMarkMap each sample to two axes: time and BPM..symbol(...)and.foregroundStyle(.pink)Adjust polyline points and color.
Cell margins, background, sliding action and selected state
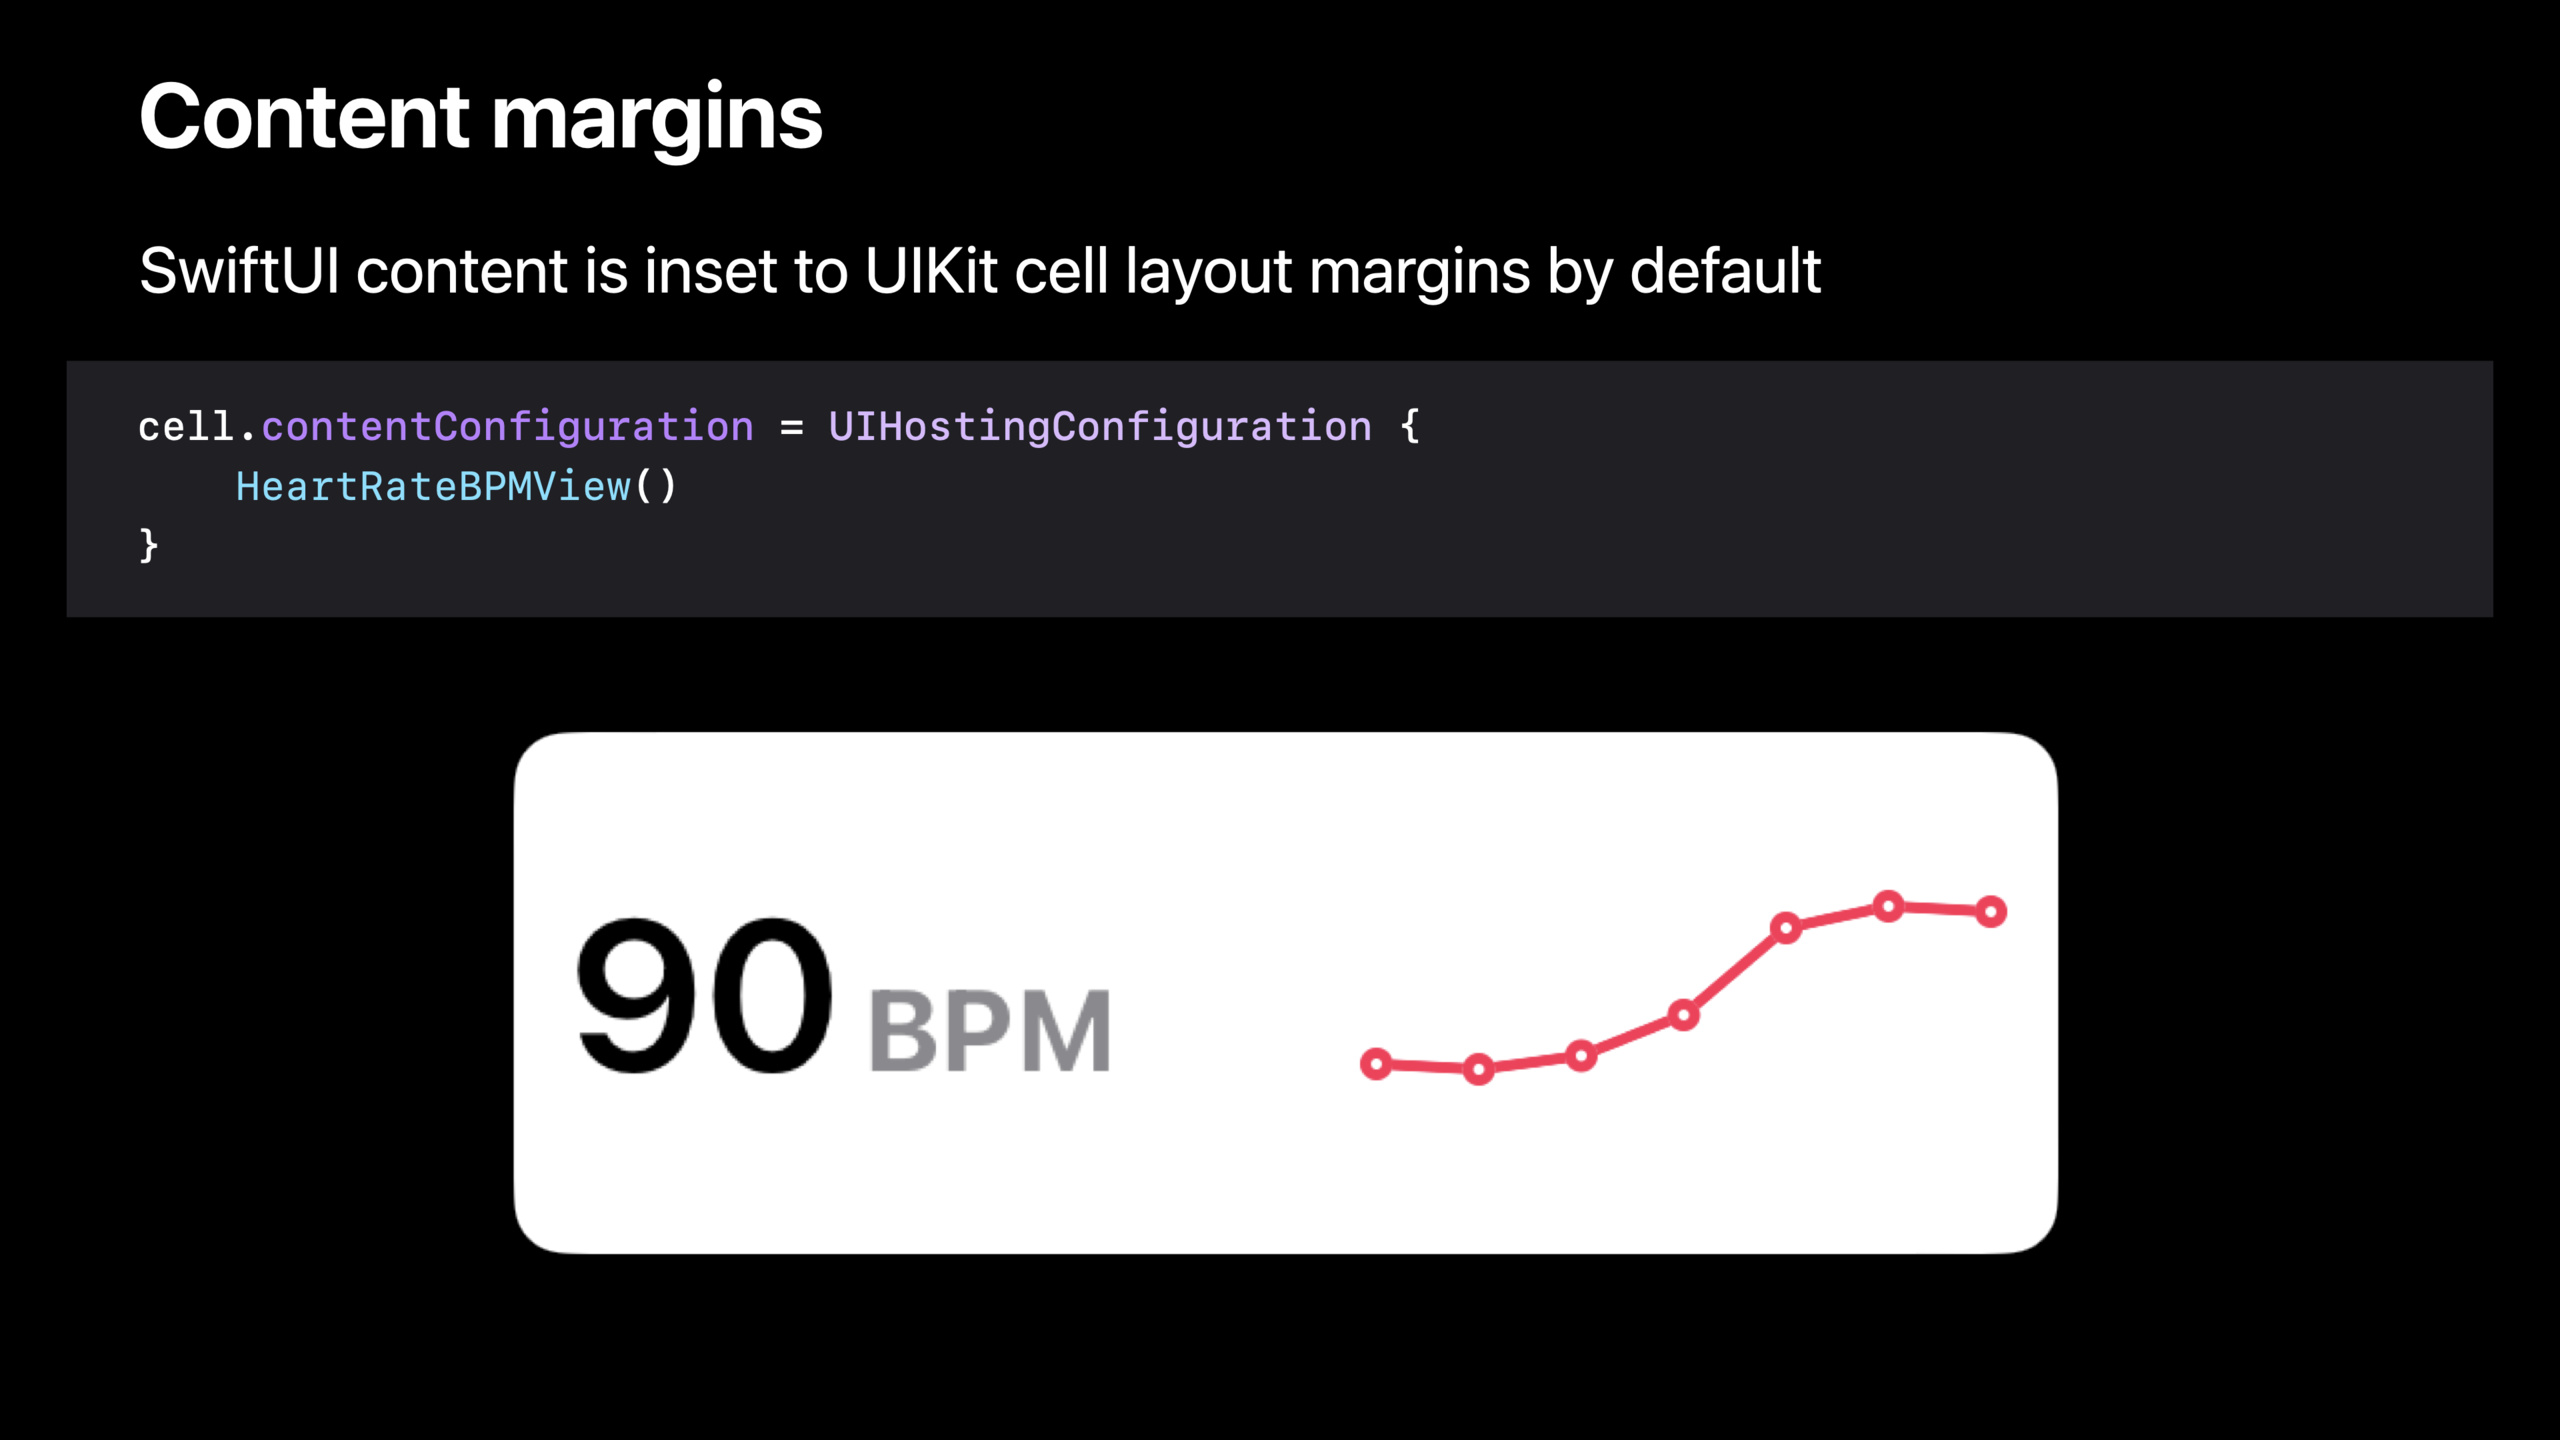
UIHostingConfigurationSupports common capabilities in several types of cell scenarios.By default, root SwiftUI content shrinks according to the UIKit cell’s layout margins.If you need to change the margin, you can add it after configuration.margins(14:37)。
cell.contentConfiguration = UIHostingConfiguration {
    HeartRateBPMView()
}
.margins(.horizontal, 16)
Key points:
HeartRateBPMView()Is the SwiftUI content of the cell..margins(.horizontal, 16)Overrides the default horizontal margins.- The object of this modifier is
UIHostingConfiguration, rather than a separate UIKit view.
The background can also be set directly using the SwiftUI modifier.The session indicates that the background is hosted on the back of the cell, and the background will extend to the edge of the cell; the size of the self-sizing cell is only determined by the content, and the background does not participate in determining the size (15:16).
cell.contentConfiguration = UIHostingConfiguration {
   HeartTitleView()
}
.background(.pink)
Key points:
HeartTitleView()is the foreground content..background(.pink)Set the configuration background.- The background is behind the SwiftUI content in the cell content view.
The swipe actions in the list can also be written directly on the SwiftUI view.Apple specifically reminds you to use the stable identifier of the item when the button performs the action, and do not use the index path; the index path may also change while the cell is visible (16:32).
cell.contentConfiguration = UIHostingConfiguration {
    MedicalConditionView()
        .swipeActions(edge: .trailing) { … }
}
Key points:
MedicalConditionView()Is the SwiftUI content of a medical condition cell..swipeActions(edge: .trailing)Show actions when swiping to the right of the list.{ … }Center buttons and business actions.- Business actions should be bound to stable item identifiers to avoid misoperation of other rows.
If the SwiftUI content wants to respond to the selected or highlighted state of the UIKit cell, it needs to beconfigurationUpdateHandlerRe-create the configuration and read the configuration provided by UIKitstate(17:25)。
// Incorporating UIKit cell states

cell.configurationUpdateHandler = { cell, state in
    cell.contentConfiguration = UIHostingConfiguration {
      HStack {
        HealthCategoryView()
            Spacer()
            if state.isSelected {
                Image(systemName: "checkmark")
            }
        }
    }
}
Key points:
configurationUpdateHandlerWill be run again when the cell state changes.stateContains UIKit cell states such as selection and highlighting.UIHostingConfigurationRebuild within the handler so SwiftUI content uses the latest state.if state.isSelectedShow checkmark only when selected.
diffable data source only changes the collection, ObservableObject is responsible for refreshing within the cell
When a collection view or table view cell is built with SwiftUI, the data flow is handled in two categories.The first category is collection changes, such as insertion, deletion, and rearrangement; continue to use diffable data source snapshot processing.Each snapshot should be placed inMedicalConditionunique identifier, rather than the model object itself, so that the diffable data source can accurately calculate the identity (18:41).
The second category is attribute changes of a single model.Traditional UIKit methods usually require reconfigure or reload the items in the snapshot.When using SwiftUI cell, you can make the model asObservableObject, let the SwiftUI view use@ObservedObjectObserve it.@PublishedAfter the attribute changes, the SwiftUI view in the cell will be refreshed directly without going through the diffable data source or collection view first (20:35).
iOS 16 also fixes the size issue.UIHostingConfigurationUtilize UIKit’s new self-resizing cells: after the content of a SwiftUI cell changes, the cells containing itUICollectionViewCellorUITableViewCellThe size will be automatically adjusted when needed. This capability is enabled by default (21:44).
Finally, SwiftUI can also write data back to the model.For sessionMedicalConditionExample: model isObservableObject,textyes@Published.SwiftUI view can create a two-way binding for this published attribute, and the user can directly write it back to the model after editing (22:48).
// Creating a two-way binding to data in SwiftUI

class MedicalCondition: Identifiable, ObservableObject {
    let id: UUID

    @Published var text: String
}

struct MedicalConditionView: View {
    @ObservedObject var condition: MedicalCondition

    var body: some View {
        HStack {

            Spacer()
        }
    }
}
Key points:
MedicalCondition: IdentifiableProvides a stable identity that a diffable data source can use.ObservableObjectMake this model observable by SwiftUI.@Published var textIt is a property that can be read by SwiftUI and refresh the interface.@ObservedObject var conditionConnect the model corresponding to the cell to the SwiftUI view.- Verbatim description, turn read-only
TextChange toTextField, and givecondition.textadd$prefix, you can create a binding that writes back to the model (23:47).
Boundary between two bearer modes
The end of the session provides an easy-to-step boundary.UIHostingControllerIt is a view controller. When using it, the view controller and its view must be added to the UIKit hierarchy.Toolbars, Keyboard Shortcuts, UsageUIViewControllerRepresentableSwiftUI views all rely on UIKit view controller hierarchy (24:33).
UIHostingConfigurationis used for cell, it does not createUIViewController.It supports most SwiftUI features but relies onUIViewControllerRepresentableThe SwiftUI view cannot be placed in a cell (25:01).
Core Takeaways
-
What to do: Change a complex UIKit custom cell to
UIHostingConfiguration。 Why it’s worth doing: The internal layout of the cell can be split into SwiftUI small views, making it easier to combine styles, charts, and status displays. How to start: Keep the existing collection view or table view, and only replace the cell’scontentConfiguration。 -
What to do: Change a partial card in an existing UIKit details page to SwiftUI. Why it’s worth doing:
UIHostingControllerCan be embedded as a child view controller without requiring the entire page to be replaced. How to get started: Create a SwiftUI card view usingUIHostingController(rootView:)carry, passaddChildConnect to an existing view controller. -
What: Let changes to the UIKit model automatically drive SwiftUI partial interface refresh. Why it’s worth doing: Manual change
rootVieweasy to miss,ObservableObjectand@PublishedAbility to bind refreshes to data changes. How to start: Conform the existing model toObservableObject, used in SwiftUI view@ObservedObjectSave it. -
What to do: Add SwiftUI swipe actions to the list cell. Why it’s worth doing: List interactions continue to be managed by UIKit, and inline actions can be written close to the content using SwiftUI modifiers. How to start: In
UIHostingConfigurationAdd on the root SwiftUI view.swipeActions, use the stable ID of the item in the action. -
What to do: Establish a two-way data flow for editable cells. Why it’s worth doing: Users in SwiftUI
TextFieldAfter inputting, you can directly write back the model object that is still used on the UIKit side. How to start: Let the editable fields of the model use@Published, passed in SwiftUI$condition.textpassed to the input control.
Related Sessions
- What’s new in SwiftUI — Learn about the overall updates to SwiftUI in iOS 16, including Swift Charts, layouts, and app structure.
- Compose custom layouts with SwiftUI — In-depth SwiftUI layout capabilities, suitable as a supplement for rewriting complex cell internal layouts.
- What’s new in UIKit — Learn about the iOS 16 UIKit update that includes background on self-resizing cells.
- Build a desktop-class iPad app — Continue building complex iPad apps using UIKit collection views, menus, and navigation APIs.
Comments
GitHub Issues · utterances