
Highlight
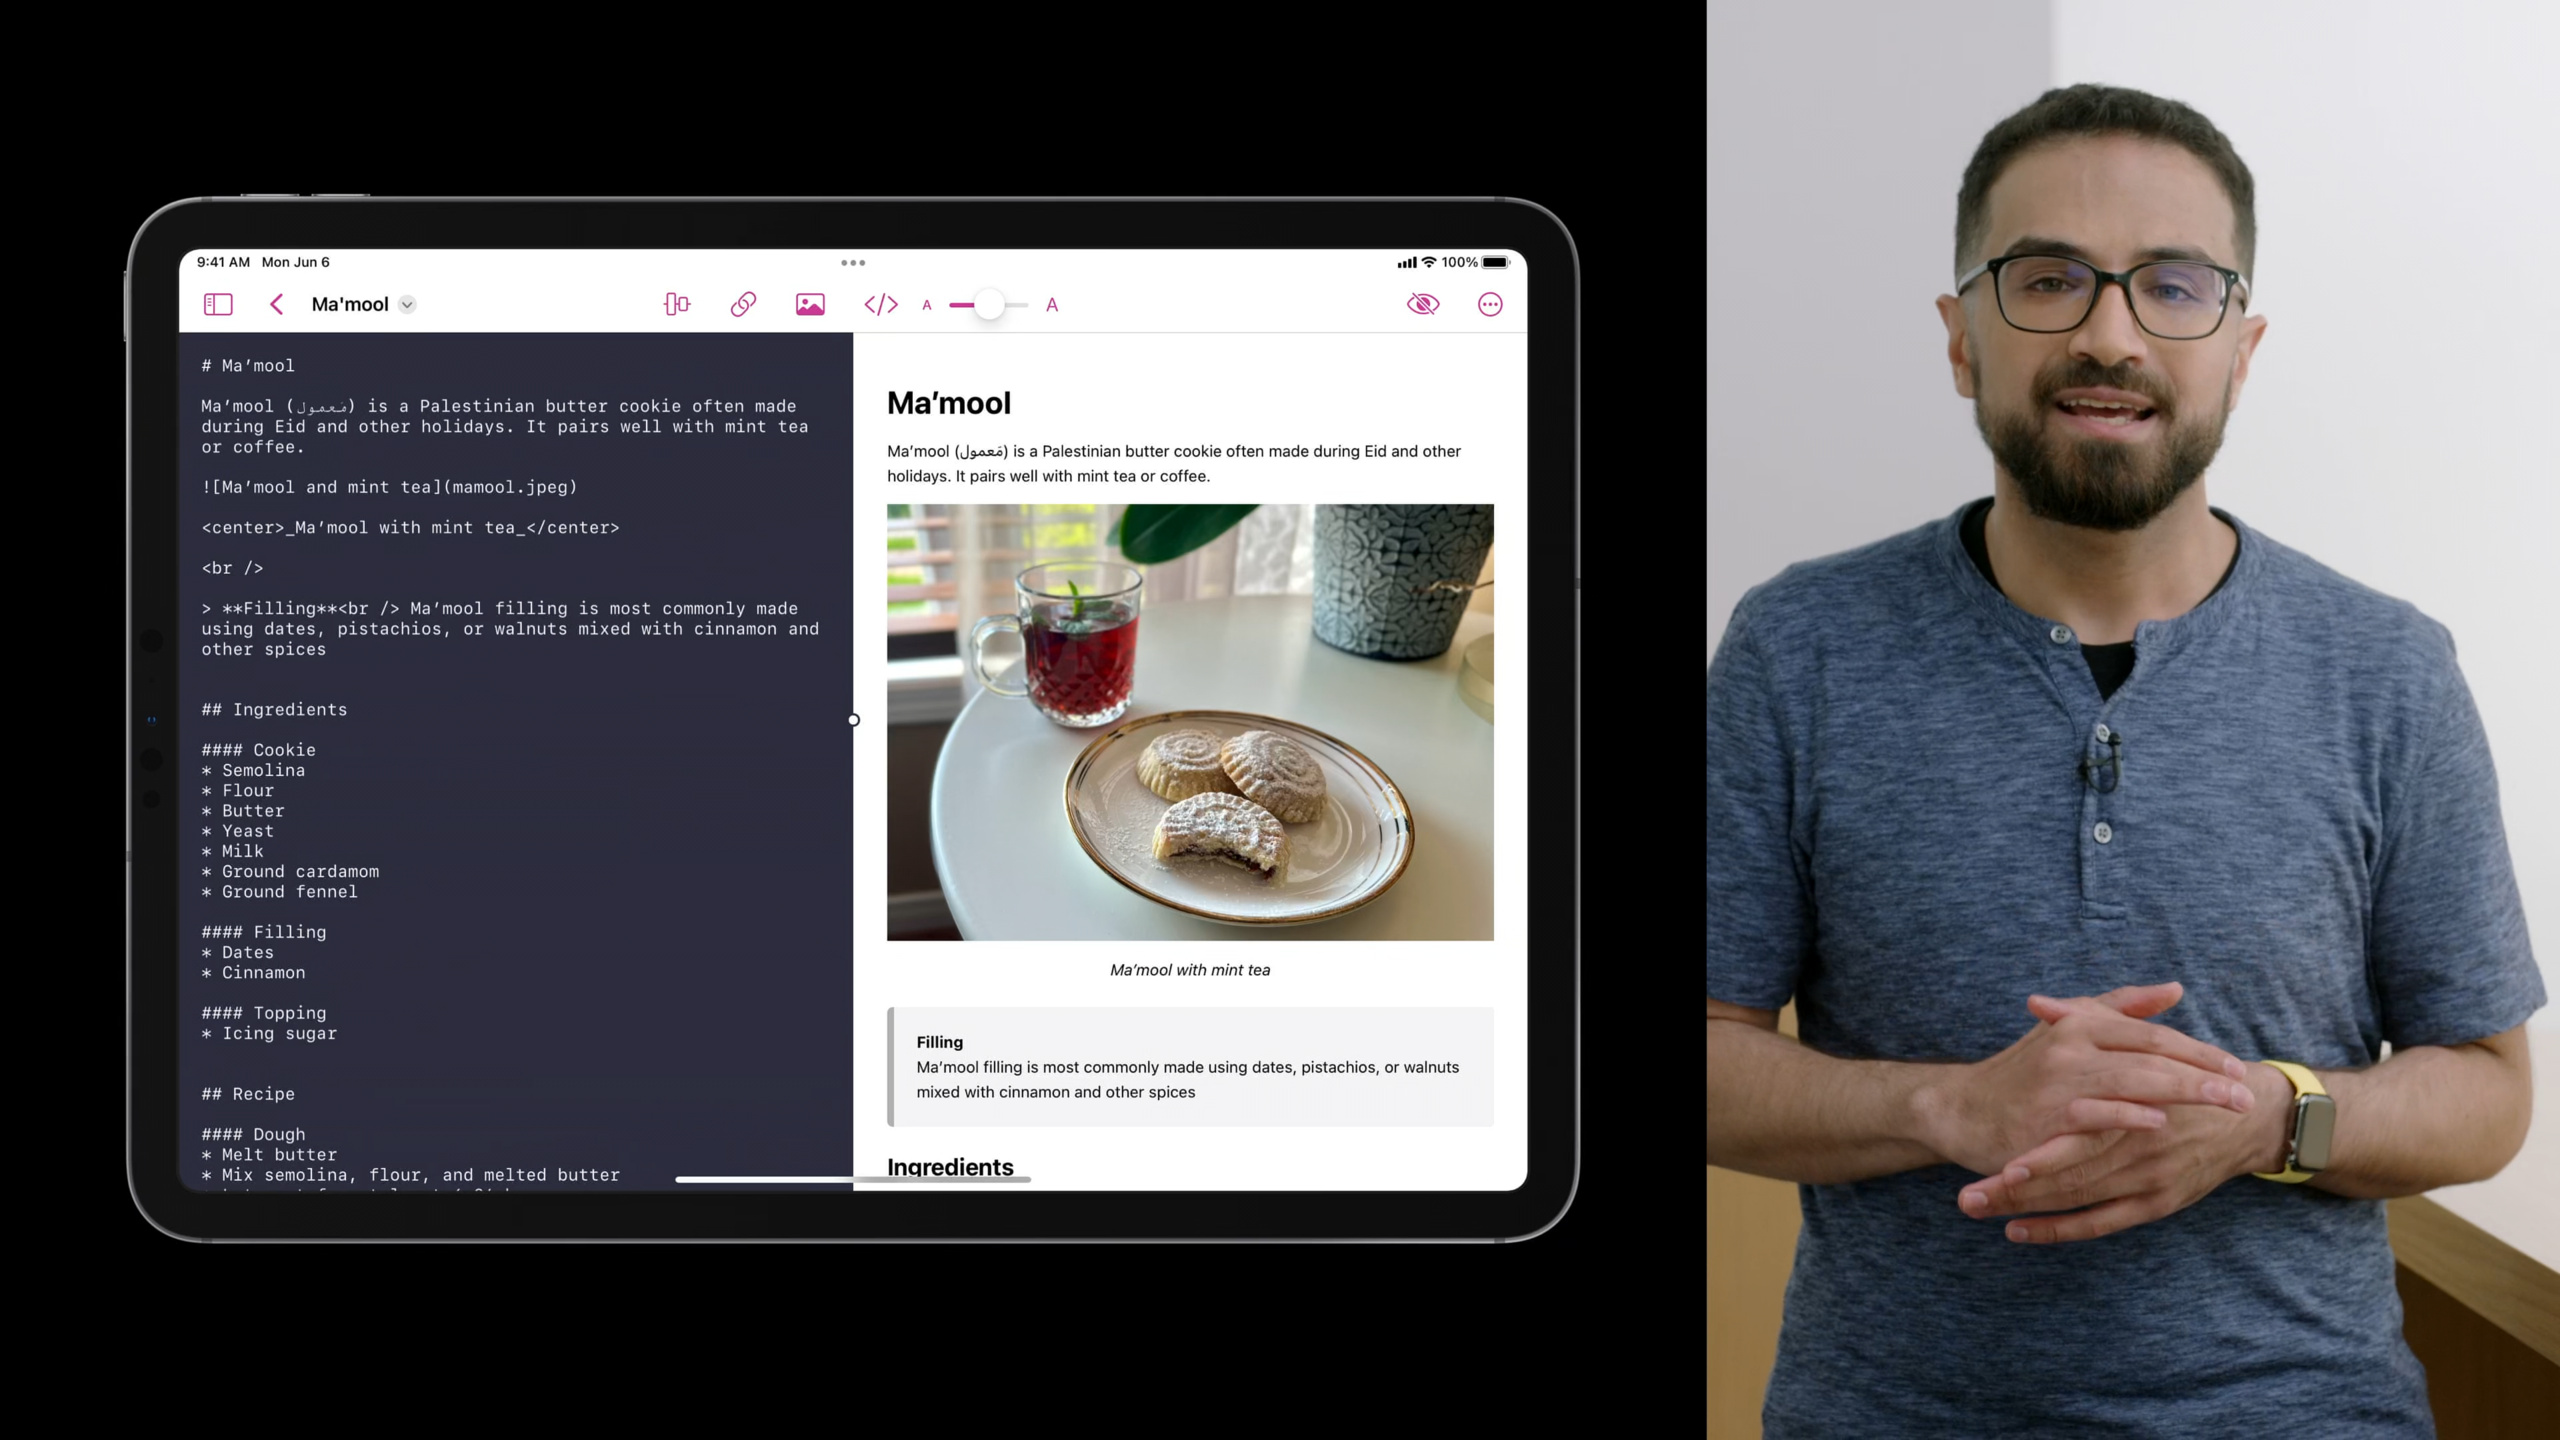
This Session uses a Markdown editor as an example to fully demonstrate how to upgrade an iPadOS 15 App to a desktop-level experience. The core changes focus on three areas: navigation bar, multi-select interaction, and text editing.
Core Content
This demo starts with an iPadOS 15 Markdown editor. This app has placed commonly used buttons in the navigation bar, and secondary functions in menus and pop-up windows. The problem is that when users connect a keyboard, trackpad, or run an app to Mac Catalyst, they expect denser, more customizable, and more direct operations.
Apple has added several sets of desktop-level APIs to UIKit in iPadOS 16: navigation bar styles, title menus, customizable center tool items, multi-select menus, find and replace, and edit menus. The route of the demonstration is very clear: first move the document operations to the navigation bar, then make the toolbar customizable, then make the sidebar support lightweight multi-selection, and finally enhance text editing.
This is not a visual reskin. Each step has corresponding interaction problems: document information is hidden too deep, batch processing requires entering edit mode, text search must be done by yourself, and the menus on Mac Catalyst must also adapt to system habits. UIKit’s new API unpacks these issues.
Detailed Content
Select editor navigation style
(03:34) iPadOS 16 divides the navigation bar style into Navigator, Browser and Editor. Navigator is suitable for hierarchical data, Browser is suitable for file and document browsing, and Editor is suitable for focusing on viewing or editing a single document. This Markdown editor is editing a single document, so select Editor.
navigationItem.style = .editorKey points:
navigationItemIs the navigation item of the current view controller. -styleControls which desktop-level layout the navigation bar adopts. -.editorThe title will be placed to the left and the middle area of the navigation bar will be released, and tool items can be placed behind it.
(03:52) The original trailing Done button can be changed to a standard return action. For use in demonstrationsbackActionExpresses the behavior of “returning to the document selector”.
navigationItem.backAction = UIAction(…)Key points:
backActionDefine the action triggered by the navigation bar return button. -UIActionWrapping the logic of dismiss or returning to the document browsing interface.- This allows the return entry to use the system’s standard appearance instead of having an extra Done button.
Use the title menu to carry document information and document operations
(04:48) The title menu opens from the navigation bar title and is suitable for document metadata and operations that affect the entire document. The example app isUIDocumentbacked, so it can be obtained fromfileURLcreateUIDocumentProperties。
let properties = UIDocumentProperties(url: document.fileURL)

if let itemProvider = NSItemProvider(contentsOf: document.fileURL) {
    properties.dragItemsProvider = { _ in
        [UIDragItem(itemProvider: itemProvider)]
    }
    properties.activityViewControllerProvider = {
        UIActivityViewController(activityItems: [itemProvider], applicationActivities: nil)
    }
}

navigationItem.documentProperties = properties
Key points:
UIDocumentProperties(url:)Create the document header information for the title menu using the document URL. -NSItemProvider(contentsOf:)Create draggable, shareable data providers for the same file URL. -dragItemsProviderreturnUIDragItem, users can drag the document icon in the title menu to copy the document outside the app. -activityViewControllerProviderreturnUIActivityViewController, the share button in the title menu will open the system sharing interface. -navigationItem.documentPropertiesConnect this set of document information to the navigation bar title menu.
(06:36) Renaming is also part of the title menu. The system provides a built-in rename UI, but the actual modification of the data model is still done by the app.
override func viewDidLoad() {
    navigationItem.renameDelegate = self
}

func navigationItem(_ navigationItem: UINavigationItem, didEndRenamingWith title: String) {
    // Rename document using methods appropriate to the app’s data model
}
Key points:
- exist
viewDidLoad()Set the current object torenameDelegate. - After setting up the proxy, the Rename action provided by the system can appear in the title menu.
-
didEndRenamingWith titleCalled after the user submits a new title. - The renaming logic in comments should be connected to the app’s own data model or file system operations.
(07:09) The title menu has two types of actions: system suggested actions and app custom actions. System actions have localized titles and SF Symbols icons; custom actions are suitable for business functions such as Export.
override func duplicate(_ sender: Any?) {
    // Duplicate document
}

override func move(_ sender: Any?) {
    // Move document
}

func didOpenDocument() {
    ...
    navigationItem.titleMenuProvider = { [unowned self] suggested in
        var children = suggested

        ...

        return UIMenu(children: children)
    }
}
Key points:
duplicate(_:)andmove(_:)It is the method corresponding to the system action.- UIKit will put available system actions into
titleMenuProviderofsuggestedparameter. -children = suggestedKeep system suggestions. - return
UIMenu(children:)Afterwards, the title menu will display these actions.
func didOpenDocument() {
    ...
    navigationItem.titleMenuProvider = { [unowned self] suggested in
        var children = suggested
        children += [
            UIMenu(title: "Export…",
                   image: UIImage(systemName: "arrow.up.forward.square"),
                   children: [
                UIAction(title: "HTML", image: UIImage(systemName: "safari")) { ... },
                UIAction(title: "PDF", image: UIImage(systemName: "doc")) { ... }
            ])
        ]
        return UIMenu(children: children)
    }
}
Key points:
children += [...]Add a custom menu after the system suggestions. -UIMenu(title:image:children:)Create the Export submenu.- two
UIActionRepresents exporting HTML and PDF respectively. - Demonstration highlights:
titleMenuProviderIt will not be called on Mac Catalyst, custom actions must be added manuallymain UIMenuSystemOnly then will you enter the Mac’s File menu.
Put commonly used tools into a customizable central area
(09:35) The Editor style frees up the middle area of the navigation bar. This area is suitable for tools originally hidden in the menu, such as synchronous scrolling, inserting links, and formatting text. To enable user customization, first givenavigationItemA persistent identifier.
navigationItem.customizationIdentifier = "editorView"Key points:
customizationIdentifierEnable the customization ability of the navigation bar center item.- The string needs to be stable and is used by the system to save the user’s toolbar configuration.
- Different interfaces in the same app should use different identifiers to avoid configuration overwriting each other.
(10:00) Functions that cannot be absent are suitable for fixed grouping. The Sync Scrolling in the example has no other entries, so it is set to fixed group.
UIBarButtonItem(title: "Sync Scrolling", ...).creatingFixedGroup()Key points:
UIBarButtonItemCreate a single tool button. -creatingFixedGroup()Wrap the button as fixedUIBarButtonItemGroup.- Fixed groups cannot be removed or moved by the user.
(10:23) Replaceable, non-critical functionality fits into the optional group. Add Link can be done by handwriting Markdown links, so put in customizable items.
UIBarButtonItem(title: "Add Link", ...).creatingOptionalGroup(customizationIdentifier: "addLink")Key points:
creatingOptionalGroupCreate user-movable, removable tool items. -customizationIdentifier: "addLink"Used to persist the custom state of this button.- Such buttons can be displayed by default or removed from the toolbar by the user.
(10:56) Low priority tools can appear in custom panels, but are not displayed by default. The Format group in the example contains Bold, Italics, Underline.
UIBarButtonItemGroup.optionalGroup(customizationIdentifier: "textFormat",
                                   isInDefaultCustomization: false,
                                   representativeItem: UIBarButtonItem(title: "Format", ...)
                                   items: [
                                        UIBarButtonItem(title: "Bold", ...),
                                        UIBarButtonItem(title: "Italics", ...),
                                        UIBarButtonItem(title: "Underline", ...),
                                   ])
Key points:
optionalGroupCreate an optional button group directly. -isInDefaultCustomization: falseIndicates that it is not displayed in the default toolbar. -representativeItemProvide delegate buttons for custom panels and compact states. -itemsIt is the button within the group that actually performs the action.
(13:16) When there is insufficient space in the navigation bar, UIKit will put the center items that cannot be placed into the overflow menu. Ordinary buttons can be automatically converted into menu representations, but buttons with custom views need to provide their own menu representations.
sliderGroup.menuRepresentation = UIMenu(title: "Text Size",
                                        preferredElementSize: .small,
                                        children: [
    UIAction(title: "Decrease",
             image: UIImage(systemName: "minus.magnifyingglass"),
             attributes: .keepsMenuPresented) { ... },
    UIAction(title: "Reset",
             image: UIImage(systemName: "1.magnifyingglass"),
             attributes: .keepsMenuPresented) { ... },
    UIAction(title: "Increase",
             image: UIImage(systemName: "plus.magnifyingglass"),
             attributes: .keepsMenuPresented) { ... },
])
Key points:
menuRepresentationSpecifies how the button group will be displayed after entering the overflow menu. -UIMenu(title:preferredElementSize:children:)Create a compact menu. -.smallMake menu items on iPad appear in a more compact landscape format. -.keepsMenuPresentedLet the menu not be closed after Decrease, Reset, and Increase are executed, and the user can continuously adjust the text size.
Use lightweight multi-select to replace edit mode
(15:10) The sidebar of the example app is a directory listing. Before iOS 16, batch editing usually required entering a separate edit mode and then placing the batch operation in the toolbar. iPadOS 16’s multi-select menus are better suited for desktop-level interaction: users directly make multiple selections, and then open the menu on the selected items.
// Enable multiple selection
collectionView.allowsMultipleSelection = true

// Enable keyboard focus
collectionView.allowsFocus = true

// Allow keyboard focus to drive selection
collectionView.selectionFollowsFocus = true
Key points:
allowsMultipleSelection = trueAllows a collection view to select multiple items at the same time. -allowsFocus = trueGive keyboard focus to the collection view. -selectionFollowsFocus = trueAllows keyboard focus to drive selection, suitable for external keyboard scenarios.
(16:11) After turning on multi-selection, the olddidSelectItemAtIndexPathWill fire on each selection, causing the editor to scroll to the corresponding title. The solution is to move the “jump to title” logic into the new primary action method.
func collectionView(_ collectionView: UICollectionView,
                    performPrimaryActionForItemAt indexPath: IndexPath) {

    // Scroll to the tapped element
    if let element = dataSource.itemIdentifier(for: indexPath) {
        delegate?.outline(self, didChoose: element)
    }
}
Key points:
performPrimaryActionForItemAtOnly handle the user’s main operation on a single item. -dataSource.itemIdentifier(for:)Find the corresponding directory element from index path. -delegate?.outline(self, didChoose:)Execute the business logic of scrolling to the corresponding content.- This jump logic will no longer be triggered when multiple items are selected.
(16:56) iPadOS 16 replaces the old single-item context menu method with a new multi-item menu method. in method parametersindexPathsQuantity determines menu type.
func collectionView(_ collectionView: UICollectionView,
                      contextMenuConfigurationForItemsAt indexPaths: [IndexPath],
                      point: CGPoint) -> UIContextMenuConfiguration? {

    if indexPaths.count == 0 {
        // Construct an empty space menu
    }
    else if indexPaths.count == 1 {
        // Construct a single item menu
    }
    else {
        // Construct a multi-item menu
    }
}
Key points:
indexPaths.count == 0Indicates that the user opens the menu in a blank area. -indexPaths.count == 1Indicates that the menu operates on a single item. -indexPaths.count > 1Indicates that the menu operates on multiple selected items.- The same delegate method covers three menu entries: blank area, single item, and multiple items.
Turn on the system find and replace and text editing menus
(18:12) Sample app usesUITextViewAs an editor, there is no need to customize the search and replace behavior. The system default search and replace only requires opening one attribute.
textView.isFindInteractionEnabled = trueKey points:
textViewIt is the Markdown text editing area. -isFindInteractionEnabled = trueTurn on the system Find and Replace experience.- Once set, users can open the Find and Replace UI by pressing Command-F while editing text.
(18:34) If the app needs to add business actions to the text editing menu, it can implement a newUITextViewDelegatemethod. The example adds a Hide action when the user selects text.
func textView(_ textView: UITextView,
              editMenuForTextIn range: NSRange,
              suggestedActions: [UIMenuElement]) -> UIMenu? {

    if textView.selectedRange.length > 0 {
        let customActions = [ UIAction(title: "Hide", ... ) { ... } ]
        return UIMenu(children: customActions + suggestedActions)
    }

    return nil
}
Key points:
editMenuForTextIn rangeCalled when the system is preparing to display the text editing menu. -suggestedActionsThese are menu items such as copy and paste recommended by the system. -selectedRange.length > 0Ensure that Hide is added only when the user selects the text. -customActions + suggestedActionsPut custom actions before system actions.- return
nil, the system uses the default edit menu.
Core Takeaways
-
What to do: Add a title menu to a document app
- Why it’s worth doing: The title menu can simultaneously carry document information, drag and drop, share, rename, copy and move, and is suitable for document editors, notes, and drawing tools.
- How to start: From
UIDocumentProperties(url:)start, putnavigationItem.documentPropertiesRetrieve an existing document URL; reuserenameDelegateAccess rename.
-
What to do: Move hidden tools to the center of the customizable navigation bar
- Why it’s worth doing: Users can leave high-frequency operations in the toolbar and move low-frequency operations to custom panels or overflow menus.
- How to start: Set up first
navigationItem.style = .editorandcustomizationIdentifier, and then put the existingUIBarButtonItemDivided into fixed group, optional group and non-default optional group.
-
What to do: Change sidebar batch operations into lightweight multi-select menus
- Why it’s worth doing: Users can perform batch operations on multiple directory items, files, tags or tasks without entering edit mode.
- How to start: Enable
allowsMultipleSelection、allowsFocus、selectionFollowsFocus, migrate the click jump logic tocollectionView(_:performPrimaryActionForItemAt:)。
-
What to do: Add system find and replace to the text editor
- Why it’s worth doing: Command-F is muscle memory for desktop users, and system Find and Replace can directly override normal
UITextViewscene. - How to start: Set up first
textView.isFindInteractionEnabled = true; If you need to customize the search experience, continue researchingUIFindInteraction。
- Why it’s worth doing: Command-F is muscle memory for desktop users, and system Find and Replace can directly override normal
-
What to do: Check the Mac Catalyst menu mapping
- Why it’s worth doing: System title menu actions will enter the Mac’s File menu, custom title menu actions will not automatically enter and need to be processed separately.
- How to start: Connect system actions such as duplicate, move, and rename first; then pass custom actions such as Export.
main UIMenuSystemAdd to Mac menu.
Related Sessions
- Meet desktop-class iPad — This is an overview of desktop-class iPad APIs. This article is a practical application of these APIs to the Markdown editor.
- Adopt desktop-class editing interactions — An in-depth explanation of the Find interaction and Edit Menu mentioned at the end of this article.
- Use SwiftUI with UIKit — If your existing app is based on UIKit architecture, but you want to gradually introduce SwiftUI, you can continue to watch this article.
- Bring multiple windows to your SwiftUI app — Complete the structural design of desktop apps from the perspective of SwiftUI and window management.
Comments
GitHub Issues · utterances