
Highlight
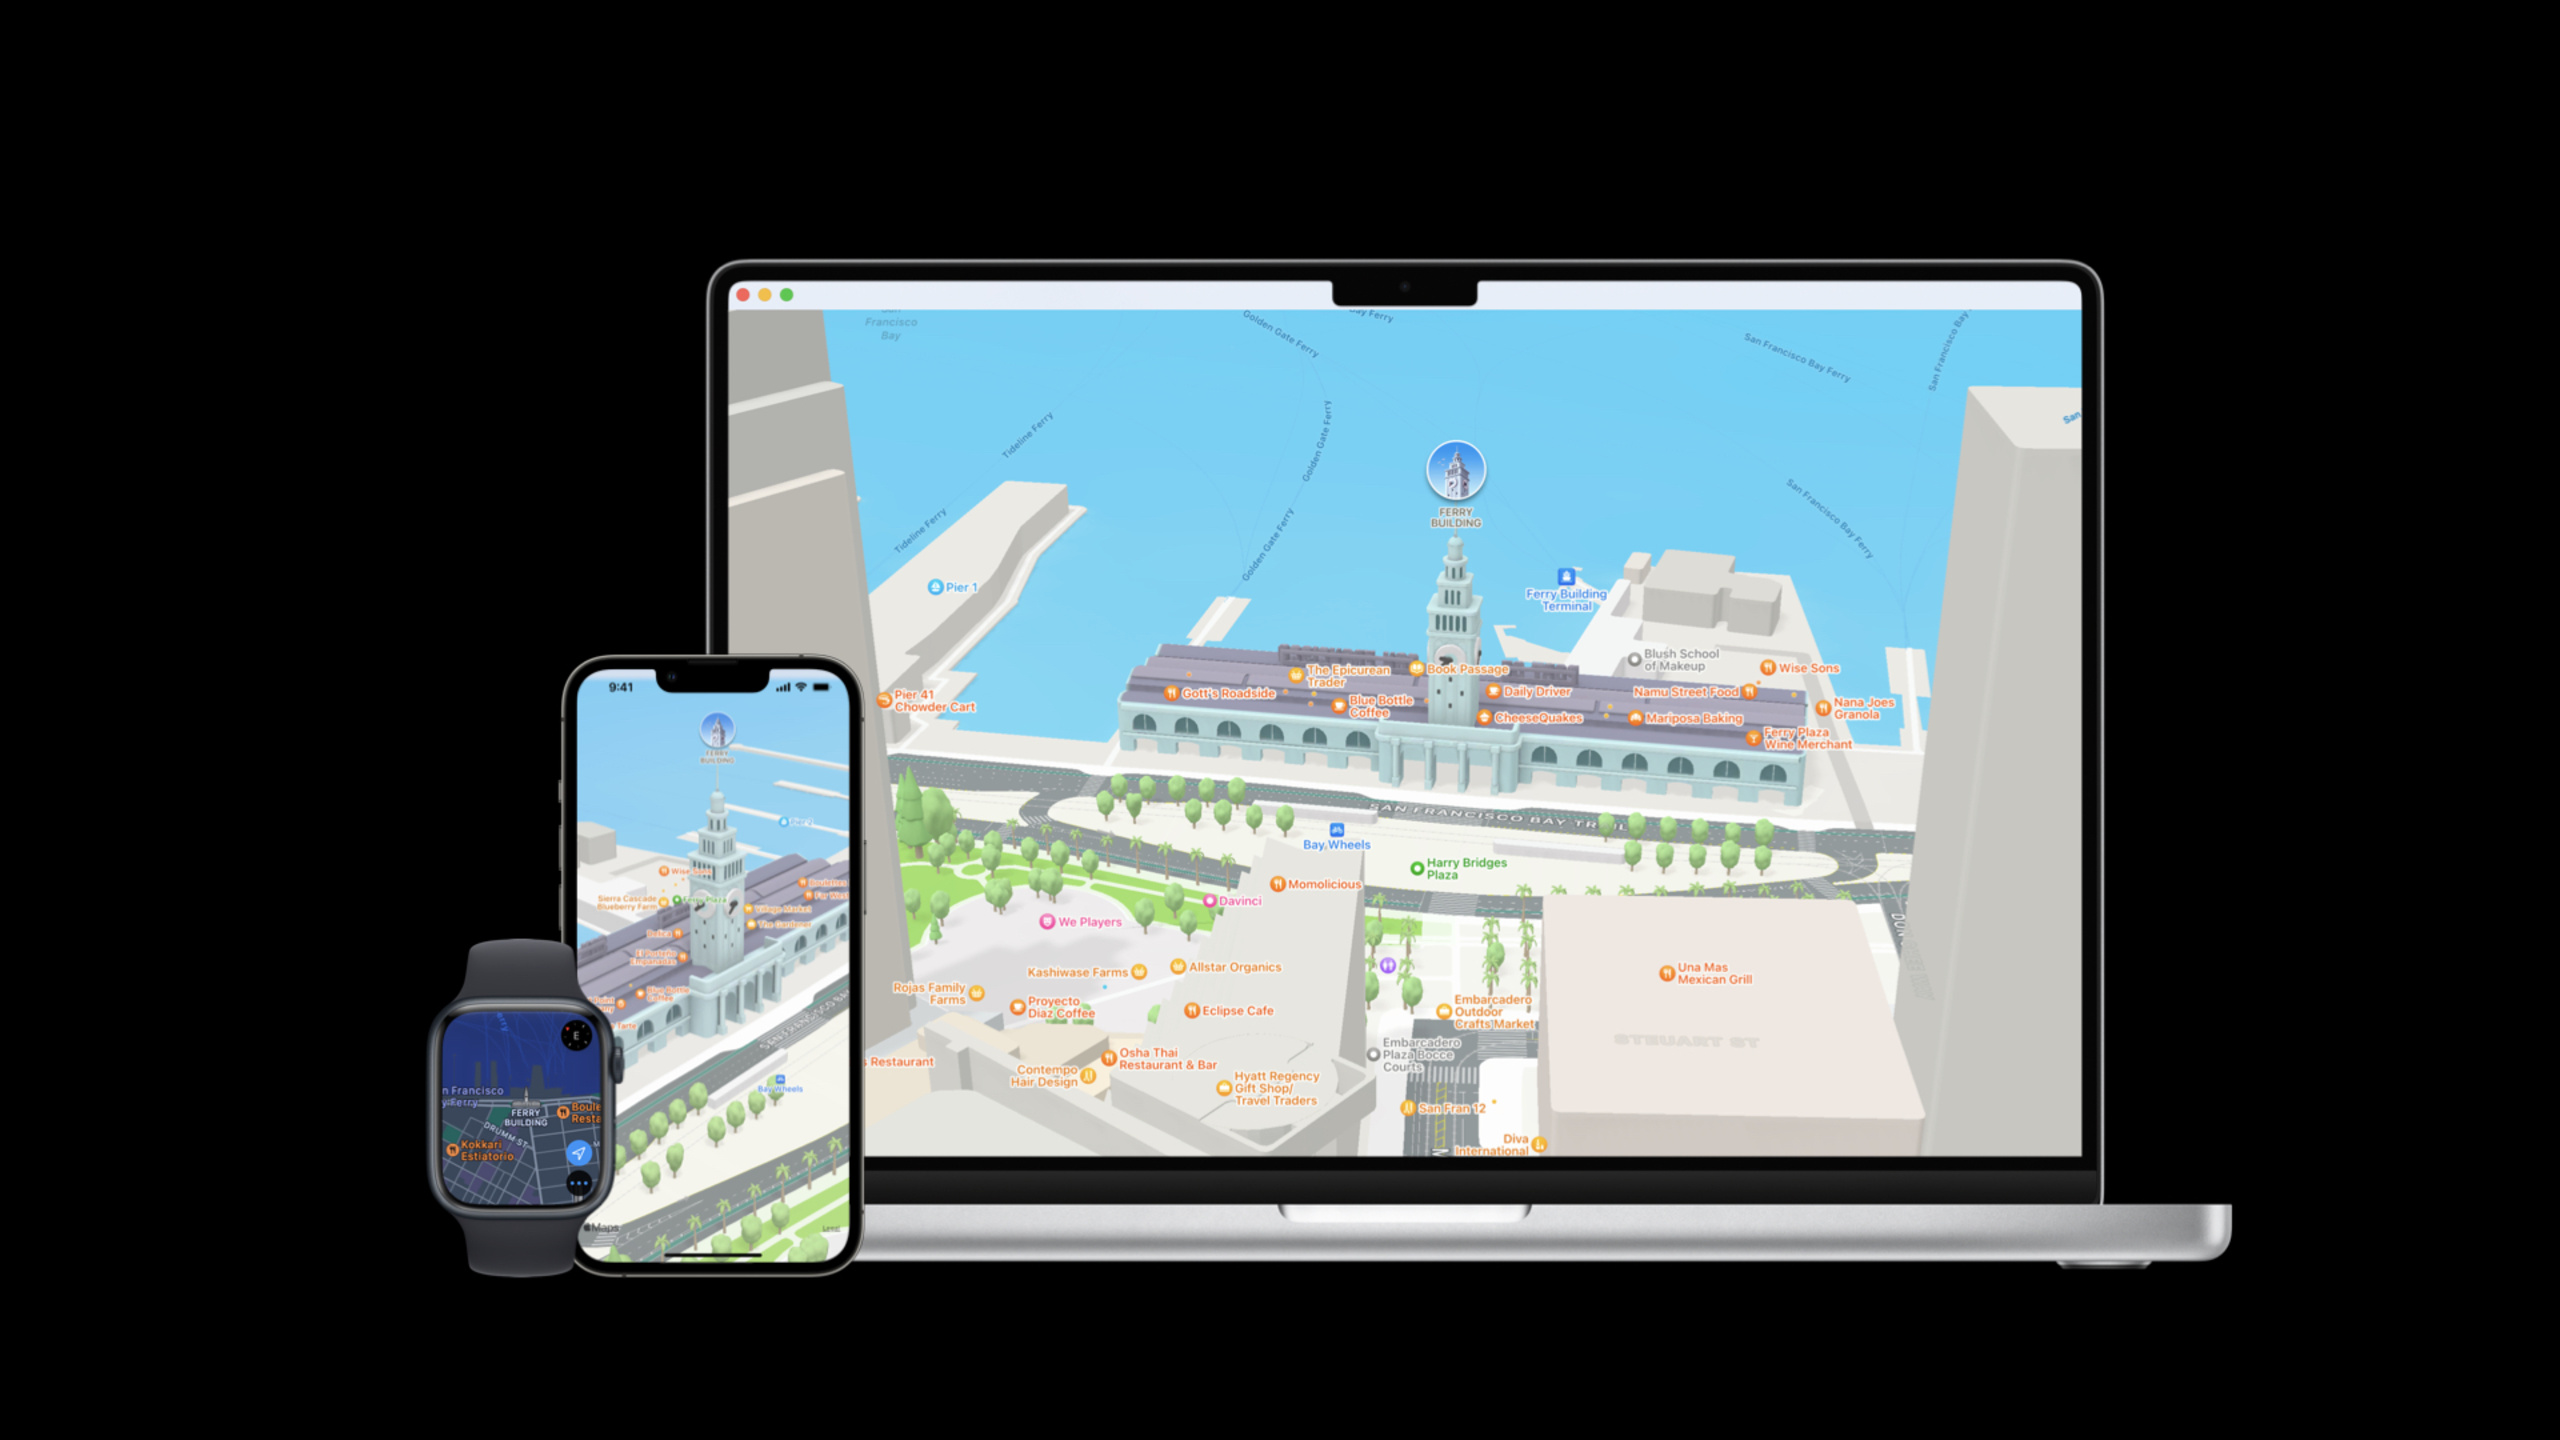
Eric and Yingxiu from the MapKit team describe five major updates to MapKit in iOS 16. Since the launch of Apple Maps’ new maps and immersive Look Around experience, coverage has expanded to Canada, multiple European countries and Japan, and last year it introduced a 3D city experience with lane markings, crosswalks, and bike lanes. This year MapKit opened all these capabilities to third-party developers.
Core Content
The difficulty of the map app is not “putting a map”. The difficulty lies in how maps and business content coexist.
Apps such as car rental, navigation, travel, and store location usually overlay operating areas, routes, points of interest, and detail cards on the map. Previously this content could easily cover map labels, or be obscured by buildings in 3D cities. What users see is a layer of business graphics, and the roads, buildings and terrain of the map itself recede to the background.
(02:13) iOS 16’s MapKit first reduces the upgrade cost: after recompiling with the new SDK, iOS, macOS, and tvOS Apps will automatically use the new Apple map and display 3D City Experience in available areas. Then, MapKit added five sets of APIs: configuration, overlay, blending mode, selectable map features, and Look Around, allowing business content to work against real maps.
The example app for this talk is a San Francisco scooter rental app. It has four functions: operating areas, cycling routes, exploring waterfront points of interest, and viewing attractions Look Around. Each subsequent API falls into this specific scenario.
Detailed Content
Use the Map Configuration API to configure the map atomically
(02:41) Before iOS 15, developers passedMKMapViewConfigure multiple properties on the map. iOS 16 softly discards these scattered properties and introducesMKMapConfigurationas the new central entrance.
MKMapConfigurationIt is an abstract base class with three specific configurations:
MKImageryMapConfiguration: Display only satellite images. -MKHybridMapConfiguration: Displays an image map and overlays map features such as road labels and points of interest. -MKStandardMapConfiguration: Displays a fully graphical standard map.
These configurations also control the terrain.elevationStylecan beflatorrealistic. Standard maps also supportemphasisStyle,inmutedThis will reduce the contrast of map details and give attention to your own graphical content.
// Concept example: organized from configuration classes and properties mentioned in the transcript; real project compatibility checks are omitted.
let configuration = MKStandardMapConfiguration()
configuration.elevationStyle = .realistic
configuration.emphasisStyle = .muted
configuration.showsTraffic = true

mapView.preferredConfiguration = configuration
Key points:
MKStandardMapConfiguration()Choose a graphical standard map, which corresponds to the “fully graphics-based map” in the speech. -elevationStyle = .realisticRequest realistic terrain and the map will show hills, road elevation differences, and 3D city effects. -emphasisStyle = .mutedReduce the contrast of map details to make the overlaid business graphics more prominent. -showsTraffic = trueCorresponds to the traffic display switch supported by both standard maps and hybrid maps. -preferredConfigurationHand these choices as a configuration objectMKMapView, to avoid scattered modification of multiple attributes.
(05:42) 3D City Experience has hardware and region restrictions. iOS requires an A12 or newer device, macOS requires an M1 or newer Mac. Unavailable areas fall back to a flat map; other devices also display a flat version. The talk recommends testing both 3D and flat fallback.
Overlay no longer holds the map roughly down
(06:55) MapKit’s overlay has always had two levels:aboveRoadsandaboveLabels。aboveLabelsWill cover everything, including labels. Apple recommends using it only when you don’t want data and maps to interact.
iOS 16aboveRoadsas the new default level. It will place overlays over terrain, roads, land cover, and bodies of water while preserving the context of the label.
// Concept example: the talk's Operating Area feature overlays a polygon on the map as the operating area.
let operatingArea = MKPolygon(coordinates: coordinates, count: coordinates.count)
mapView.addOverlay(operatingArea, level: .aboveRoads)
Key points:
MKPolygonCorresponding to the “polygon overlay” in the speech, it is used to represent the operable area of the scooter. -addOverlayAdd business areas to the map. -level: .aboveRoadsChoose the iOS 16 recommended tier and the overlay will not cover the map labels.- if selected
aboveLabels, the overlay will cover more of the map context and is only suitable for a few scenarios.
(08:11) iOS 16 also adds transparent buildings. When the map has a pitch, if trees and buildings block itaboveRoadsThe cover will automatically become transparent; when the pitch returns to 0 degrees, the conflicting ground object will disappear from view, leaving the cover fully visible.
In the demonstration, Yingxiu changed the alpha of the operation area to0.8. This allows users to see the roads and buildings below even without tilting the map.
// Concept example: make the polygon fill semi-transparent in the renderer.
func mapView(_ mapView: MKMapView, rendererFor overlay: MKOverlay) -> MKOverlayRenderer {
    let renderer = MKPolygonRenderer(overlay: overlay)
    renderer.fillColor = UIColor.systemPurple.withAlphaComponent(0.8)
    return renderer
}
Key points:
rendererFor overlayIt is the delegate entry used by MapKit to draw overlays. -MKPolygonRendererResponsible for drawing polygons. -withAlphaComponent(0.8)In the corresponding speech, change alpha to0.8operation.- Semi-transparent overlay and transparent buildings will take effect in combination, and the map still retains spatial context.
Route overlay can follow the real terrain
(13:14) When a normal overlay is added to a realistic terrain map, MapKit will automatically switch the map to flat. After removing the last overlay, restore realistic. The exception is the route overlay returned by the Directions API, which follows the real terrain.
The Ride function in the demo goes from Presidio Park entry to Battery Spencer, requesting a route across the Golden Gate Bridge. The route lines will be displayed along the height difference between the bridge and the road, and can even show through the bridge piers and in front of the trees.
// Concept example: the talk uses the Directions API to get a route and add the route polyline to the map.
let source = MKMapItem(placemark: MKPlacemark(coordinate: startCoordinate))
let destination = MKMapItem(placemark: MKPlacemark(coordinate: endCoordinate))

let request = MKDirections.Request()
request.source = source
request.destination = destination

let directions = MKDirections(request: request)
let response = try await directions.calculate()

if let route = response.routes.first {
    mapView.addOverlay(route.polyline, level: .aboveRoads)
}
Key points:
MKPlacemarkPack the start and end coordinates into locations. -MKDirections.RequestSave source and destination. -MKDirectionsRequest directions. -route.polylineIs the directions overlay returned by the Directions API.- This type of overlay is an exception specifically stated in the talk: it preserves realistic terrain rather than flattening the map.
(16:28) The elevated route line supports A12 and newer iOS devices. Older devices automatically get 2D routes on a 2D map.
Use blendMode to control the visual relationship between overlay and map
(17:02) If the goal is just to make the custom content more prominent, it is not necessary to put the overlay inaboveLabels. iOS 16 givesMKOverlayRendereraddedblendModeProperty, you can use CoreGraphics’ blend mode.
The speech uses Presidio National Park as an example: first use a large overlay with cutout to cover the map area, and then set the mixing modes such as hue, hard light, and color burn respectively. The result is that areas outside the park are desaturated and darkened, while the interior of the park remains focused.
// Concept example: the talk explicitly states that MKOverlayRenderer adds the blendMode property.
func mapView(_ mapView: MKMapView, rendererFor overlay: MKOverlay) -> MKOverlayRenderer {
    let renderer = MKPolygonRenderer(overlay: overlay)
    renderer.fillColor = UIColor.gray
    renderer.blendMode = .colorBurn
    return renderer
}
Key points:
MKOverlayRendererIs the base class for all overlay renderers. -blendModeIt is a new attribute in iOS 16. -.colorBurnComes from CoreGraphics blend mode, used for presentations to get a more restrained Presidio highlight effect.- The insertion order of overlays will affect the results: the bottom overlay is mixed with the map first, and the upper overlay is mixed with the previous result.
Allow users to directly select POIs, areas and natural features on the map
(20:09) In the past, users could only click annotations that you put on the map yourself. The stores, restaurants, landmarks, cities, states, mountains, lakes and other elements provided by Apple in the map are just the background.
iOS 16’s Selectable Map Features API changes this. Developers can configure which map features are optional and then receive selection events through the delegate.
// Concept example: the talk's Explore feature enables only points of interest.
mapView.pointOfInterestFilter = MKPointOfInterestFilter(excluding: [
    .airport,
    .carRental,
    .hospital,
    .laundry
])

mapView.selectableMapFeatures = [.pointsOfInterest]
Key points:
pointOfInterestFilterCorresponds to the step of first excluding irrelevant POI categories in the speech. -.airport、.carRental、.hospital、.laundryis a category that is excluded by name in the demonstration. -selectableMapFeaturesIs a new optional map feature configuration entry.- Examples only selected
.pointsOfInterest, the speech also mentioned that territories and physical features are also optional.
(22:41) After the user clicks on the map element, MapKit will take two entrances. newdidSelect annotationCallback to handle selection events; existingviewFor annotationCallback to customize the annotation view of the selected state.
// Concept example: the talk customizes the selected style through MapFeatureAnnotation and starts an MKMapItemRequest.
func mapView(_ mapView: MKMapView, didSelect annotation: MKAnnotation) {
    guard let feature = annotation as? MKMapFeatureAnnotation else { return }

    Task {
        let request = MKMapItemRequest(mapFeatureAnnotation: feature)
        let mapItem = try await request.mapItem
        showInfoCard(for: mapItem)
    }
}

func mapView(_ mapView: MKMapView, viewFor annotation: MKAnnotation) -> MKAnnotationView? {
    guard let feature = annotation as? MKMapFeatureAnnotation else { return nil }

    let view = MKMarkerAnnotationView(annotation: feature, reuseIdentifier: "Feature")
    view.markerTintColor = .systemPurple
    view.glyphImage = feature.iconStyle.image
    view.selectedGlyphImage = feature.iconStyle.image
    return view
}
Key points:
MKMapFeatureAnnotationIt is a new type in iOS 16 and represents the map feature selected by the user. -feature.iconStyleProvides the POI’s icon and color information, which the speaker uses to preserve Apple iconography. -MKMapItemRequestRequest a more complete one based on map featureMKMapItem。MKMapItemAddress, name, phone number, and URL are available. -viewFor annotationreturnnilWhen returning to a custom view, MapKit uses the default gradient annotation; when returning to a custom view, you can apply the App’s own brand color.
Put Look Around into your own interface
(31:14) Look Around is available in the Maps app starting with iOS 13. iOS 16 brings it to MapKit. Developers can first display a small preview in their app, and users can click it to enter a full-screen interactive view.
There are three steps in the usage process: check whether there is Look Around data at the target position; pass the scene to the Look Around view controller or snapshotter; if the data is available, update the UI display preview.
// Concept example: the talk explains that LookAroundSceneRequest can be initialized with a coordinate or map item.
let request = MKLookAroundSceneRequest(mapItem: mapItem)
let scene = try await request.scene

if let scene {
    lookAroundViewController.scene = scene
    previewContainer.isHidden = false
} else {
    previewContainer.isHidden = true
}
Key points:
MKLookAroundSceneRequestIs a new class in iOS 16, used to check whether there is Look Around data at a certain location. -sceneis an optional async property. Returns scene if available, returns if unavailablenil, an error is thrown when the request fails.- Look Around scene is an opaque object, only used as a token required for usability and display.
-
lookAroundViewController.scene = sceneCorresponds to the method of assigning scene to existing view controller in the speech. -previewContainer.isHiddenIndicates that the UI should be used to show or hide the preview based on whether data is available.
(36:44) Yingxiu’s Highlights functionMKLookAroundViewControllerEmbed in the bottom left container. When the user selects Ferry Building, the map first uses the new camera API to animate to the location; after the animation is completed, it requests the Look Around scene; a preview is displayed if there is data. The Ferry Building is a landmark, so it will get curated camera framing; the Dragon Gate is not a landmark, so it will get a top-down view.
If you only need static images, you can also useMKLookAroundSnapshotterGet snapshot.
// Concept example: the talk mentions that snapshotter is suitable when only a static image is needed.
let request = MKLookAroundSceneRequest(coordinate: coordinate)
if let scene = try await request.scene {
    let snapshotter = MKLookAroundSnapshotter(scene: scene)
    let snapshot = try await snapshotter.snapshot
    imageView.image = snapshot.image
}
Key points:
MKLookAroundSceneRequest(coordinate:)Use coordinates to check availability. -MKLookAroundSnapshotterreceive scene. -snapshotIs an async property that returns a static preview image.- This method is suitable for list cards, search results or lightweight previews, and does not require embedding a full interactive controller from the beginning.
Core Takeaways
1. Make a map of urban cycling operation areas
- What to do: Show rideable areas, no-parking zones and recommended parking spots on the map.
- Why it’s worth doing:
aboveRoads, transparent buildings, and translucent polygons allow operational areas to not obscure roads, labels, and buildings. - How to start: Use
MKPolygonRepresents the area, inserted into.aboveRoads, then useMKPolygonRendererSet translucent fill.
2. Create an urban walking route with real height differences
- What it does: Display terrain-appropriate routing lines for bridges, ramps, and park routes.
- Why it’s worth it: The route polyline returned by the Directions API is an exception to the normal overlay and preserves realistic terrain.
- How to start: Use
MKDirections.RequestRequest directions, putroute.polylineAdd to the map and test the 3D effect on A12 and newer devices.
3. Make a clickable attractions exploration map
- What to do: After the user clicks on a restaurant, landmark, or museum on the map, a branded information card will pop up.
- Why it’s worth doing: Selectable Map Features allows Apple Maps’ built-in POIs to become interactive objects, eliminating the need to maintain all annotation data yourself.
- How to start: Configuration
selectableMapFeatures = [.pointsOfInterest],existdidSelectChinese useMKMapItemRequestGet address, URL and phone number.
4. Make a map of a park or business district with visual emphasis
- What to do: Highlight the target area, darken or desaturate the surrounding map.
- Why it’s worth doing:
MKOverlayRenderer.blendModeYou can control the mixing method of overlay and map basemap, which is more natural than covering the layer on the label. - How to start: Prepare the target area polygon and the outer mask polygon, insert the overlay in order, and experiment
.hue、.hardLight、.colorBurnetc. blend mode.
5. Make a scenic Look Around preview card
- What to do: After the user selects a landmark, a small Look Around window is displayed in the corner of the map, and click to enter the full-screen street view.
- Why it’s worth doing:
MKLookAroundSceneRequestYou can first determine whether the data exists to avoid a blank UI. - How to start: Use map item to create request, get the scene and assign it to
MKLookAroundViewController;Hide the preview container when there is no scene.
Related Sessions
- Meet Apple Maps Server APIs — Client MapKit and server-side Apple Maps Server APIs together form a complete map capability stack.
- Meet WeatherKit — WeatherKit provides weather data that is strongly related to location and is suitable for overlaying on maps and travel scenarios.
- Get more mileage out of your app with CarPlay — CarPlay navigation apps need to be combined with MapKit’s map, route and driving scene UI.
Comments
GitHub Issues · utterances