
Highlight
Apple releases Xcode Cloud, which integrates continuous integration and continuous delivery services into Xcode and App Store Connect, allowing teams to automatically build, test, archive, and distribute applications in Apple’s hosting environment, and locate problems directly from build reports.
Core Content
When a team develops an app, trouble usually occurs after the code is merged.
You fix bugs and add features in Xcode. Teammates give feedback in pull requests. Testers try out new versions in TestFlight. Every feedback leads to a code change. After the changes are incorporated, you also need to confirm whether iOS can be compiled, whether macOS can be archived, whether the tests have failed, and whether the build can be sent to testers.
In the past, these things were often linked together by local machines and manual inspection. Whoever is free runs a test. Who is responsible for issuing the contract, and who handles the certificate, product building and upload process. The problem is, the larger the team and the more branches there are, the easier it is for omissions to occur.
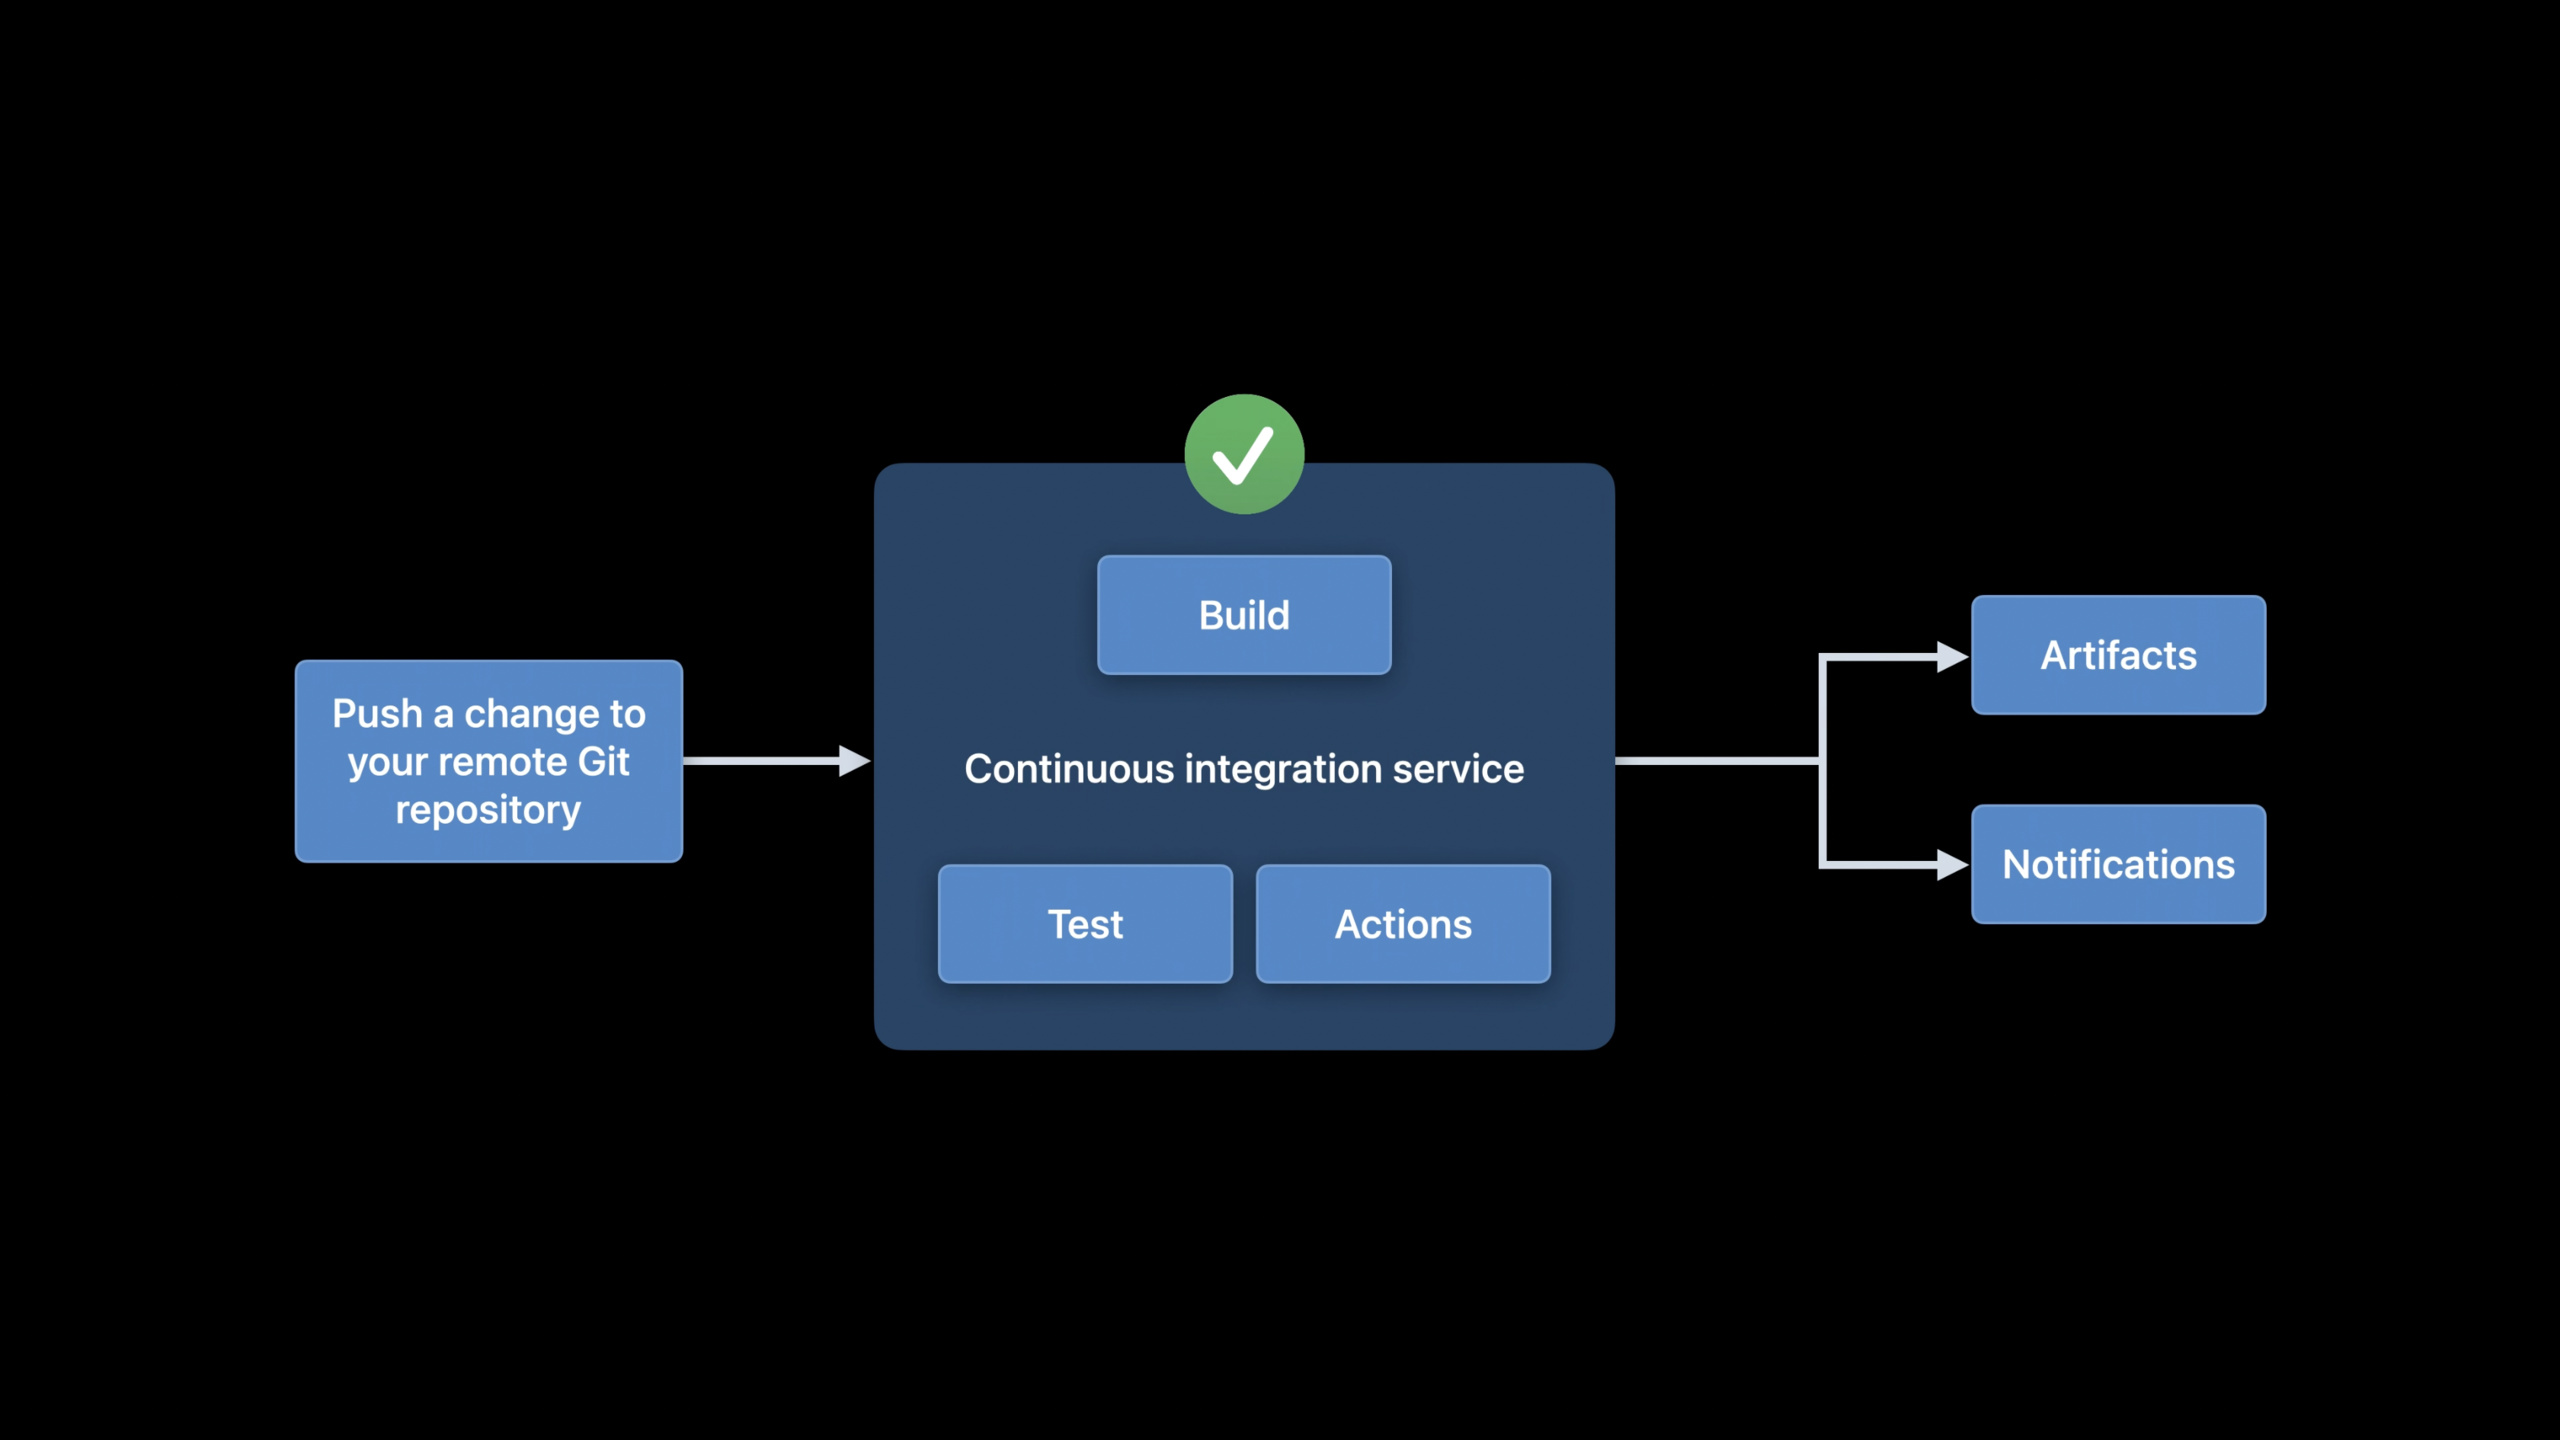
Xcode Cloud solves this link. It puts Continuous Integration (CI) into Apple’s development tools. After developers push code, the workflow runs in an Apple-hosted cloud environment. It can be built, tested, archived, and the results can be handed over to subsequent distribution processes.
This talk demonstrates the entire process using Fruta, a sample app across iOS and macOS. Developers first create a workflow in Xcode, authorize Xcode Cloud to access the code repository, and start the first build. After a failed build, reports indicate that the Mac archive action encountered an import error. Developers can click on the issue and jump to the source code to fix it, then submit and push it.
The changes to teamwork are also straightforward. Workflows are part of a team’s shared configuration. After one member creates and runs a build, another member opens the same project and can see the workflow, build history, and results in the Cloud tab of Xcode. Then, she can edit the workflow, add trigger conditions to the release branch, and add test actions to iOS.
That’s where Xcode Cloud comes in: it doesn’t just run a remote build machine. It connects Xcode, App Store Connect, TestFlight, code hosting services, and team notifications into a pre-release pipeline.
Detailed Content
Minimal model of CI: automatically run a set of actions after pushing the code
(00:45) The speech first defines continuous integration. CI is the practice of integrating code changes on a regular basis with the goal of finding and fixing problems as early as possible. A typical CI workflow runs automated steps when you or a teammate pushes code to the repository.
These steps can be builds, tests, or other quality checks required by the team. Xcode Cloud wraps these steps into workflows.
Workflow
- Start condition: starts when code is pushed to the repository
- Actions: build, test, archive
- Result: build report
Key points:
WorkflowIt is the configuration that determines what Xcode Cloud does at what time. -Start conditionis the trigger condition, and the default in the lecture is to push to the main branch. -ActionsIt is an action to be performed. The speech mentioned build, test, and archive. -build reportIt is the result entry after a workflow is run, used to view test reports, logs and problems.
Workflow runs in Apple hosted environment
(02:34) A workflow run in Xcode Cloud is called a build. These builds run on Apple managed Cloud infrastructure.
The talk clearly mentioned three things: cloud environments provide code signing, provide multiple operating system versions, and provide different Xcode versions. Developers do not need to prepare these capabilities individually for each build machine.
Xcode Cloud Build Environment
- Code signing
- Multiple operating system versions
- Xcode releases
Key points:
Code signingPowered by a cloud build environment, reducing the burden of certificate management on the local build machine. -Multiple operating system versionsAllows teams to verify apps on different system versions. -Xcode releasesBring build environment and Xcode version-related configuration into the workflow.- The build results are viewed in the Cloud tab of Xcode’s Report navigator.
Creating a workflow for the first time: Start from the Xcode menu
(06:04) Demonstrates entering the Xcode Cloud area from Xcode’s Product menu and selecting Create Workflow. Xcode detects the app in the local project and generates the default first workflow.
Fruta supports iOS and macOS. After Xcode Cloud checks the local project, it automatically includes both platforms into the default configuration.
Product > Xcode Cloud > Create Workflow

Detected app: Fruta
Platforms: iOS, macOS
Default workflow:
- Start condition: every push to main
- Environment: latest released Xcode
- Actions: archive iOS, archive macOS
Key points:
Create WorkflowIt is the entrance in the speech. -Detected appChecks from Xcode for local projects. -every push to mainis the default trigger condition. -latest released Xcodeis the default environment selection. -archive iOSandarchive macOSPlatform support from Fruta.
Authorization code repository: Private repository requires explicit permissions
(07:24) Xcode Cloud To build the project, the source code must be read. The authorization in the talk is a one-time operation and covers all source code repositories required to build the project, including the main repository, submodules (submodules) and private Swift packages (private Swift packages).
Public repositories require no additional authorization. Private warehouses need to be authorized by the code hosting service. In the demonstration, Fruta has two private repositories, and the source code is hosted on GitHub, so GitHub needs to be authorized in the App Store Connect web process.
Source access
- Primary repository
- Submodules
- Private Swift packages

Public repositories: no additional authorization
Private repositories: grant provider access
Key points:
Primary repositoryIt is the main project repository. -SubmodulesandPrivate Swift packageswill also be included in the scope of authorization. -grant provider accessOccurs during the code hosting service’s native authentication process.- The speech mentioned that developers can revoke access at any time.
Build report: Jump from failed action to error code
(09:18) After the first build, the Build group overview shows active and completed builds. After entering the single build page, you can see the build duration, environment configuration, and the status of all actions and post-actions.
If an action fails, the action summary can be expanded. The Mac archive action in the presentation failed and Xcode Cloud caught an import issue. Developers click the jump button in the Xcode issue list to jump directly to the source code that needs to be modified.
Build report
- Overview: duration, environment configuration
- Action summary: status, logs, artifacts
- Issues: filter by type, jump to source
Key points:
OverviewDisplays basic information about a build. -Action summaryShow the execution of an action. -logsOrganized by task, with filtering available. -artifactsContains binaries, log files, and other build artifacts. -jump to sourceLet developers return from CI issues to local source code.
A real fix: UIKit is only imported on non-macOS platforms
(11:04) Fruta builds for both iOS and macOS. The first CI build found that the archiving action of the Mac app failed because there were imports in the source code that were not suitable for macOS. The fix given in the talk is conditional compilation: importing UIKit only on non-macOS platforms.
import SwiftUI
#if !os(macOS)
import UIKit
#endif
Key points:
import SwiftUIImport SwiftUI for use by cross-platform interface code. -#if !os(macOS)Start a compilation condition, which means that the following code will be compiled only when the current target system is a non-macOS platform such as iOS. -import UIKitOnly import on non-macOS platforms such as iOS to prevent Mac archiving actions from encountering mismatched frame imports. -#endifEnd conditional compilation block.
This code demonstrates the value of CI. Problems didn’t wait until launch. A cloud archiving action immediately exposes cross-platform differences. After the developer fixes the problem, submit it and push it, and the new build automatically starts running.
Team shared workflow: one person creates, others continue editing
(11:43) After Geoff creates and fixes the workflow, Holly opens the Fruta project as a member of the same team and can also see the default workflow and build history. The talk emphasized workflow sharing within the team.
She then renamed the default workflow to Releases, edited the start condition, and added the release branch to the build scope.
Workflow: Releases
Start condition:
- main
- release/v1
Key points:
Releasesis the new name set for the workflow in the demo. -mainIs the default branch trigger condition. -release/v1Is the branch the team uses for releases.- After adding branches, the same workflow can display the build results of different branches separately.
Add test action: select scheme and device for iOS
(13:18) The default workflow creates archive actions for all Fruta platforms. To increase coverage, a Test action has been added to the demo.
For this test action, select the iOS platform, select the Fruta iOS scheme, and then add a test device. Xcode Cloud will recommend the iPhone simulator, and clicking again will add a recommended iPad. In the demonstration, the device was also changed to the latest iPhone to ensure that the app would behave properly on iPhone 12.
Action: Test
Platform: iOS
Scheme: Fruta iOS
Destinations:
- Recommended iPhone simulators
- Recommended iPads
- iPhone 12
OS version: latest
Key points:
TestIt is the action type in the workflow. -Platform: iOSSpecify the platform on which the test will be run. -Scheme: Fruta iOSSpecify which scheme Xcode uses to execute tests. -DestinationsSpecify a test device or emulator. -OS version: latestFrom the default device system version settings mentioned in the talk.
Manually start the build: verify the workflow without changing the code
(14:41) After modifying the workflow, Holly wants to verify that it runs, but does not want to submit another line of code in order to trigger CI. Xcode Cloud supports manual startup by right-clicking the workflow in the Report navigator and selecting Start Build.
Branches can be selected at startup. Demonstration of selecting the newly added workflowrelease/v1, then click Start Build.
Report navigator > Workflow > Start Build
Branch: release/v1
Result: Build 3 starts under release/v1 section
Key points:
Start BuildLet developers run workflows manually. -Branch: release/v1Used to verify the newly added release branch. -Build 3Appears in build group overviewrelease/v1under partition.- This step is used to check the workflow configuration and does not require additional code changes.
Privacy design: temporary environment, isolated load, no source code saved
(04:59) Xcode Cloud requires access to source code, so the talk separately explains privacy by design.
Build environments are temporary. Workloads are isolated from each other. The environment is destroyed and recreated between each build. The source code is not stored and Xcode Cloud only fetches the code in a temporary build environment. Build data is stored encrypted at rest and in a private CloudKit database. Developers can delete their own data.
Privacy model
- Temporary build environments
- Isolated workloads
- Source code is never stored
- Build data encrypted at rest
- Dedicated CloudKit database
- User-controlled deletion
Key points:
Temporary build environmentsReduce the risk posed by the residual state of your build environment. -Isolated workloadsKeep different build workloads isolated from each other. -Source code is never storedis a clear statement in the speech. -encrypted at restDescribes encryption of build data at rest. -User-controlled deletionAllow teams to delete data themselves.
Core Takeaways
-
What to do: Set up a minimal CI workflow for the master branch. Why it’s worth doing: The default workflow in the lecture will run archive actions after pushing to main, which can detect build problems as early as possible. How to start: Open in Xcode
Product > Xcode Cloud > Create Workflow, accept the default main branch trigger condition, and let the iOS and macOS archiving actions run first. -
What to do: Add a separate build view to the release branch. Why it’s worth doing: Build group overview will organize the results by branches. One workflow can cover multiple branches while retaining independent status. How to start: Edit the start condition of the workflow and add it to custom branches
release/v1This type of release branch is then manually Start Build verified. -
What to do: Handle cross-platform import issues to CI capture. Why it’s worth doing: Fruta’s Mac archive action catches UIKit import issues, indicating that multi-platform projects are well suited for continuous verification with cloud archive actions. How to get started: Enable a workflow to archive both iOS and macOS. When encountering platform differences, use
#if !os(macOS)This type of conditional compilation restricts platform-specific imports. -
What to do: Add device matrix testing to iOS App. Why it’s worth doing: In the speech, the Test action can select scheme and multiple destinations, covering iPhone, iPad and the latest system version. How to start: Add Test in the Actions of the workflow, select the iOS platform and project scheme, and then use the recommended simulator as the destination.
-
What to do: Integrate failed build notifications into team collaboration tools. Why it’s worth doing: The talk mentioned that team members can set up their own notifications in App Store Connect, such as Slack notifications for failed builds. How to start: First let the build report produce stable results, then configure personal notifications in App Store Connect, and subscribe to failing builds first.
Related Sessions
- Explore Xcode Cloud workflows — Continue to talk about the start condition, environment, actions and post-actions of the workflow, which is suitable for reading before configuring the formal CI pipeline.
- Customize your advanced Xcode Cloud workflows — Talks about environment variables, custom scripts, additional warehouses and webhooks, suitable for teams that already have basic workflows.
- Meet TestFlight on Mac — Talk about Mac beta test distribution and introduce its connection with Xcode Cloud’s build distribution.
- Faster and simpler notarization for Mac apps — Talk about the Mac app notarization tool notarytool, which is suitable for handling Mac distribution steps outside of Xcode Cloud.
Comments
GitHub Issues · utterances