
Highlight
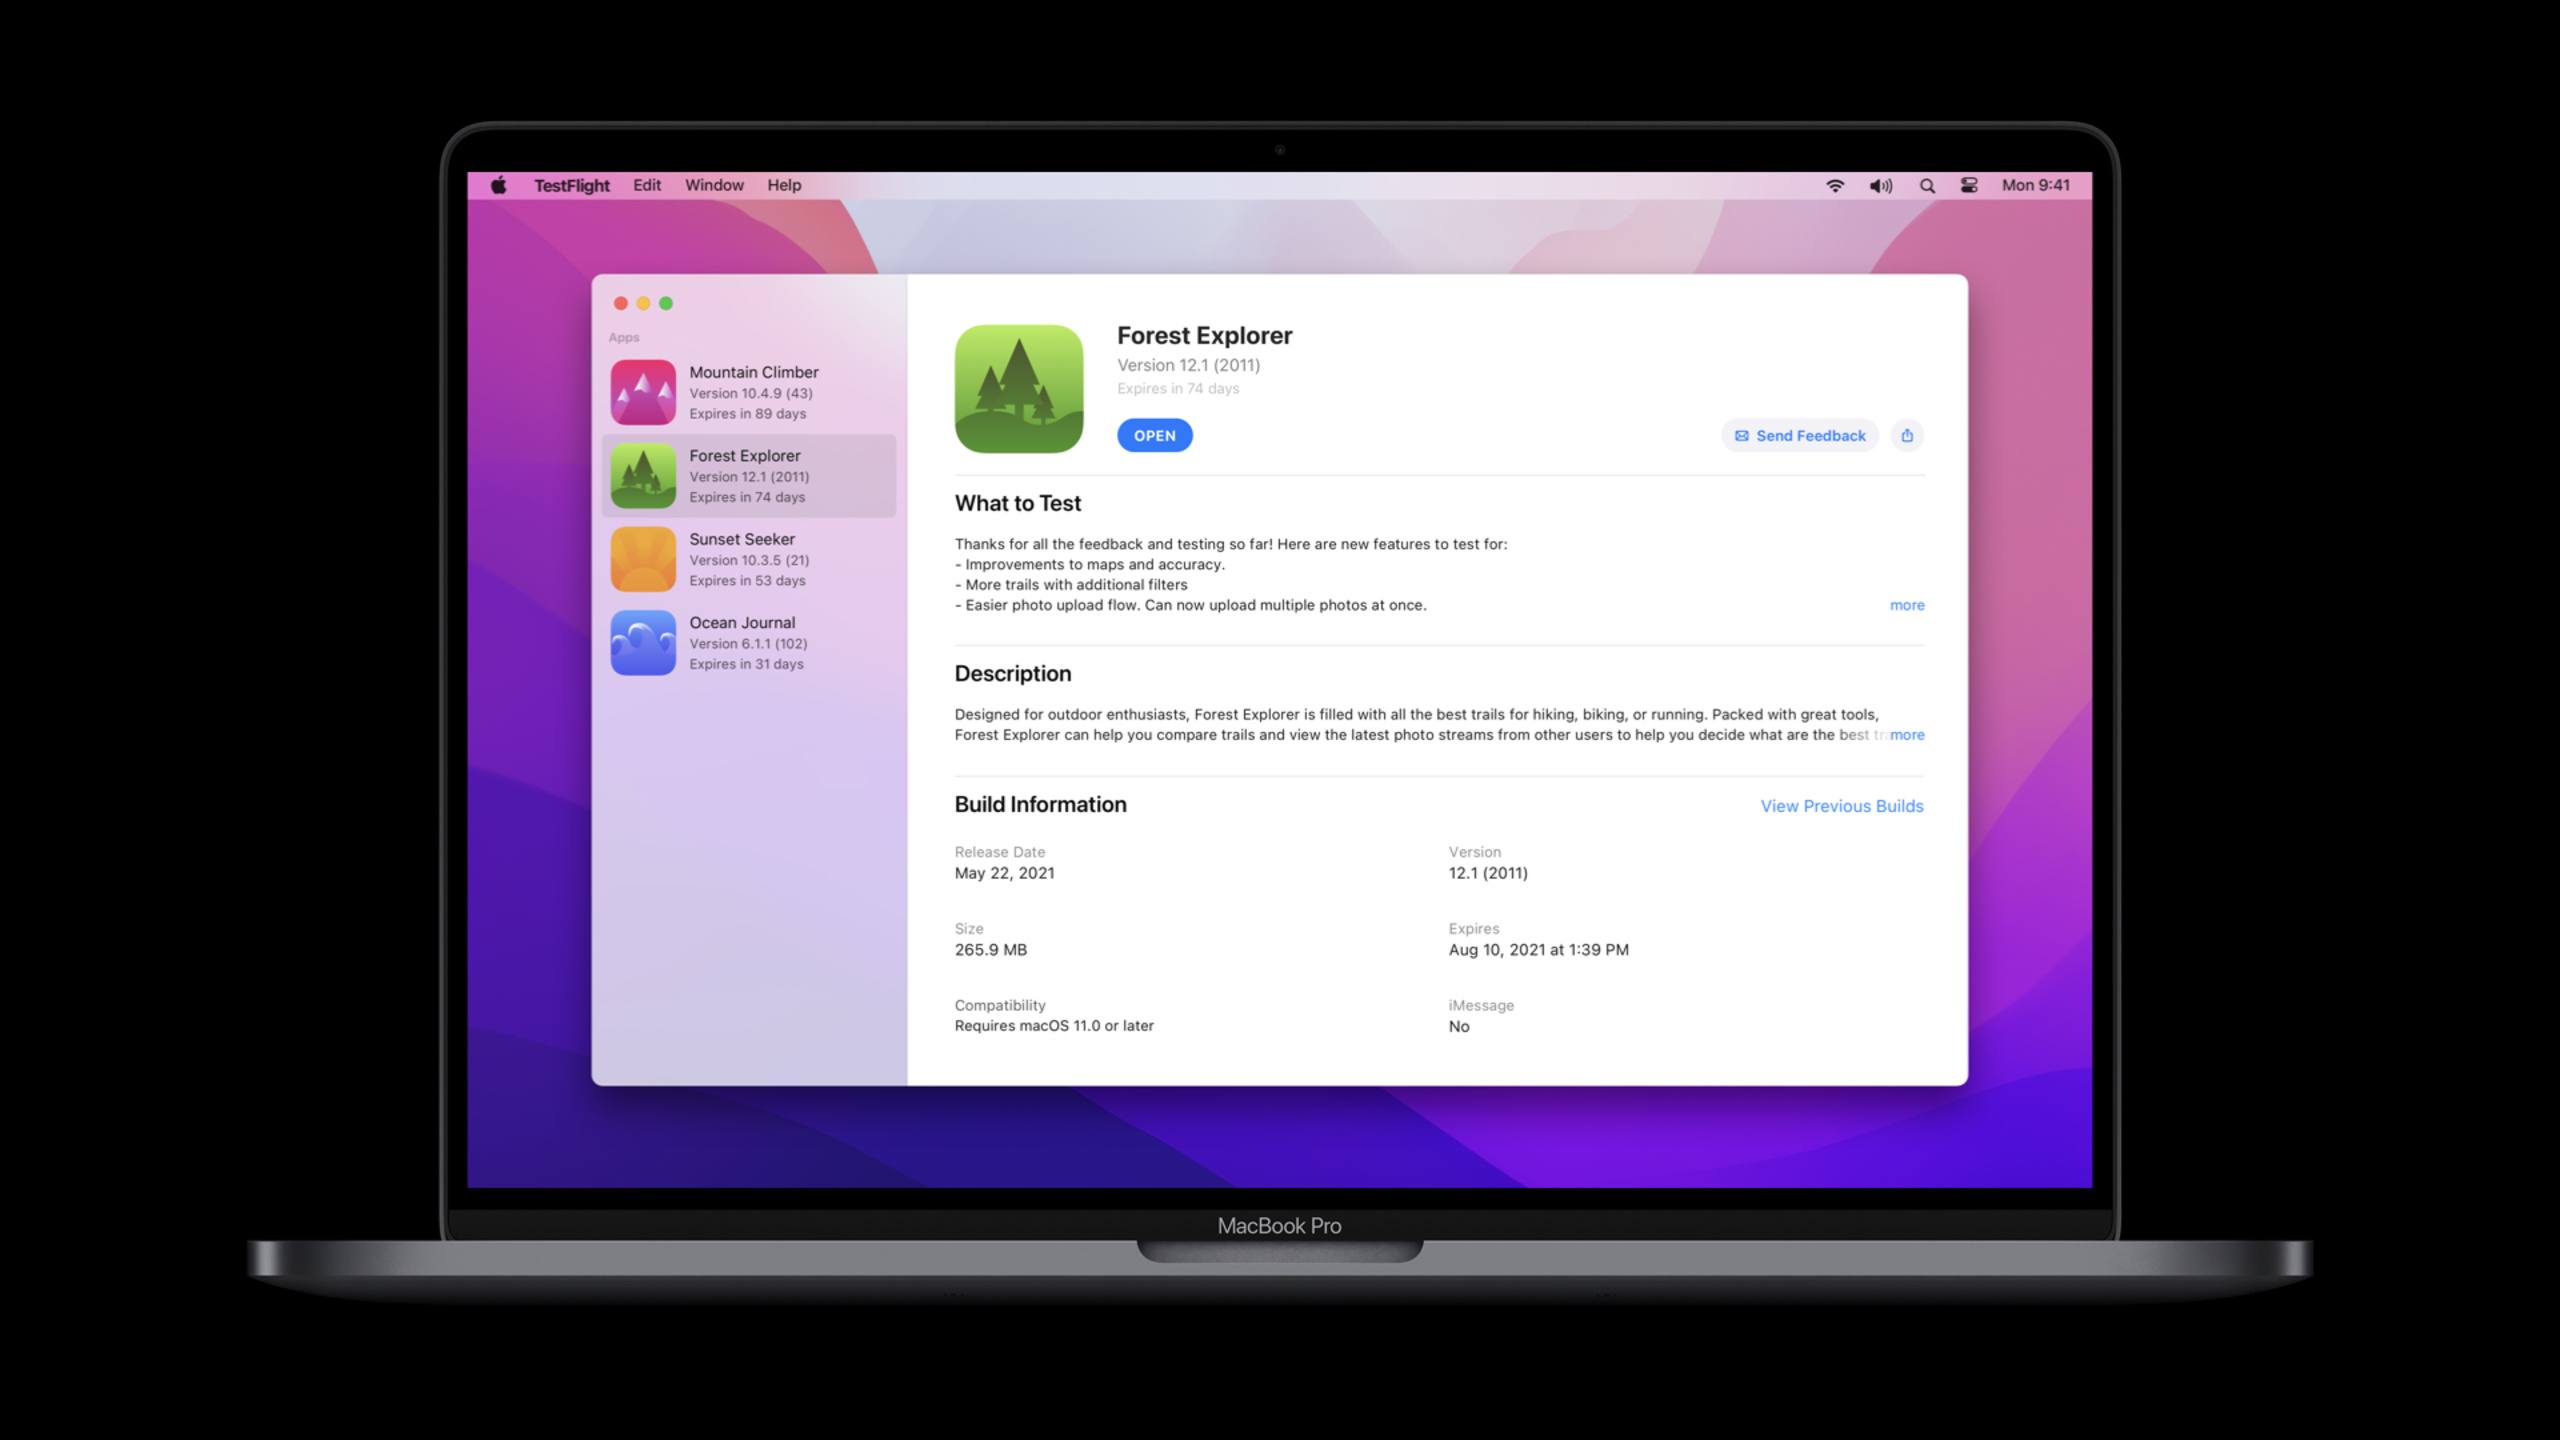
Apple brings TestFlight to macOS, allowing developers to distribute beta builds to Mac testers, collect screenshot feedback and crash logs, and manage build distribution with internal test groups and Xcode Cloud.
Core Content
Doing Mac application beta testing used to easily become a manual job. Developers should package the build and send it to testers to remind them to install the new version. After the tester encounters a problem, he has to describe the phenomenon, find the log, and send back the screenshot.
This process has long been taken over by TestFlight on iOS. Testers accept the invitation, install the beta app, and app updates arrive automatically. Crash and screenshot feedback goes back to App Store Connect.
What’s new at WWDC 2021: TestFlight comes to Mac. It supports native Mac apps as well as iOS apps running on Apple Silicon Macs. Testers download TestFlight from the Mac App Store and can install beta apps, turn on automatic updates, and submit feedback.
This solves three pain points of Mac testing. First, build and distribute uniformly through App Store Connect. Second, testers can directly report problems through screenshots. Third, crash logs are automatically collected and appear in App Store Connect and Xcode Organizer.
Apple has also added team collaboration scenarios. Internal testing can now create multiple groups. The development team can automatically receive all builds, and the QA team can only receive stable builds. The builds generated by Xcode Cloud are organized by workflow and Git branches, making it easier for testers to find the version they want to test.
Detailed Content
TestFlight testing process on Mac
(00:26) TestFlight’s core job is to distribute beta builds and collect feedback. Before 2021, it already supports iOS and tvOS. Now the same set of capabilities extends to macOS.
TestFlight on Mac
- install beta apps
- setup automatic updates
- share feedback
- support native Mac apps
- support iOS apps on Apple Silicon Mac
Key points:
install beta apps: After testers accept an email invitation or public link, they can install the beta app on their Mac.setup automatic updates: Testers can turn on automatic updates, and subsequent builds will be automatically installed.share feedback: Testers can submit questions and suggestions for improvements.support native Mac apps: Native Mac apps can be distributed through TestFlight.support iOS apps on Apple Silicon Mac: iOS apps running on Apple Silicon Mac can also enter the testing process.
(01:07) There are two entrances for testers to join the test: email invitation and public link. After accepting the invitation, they become a tester of the app, can view different builds grouped by version, and select a build to install.
Tester invite flow
1. Developer sends an email invite or shares a public link
2. Tester accepts the invite
3. Tester browses builds grouped by versions
4. Tester clicks Install
5. Tester launches the beta app from TestFlight, Dock, Launchpad, or Finder
Key points:
- Step 1: Developers recruit testers via email or public link.
- Step 2: Only after the tester accepts the invitation will they join the TestFlight test for the app.
- Step 3: Builds are grouped by version and testers can select specific versions.
- Step 4: The installation happens in TestFlight on Mac.
- Step 5: Once installed, the beta app can be launched from TestFlight, Dock, Launchpad, and Finder.
(01:42) Mac will mark beta apps. A yellow dot appears next to the app name in the Dock and Launchpad. It will appear in the Finder as Beta Application.
Beta app indicators on Mac
- Dock: yellow dot next to the app name
- Launchpad: yellow dot next to the app name
- Finder: Beta Application
Key points:
Dock: Users can see the test version mark when they launch the app.Launchpad: The same yellow dot will also appear in the app list.Finder: Display Beta Application at the file level to avoid confusion between the test version and the official version.
Feedback and crash logs back to App Store Connect
(02:09) When testers encounter problems, they can submit feedback directly from the app. The process starts with taking a screenshot, attaching it, filling out instructions, and submitting.
Screenshot feedback flow
1. Tester takes a screenshot
2. Tester attaches the screenshot
3. Tester adds comments to describe the issue
4. Tester submits feedback
5. Developer views it in App Store Connect > Screenshot Feedback
Key points:
- Step 1: Take a screenshot to save the problem scene.
- Step 2: Submit the screenshot as a feedback attachment.
- Step 3: Comments are used to supplement the replication path or desired behavior.
- Step 4: Feedback is submitted directly from the tester device.
- Step 5: Developers view it in the Screenshot Feedback area of App Store Connect.
(02:38) If the beta application crashes, TestFlight will automatically capture the crash logs (crash logs) and pop up a dialog box for the tester to add comments. Developers can download logs in the crashes feedback area of App Store Connect or view them in Xcode Organizer.
Crash feedback flow
1. Beta app crashes
2. TestFlight automatically captures crash logs
3. Tester enters additional comments
4. Developer downloads crash logs in App Store Connect
5. Developer views the feedback in Xcode Organizer
Key points:
- Step 1: The process is triggered by a beta app crash.
- Step 2: TestFlight automatically collects crash logs.
- Step 3: The tester can add what they did before the crash.
- Step 4: App Store Connect provides log download.
- Step 5: Xcode Organizer can also view this feedback.
Distribution conditions for native Mac apps
(03:22) Native Mac apps require a provisioning profile when distributed through TestFlight. If your project uses Xcode’s Automatically manage signing, Xcode creates and includes the description file. If the project manages signatures manually, the developer needs to explicitly add the description file.
Native Mac app signing for TestFlight
- Xcode Automatically manage signing
  - Xcode creates and includes the provisioning profile
- Manual signing
  - Developer adds the provisioning profile explicitly
  - Creation and upload are documented in the Developer portal
Key points:
Xcode Automatically manage signing: The automatic signing path is handled by Xcode in the profile.Xcode creates and includes the provisioning profile: When uploading the build, the required description files are already included in the build.Manual signing: For manual signature projects, you need to add the description file yourself.Developer portal: The process for manually creating and uploading profiles is explained in the Developer portal.
(03:53) Once uploaded with the description file, the build will appear in the macOS area of App Store Connect. Developers can create test groups, distribute builds, and view test data for each build.
App Store Connect metrics for a macOS TestFlight build
- invited testers
- installations on devices
- sessions in the last seven days
- crashes
- feedback count
Key points:
invited testers: Display the number of invited testers.installations on devices: Displays the number of installations on the device.sessions in the last seven days: Displays the number of sessions in the last seven days.crashes: Display the number of crashes.feedback count: Display the number of tester feedback.
(04:22) When viewing crash or screenshot feedback, developers can select macOS by platform, and then continue to filter by Mac device or macOS version.
Feedback filters
- platform: macOS
- device: a specific Mac device
- OS version: a specific macOS version
Key points:
platform: macOS: Filter Mac feedback from other platforms.device: Locate the problem on a certain Mac model.OS version: Locate problems on a certain macOS version.
iOS app TestFlight control on Apple Silicon Mac
(04:54) iPhone and iPad apps can run on Apple Silicon Macs. TestFlight allows developers to control whether these iOS builds are available for Mac by tester group.
Tester group setting
- enabled: iOS builds in this group are available to TestFlight on Apple Silicon Macs
- disabled: iOS builds from this group stop being available on Mac
Key points:
enabled: iOS builds in this group will appear in TestFlight for Apple Silicon Macs.disabled: iOS builds in this group will no longer be available for Mac.Tester group: The control granularity falls at the test group level, which is smaller than the entire app.
(05:22) iOS builds are still displayed as currently, but the statistics will include Apple Silicon Macs. Crash and screenshot feedback remains under the iOS platform in App Store Connect and includes data submitted from Apple Silicon Macs.
iOS build data with Apple Silicon Macs
- build counts include Apple Silicon Macs
- crashes appear under platform iOS
- screenshot feedback appears under platform iOS
- feedback submitted from Apple Silicon Macs is included
Key points:
build counts: iOS build counts include Apple Silicon Macs.crashes: Crash feedback is viewed on the iOS platform.screenshot feedback: Screenshot feedback can also be viewed on the iOS platform.Apple Silicon Macs: Data submitted by Mac will go into the same feedback flow.
Internal test group becomes multi-group management
(05:52) Internal testing was previously available for quick trials by the App Store Connect team. An improvement for 2021 is multiple internal groups. Each internal group can configure build distribution and feedback collection independently.
Internal testing improvements
- create multiple internal groups
- configure build distribution per internal group
- configure feedback collection per internal group
- applies to all supported platforms
Key points:
create multiple internal groups: Internal testing can be split by team.build distribution: Different groups can get different builds.feedback collection: Different groups can turn on or off feedback independently.all supported platforms: This improvement applies to all TestFlight supported platforms.
(06:20) The examples given by Apple are Development Team and QA Team. The development team needs access to all builds in the development cycle, and the QA team only needs access to specific stable builds.
Internal group example
- Development Team
  - automatic distribution enabled
  - all current and future builds are available
- QA Team
  - automatic distribution disabled
  - specific builds are manually added
Key points:
Development Team: The development group turns on automatic distribution, and current and future builds will enter this group.automatic distribution enabled: For those who need to keep up to date with the latest builds.QA Team: The QA group turns off automatic distribution and only adds specific builds manually.specific builds: Suitable for processes that only test stable candidate versions.
(07:02) The setup step occurs in App Store Connect. Developers click the plus sign next to Internal Testing to create a group, name it and choose whether to enable automatic distribution. Once the group is created, build and testers can be added manually.
Create internal groups in App Store Connect
1. Click the plus button next to Internal Testing
2. Give the internal group a name
3. Choose Enable automatic distribution for the Dev Team
4. Uncheck Enable automatic distribution for the QA Team
5. Add specific builds to the QA Team
6. Add testers to each group
7. Enable or disable feedback per group
Key points:
- Step 1: The entrance is next to Internal Testing.
- Step 2: Each internal group has its own name.
- Step 3: The development team enables automatic distribution.
- Step 4: QA group turns off automatic distribution.
- Step 5: The QA group manually selects the build via the plus sign.
- Step 6: Each group manually selects the corresponding testers.
- Step 7: Feedback collection can be switched on and off by group.
(07:52) If your team uses the App Store Connect API, you can manage internal groups in different configurations through the BetaGroups Resource. Apple only named the resource name in its presentation and did not give specific request paths or fields.
App Store Connect API resource
BetaGroups Resource
- manages internal groups
- supports different group configurations
Key points:
BetaGroups Resource: This is an API resource explicitly mentioned in the talk.manages internal groups: Internal groups can be managed via the API.different group configurations: Can handle different group configurations.- The speech did not show API endpoints, request bodies or field names. Actual access should be based on the App Store Connect API documentation.
Xcode Cloud build into TestFlight
(08:13) Xcode Cloud was launched the same year and integrated with TestFlight. It automatically builds, tests, and distributes applications to designated beta groups via TestFlight.
Xcode Cloud + TestFlight
1. Xcode Cloud builds the app
2. Xcode Cloud tests the app
3. Xcode Cloud distributes builds through TestFlight
4. TestFlight sends builds to specific beta groups
Key points:
- Step 1: The build is performed by Xcode Cloud.
- Step 2: Tests are also run in the Xcode Cloud process.
- Step 3: Distribution is done via TestFlight.
- Step 4: The target test group can be pre-specified.
(09:04) A new Build Groups view has been added to App Store Connect. Builds are grouped by Xcode Cloud workflow and Git branch. Internal testers can also find builds by familiar branch names and workflows in TestFlight.
Build Groups view
- grouped by Xcode Cloud workflow
- grouped by Git branch
- supported in the App Store Connect app on iOS
- visible to internal testers on TestFlight
- feedback can be filtered by a specific Build Group
Key points:
Xcode Cloud workflow: Builds are organized by workflow.Git branch: Builds are organized by branches.App Store Connect app on iOS: App Store Connect for iOS also supports Build Groups.internal testers on TestFlight: Internal testers can use these groups to find builds.feedback: The feedback area can be filtered by specific Build Group.
Core Takeaways
-
What to do: Connect your Mac app to TestFlight beta testing. Why it’s worth doing: TestFlight on Mac supports the installation of beta applications, automatic updates, screenshot feedback and crash log collection, replacing manual package distribution. How to get started: Enable Automatically manage signing in Xcode, upload the macOS build with provisioning profile to App Store Connect, and create a TestFlight test group.
-
What to do: Split the internal testing process for the development group and the QA group. Why it’s worth doing: Internal testing supports multiple groups, and each group can independently configure build distribution and feedback collection. The development team can automatically get all builds, and the QA team only tests stable builds. How to get started: Create two internal groups next to Internal Testing in App Store Connect, enable automatic distribution for the development group, and manually add builds for the QA group.
-
What to do: Make iOS apps available for targeted beta testing on Apple Silicon Macs. Why it’s worth doing: TestFlight can control whether iOS builds are available on Apple Silicon Macs by test group, which is suitable for verifying the Mac experience with a small range of users first. How to start: Enter the corresponding tester group, enable the availability settings of iOS builds on Apple Silicon Macs, and then check the crash and screenshot feedback under the iOS platform.
-
What to do: Use Xcode Cloud to automatically distribute every build to TestFlight. Why it’s worth it: Xcode Cloud can automatically build, test, and distribute to designated beta groups via TestFlight, reducing the manual steps of uploading and distribution. How to get started: Create an Xcode Cloud workflow, associate App Store Connect, and set the distribution target to the specified TestFlight test group.
-
What to do: Track test feedback by Git branch. Why it’s worth doing: Build Groups will organize builds by Xcode Cloud workflow and Git branch, and the feedback area can be filtered by specific Build Groups. How to get started: Let different development lines use clear branch names and workflow names, and filter issues by Build Group in the Feedback area of App Store Connect.
Related Sessions
- Meet Xcode Cloud — Introducing how Xcode Cloud provides continuous integration and continuous delivery for Apple platform applications.
- Explore Xcode Cloud workflows — Explain how workflow automatically builds, analyzes, tests, archives and distributes applications.
- Distribute apps in Xcode with cloud signing — Demonstrates improvements to the Xcode distribution process and cloud signing for App Store Connect uploads.
- Triage TestFlight crashes in Xcode Organizer — Describes how to handle TestFlight crashes and test feedback in Xcode Organizer.
- Qualities of great iPad and iPhone apps on Macs with M1 — Explains the quality of experience you should focus on when running iPhone and iPad apps on M1 Macs.
Comments
GitHub Issues · utterances