
Highlight
on macOS
PhotogrammetrySessionThe API allows you to generate USDZ 3D models with material maps in minutes from dozens of photos. It supports four levels of precision from Reduced to Raw, and is accelerated by Neural Engine on Apple Silicon.
Core Content
You need a 3D model.The traditional approach: hire a professional modeler to spend hours or even days pinching out shapes and drawing textures based on reference drawings.The cost is high and the cycle is long.
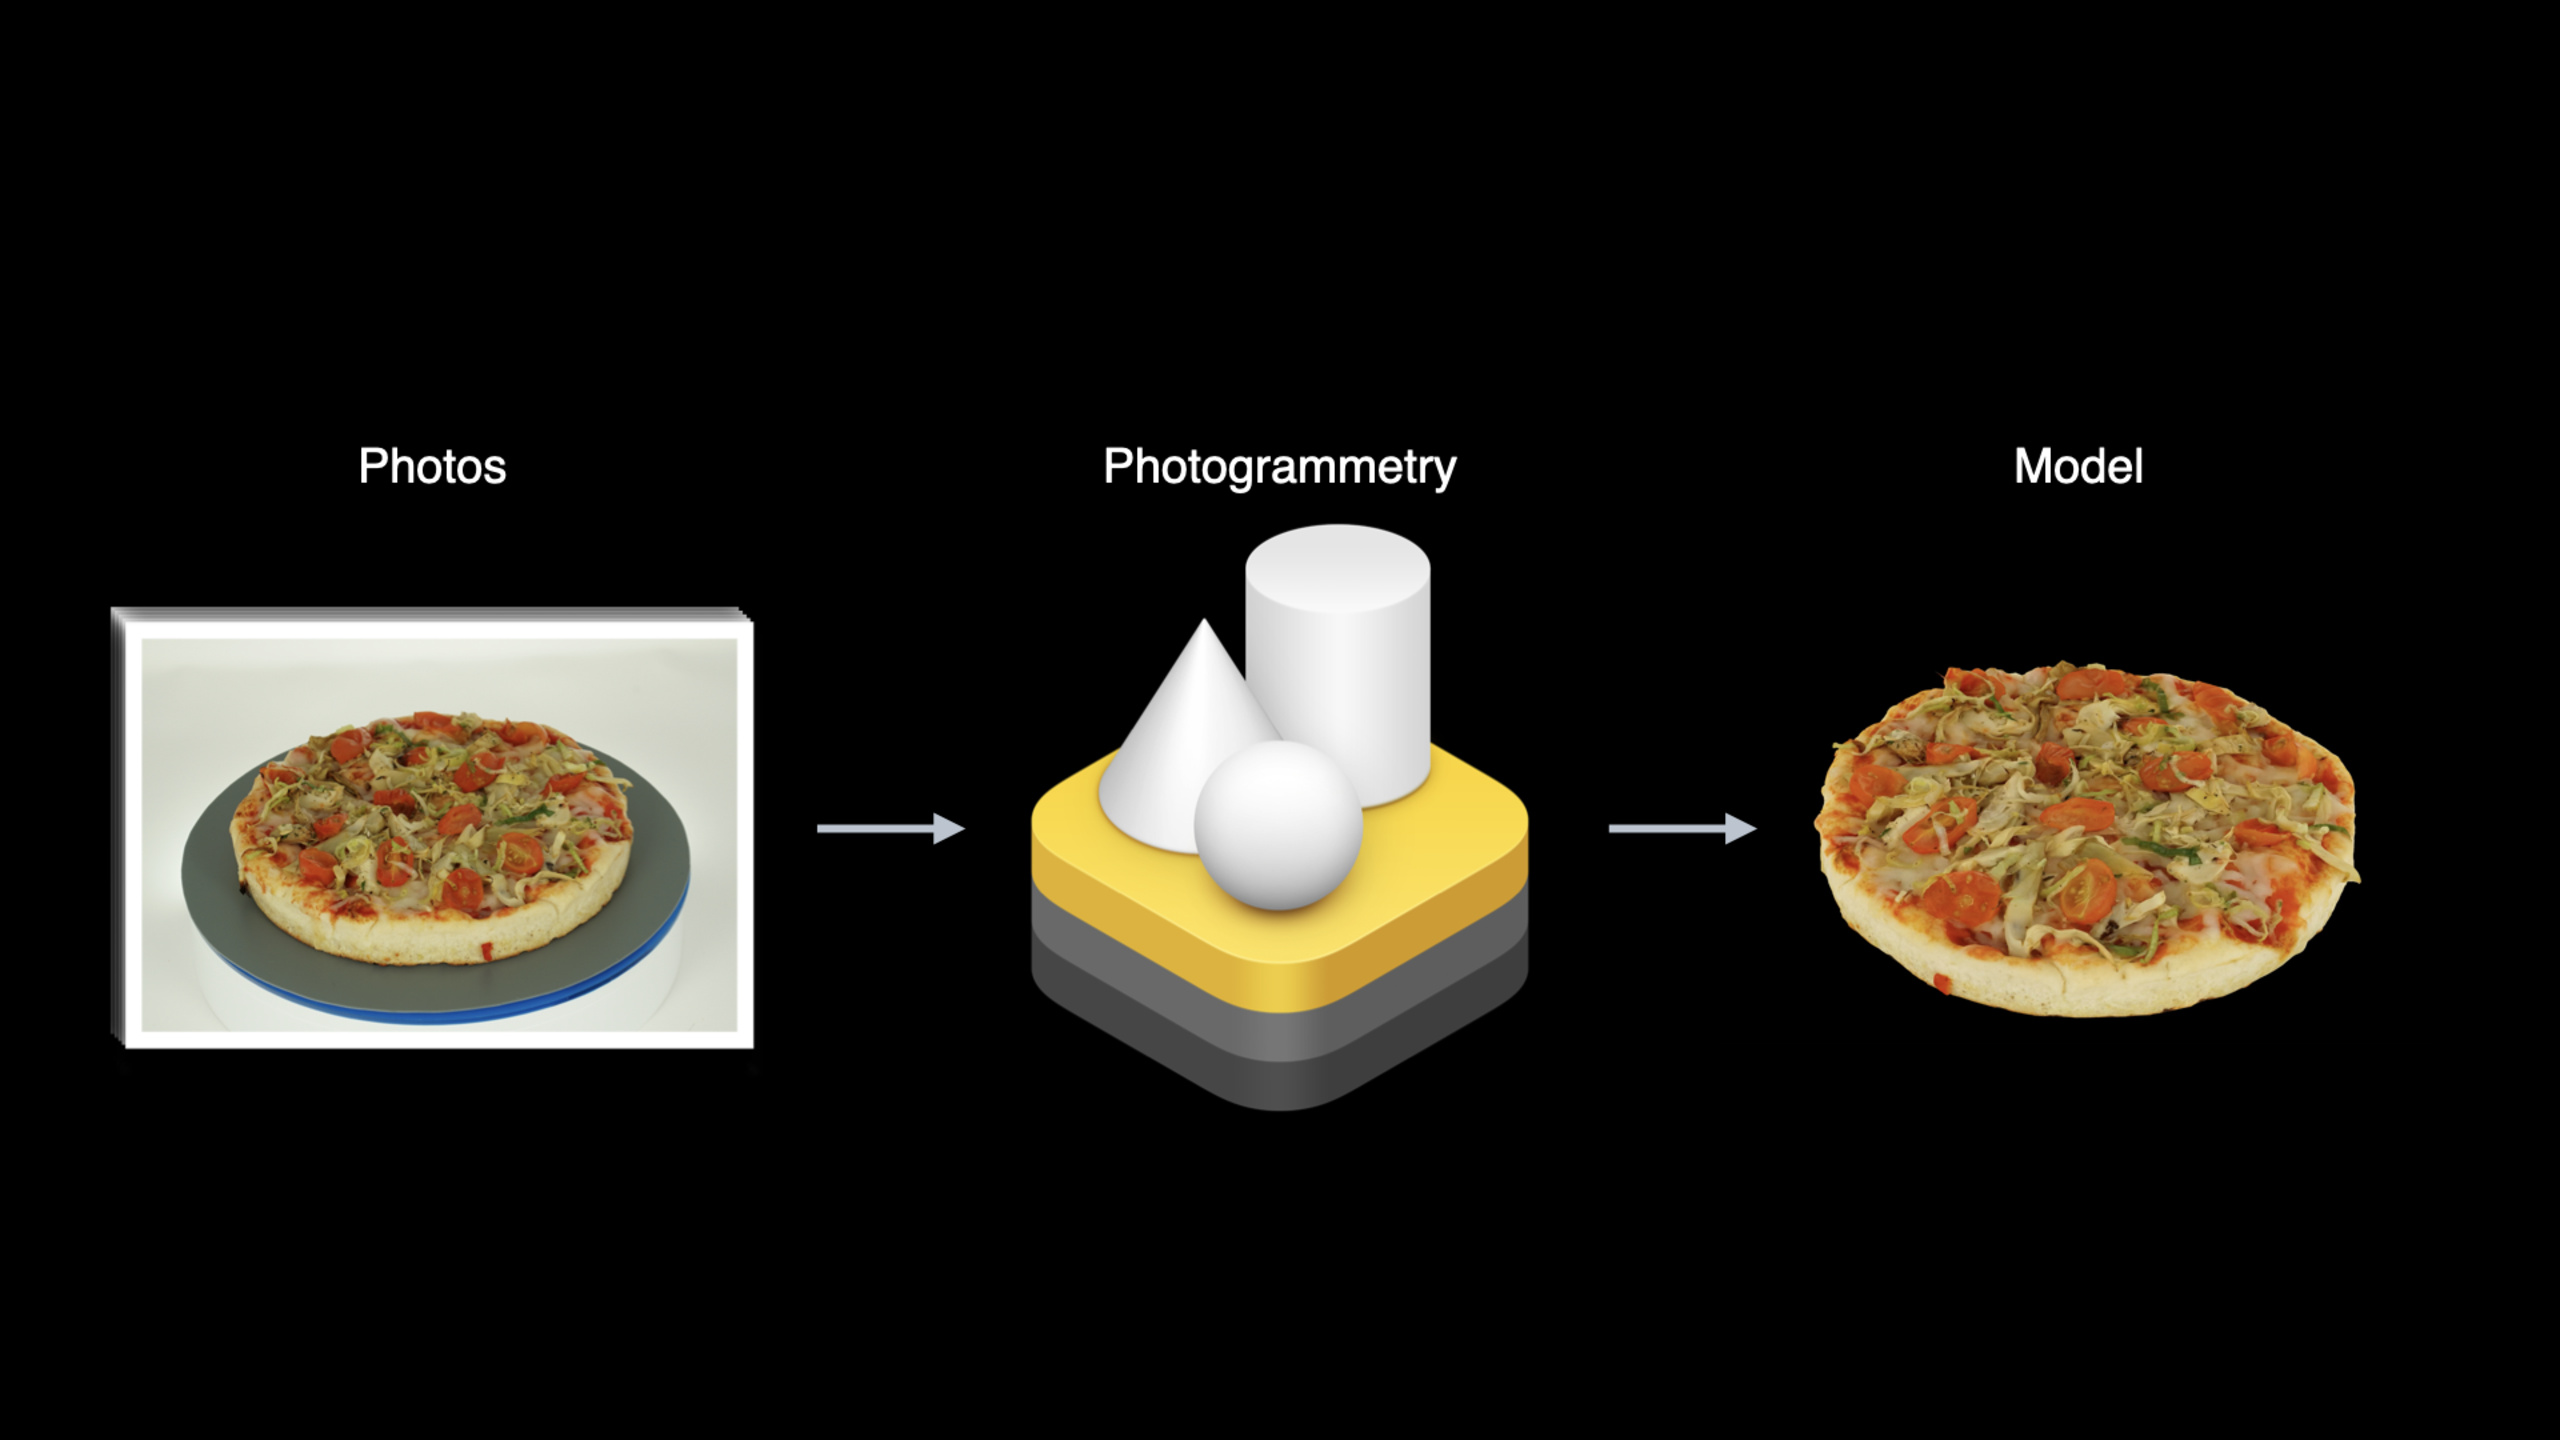
Object Capture provides another way: take a photo, transfer it to Mac, run the code, and wait a few minutes for the model to come out.
This technique is called photogrammetry.The principle is not new – using computer vision to recover 3D structures from multiple 2D photos.What’s new is that Apple has made it a macOS API that can be called with one line of code, and has made Neural Engine acceleration for Apple Silicon.
A real-life scenario: You open a pizza shop and want to create an AR menu to allow customers to view the 3D pizza model on their mobile phones.In the past, I had to find outsourced modeling.Now you take a circle of photos yourself, use Object Capture to generate a model, and throw it directly into AR Quick Look.
Detailed Content
Create PhotogrammetrySession
(06:56)
The API is in the RealityKit framework.The most basic usage: specify a folder containing photos and create a session.
import RealityKit

let inputFolderUrl = URL(fileURLWithPath: "/tmp/Sneakers/", isDirectory: true)
let session = try! PhotogrammetrySession(
    input: inputFolderUrl,
    configuration: PhotogrammetrySession.Configuration()
)
Key points:
- Photos can be taken by iPhone, iPad, DSLR or even drone
- If you take photos in HEIC format with a device that supports depth sensing such as iPhone 12 Pro, the API will automatically extract the depth data to restore the true size and gravity direction.
- Also supports advanced usage: importing pictures one by one
PhotogrammetrySample, each image can come with a depth map, gravity vector or custom segmentation mask
Handle asynchronous output streams
(09:26)
After the Session is created, you need to connect to the output stream to receive progress and results.StoreKit 2 for SwiftAsyncSequenceaccomplish:
Task {
    do {
        for try await output in session.outputs {
            switch output {
            case .requestProgress(let request, let fraction):
                print("Request progress: \(fraction)")
            case .requestComplete(let request, let result):
                if case .modelFile(let url) = result {
                    print("Request result output at \(url).")
                }
            case .requestError(let request, let error):
                print("Error: \(request) error=\(error)")
            case .processingComplete:
                print("Completed!")
                handleComplete()
            default:
                break
            }
        }
    } catch {
        print("Fatal session error! \(error)")
    }
}
Key points:
for try awaitThe loop will continue to receive messages until the session is released or a fatal error occurs.requestProgressCan be used to drive a progress bar.requestCompleteReturn model file URL.processingCompleteIndicates that all queued requests have been processed
Generate models with multiple accuracy levels at the same time
(13:44)
Multiple outputs can be requested simultaneously with one call, and the engine will share the calculations, making it faster than sequential requests:
try! session.process(requests: [
    .modelFile("/tmp/Outputs/model-reduced.usdz", detail: .reduced),
    .modelFile("/tmp/Outputs/model-medium.usdz", detail: .medium)
])
Key points:
- Request multiple detail levels at the same time to reuse intermediate calculation results
- You can even request all four levels at once
process()Will return immediately and the result will be delivered asynchronously through the output stream
Four types of output precision
(23:51)
| Level | Purpose | Contains Materials |
|---|---|---|
| Preview | Interactive preview, lowest quality but fastest to generate | - |
| Reduced | Web/mobile AR, low polygon count | Diffuse, Normal, AO |
| Medium | Single model high-detail display | Diffuse, Normal, AO |
| Full | Game/Post-Production, Highest Geometry Detail | Diffuse, Normal, AO, Roughness, Displacement |
| Raw | Professional workflow, maximum number of faces + original texture | Only maximum diffuse texture, you need to process the material yourself |
Key points:
- Reduced/Medium has been compressed and optimized and can be used directly in AR Quick Look
- Full baked PBR material, suitable for most rendering scenarios
- Raw is for studios with their own pipelines, with the highest number of faces and texture details but requires post-processing
Interactive workflow
(15:28)
In addition to directly generating the final model, the API also supports interactive workflows:
- Ask first
detail: .previewGenerate low-quality preview models - Request at the same time
.boundsGet estimated capture volume - Adjust the bounding box in the UI and crop out unnecessary parts (such as the base supporting the object)
- Adjust root transform (zoom, translation, rotation)
- Request the final model with the adjusted geometry parameters
This process eliminates the need for post-editing while optimizing memory usage.
Best Practices for Photography
(20:08)
- Object Selection: Select objects with sufficient texture details.Avoid transparent, highly reflective areas.The object needs to be rigid and cannot deform when flipped and photographed
- Background: Place it on a simple background, and the objects should stand out
- Shooting Method: Move slowly around the object to ensure even coverage of all angles.20-200 close-up photos are usually sufficient
- Overlap: Maintain high overlap between adjacent photos
- Composition: Try to let the object fill the screen, choose horizontal or vertical shot according to the size of the object
- Flip Shot: If you need to reconstruct the bottom, flip the object and continue shooting
- Recommended Solution: Turntable + Softbox + Uniform lighting, use CaptureSample App’s timed shutter to synchronize the turntable rotation
Apple provides the CaptureSample App (written in SwiftUI) that demonstrates how to take high-quality photos with depth and gravity data on iOS.Supports manual and timed shutter modes, gallery to quickly check photo quality.
Core Takeaways
-
Make a 3D display tool for e-commerce products.Use iPhone to take a circle of product photos, upload them to Mac to automatically generate USDZ with Reduced precision, and embed AR Quick Look into the web page.Customers can view 3D products using their mobile phones.Entrance API:
PhotogrammetrySession+.reduced。 -
Build a digital archiving system for cultural relics.The museum uses a SLR to photograph cultural relics, generates Full precision model archives, and outputs Medium precision for online exhibition.Entrance API:
PhotogrammetrySession+ Multiple detail levels are requested simultaneously. -
Make a furniture placement AR application.Users take photos of their own furniture to generate 3D models, and then use AR to preview the placement effects in their new homes.Automatically restore true size using iPhone depth data.Entrance API:
PhotogrammetrySession+ HEIC depth data. -
Make a 3D food menu tool.The restaurant takes photos of the dishes, generates a 3D model in a few minutes, and customers scan the QR code to see the rotating 3D dishes.Entrance API:
PhotogrammetrySession+ARQuickLook。 -
Make an interactive model refinement tool.First request the preview model, let the user adjust the cropping frame and rotation in the UI, and then generate Full precision output after confirmation.Forget external 3D editing software.Entrance API:
PhotogrammetrySession+.preview+geometryparameter.
Related Sessions
- AR Quick Look, meet Object Capture — Use the USDZ model created by Object Capture for AR Quick Look display
- Create 3D Workflows with USD — Detailed explanation of the USD format, suitable for workflows that require Raw output for post-processing
- Dive into RealityKit 2 — New features in RealityKit 2, including custom shaders and dynamic textures
- Explore Shaders in RealityKit 2 — Add custom material effects to models generated by Object Capture
Comments
GitHub Issues · utterances