
Highlight
RealityKit 2 introduces customization systems, PhysicallyBasedMaterial, animation blending layers, character controllers, and runtime resource generation, allowing AR application development to upgrade from “placing models” to “building complete interactive experiences.”
Core Content
When RealityKit was released in 2019, its positioning was to “make AR development easier.”Load the USDZ model, place it on the detected plane, and run it with just a few lines of code.
But developer feedback is clear: we need more control.Custom shaders, custom game logic, more flexible animations, physics interactions - these were difficult to implement in RealityKit 1.
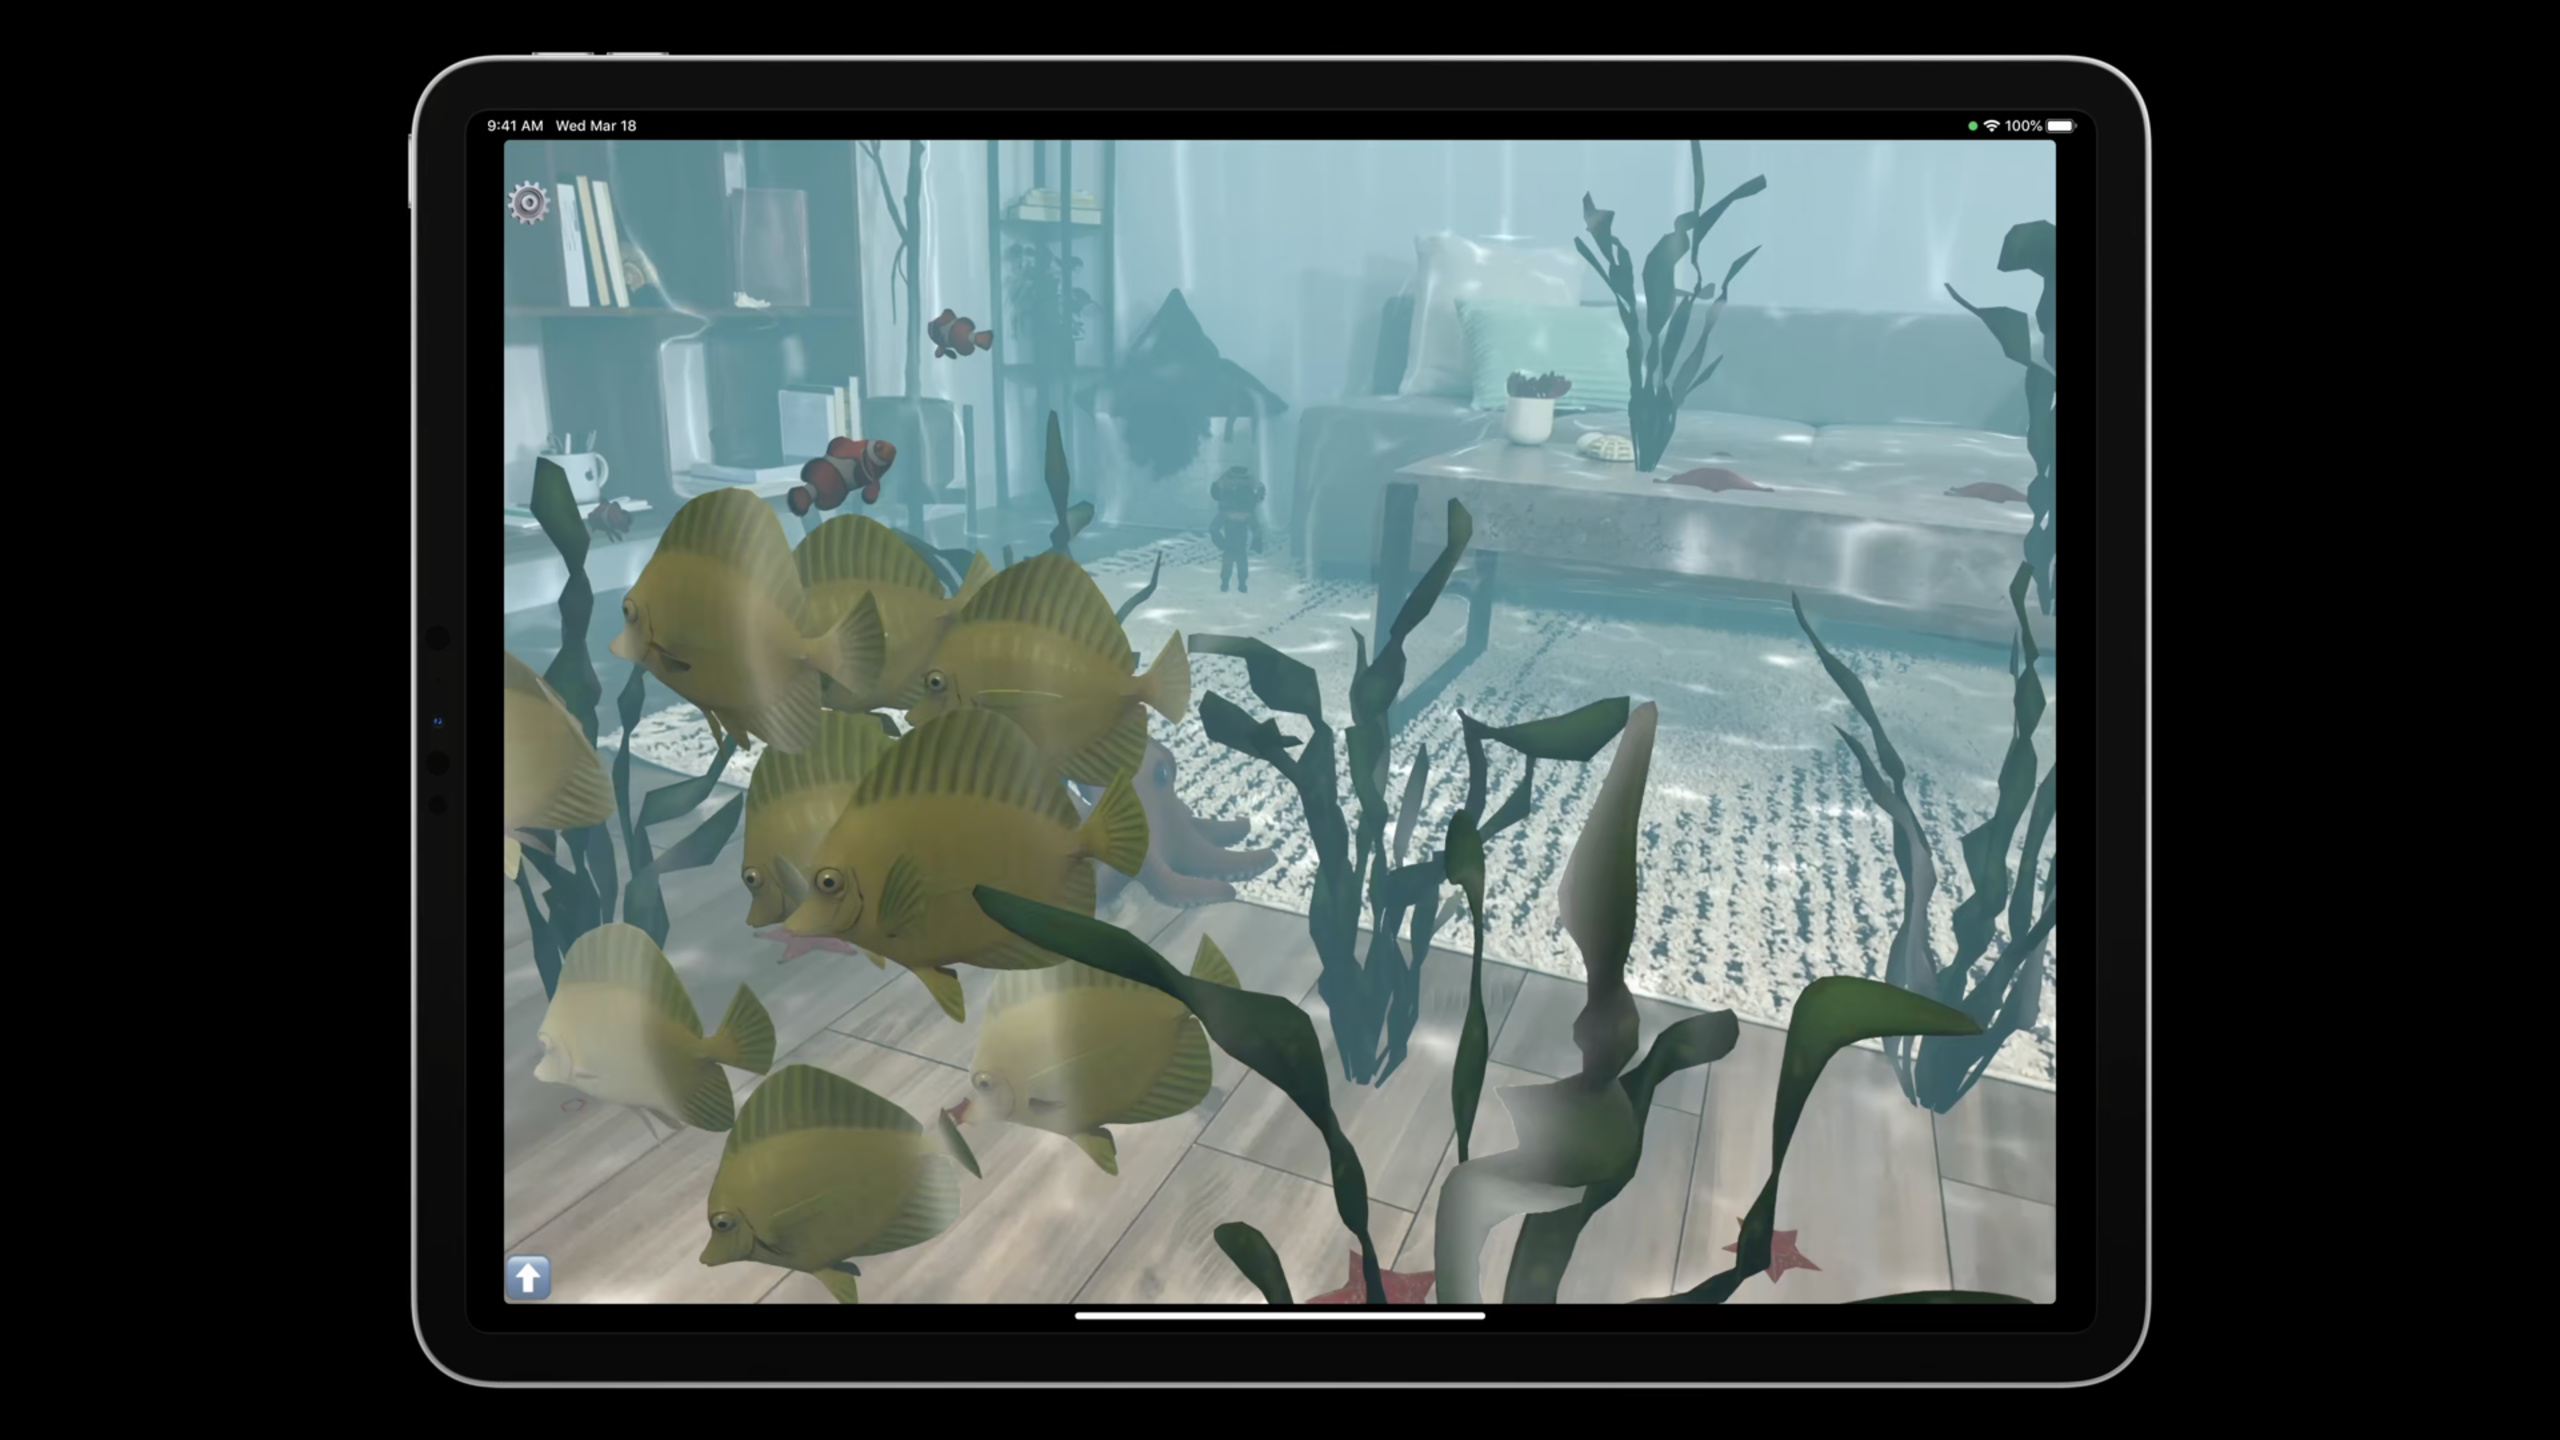
The answer to WWDC2021 is RealityKit 2.Session runs throughout with an underwater AR demo: schools of fish swim around the living room, divers jump between the couch and the floor, and an octopus changes color and flees when frightened.All these effects are implemented using the new API.
Detailed Content
Custom system: pure ECS architecture
RealityKit 2 evolves towards a purer ECS (Entity Component System) architecture.The function is placed in System, the state is placed in Component, and Entity is just the identifier of the component.
class FlockingSystem: RealityKit.System {
    required init(scene: RealityKit.Scene) { }

    static var dependencies: [SystemDependency] { [.before(MotionSystem.self)] }

    private static let query = EntityQuery(where: .has(FlockingComponent.self)
                                                && .has(MotionComponent.self)
                                                && .has(SettingsComponent.self))

    func update(context: SceneUpdateContext) {
        context.scene.performQuery(Self.query).forEach { entity in
            guard var motion: MotionComponent = entity.components[MotionComponent.self]
                else { continue }

            // Boids simulation: separation, cohesion, and alignment
            motion.forces.append(/* forces */)

            entity.components[MotionComponent.self] = motion
        }
    }
}
Key points:
- Custom system to follow
RealityKit.SystemAgreement (07:10) dependenciesSpecify the order of execution,.before(MotionSystem.self)Make sure this system runs before the motion systemEntityQueryEfficiently filter entities participating in the system without traversing the entire scene graph- Component is a Swift struct (value type), which needs to be written back to entity after modification.
- conform to
CodableComponent for automatic network synchronization in multiplayer AR (08:15)
Architecture changes: Game Manager role weakened
Previously, the update logic for each frame was written inSceneEvents.updateclosures, usually concentrated in the Game Manager class.Now, the update logic is split into a separate System and called by the engine in dependency order.
Previously, component composition was expressed through protocol conformance of Entity subclasses.Now there is no need to subclass Entity, components can be added and removed dynamically at runtime.
// New approach: add/remove components at runtime
entity.components[FlockingComponent.self] = FlockingComponent()
entity.components[FlockingComponent.self] = nil
Key points:
- Game Manager only needs to add Component to Entity, and System will automatically handle the logic (10:15)
- Entity subclassing is no longer required
TransientComponent: Components that are not inherited when cloning an Entity, such as temporary state markers (11:25)storeWhileEntityActive: Event subscriptions are automatically managed with the Entity lifecycle (11:58)
Data transfer between SwiftUI and RealityKit
Build settings panels with SwiftUI to pass data into RealityKit’s custom system.
class Settings: ObservableObject {
    @Published var separationWeight: Float = 1.6
}

struct ContentView: View {
    @StateObject var settings = Settings()
    var body: some View {
        ZStack {
            ARViewContainer(settings: settings)
            MovementSettingsView()
                .environmentObject(settings)
        }
    }
}

struct SettingsComponent: RealityKit.Component {
    var settings: Settings
}

class UnderwaterView: ARView {
    let settings: Settings
    private func addEntity(_ entity: Entity) {
        entity.components[SettingsComponent.self] =
            SettingsComponent(settings: self.settings)
    }
}
Key points:
Settingsas@StateObjectandenvironmentObjectPassing in SwiftUI (12:36)- Packed as
SettingsComponentappended to Entity - Custom system reads setting values from Entity components
Material system upgrade
New in RealityKit 2PhysicallyBasedMaterial, aligned with the USD material specification, isSimpleMaterialsuperset of .
var faceMaterial = PhysicallyBasedMaterial()
faceMaterial.roughness = 0.1
faceMaterial.metallic = 1.0
faceMaterial.blending = .transparent(opacity: .init(scale: 1.0))

let sparklyNormalMap = try! TextureResource.load(named: "sparkly")
faceMaterial.normal.texture = PhysicallyBasedMaterial.Texture.init(sparklyNormalMap)

faceMaterial.baseColor.texture = PhysicallyBasedMaterial.Texture.init(faceTexture)
faceEntity.model!.materials = [faceMaterial]
Key points:
PhysicallyBasedMaterialContains standard PBR properties: baseColor, roughness, metallic, normal, ambientOcclusion, clearcoat, etc. (13:57)- Support for transparency textures and opacityThreshold (14:35)
VideoMaterialAdded transparency support (13:42)CustomMaterialAllows writing custom shaders in Metal code (15:05)
Animation enhancement
The animation API adds new blend layers (Blend Layers) and procedural animation.
// Animation transition
entity.playAnimation(animation, transitionDuration: 0.3)

// Blend layers: Walking on the upper layer, Idle on the lower layer
// Adjust the blend factor to control weight
// Change playback speed to control velocity
Key points:
transitionDurationMake the transition between old and new animations smooth (15:55)- Blend Layers: Multiple animations play on different layers, mixed by blend factor (16:22)
- Change the playback speed to make the character go faster or slower (16:47)
- Use the character’s speed relative to the ground to control blend factor and speed to reduce foot sliding (16:55)
FromToByAnimationProgrammatically create transformation animations (18:33)AnimationViewSlicing multiple animation clips from the USD timeline (17:47)
Character Controller
Character controllers allow entities to physically interact with colliders in the scene.
// Create a capsule-shaped character controller
let characterController = CharacterController(
    height: capsuleHeight,
    radius: capsuleRadius
)
entity.components[CharacterControllerComponent.self] =
    CharacterControllerComponent(characterController)

// Call every frame to automatically avoid obstacles
characterController.move(to: targetPosition)

// Ignore obstacles and teleport directly
characterController.teleport(to: targetPosition)
Key points:
- Capsule shape matches character outline (19:55)
move(to:)Automatic collision detection with environment mesh (LiDAR generated) (20:08)teleport(to:)Ignore obstacles and move directly (20:19)- In the demo, the diver jumps between the sofa and the floor, automatically interacting with the room grid
Runtime resource generation
Facial Mesh
SceneUnderstanding now recognizes faces and returns an Entity with a ModelComponent.
static let sceneUnderstandingQuery =
    EntityQuery(where: .has(SceneUnderstandingComponent.self) && .has(ModelComponent.self))

func findFaceEntity(scene: RealityKit.Scene) -> HasModel? {
    let faceEntity = scene.performQuery(sceneUnderstandingQuery).first {
        $0.components[SceneUnderstandingComponent.self]?.entityType == .face
    }
    return faceEntity as? HasModel
}
Key points:
SceneUnderstandingComponent.entityTypedistinguish.faceand.meshChunk(21:26)- After obtaining the facial Entity, you can replace its material
- Use PencilKit to draw patterns in the demo and apply them to the facial mesh in real time
Audio buffer
from anyAVAudioBufferCreate spatial audio resources.
let synthesizer = AVSpeechSynthesizer()

func speakText(_ text: String, forEntity entity: Entity) {
    let utterance = AVSpeechUtterance(string: text)
    utterance.voice = AVSpeechSynthesisVoice(language: "en-IE")

    synthesizer.write(utterance) { audioBuffer in
        guard let audioResource = try? AudioBufferResource(
            buffer: audioBuffer,
            inputMode: .spatial,
            shouldLoop: true
        ) else { return }

        entity.playAudio(audioResource)
    }
}
Key points:
AudioBufferResourcefromAVAudioBufferCreate (23:09)inputMode: .spatialEnable 3D positional audio- Other modes:
.nonSpatial、.ambient - Available
AVSpeechSynthesizerConvert text to speech, or record microphone input
Core Takeaways
-
Use ECS architecture to organize AR game logic: Split the behavior into independent Systems, and put the state in Component.Entity is just an identifier.This makes the code clearer and facilitates multi-player synchronization.
-
Character controller simplifies AR physical interaction: There is no need to write collision detection and navigation meshes by yourself. The character controller automatically interacts with the environment mesh scanned by LiDAR.
-
New ways to play facial AR: The face mesh + custom materials provided by SceneUnderstanding can achieve virtual makeup, facial filters, expression tracking and other effects.
-
Procedural Audio Generation:
AudioBufferResourceSound effects in AR no longer rely on preset files, and audio can be synthesized, processed and applied in real time. -
PBR materials make virtual content more realistic:
PhysicallyBasedMaterialIt provides a complete PBR workflow, and with advanced attributes such as normal map and clearcoat, virtual objects can better integrate into the real environment lighting.
Related Sessions
- Create 3D models with Object Capture — Quickly create realistic 3D models from photos to provide content material for RealityKit
- Explore ARKit 5 — New features in ARKit 5 include positional anchors and facial tracking improvements
- Discover geometry-aware audio with ARKit — Geometry-aware audio in ARKit
- Render with Metal — Metal rendering pipeline, the basis for writing shaders for CustomMaterial
Comments
GitHub Issues · utterances