
Highlight
Create ML added a Style Transfer template in 2020. Developers can train a Core ML style transfer model that can be used for images and real-time videos by providing a style map and a content image directory.
Core Content
Style transfer used to be more like a research project. Developers need to prepare neural networks, training scripts, inference pipelines, and optimize mobile device performance. At the beginning of the session, the problem is reduced to two inputs: a style image and a content image. The model learns color, shape, and texture, and then applies these visual features to content images.
Create ML app added the Style Transfer template in 2020, integrating the training entry into the visual process. Developers drag in the style map, verification map and content image directory, select the image or video optimization target, set style strength and style density, and then start training. The training in the demonstration will generate a checkpoint every five iterations, and use the verification graph to directly display the current model effect.
The focus of this session is more than just generating a stylized image. The speaker demonstrated a video use case: the model can process video frame by frame and reach up to 120 fps on the A13 Bionic. In the second half, the model is put into the ARKit pipeline, in the AR frameCVPixelBufferScaled to the model input dimensions, stylized with Core ML and rendered to the screen using Metal.
The final AR demo illustrates how this type of model can be put together. One model can handle the real environment background, the other model can handle the character area obtained by person segmentation, and the result is mixed with Metal. Create ML is responsible for training small models, Core ML is responsible for inference, and ARKit and Metal are responsible for real-time scenes.
Detailed Content
Style Transfer What to learn
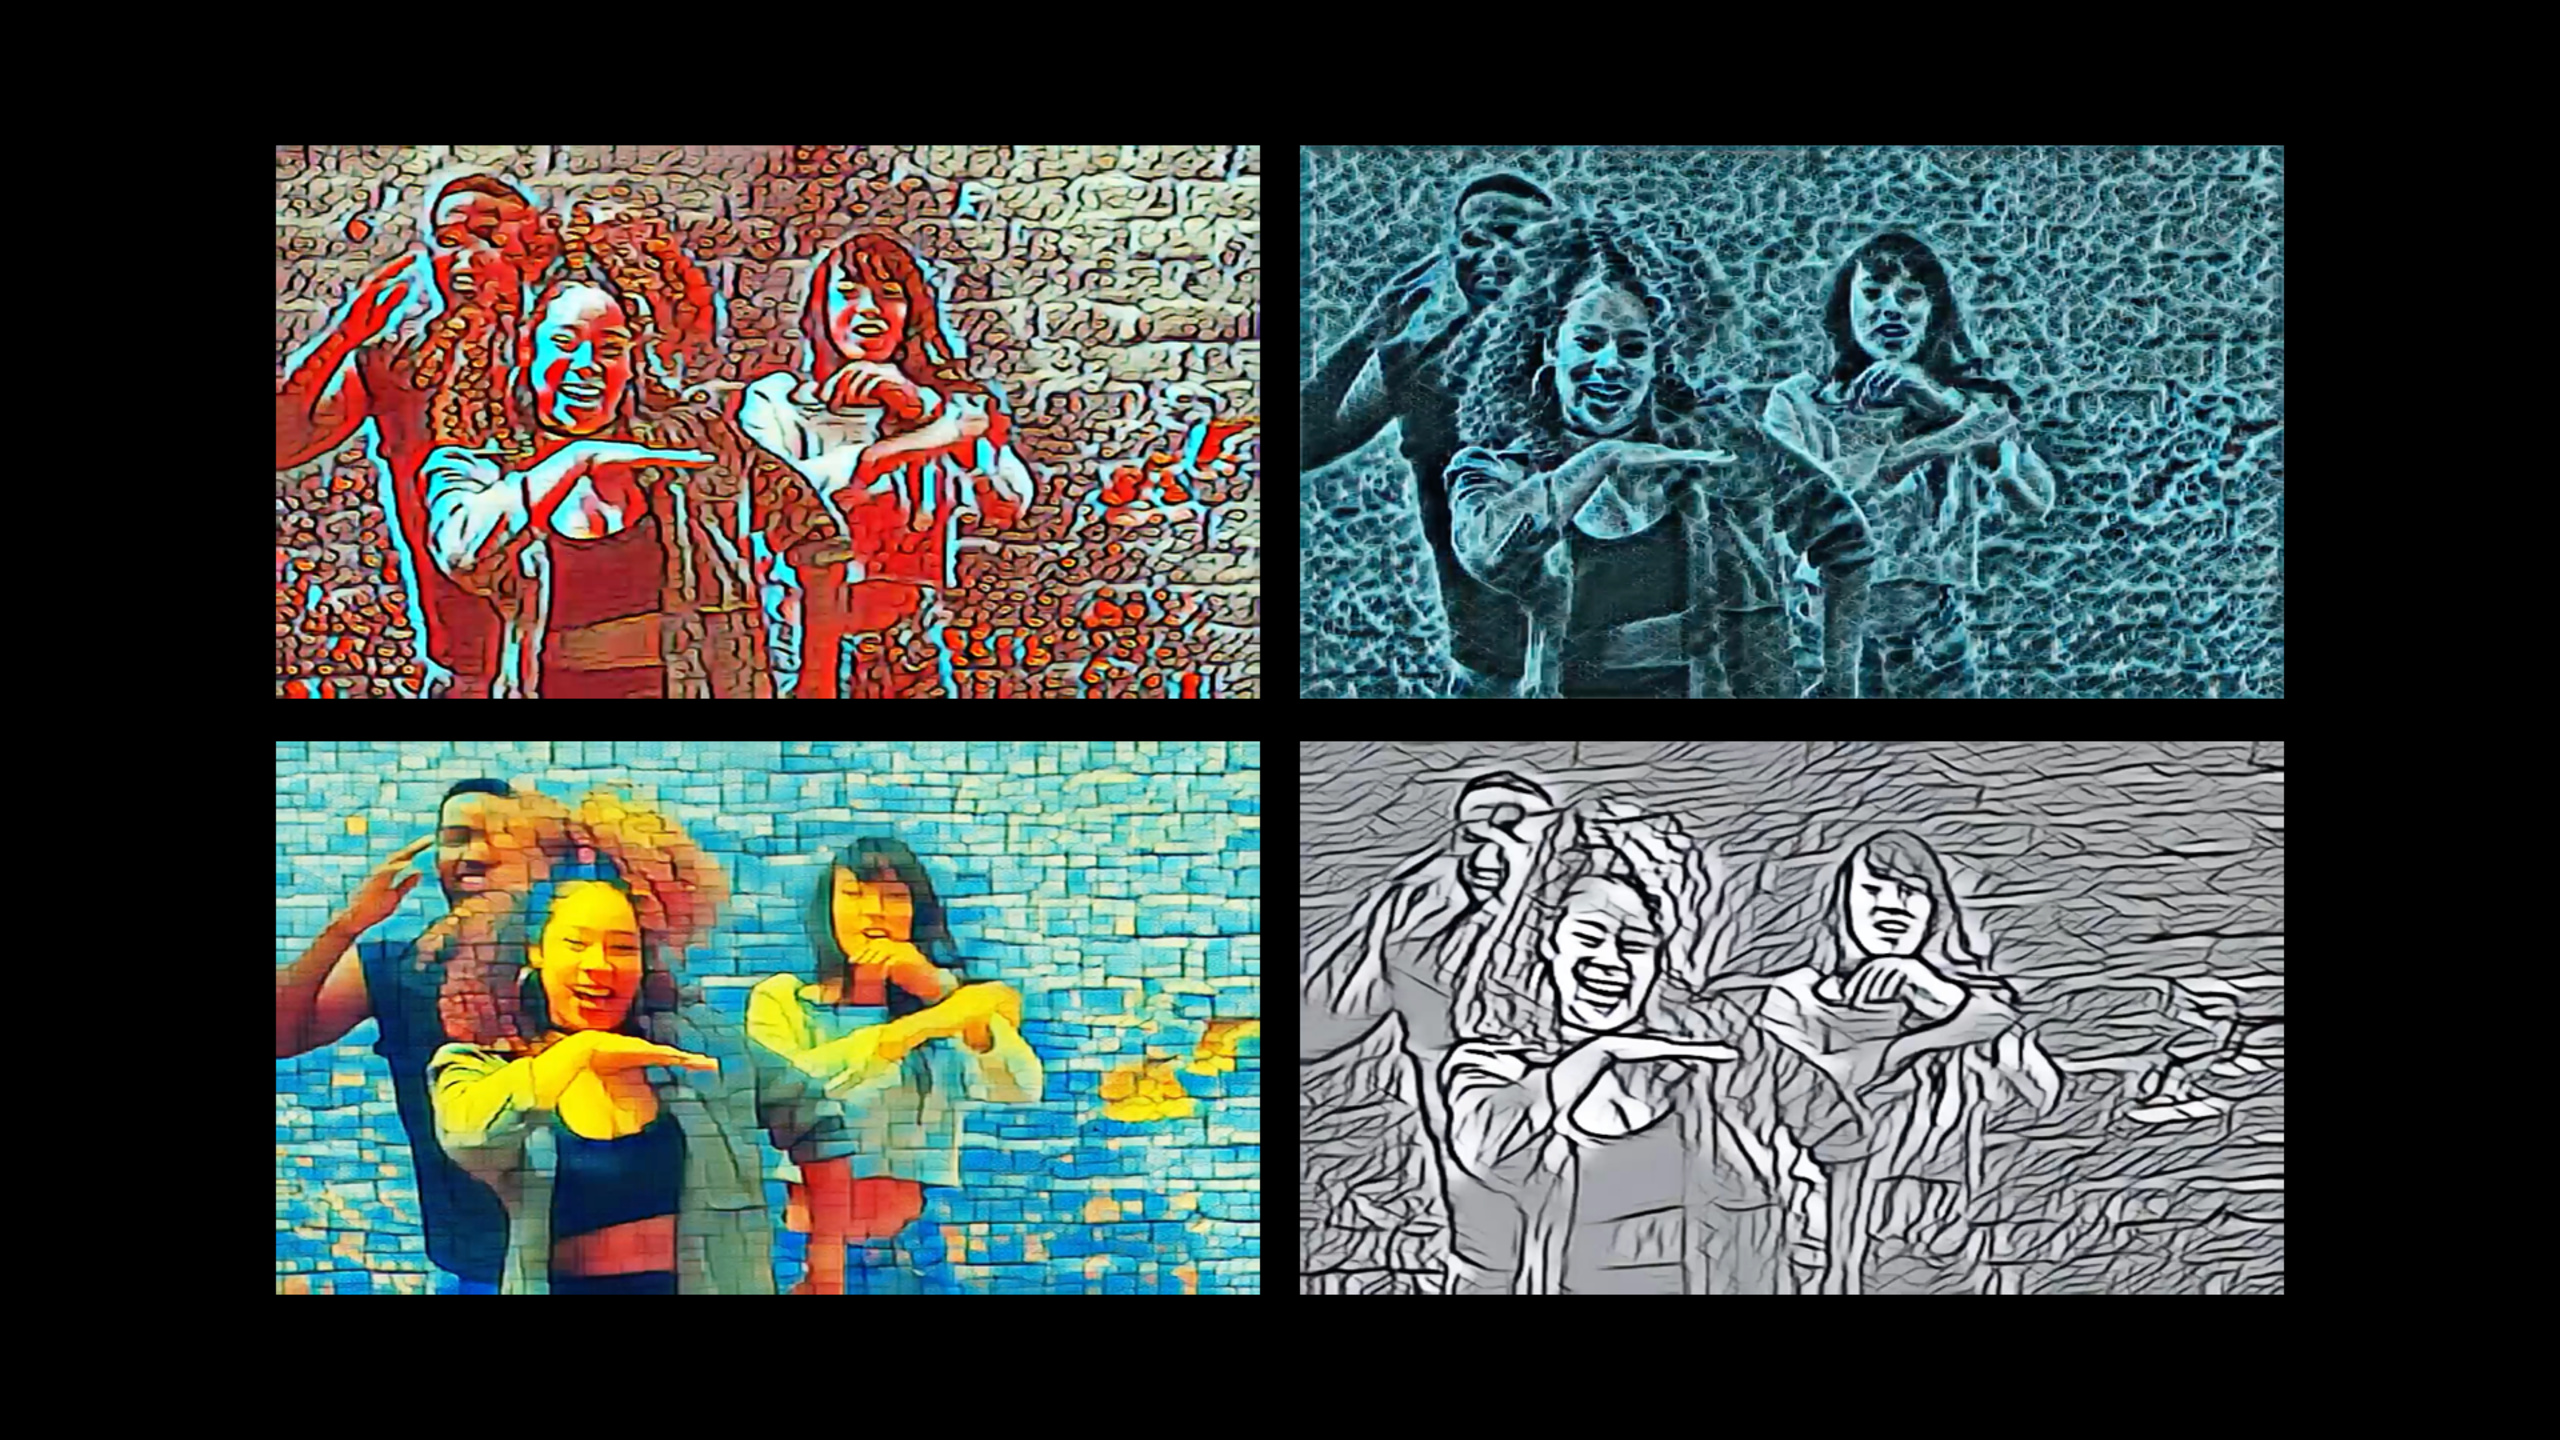
(00:19) Style Transfer is a new machine learning task added to Create ML app this year. It mixes style and content maps: the style map provides the colors, shapes, textures, and the content map provides the main structure to be preserved. In the demo, black strokes on white produce a black and white result, and mosaics and ice cracks can also be sources of style.
Key points:
- Style diagrams are not limited to paintings, mosaics, natural textures and patterns can all be used as training materials.
- The model will learn the visual quality of the style map and then transfer it to new content maps or video frames.
- The training content graph should be close to the images that will be processed during future inference. The demonstration uses natural content images.
Use parameters to control the results
(02:10) Create ML exposes two main parameters to Style Transfer. Style strength controls the balance between content and style. At low intensities, the background absorbs only a small amount of style; at high intensities, both characters and backgrounds more obviously adopt the colors and textures of the style map.
(02:54) style density controls whether the model learns coarse-grained or fine-grained styles. Low density will make the model focus on high-level details such as birds; high density will make the model pay more attention to colors and brushstrokes. This parameter is suitable for exploring different outputs of the same style map.
Key points:
- style strength solves the problem of “how much original image content to retain”.
- style density solves the problem of “learning how thick or thin the style details are”.
- Both sliders are set before training, and the demonstration also shows that the default parameters perform well in most scenarios.
Training in Create ML app
(03:45) The training process starts with creating a new Style Transfer document. The demo project is called DanceStylizer, and the training input includes a style image, a validation image, and a content image directory. The Create ML app can directly download hundreds of natural content images, or use the developer’s own image folder. The demo uses 600 images of natural content.
(04:57) The training target can be image or video. The demo selects video and trains for 400 iterations. Once training starts, Create ML processes the style and content graphs and starts training immediately. Every five iterations, a new model checkpoint will stylize the verification graph, and developers can watch quality changes while training.
Key points:
- The validation graph is used to observe the model quality during the training process without waiting until the end of training.
- A snapshot is an ML model that can be put into the app later and will be saved under model sources.
- The style loss and content loss charts help judge the model’s learning progress on style and content.
- After training for 400 iterations, if the style loss has converged, you can stop; if you still want to improve, you can click train more to continue training.
Preview, export and integration
(06:30) The Preview tab is used to test the trained model. Developers can drag in new test images, switch between stylized image and original content, and compare results from different snapshots. Because the demo model is optimized for video use cases, videos can also be dragged into the preview, and the results can be downloaded, shared, or opened with QuickTime Player.
(07:13) The Output tab displays model information. The model in the demo is less than 1 MB and is suitable for packaging with the app. This page also displays OS availability, as well as input and output layer names in predictions. Finally, you can pass the model to the app for use through get, open in Xcode, or share.
Key points:
- During the preview phase, use new images or videos outside the training set to check the effect.
- Snapshot comparison is suitable for selecting the subjectively better stylized version.
- The system availability and input and output layer names in the output information are model interfaces that must be confirmed before integration.
Put into real-time AR scene
(08:24) The second demonstration combines the Style Transfer model with ARKit. ARKit captures the real environment, and each style transform model is responsible for transforming the scene into a visual style. Each AR frame contains aCVPixelBuffer, the demo will scale it to the input size expected by the Style Transfer model, stylize it with Core ML, and render it to the screen with Metal.
(10:18) A more complex version runs multiple style transfer models simultaneously. The demo combines Apple Neural Engine, ARKit person segmentation and Metal: one model is used for the background environment, another model is used for the segmented person, and the two stylized results are finally blended.
Key points:
- ARKit provides AR frames and person segmentation.
- Core ML executes the Style Transfer model trained by Create ML.
- Metal is responsible for rendering or blending the stylized results to the screen.
- Real-time running of multiple models relies on optimized Style Transfer models and Apple Neural Engine.
Core Takeaways
-
Live Camera Filter: What to do: Add a custom artistic filter to your camera or short video app. Why it’s worth doing: The session clearly demonstrates that video style transfer can run frame-by-frame, reaching up to 120 fps on the A13 Bionic. How to get started: Use Create ML to train a video-optimized Style Transfer model, convert frames into model inputs in the camera frame pipeline, and render the output back to the preview layer.
-
Brand Visual Kit: What it does: Turn brand patterns, textures or illustration styles into reusable filters. Why it’s worth it: Style Transfer can learn colors, shapes, and textures, and the model is less than 1 MB, making it suitable for packaging with apps. How to start: Prepare a style image that represents the brand style, use a content image directory that is close to real user photos for training, and then use the Preview tab to compare snapshots of multiple test images.
-
AR Scene Skinning: What to do: Add a real-time visual theme to an AR scene, such as turning a room into a hand-drawn, ice-cracked, or mosaic style. Why it’s worth doing: In the demo, the ARKit frame is stylized with Core ML and then rendered to the screen with Metal. How to get started: Get it from ARKit
CVPixelBuffer, scale according to the model input size, execute Style Transfer model, and then send the result to Metal for display. -
Character and background layered styles: What to do: Use different styles for characters and background, for example, the characters stay clear and the background becomes an artistic texture. Why it’s worth doing: The session demonstrates combining ARKit person segmentation, running two style transfer models simultaneously and blending them with Metal. How to start: First train two style models separately, and then use segmentation mask to process the background and character areas separately.
Related Sessions
- Control training in Create ML with Swift — Use Swift to control Create ML training, checkpoint, progress monitoring and continued training.
- Build an Action Classifier with Create ML — Also belongs to the new training task of Create ML in 2020, showing how to train an action classification model from videos.
- Explore the Action & Vision app — Shows how Create ML, Core ML, and Vision combine into a complete motion analysis app.
- Detect Body and Hand Pose with Vision — Supplement Vision’s ability to detect human body and hand poses in photos and videos.
- Explore ARKit 4 — Supplements the real-time scene capabilities of ARKit 4, which can be connected to this Style Transfer + ARKit demonstration.
Comments
GitHub Issues · utterances