
Highlight
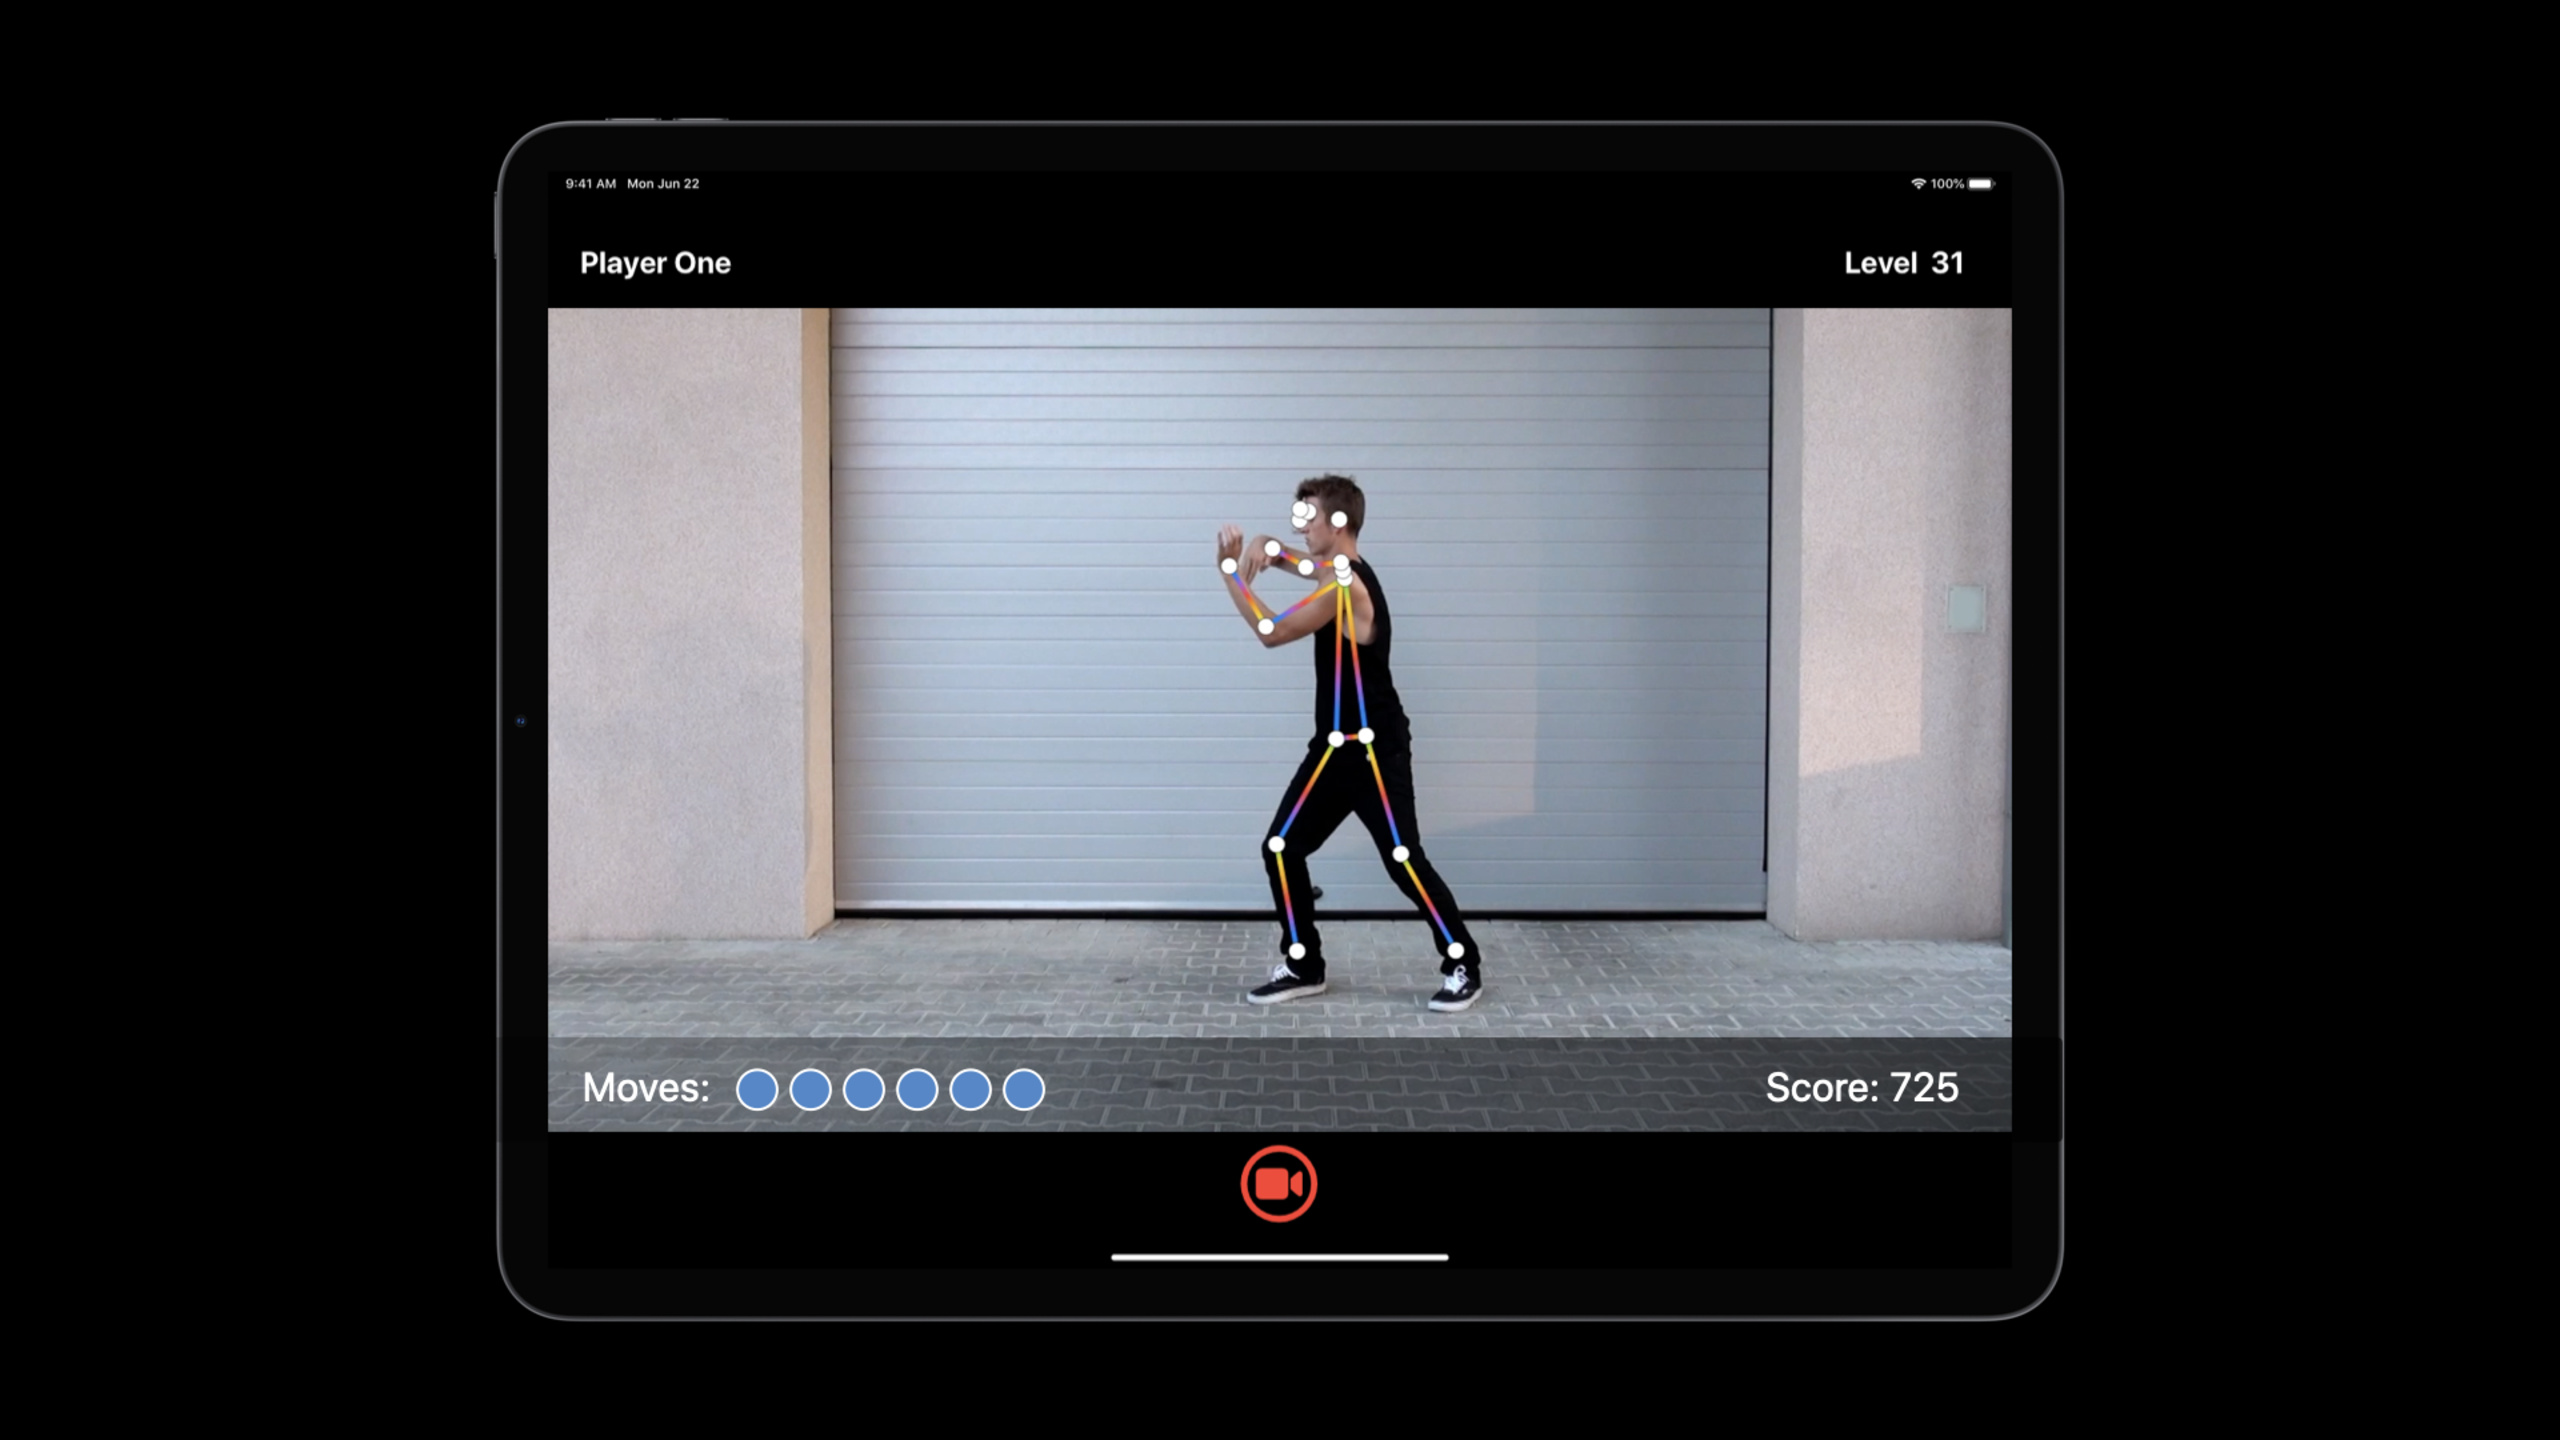
Create ML adds Action Classification templates in 2020. It extracts skeletal key points in the video based on the Vision framework’s Body Pose Estimation, and then uses these key points to train a classification model.
Core Content
Previously, Create ML has been able to train Activity Classification models using motion sensor data. The problem is, many actions don’t have a watch or sensor input, just a phone, camera, or a video. Fitness movements, gymnastics training, and dance movements all fall into this category.
Action Classification converts the input into a sequence of body postures in the video. The Vision framework first extracts human poses from each frame, and Create ML then trains the pose sequence within a period of time into a classification model. The output of the model is predefined action labels such as jumping jacks, lunges, squats.
This process is divided into two stages. In the training phase, developers prepare videos classified by actions in Create ML app, set Action Duration and Augmentations, and then export .mlmodel. During the running phase, the app uses Vision to extract poses from camera frames or video frames, assembles 60 consecutive frames into model input, and then obtains action labels and confidence levels.
Session also made the boundaries clear: this model is driven by Vision’s human pose estimation and is suitable for human body movements; it is not suitable for recognizing animal or object movements. Training data should also be prepared around a person, complete body, stable footage and consistent frame rate.
Detailed Content
Prepare training data using folders or annotation files
(03:45) The basic form of training data is a set of video files. Each video contains only one action, and the folder name is the label to be predicted by the model. The Session example collects five types of sports such as jumping jacks and squats, and also adds two negative categories other and none.
(05:28) If a montage video contains multiple actions, use CSV or JSON to mark the start and end time of each action. The official code snippet gives the JSON structure:
[
    {
        "file_name": "Montage1.mov",
        "label": "Squats",
        "start_time": 4.5,
        "end_time": 8
    }
]
Key points:
file_namepoints to the video file containing the action clip.labelis the action category corresponding to this video, which will become the label predicted by the model.start_timeandend_timemark the time range of the action in the video.- This method is suitable for mixed-cut materials that have been cut by others or obtained from the Internet.
Set up the action window in Create ML
(07:52) Action Duration is one of the most critical parameters during training. Complex movements require a longer window, such as a dance move that might take ten seconds; short, repetitive fitness moves can use a two-second window. Create ML will calculate the number of frames based on the video frame rate and action duration. Session’s fitness model uses 60 frames as the prediction window.
(08:39) Augmentations generate training variations using existing videos. Session demonstrated horizontal flip: if the characters in the training video are all facing left, horizontal flip will generate mirror samples, allowing the model to cover both directions.
(09:40) Training is divided into two steps. The first step is feature extraction. Vision will analyze each frame and encode the positions of 18 landmarks (key points) on the body. Each keypoint records the x-coordinate, y-coordinate, and confidence. The second step is to use these posture features to train the classification model.
Use Vision to extract poses from videos or pictures
(14:05) The model receives the human pose extracted by Vision, and the original video first undergoes pose extraction. The minimum entry point is VNDetectHumanBodyPoseRequest:
import Vision
let request = VNDetectHumanBodyPoseRequest()
Key points:
import Visionintroduces the framework for human pose estimation.VNDetectHumanBodyPoseRequestcreates a body pose request to detect human key points in video frames or pictures.
(14:10) When processing a video file, you can hand this request to VNVideoProcessor:
import Vision
let videoURL = URL(fileURLWithPath: "your-video-file.MOV")
let startTime = CMTime.zero
let endTime = CMTime.indefinite

let request = VNDetectHumanBodyPoseRequest(completionHandler: { request, error in
    let poses = request.results as! [VNRecognizedPointsObservation]
})

let processor = VNVideoProcessor(url: videoURL)
try processor.add(request)
try processor.analyze(with: CMTimeRange(start: startTime, end: endTime))
Key points:
videoURLpoints to the video file to be analyzed.startTimeandendTimedefine the analysis range; here it is analyzed from the beginning to the end of the video.- Obtain
[VNRecognizedPointsObservation]fromrequest.resultsin the completion handler. VNVideoProcessoris responsible for applying requests to video frames.analyze(with:)performs analysis for the given time range.
(14:26) When processing pictures or camera frames, Session uses VNImageRequestHandler:
import Vision
let request = VNDetectHumanBodyPoseRequest()
// Use either one from image URL, CVPixelBuffer, CMSampleBuffer, CGImage, CIImage, etc. in image request handler, based on the context.
let handler = VNImageRequestHandler(url: URL(fileURLWithPath: "your-image.jpg"))

try handler.perform([request])
let poses = request.results as! [VNRecognizedPointsObservation]
Key points:
- The same
VNDetectHumanBodyPoseRequestcan be used for image input. - The input to
VNImageRequestHandlercan come from image URL, or fromCVPixelBuffer,CMSampleBuffer,CGImage,CIImage. perform([request])performs pose detection.- The result is also
[VNRecognizedPointsObservation].
Combine continuous poses into model input
(14:57) The action classification model exported by Create ML receives a three-dimensional multi-array. The posture of each frame is first converted into [1, 3, 18], and then 60 frames are assembled into [60, 3, 18]:
import Vision
import CoreML

// Assume pose1, pose2, ..., have been obtained from a video file or camera stream.
let pose1: VNRecognizedPointsObservation
let pose2: VNRecognizedPointsObservation
// ...

// Get a [1, 3, 18] dimension multi-array for each frame
let poseArray1 = try pose1.keypointsMultiArray()
let poseArray2 = try pose2.keypointsMultiArray()
// ...

// Get a [60, 3, 18] dimension prediction window from 60 frames
let modelInput = MLMultiArray(concatenating: [poseArray1, poseArray2], axis: 0, dataType: .float)
Key points:
keypointsMultiArray()is a convenient API provided by Vision, which converts a frame of pose into a multi-array required by the model.- The dimension of a single frame array is
[1, 3, 18], corresponding to one time point, three numerical channels and 18 body key points. MLMultiArray(concatenating:axis:dataType:)splices multiple frames of poses along the timeline.- The window size during training is 60, and a 60-frame window must be prepared during runtime.
Maintain windows and predictions in the app
(16:27) The Xcode demo encapsulates pose extraction, window caching and prediction in Predictor:
import Foundation
import CoreML
import Vision

@available(iOS 14.0, *)
class Predictor {
    /// Fitness classifier model.
    let fitnessClassifier = FitnessClassifier()

    /// Vision body pose request.
    let humanBodyPoseRequest = VNDetectHumanBodyPoseRequest()

    /// A rotation window to save the last 60 poses from past 2 seconds.
    var posesWindow: [VNRecognizedPointsObservation?] = []
    init() {
        posesWindow.reserveCapacity(predictionWindowSize)
    }

    /// Extracts poses from a frame.
    func processFrame(_ samplebuffer: CMSampleBuffer) throws -> [VNRecognizedPointsObservation] {
        // Perform Vision body pose request
        let framePoses = extractPoses(from: samplebuffer)

        // Select the most promiment person.
        let pose = try selectMostProminentPerson(from: framePoses)

        // Add the pose to window
        posesWindow.append(pose)

        return framePoses
    }

    // Make a prediction when window is full, periodically
    var isReadyToMakePrediction: Bool {
        posesWindow.count == predictionWindowSize
    }

    /// Make a model prediction on a window.
    func makePrediction() throws -> PredictionOutput {
        // Prepare model input: convert each pose to a multi-array, and concatenate multi-arrays.
        let poseMultiArrays: [MLMultiArray] = try posesWindow.map { person in
            guard let person = person else {
                // Pad 0s when no person detected.
                return zeroPaddedMultiArray()
            }
            return try person.keypointsMultiArray()
        }

        let modelInput = MLMultiArray(concatenating: poseMultiArrays, axis: 0, dataType: .float)

        // Perform prediction
        let predictions = try fitnessClassifier.prediction(poses: modelInput)

        // Reset poses window
        posesWindow.removeFirst(predictionInterval)

        return (
            label: predictions.label,
            confidence: predictions.labelProbabilities[predictions.label]!
        )
    }
}
Key points:
FitnessClassifier()is a Core ML model exported from Create ML.humanBodyPoseRequestis only initialized once, Session is recommended to avoid repeated creation every frame.posesWindowsaves the latest 60 frames of poses, corresponding to the two-second window during training.processFrame(_:)extracts poses fromCMSampleBufferand selects the most salient one.- Action Classifier only accepts single-person input; multi-person screens need to implement their own selection logic.
- When no person is detected, the example uses
zeroPaddedMultiArray()to pad with zeros. fitnessClassifier.prediction(poses:)returns the predicted label and confidence of each category.removeFirst(predictionInterval)makes the window slide forward to facilitate continuous prediction.
Limitations during training and use
(22:00) Models require repetition and variety. Session recommends preparing approximately 50 videos of each move and covering different people’s styles, abilities, and speeds. If the user will move from the side or back, the training data should also include these angles.
(23:35) Action Duration should match the action length, and the duration of various actions should be as close as possible. Video frame rate affects the actual window length, so the average frame rate of training and test videos needs to be consistent.
(24:21) Only one person is selected when running. If Vision detects multiple people, the app can remind the user to keep only one person in the frame, or it can select a person by size or location based on pose keypoint coordinates.
(24:52) If you want to count repeated movements, it is best to only include a single movement once per training video. Predictions also require reliable trigger points or smoothing logic to update counters.
Core Takeaways
- Make a home fitness timer without touching the screen: When the model recognizes jumping jacks, lunges or squats, it automatically starts the timer and returns to the
otherstate after stopping the action. Session’s demo uses continuous prediction to drive challenge timing, which is suitable for training after placing the phone away. - Make an action quality scoring tool: Use the confidence value in the prediction result to score the action quality. Session explicitly mentions that confidence can be used to evaluate action quality and compared with example actions in training videos.
- Make a repetition counter: Organize the training video into “a video only contains a single action”, and use prediction window and smoothing logic to update the count during runtime. This program is suitable for repetitive movements such as squats, lunges, and jumping jacks.
- Make a training data check list: Before the user imports the video, check whether there is only one person, whether the whole body is in the frame, whether the lens is stable, and whether clothes block the action. Session lists these as key conditions that affect model performance.
- Make a mixed-cut video annotation gadget: Allow users to mark
file_name,label,start_timeandend_timeon long videos, and then export it to JSON or CSV for Create ML training. This allows you to reuse existing footage without having to cut each action into a separate video first.
Related Sessions
- Explore the Action & Vision app — Continuing the teardown of a motion analysis example app that uses action classification, pose detection, and Vision capabilities.
- Detect Body and Hand Pose with Vision — Explains body posture and hand posture detection, complementing the underlying capabilities of Vision posture input in this session.
- Control training in Create ML with Swift — Shows how to use Swift to control the Create ML training process, which is suitable for extending model training from GUI to scripted process.
Comments
GitHub Issues · utterances