
Highlight
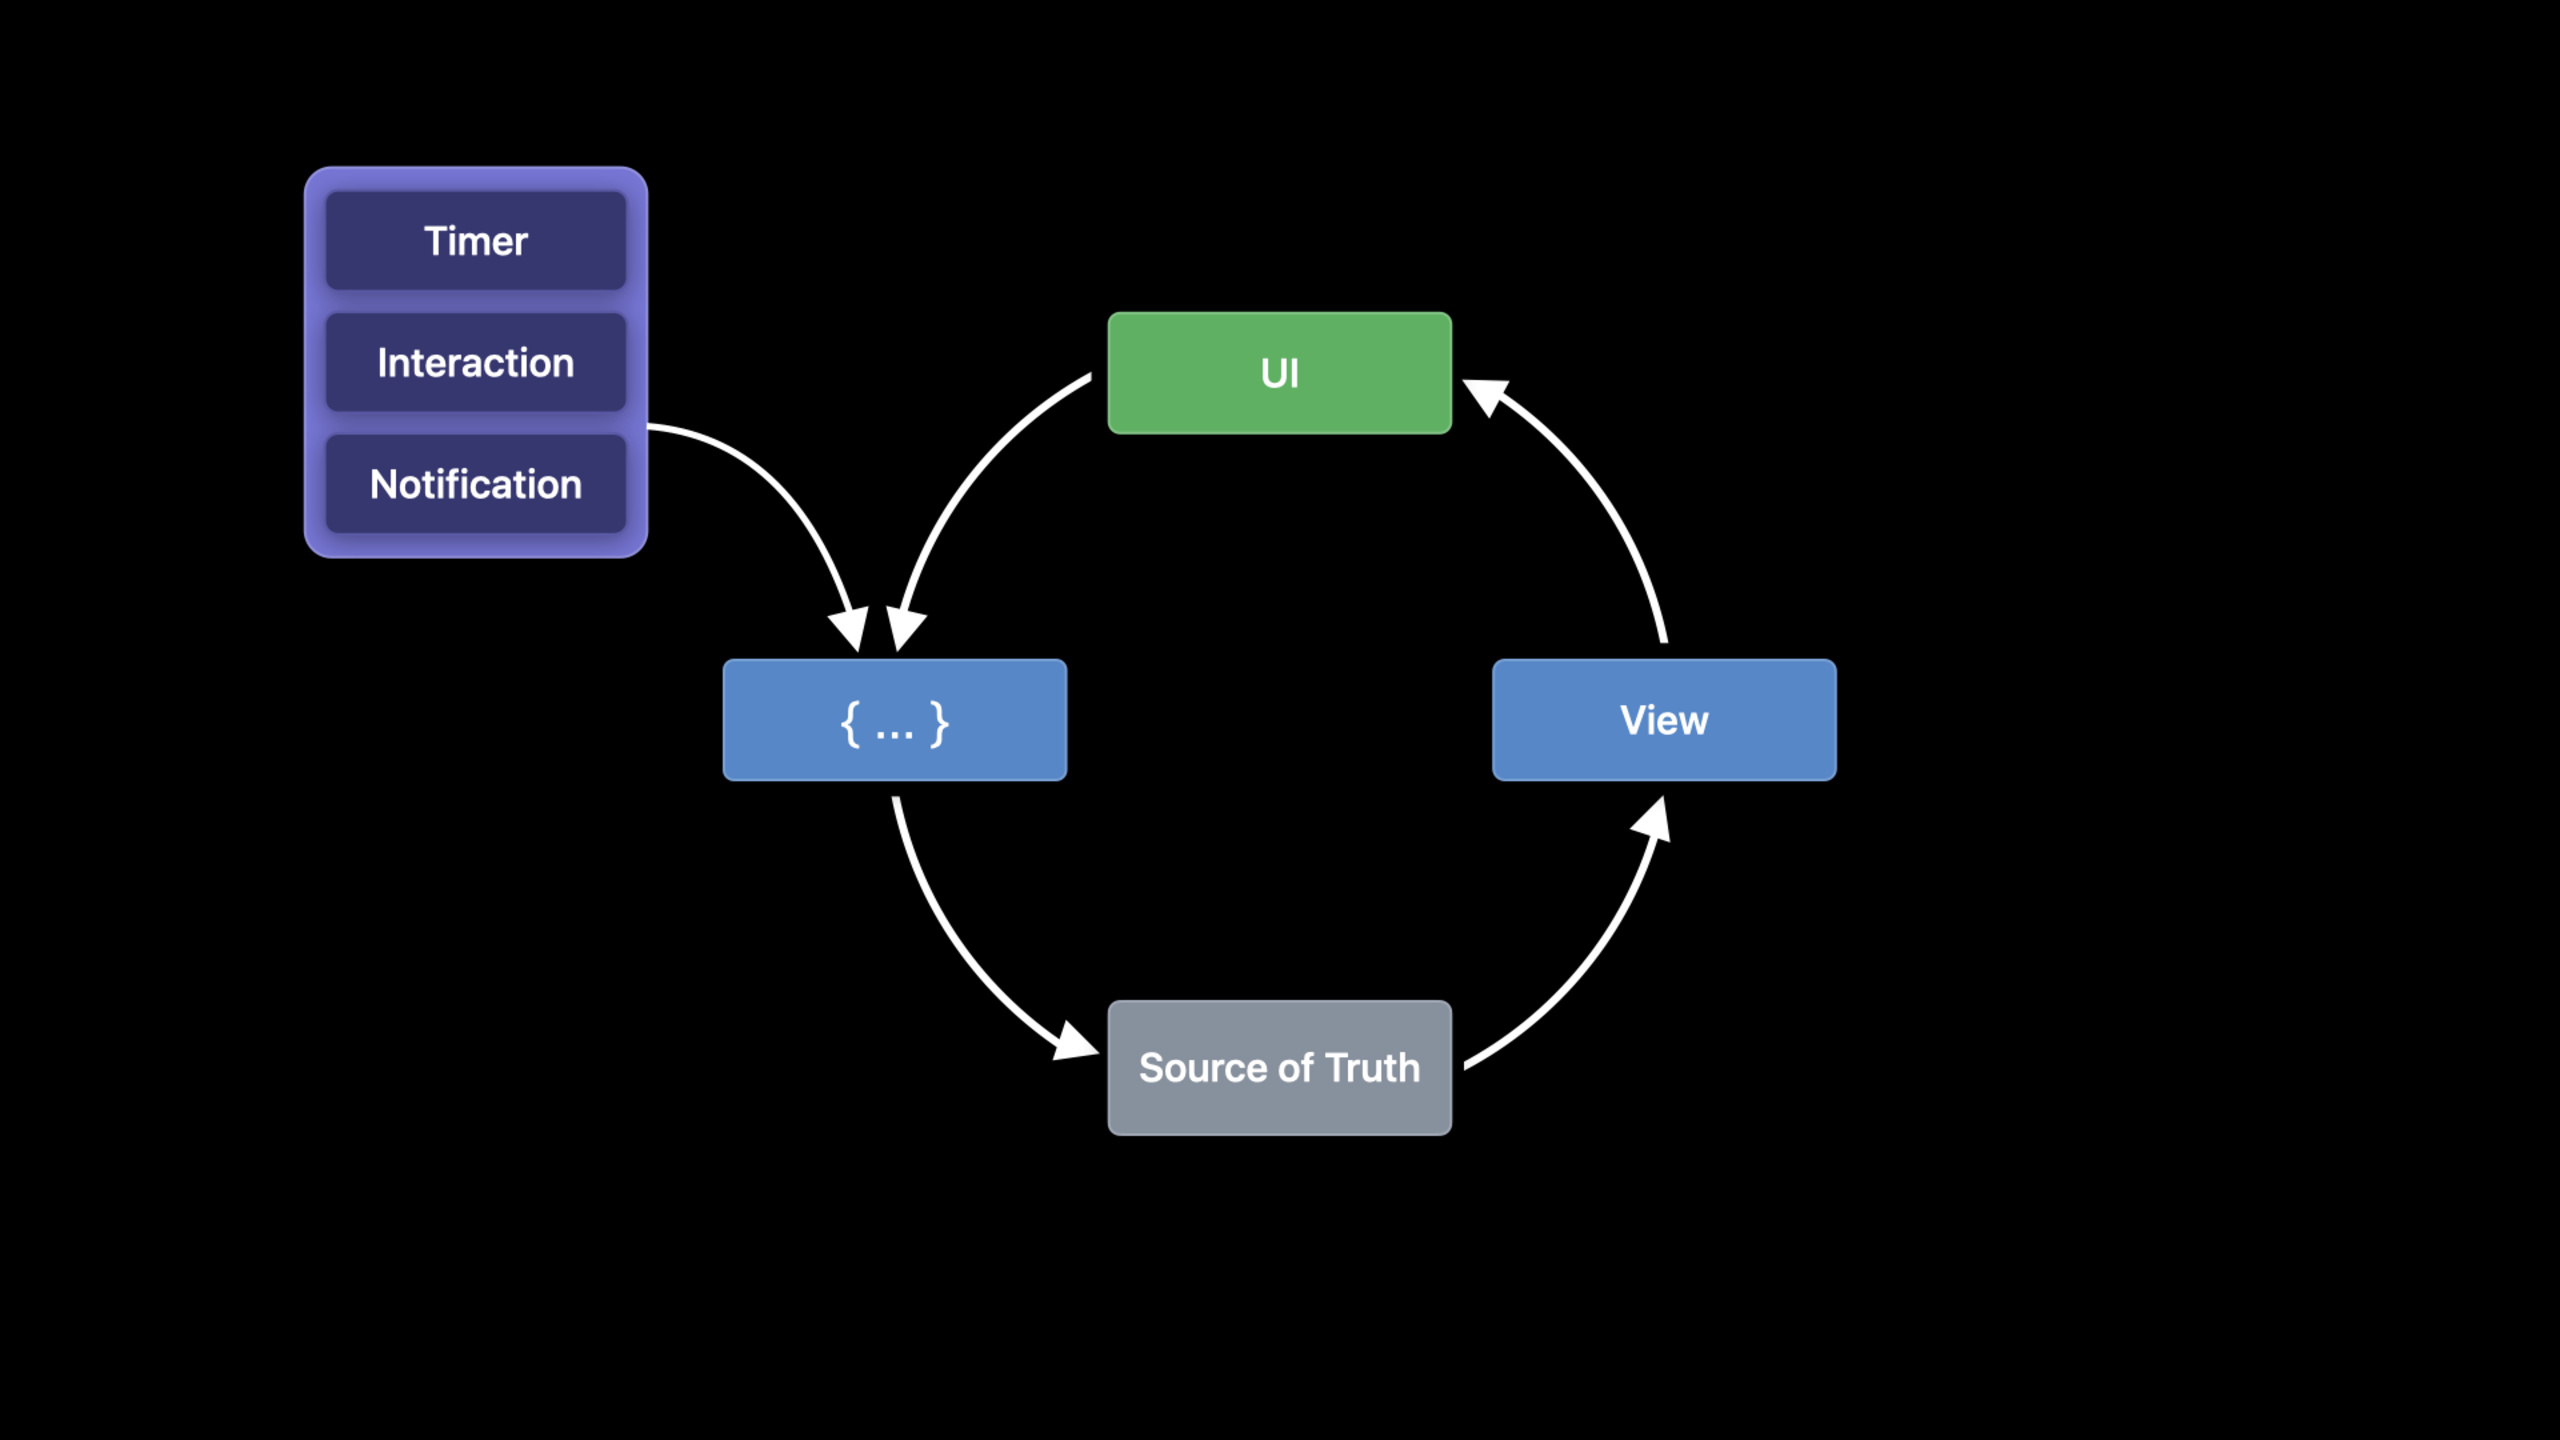
SwiftUI’s data flow is its core design concept, and it is also where beginners are most likely to get confused. Session Starting from the concept of “data dependency graph”, the system sorts out all data flow-related attribute wrappers.
Core Content
View in SwiftUI is a short-lived structure. Every time the upper-level state changes, SwiftUI may re-create a view struct and then use it to generate a new interface. If developers understand the data life cycle as the life cycle of the view struct, they will encounter state loss during refresh, navigation, multi-window and asynchronous loading.
This speech gives a fixed question: what data does this view need, will it modify the data, and where does the data come from. When only displaying data passed in from the upper layer, use ordinary attributes. Use @State when the current view has transient state. When the subview needs to modify the same state of the parent view, use @Binding.
When the data has entered the model layer, @State is not enough. The lecture uses a reading app to explain: reading progress, completion status, cover loading and global book list have different life cycles. SwiftUI separates these life cycles with ObservableObject, @ObservedObject, @StateObject, @EnvironmentObject, @SceneStorage and @AppStorage, allowing the interface to rely on data rather than manually listening for events.
The last paragraph focuses on performance. body should only describe the interface, and cannot create expensive objects or do blocking work in it. The newly introduced @StateObject solves a common mistake: repeatedly creating ObservableObject in the view initialization path, resulting in slow updates and data reset.
Detailed Content
@State saves the transient state owned by the current view
(05:09)
The lecture starts with a sheet that updates the reading progress. BookView needs to save whether the sheet is displayed, user notes and current progress. Because these fields change together, Apple collects them into a value type EditorConfig and hands them over to @State for management.
struct EditorConfig {
    var isEditorPresented = false
    var note = ""
    var progress: Double = 0
    mutating func present(initialProgress: Double) {
        progress = initialProgress
        note = ""
        isEditorPresented = true
    }
}
struct BookView: View {
    @State private var editorConfig = EditorConfig()
    func presentEditor() { editorConfig.present(…) }
    var body: some View {
        …
        Button(action: presentEditor) { … }
        …
    }
}
Key points:
EditorConfigputs three related fields together, so progress, notes and display status are not scattered in multiple properties.present(initialProgress:)is amutatingmethod, indicating that the update occurs on the value itself.@Statetells SwiftUI to manage this storage; when the view struct is recreated, SwiftUI will reconnect to the existing state.presentEditor()only requestsEditorConfigto update the state, and the interface refresh is completed by SwiftUI according to the state change.
@Binding Hands over the same state to the subview for modification
(07:22)
ProgressEditor needs to modify the EditorConfig of BookView. If you pass the value directly, the subview will only be changed to the copy. If the subview declares its own @State, a second source of truth will be generated. The function of @Binding is to pass on the read and write entries of the parent view state.
struct EditorConfig {
    var isEditorPresented = false
    var note = ""
    var progress: Double = 0
}
struct BookView: View {
    @State private var editorConfig = EditorConfig()
    var body: some View {
        …
        ProgressEditor(editorConfig: $editorConfig)
        …
    }
}

struct ProgressEditor: View {
    @Binding var editorConfig: EditorConfig
    …
        TextEditor($editorConfig.note)
    …
}
Key points:
$editorConfigprojected value from@State, type isBinding<EditorConfig>.- After
ProgressEditorreceives@Binding, it modifies the same state owned byBookView. TextEditoritself also receives binding,$editorConfig.noteis a string binding derived from the existing binding.- Binding is independent of the specific source; it can come from
@State, or from the underlying model object or storage wrapper.
ObservableObject exposes model changes to the view
(13:15)
The talk recommends entering the model layer when data needs to be persisted, synchronized, or side effects handled. ObservableObject is a class-constrained protocol that tells SwiftUI that an object is about to change via the objectWillChange publisher. A common way to write it is to put @Published on the properties that will change.
/// The current reading progress for a specific book.
class CurrentlyReading: ObservableObject {
    let book: Book
    @Published var progress: ReadingProgress

    // …
}

struct ReadingProgress {
    struct Entry : Identifiable {
        let id: UUID
        let progress: Double
        let time: Date
        let note: String?
    }

    var entries: [Entry]
}
Key points:
CurrentlyReadingis a reference type used to manage the reading status of a certain book.- Use
letforbookbecause the book itself will not change during the speech. progressuses@Published, so SwiftUI’s dependency update will be triggered before reading record changes.ReadingProgressis still a value type; the talk makes it clear that you can use value types to model data, and use reference types to manage lifecycle and side effects.
@ObservedObject refers to an external model, @StateObject owns the model life cycle
(15:36)
@ObservedObject is suitable for reading ObservableObject passed in from outside. It causes SwiftUI to subscribe to the object’s objectWillChange, but is not responsible for creating and keeping this instance alive.
struct BookView: View {
    @ObservedObject var currentlyReading: CurrentlyReading

    var body: some View {
        VStack {
            BookCard(
                currentlyReading: currentlyReading)

            //…

            ProgressDetailsList(
                progress: currentlyReading.progress)
        }
    }
}
Key points:
currentlyReadingis the source of truth for this view, but the instance lifecycle is managed externally.BookCardandProgressDetailsListboth read data from the same object and refresh them together when they change.- The view only declares how the data is mapped to the interface, and does not require hand-written subscription and refresh code.
(20:20)
@StateObject is new in 2020. It’s suitable for views to have an ObservableObject. The lecture uses a cover loader as an example: the cover is only needed when the view is visible, and the loader should be created and released following the view life cycle.
struct BookCoverView: View {
    @StateObject var loader = CoverImageLoader()

    var coverName: String
    var size: CGFloat

    var body: some View {
        CoverImage(loader.image, size: size)
            .onAppear { loader.load(coverName) }
    }
}
Key points:
@StateObjectprovides an initial value that SwiftUI will instantiate before runningbodyfor the first time.- SwiftUI will retain
loaderthroughout the view life cycle to avoid losing objects when the view struct is rebuilt. onAppearonly triggers the loading action; when the object is released,CoverImageLoaderitself can cancel the work indeinit.
(26:39)
The speech specifically compared an incorrect way of writing: creating ReadingListStore() directly on the @ObservedObject property. Because the view struct does not have a stable life cycle, this will repeatedly allocate objects when body is rebuilt, causing slow updates and data loss. The fix is to use @StateObject instead.
struct ReadingListViewer: View {
    var body: some View {
        NavigationView {
            ReadingList()
            Placeholder()
        }
    }
}

struct ReadingList: View {
    @StateObject var store = ReadingListStore()

    var body: some View {
        // ...
    }
}
Key points:
ReadingListStoreis the source of truth owned byReadingList.@StateObjectlets SwiftUI create an object at the right time and persist it for the life of the view.- This modification solves the two problems of repeated heap allocation and object reset at the same time.
@SceneStorage and @AppStorage save lightweight UI state
(32:43)
The life cycle of @State and @StateObject is related to the process. After apps are terminated by the system, they will not be automatically restored. The speech introduces the Storage family, which is used to save lightweight state. @SceneStorage is suitable for each scene to be saved independently, such as the currently selected book in the column interface.
struct ReadingListViewer: View {
    @SceneStorage("selection") var selection: String?

    var body: some View {
        NavigationView {
            ReadingList(selection: $selection)
            BookDetailPlaceholder()
        }
    }
}
Key points:
"selection"is a storage key. The same type of data requires a stable and unique key.selectioncan be used like@State, and binding can also be generated through$selection.- Each scene can have its own selection state, suitable for multiple windows on iPad or Mac.
(33:49)
@AppStorage uses UserDefaults to save small App-level data. The example of the speech is two setting switches: whether to update the cover image and whether to synchronize the reading progress.
struct BookClubSettings: View {
    @AppStorage("updateArtwork") private var updateArtwork = true
    @AppStorage("syncProgress") private var syncProgress = true

    var body: some View {
        Form {
            Toggle(isOn: $updateArtwork) {
                //...
            }

            Toggle(isOn: $syncProgress) {
                //...
            }
        }
    }
}
Key points:
- Each setting uses its own key because they are two independent pieces of data.
@AppStorageuses standard user defaults by default.- Toggle modify the setting value through binding, and SwiftUI automatically saves and restores it.
- The speech reminds not to stuff all the data into the storage wrapper, because persistence has a cost.
Core Takeaways
-
Reading Progress Editor: What it does: Make a progress update sheet with notes for reading, courses, or fitness apps. Why it’s worth doing: The
EditorConfigof this session shows how to collect multiple related fields into one@Statevalue. How to start: First define a value type configuration object, and then pass$editorConfigto the editing subview. -
Cover or avatar loading view: What to do: Encapsulate the network image loader into an independent SwiftUI view. Why it’s worth doing:
@StateObjectallows the loader to keep alive following the view life cycle, reducing repeated allocation and state reset. How to start: Make the loader comply withObservableObject, create it with@StateObjectin the view, and trigger loading inonAppear. -
Multi-window selection state restoration: What to do: Restore the current selection of each window in the list details interface of iPad or Mac. Why it’s worth doing:
@SceneStorageis per-scene storage, suitable for saving lightweight UI state. How to start: Define a unique key for the selection value and pass$selectionto the list view. -
Lightweight settings page: What to do: Implement switches such as whether to synchronize, whether to update the cover, and whether to display a certain area. Why it’s worth doing:
@AppStoragedirectly connects toUserDefaults, suitable for small App-level settings. How to get started: Declare a@AppStorageproperty for each setting and pass the binding toToggle. -
Global data entry: What to do: Put the book list, account status or current workspace model at the root of SwiftUI App. Why it’s worth doing: The speech demonstrated using
@StateObjectin@main Appto create an app-wide source of truth, so that all scenes can respond to model changes. How to start: Declare@StateObject private var storein the App type, and then pass the store to the root view or injection environment.
Related Sessions
- App essentials in SwiftUI — Continue to talk about SwiftUI App, Scene, WindowGroup and App-level source of truth.
- What’s new in SwiftUI — Overview of 2020 SwiftUI updates, including App/Scene API, controls, grids, and widget support.
- Build document-based apps in SwiftUI — Shows how
DocumentGroupbinds document data, scenes and SwiftUI. - Stacks, Grids, and Outlines in SwiftUI — Pay attention to the way detailed data and hierarchical data are displayed in SwiftUI.
Comments
GitHub Issues · utterances