
Highlight
SwiftUI 2020 adds
App,Scene,WindowGroup,SceneStorage,DocumentGroup,SettingsandCommands, allowing application entry, multi-window, state restoration, document window, preferences and menu commands to be organized with declarative code.
Core Content
(00:35) The focus of SwiftUI in the first year is View. Developers can use declarative syntax to combine text, images, lists, and navigation, but a complete app also faces portals, windows, platform life cycles, menus, preferences, and document management. The entry point of this session is to fill in the layers outside the View: the App owns the Scene, the Scene hosts the View, and the platform determines how the Scene is displayed.
(03:57) The App protocol writes the entry as a type with @main. The body of this entry returns the Scene, which then hosts the View. The most common Scene is WindowGroup, which hands the same interface definition to the system, allowing iPadOS and macOS to create windows, tabs, and new instances according to platform rules.
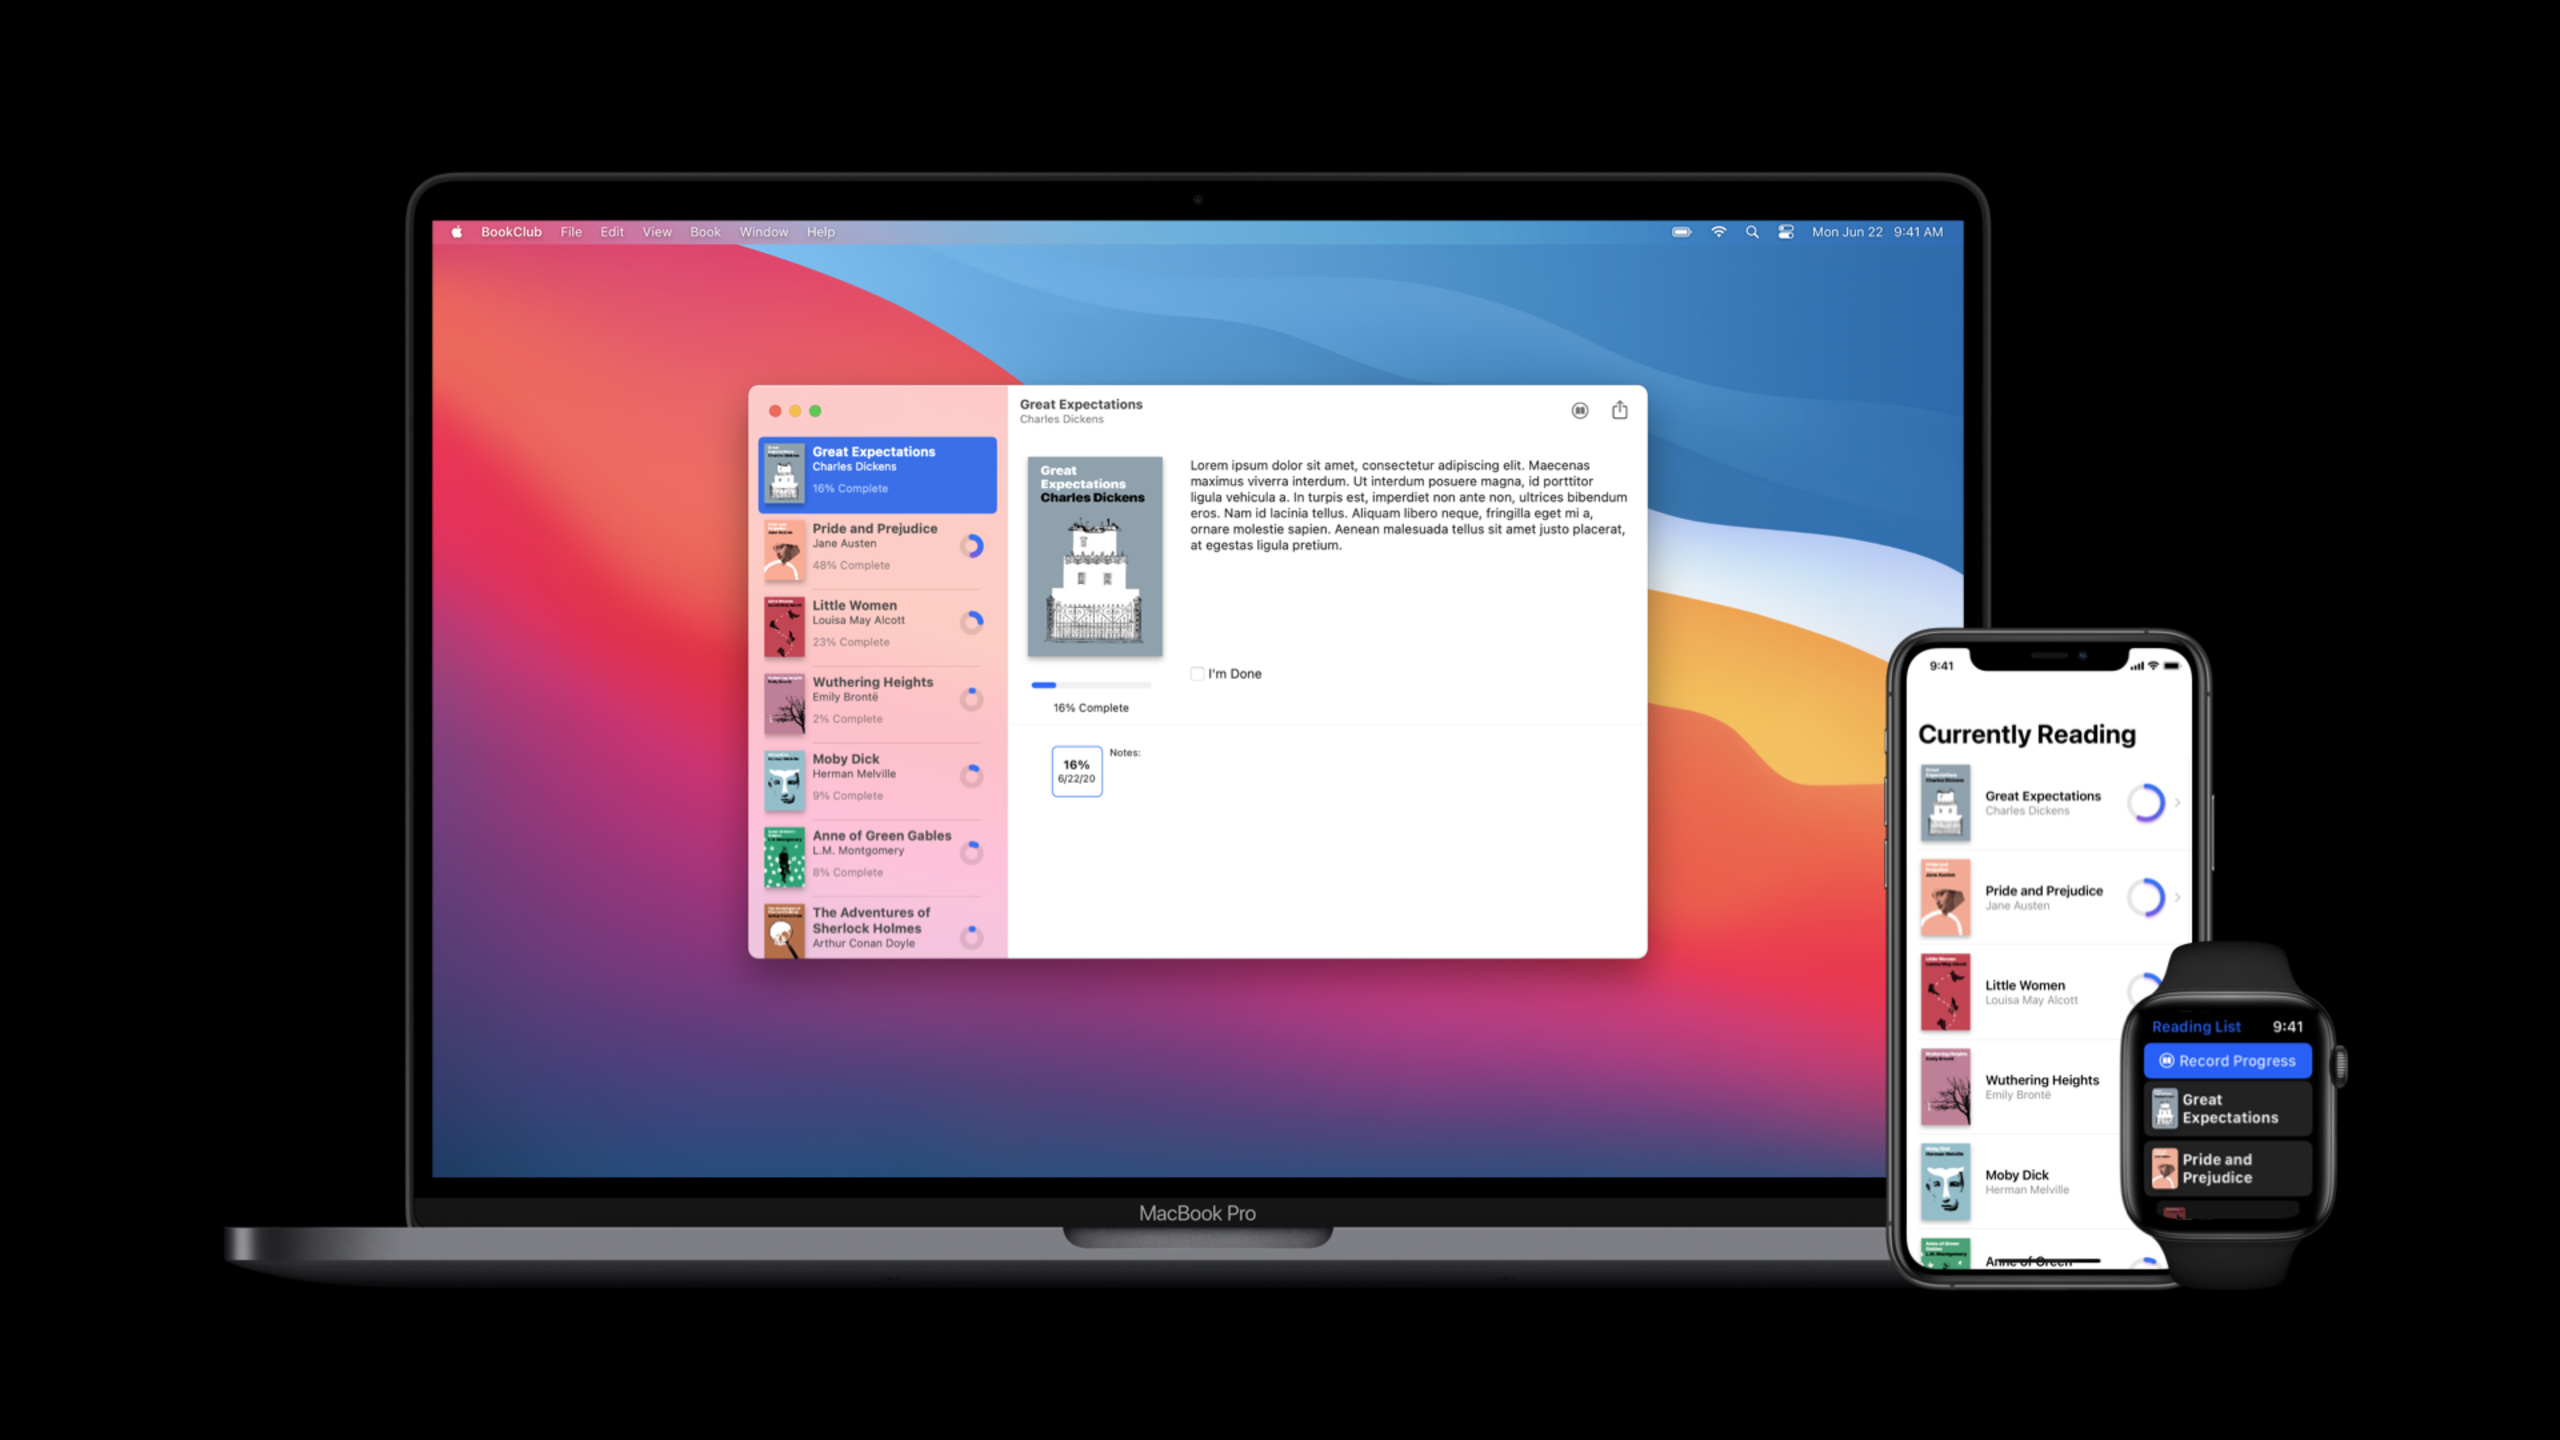
(07:48) The first practical problem brought by multiple windows is state boundaries. In the BookClub example, the books selected in each window are different; modifying the selection of one window will not affect other windows. The shared data model is placed on the App layer, and the View state in the window remains independent. This is the core of the SwiftUI Scene architecture.
(12:08) When the platform is responsible for creating and destroying Scenes, developers also need to restore the local state of each window. SceneStorage saves View state with a unique key, and SwiftUI will automatically save and restore it at the appropriate time. The second half also gives three expansion directions: DocumentGroup manages the document window, Settings manages macOS preferences, and commands modifier manages menu commands.
Detailed Content
App, Scene and View levels
(03:57) The sample App has only one entry type. BookClubApp conforms to the App protocol, body returns WindowGroup, and WindowGroup creates ReadingListViewer.
@main
struct BookClubApp: App {
    @StateObject private var store = ReadingListStore()

    var body: some Scene {
        WindowGroup {
            ReadingListViewer(store: store)
        }
    }
}

struct ReadingListViewer: View {
    @ObservedObject var store: ReadingListStore

    var body: some View {
        NavigationView {
            List(store.books) { book in
                Text(book.title)
            }
            .navigationTitle("Currently Reading")
        }
    }
}

class ReadingListStore: ObservableObject {
    init() {}

    var books = [
        Book(title: "Book #1", author: "Author #1"),
        Book(title: "Book #2", author: "Author #2"),
        Book(title: "Book #3", author: "Author #3")
    ]
}

struct Book: Identifiable {
    let id = UUID()
    let title: String
    let author: String
}
Key points:
@mainmakesBookClubAppthe program entry point, and session clearly mentions that this is a new attribute in Swift 5.3.- The
bodyofBookClubAppreturnssome Scenebecause the content of the App consists of Scenes. WindowGroupis the Scene definition of the main interface. The system will create windows or tabs based on platform capabilities.@StateObjectownsReadingListStoreat the App layer, andReadingListVieweruses this model through@ObservedObject..navigationTitle("Currently Reading")doesn’t just show the navigation bar title; the session demo also affects the App Switcher and macOS window titles.
Multi-window status of WindowGroup
(10:21) A WindowGroup view definition can be instantiated multiple times by the platform. On macOS and iPadOS, when users create new windows through menu items, shortcut keys, or multitasking gestures, each Scene has its own View state.
@main
struct BookClubApp: App {
    @StateObject private var store = ReadingListStore()

    var body: some Scene {
        WindowGroup {
            ReadingListViewer(store: store)
        }
    }
}

struct ReadingListViewer: View {
    @ObservedObject var store: ReadingListStore

    var body: some View {
        NavigationView {
            List(store.books) { book in
                Text(book.title)
            }
            .navigationTitle("Currently Reading")
        }
    }
}

class ReadingListStore: ObservableObject {
    init() {}

    var books = [
        Book(title: "Book #1", author: "Author #1"),
        Book(title: "Book #2", author: "Author #2"),
        Book(title: "Book #3", author: "Author #3")
    ]
}

struct Book: Identifiable {
    let id = UUID()
    let title: String
    let author: String
}
Key points:
storeis a shared model, each window can read the same book list.ReadingListVieweris a template for window content, and a new Scene instance will be created when the platform needs a new window.- View states belong to their respective Scenes, and session demonstrates this boundary with “different books selected in different windows”.
WindowGroupwill provide a new window entry in the File menu on macOS and supports the standard Command-N shortcut key.
SceneStorage restores selections for each window
(12:07) After the platform manages the Scene life cycle, the local View state requires a recovery mechanism. The example saves the selected book as a string, then converts it into Binding<UUID?> and gives it to NavigationLink.
@main
struct BookClubApp: App {
    @StateObject private var store = ReadingListStore()

    var body: some Scene {
        WindowGroup {
            ReadingListViewer(store: store)
        }
    }
}

struct ReadingListViewer: View {
    @ObservedObject var store: ReadingListStore
    @SceneStorage("selectedItem") private var selectedItem: String?

    var selectedID: Binding<UUID?> {
        Binding<UUID?>(
            get: { selectedItem.flatMap { UUID(uuidString: $0) } },
            set: { selectedItem = $0?.uuidString }
        )
    }

    var body: some View {
        NavigationView {
            List(store.books) { book in
                NavigationLink(
                    destination: Text(book.title),
                    tag: book.id,
                    selection: selectedID
                ) {
                    Text(book.title)
                }
            }
            .navigationTitle("Currently Reading")
        }
    }
}

class ReadingListStore: ObservableObject {
    init() {}

    var books = [
        Book(title: "Book #1", author: "Author #1"),
        Book(title: "Book #2", author: "Author #2"),
        Book(title: "Book #3", author: "Author #3")
    ]
}

struct Book: Identifiable {
    let id = UUID()
    let title: String
    let author: String
}
Key points:
@SceneStorage("selectedItem")Use a unique key to identify the state to be saved.selectedItemstores strings because SceneStorage stores simple recoverable values.selectedIDconverts the string intoUUIDand then wraps it intoBinding.NavigationLinkusestagandselectionto bind the selected items, and can return to the corresponding books after restoration.- SwiftUI is responsible for saving and restoring this state at the appropriate time, so developers do not need to write window life cycle logic by hand.
DocumentGroup handles the document window
(12:59) Document Apps can replace the root Scene with DocumentGroup. It is responsible for opening, editing and saving document Scene. The example uses ShapeDocument to show the read and write entry of FileDocument.
import SwiftUI
import UniformTypeIdentifiers

@main
struct ShapeEditApp: App {
    var body: some Scene {
        DocumentGroup(newDocument: ShapeDocument()) { file in
            DocumentView(document: file.$document)
        }
    }
}

struct DocumentView: View {
    @Binding var document: ShapeDocument

    var body: some View {
        Text(document.title)
            .frame(width: 300, height: 200)
    }
}

struct ShapeDocument: Codable {
    var title: String = "Untitled"
}

extension UTType {
    static let shapeEditDocument =
        UTType(exportedAs: "com.example.ShapeEdit.shapes")
}

extension ShapeDocument: FileDocument {
    static var readableContentTypes: [UTType] { [.shapeEditDocument] }

    init(fileWrapper: FileWrapper, contentType: UTType) throws {
        let data = fileWrapper.regularFileContents!
        self = try JSONDecoder().decode(Self.self, from: data)
    }

    func write(to fileWrapper: inout FileWrapper, contentType: UTType) throws {
        let data = try JSONEncoder().encode(self)
        fileWrapper = FileWrapper(regularFileWithContents: data)
    }
}
Key points:
DocumentGroup(newDocument:)defines the default value for new documents.file.$documentgivesDocumentViewa document binding, and the interface can directly edit the document content.ShapeDocumentconforms toCodable, and the example usesJSONDecoderandJSONEncoderto complete reading and writing.UTType(exportedAs:)declares a custom document type.readableContentTypes, initialization method andwritemethod ofFileDocumentconstitute the document read and write boundary.
Settings and Commands complement the desktop App experience
(13:27) The common preference window in macOS can be written as Settings Scene. session indicates that it will automatically set the Preferences command and give the window the correct style.
@main
struct BookClubApp: App {
    @StateObject private var store = ReadingListStore()

    @SceneBuilder var body: some Scene {
        WindowGroup {
            ReadingListViewer(store: store)
        }

    #if os(macOS)
        Settings {
            BookClubSettingsView()
        }
    #endif
    }
}

struct BookClubSettingsView: View {
    var body: some View {
        Text("Add your settings UI here.")
            .padding()
    }
}
Key points:
@SceneBuilderallows thebodyof the App to declare multiple Scenes at the same time.WindowGroupis still the main interface.Settingsonly appears under the macOS branch.BookClubSettingsViewis the content of the preferences window.
(14:07) Menu commands are encapsulated using the Commands type and then added to the Scene through the commands modifier. The commands in the example are enabled or disabled based on the current focus.
struct BookCommands: Commands {
    @FocusedBinding(\.selectedBook) private var selectedBook: Book?

    var body: some Commands {
        CommandMenu("Book") {
            Section {
                Button("Update Progress...", action: updateProgress)
                    .keyboardShortcut("u")
                Button("Mark Completed", action: markCompleted)
                    .keyboardShortcut("C")
            }
            .disabled(selectedBook == nil)
        }
    }

    private func updateProgress() {
        selectedBook?.updateProgress()
    }
    private func markCompleted() {
        selectedBook?.markCompleted()
    }
}
Key points:
BookCommandsconforms toCommands, menu logic can be separated into types.CommandMenu("Book")creates a custom menu.Buttoncan be bound to actions and keyboard shortcuts..disabled(selectedBook == nil)disables an entire set of commands based on focus state.@FocusedBinding(\.selectedBook)makes the command oriented to the current user focus, and the session compares it to the responder chain of AppKit or UIKit.
Core Takeaways
-
What to do: Change the entry point of SwiftUI App to
@main+Appprotocol. Why it’s worth doing: TheBookClubAppdisplayed in the session uses one type to declare the entrance, shared model and main Scene at the same time, so that the startup code is closer to the interface structure. How to start: First createstruct YourApp: App, putWindowGroupinbody, and use the original first screen View as the content ofWindowGroup. -
What: Adds multi-window capabilities to iPadOS and macOS users. Why it’s worth doing:
WindowGroupwill create multiple windows or tabs according to platform rules, and the BookClub example proves that each window can retain independent selection status. How to start: Put the main interface intoWindowGroup, put the shared data in@StateObjectin the App layer, and leave the selection, scrolling or navigation state in the window in the View layer. -
What: Use
SceneStorageto restore the local state of each window. Why it’s worth doing: session clearly states that the Scene life cycle is managed by the platform, andSceneStorageuses key to automatically save and restore View state. How to start: Add@SceneStorage("key")to the simple value that needs to be restored, and if necessary, perform binding conversion between the string and the business ID as shown in the example. -
What to do: Use
DocumentGroupfor document-based tools instead. Why it’s worth doing: The ShapeEdit example puts document creation, opening, editing and saving into Scene definitions, and document reading and writing is concentrated onFileDocument. How to start: Define a document type that conforms toFileDocument, declareUTType, and then useDocumentGroup(newDocument:)to create the root Scene. -
What to do: Add a preference window and menu commands to the macOS version. Why it’s worth doing:
SettingsandCommandsin the session allow preferences, menu items, shortcut keys, and focus states to all follow SwiftUI’s declarative model. How to start: AddSettingsScene to@SceneBuilder, then create a type that conforms toCommands, and useCommandMenuand@FocusedBindingto organize commands.
Related Sessions
- Introduction to SwiftUI — First understand SwiftUI’s declarative View model, and then read the App, Scene and WindowGroup levels of this session.
- Build document-based apps in SwiftUI — Deep dive into
DocumentGroup,FileDocumentand document management, connecting the ShapeEdit example of this session. - Data Essentials in SwiftUI — Continue to learn
@State,@BindingandObservableObjectto complete the data transfer between App, Scene and View. - What’s new in SwiftUI — Look at the new capabilities of app, scene, widget, complication, etc. from the 2020 SwiftUI global update.
Comments
GitHub Issues · utterances