
Highlight
This code-along extends the small widget from the first episode to systemMedium, uses
TimelineReloadPolicyto generate multiple timeline entries before the treatment is completed, and supports user configuration and deep linking through SiriKit custom intent,widgetURLand SwiftUILink.
Core Content
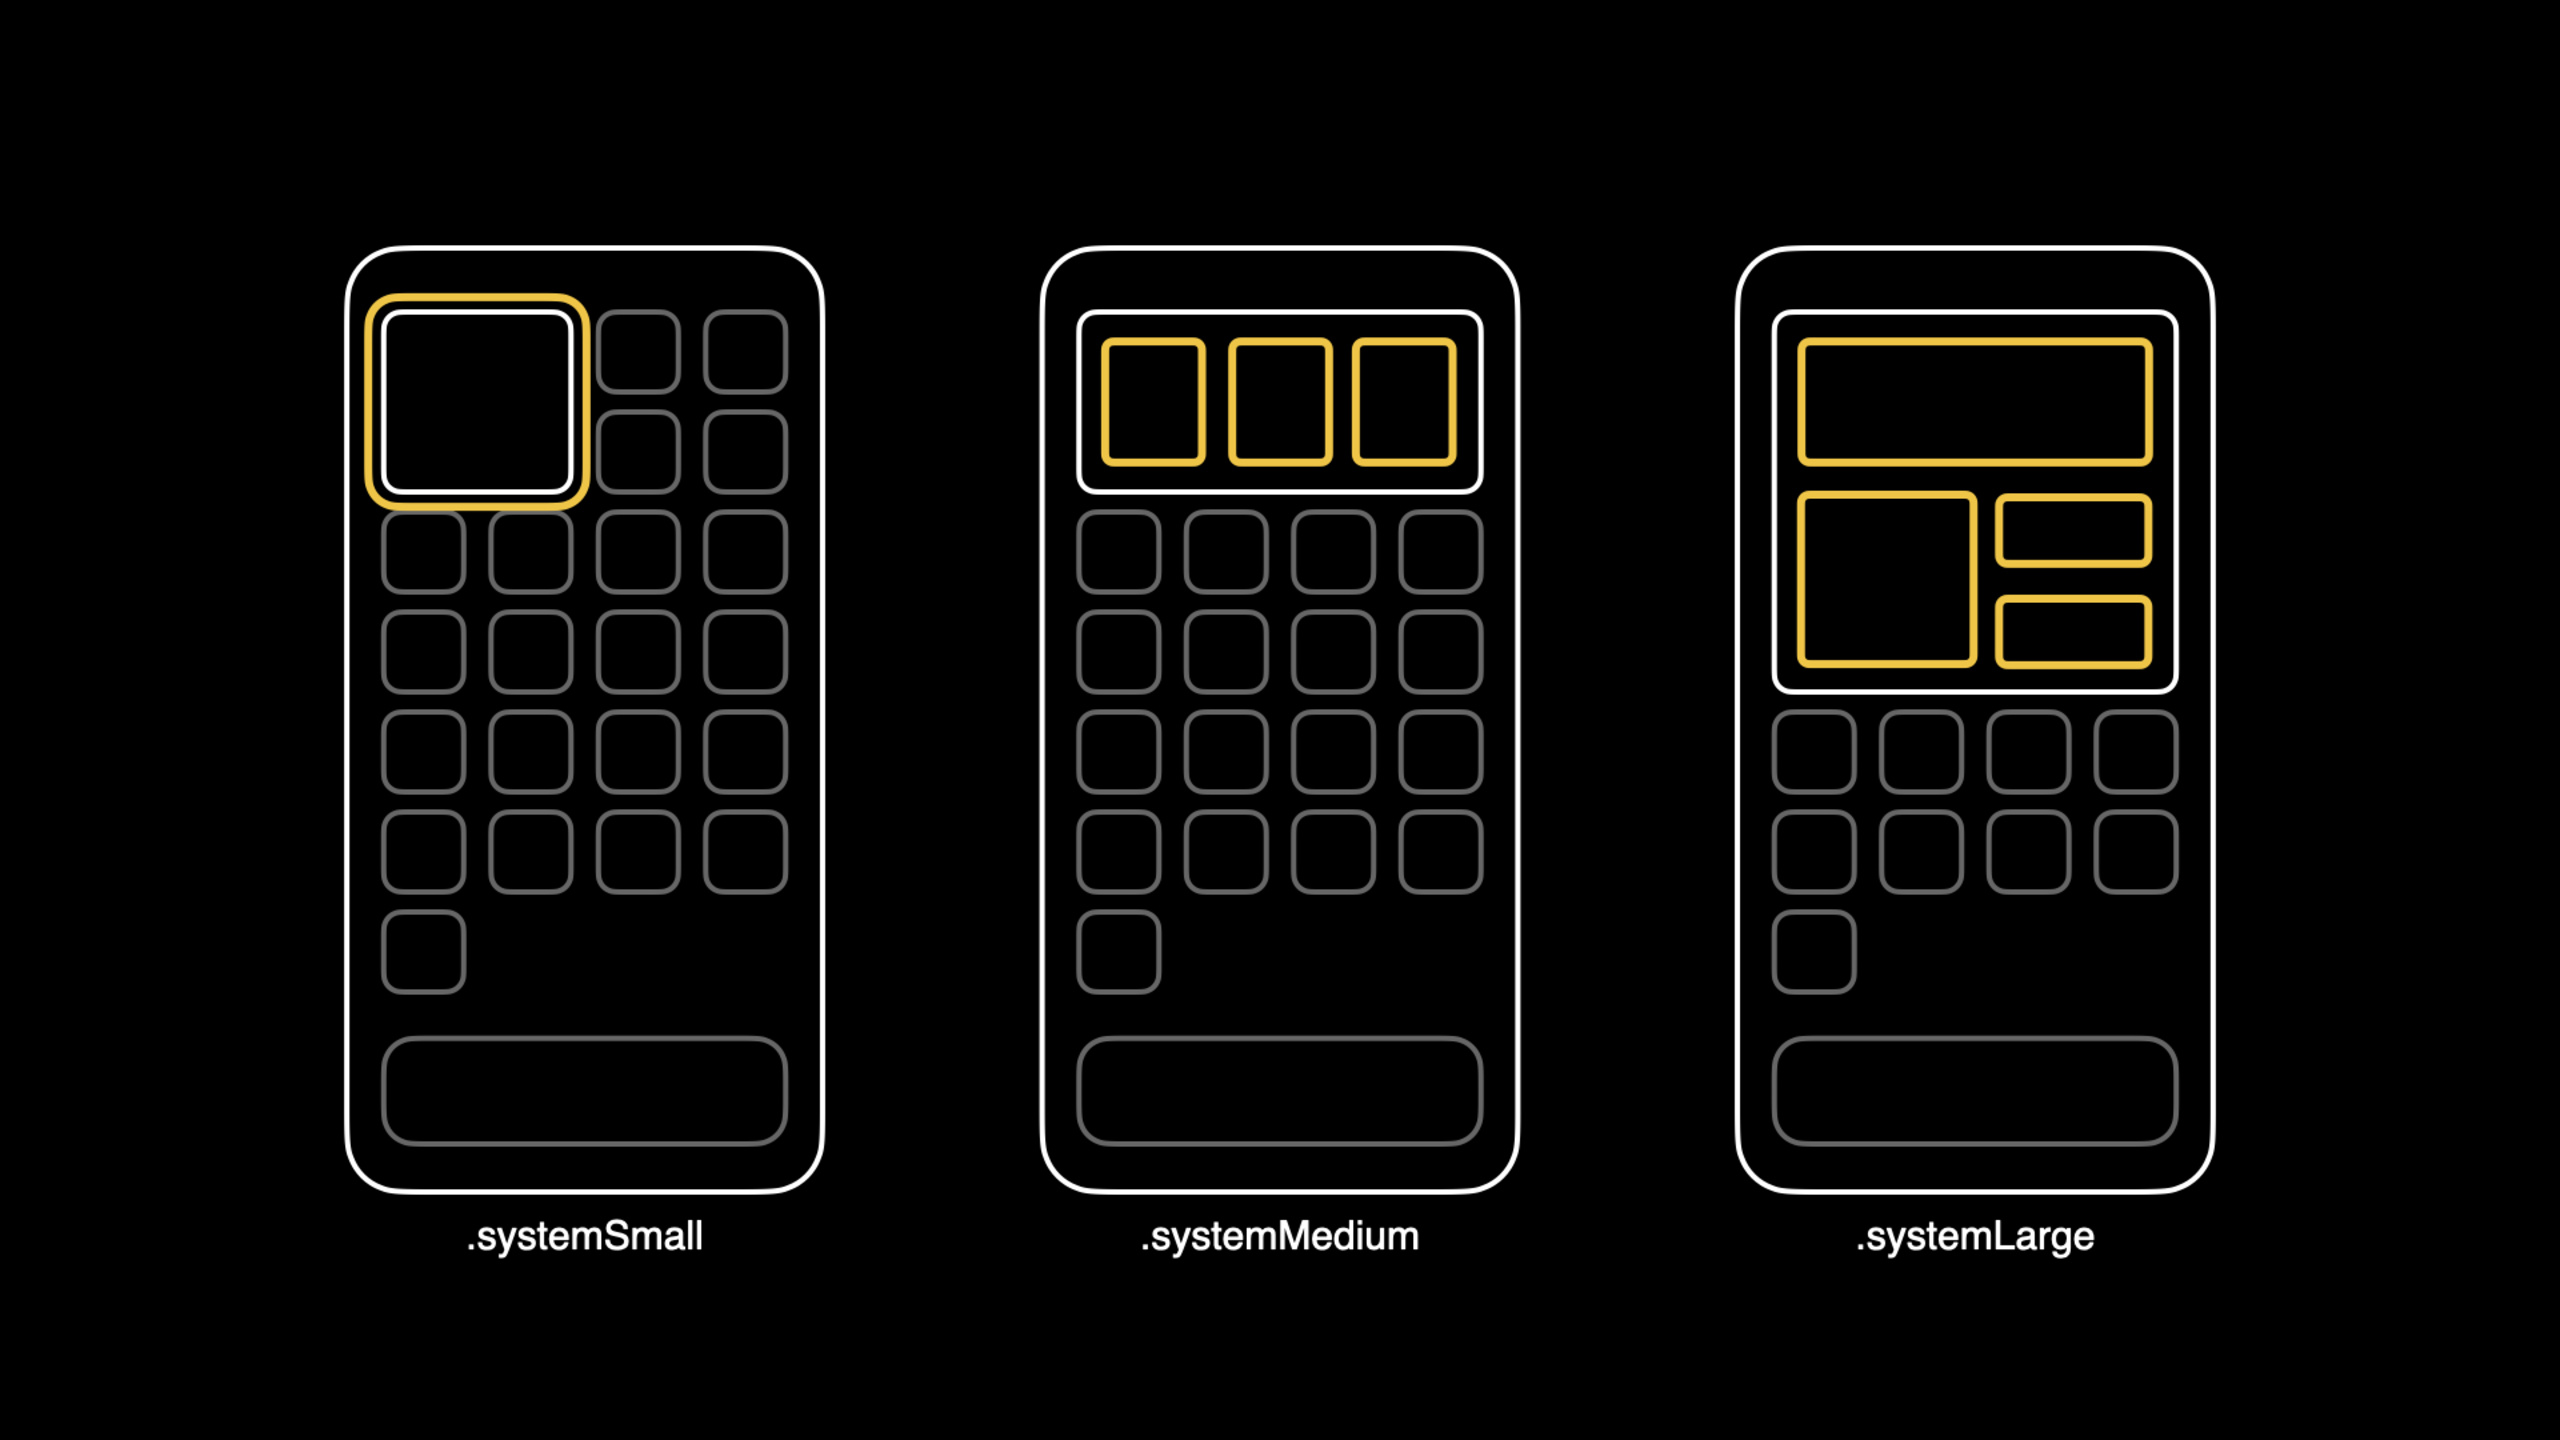
The first episode already has Emoji Rangers’ Power Panda appearing on the home screen, but it’s still just a systemSmall widget. When the user opens the Widget Gallery, if a widget supports multiple sizes, the system will ask the user to select different families. The problem is, the small version is only big enough for one avatar, and the extra space in the medium version should hold more character information.
This code-along first completes the family adaptation, and then enters the real timeline. The character regenerates health over time, and the app already knows when the character is fully healed. Continuing to allow the widget to request refresh will waste system scheduling opportunities; a better approach is to generate the timeline entry in the provider once until the restoration is completed, and let WidgetKit display it according to time.
The second half advances this widget from a fixed role to a configurable experience. Users can long press the widget on the home screen to enter the Edit Widget and select Power Panda, Egghead or Spouty. After selecting a character, clicking on the widget should directly lead to the corresponding character details page. WidgetKit is responsible for display, SiriKit custom intent is responsible for configuration, widgetURL and SwiftUI Link are responsible for jumping back to the App.
Detailed Content
1. The same widget supports small and medium
(03:46) The first step is to extend the widget that only supported systemSmall in the previous episode to systemMedium. WidgetKit provides widgetFamily environment value, and the view can return different layouts based on the current family.
There are no official Code tab clips for this session. Only the API and view structures that appear clearly in transcript are organized below to illustrate the code shape.
supportedFamilies([.systemSmall, .systemMedium])

@Environment(\.widgetFamily) var family

switch family {
case .systemSmall:
    AvatarView(character: selectedCharacter)
default:
    HStack {
        AvatarView(character: selectedCharacter)
        Text(selectedCharacter.bio)
    }
}
Key points:
supportedFamiliesexpanded from single family in the first episode tosystemSmallandsystemMedium.widgetFamilylets the same entry view know which family it is rendering with.systemSmallcontinues to useAvatarView.- The medium version puts
AvatarViewintoHStackand displays the character bio next to it. - transcript also demonstrated adding background and foreground colors to both small and medium, making the preview close to the real home screen effect.
2. Use complete timeline instead of unnecessary refreshes
(01:12) WidgetKit has three timeline reload policies: atEnd, after and never. atEnd will start scheduling updates after the last entry is displayed; after will start scheduling on the specified date; never means that the system will not update independently, and developers need to explicitly reload through the Widget Center API.
(07:39) Emoji Rangers characters regenerate over time. Now that the app knows the endDate of a full restore, the provider can generate entries at one-minute intervals until the character restore is complete.
let selectedCharacter = configuration.hero
let endDate = selectedCharacter.fullHealthDate
let interval = oneMinute
var currentDate = Date()
var entries: [Entry] = []

while currentDate < endDate {
    entries.append(Entry(date: currentDate, character: selectedCharacter))
    currentDate += interval
}

Timeline(entries: entries, policy: .atEnd)
Key points:
selectedCharacteris the character to be displayed by the current widget.endDateis the point in time when the character is fully restored.- transcript explicitly says that the update interval is one minute, starting from
currentDate. - Each loop creates an entry with
currentDate, and then advances the time one step. - WidgetKit does not need to call the provider again to retrieve data before the timeline is exhausted.
atEndandafterare only the earliest refresh time, and the system will arrange the actual refresh based on user experience and scheduling conditions.
3. Use relevance to prompt Smart Stack
(09:00) The timeline entry also has an optional relevance. When the widget is in the stack, the system can rotate the widget to a more appropriate position based on this prompt.
let relevance = selectedCharacter.healthLevel

Entry(
    date: currentDate,
    character: selectedCharacter,
    relevance: relevance
)
Key points:
- The value range of
relevanceis defined by the developer. - session chooses to use character health directly, because full recovery is the most important state for this widget.
- Relevance is an intelligent prompt from the system, not a forced display command.
4. Use SiriKit custom intent for home screen configuration
(09:56) After the timeline is completed, the widget still only displays Power Panda. The demo then uses the SiriKit Intent Definition file to add configuration items to allow users to select roles on the Home Screen.
Intent Definition file
category: information view
parameter: hero
enum values: Panda, Egghead, Spouty

StaticConfiguration -> IntentConfiguration
TimelineProvider -> IntentTimelineProvider
intent: CharacterSelectionIntent
snapshot(configuration)
timeline(configuration)
Key points:
- Intent Definition file needs to include both widget target and app target.
- intent category is set to information view in the demo.
- The
heroparameter is enum, and Panda, Egghead and Spouty are completed in the demo. - Widget type changed from
StaticConfigurationtoIntentConfiguration. - Provider changed from timeline provider to intent timeline provider.
- The snapshot and timeline methods will receive an additional
configurationparameter, and the provider will map the configuration to the role definition in the App.
5. Click the widget to return to the corresponding content
(02:54) Widgets have no animations or custom interactions, but can be deep linked to Apps. systemSmall is a complete clickable area; systemMedium and systemLarge can use SwiftUI Link to create multiple clickable areas.
(13:42) Demonstrates adding the widgetURL modifier to the view after the configuration is completed. In this way, when the user clicks on the widget of the current role, he will directly enter the corresponding role details page.
AvatarView(character: selectedCharacter)
    .widgetURL(selectedCharacter.detailURL)

Link(destination: selectedCharacter.detailURL) {
    AvatarView(character: selectedCharacter)
}
Key points:
widgetURLis used on small and medium views to allow clicks to enter the current role.- After the user switches favorite Ranger, the jump target also changes with the configuration.
- Medium and large families can use SwiftUI
Linkwhen there is room for multiple click areas.
Core Takeaways
1. Make a recovery countdown widget
What to do: Put states with known end times such as game characters, fitness recovery, and learning cooldown time on the home screen.
Why it’s worth doing: The core example of a session is that the character is restored over time, and the app knows the endDate of full restoration.
How to start: In the timeline provider, starting from the current time, an entry is generated every minute until endDate. The policy first uses .atEnd.
2. Design two sets of reading methods, small and medium, for the same content.
What to do: small only displays a key status, medium adds a piece of supplementary information.
Why it’s worth doing: The transcript demonstrates that small continues to use AvatarView, and medium uses HStack to add character bio.
How to start: Read the widgetFamily environment value, use switch to return different layouts to different families, and then update the primary view and placeholder at the same time.
3. Give users a home screen configuration entry
What to do: Let the user long press the widget and then select the role, project or account to be displayed.
Why it’s worth doing: The session uses CharacterSelectionIntent to let the user select Power Panda, Egghead or Spouty in the Edit Widget.
How to start: Create an Intent Definition file, set the category to information view, add the enum parameter, and then change the widget to IntentConfiguration.
4. Provide sorting signals to Smart Stack
What to do: Improve the relevance of the widget at the time when the state is most important.
Why it’s worth doing: When the session explicitly states that the widget is in the stack, the system can intelligently rotate it based on relevance.
How to start: Choose a numerical value that represents priority. Emoji Rangers uses health level because full recovery is the most important state.
5. Let the click action enter the correct details page
What to do: The user clicks the widget and directly enters the details page corresponding to the current configuration.
Why it’s worth doing: After the session demo is configured as Spouty, clicking on the widget will enter the Spouty information page.
How to get started: Add widgetURL to the small/medium view. If there are multiple target areas in medium or large, use SwiftUI Link to detach the local click area.
Related Sessions
- Widgets Code-along, part 1: The adventure begins — First complete the basic links of widget target, provider, placeholder and systemSmall.
- Widgets Code-along, part 3: Advancing timelines — The next episode recommended at the end of this session continues to advance advanced timelines, URLs, and multiple widgets.
- Add configuration and intelligence to your widgets — transcript Recommended at custom intent for in-depth widget configuration and system intelligence.
- Design great widgets — Recommended transcript ending, used to judge the information level and visual expression of the widget.
- Build SwiftUI views for widgets — Complete the construction details of SwiftUI widget views, suitable for viewing together with the family adaptation of this site.
Comments
GitHub Issues · utterances