
Highlight
macOS 14 的 ScreenCaptureKit 新增 Presenter Overlay 演讲者叠加效果、SCContentSharingPicker 系统级内容选择器、以及 SCScreenshotManager 高清截图 API,让屏幕共享应用无需自建 UI 就能获得与系统一致的体验。
核心内容
屏幕共享的 UI 困境
做视频会议或屏幕录制工具时,内容选择界面是个麻烦事。要枚举所有窗口和应用,画一个选择面板,处理各种边界情况。不同应用的选择界面长得都不一样,用户每次都要重新学习。
SCContentSharingPicker 把这个包袱接过去了。它是一个系统级单例,提供与 macOS 原生一致的窗口/应用/显示器选择体验,用户从 Video 菜单栏、应用内按钮或直接点击窗口都能触发。
Presenter Overlay:自动生效的演讲者效果
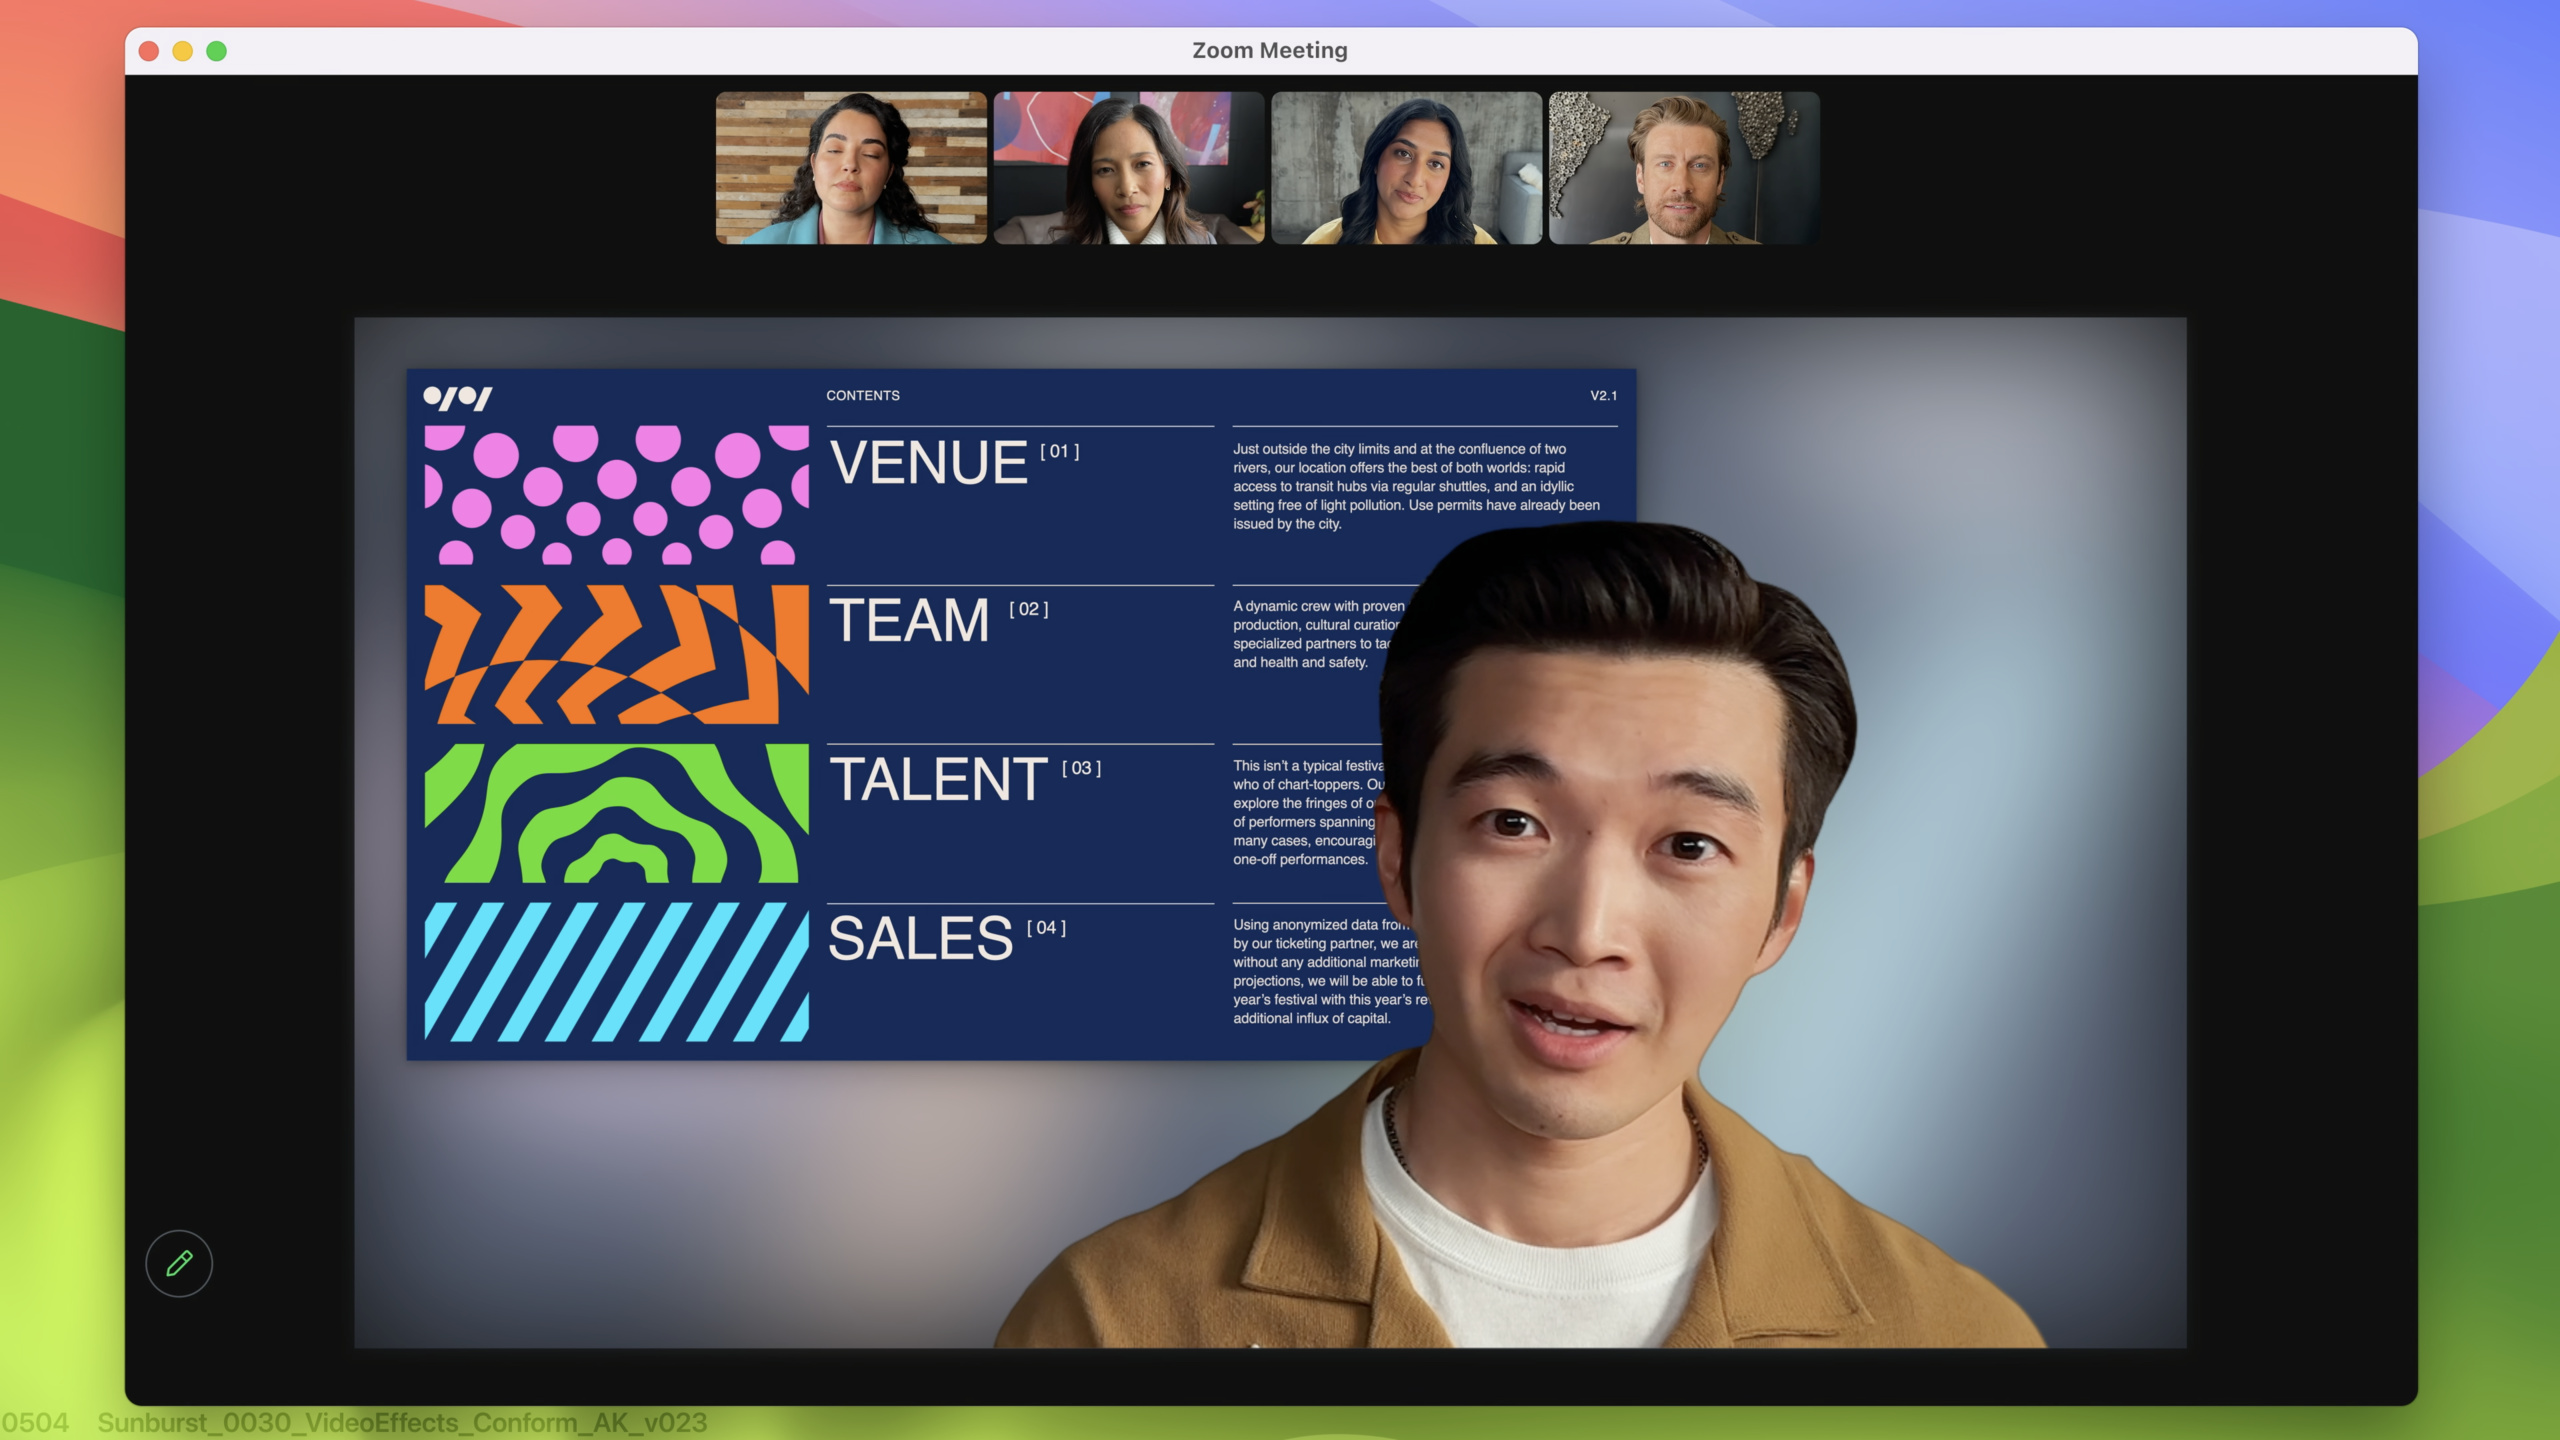
远程会议中共享屏幕时,演讲者的人像和内容是分离的。Presenter Overlay 通过高级分割算法,把演讲者嵌入到共享内容之上。
小叠加模式把演讲者放在可移动的圆形窗口中。大叠加模式将演讲者从背景分离,屏幕内容放在演讲者和背景之间,产生类似天气预报的沉浸效果。
关键是这个效果对使用 ScreenCaptureKit 的应用自动生效。只要应用同时使用了摄像头和屏幕捕获流,Video 菜单栏就会出现控制选项,ScreenCaptureKit 直接把合成后的帧推送到你的流中。
从视频流抓帧到原生截图
以前要截取屏幕内容,要么从 SCStream 中抓一帧,要么用 CGWindowListCreateImage。前者需要维护一个流,后者功能有限。
SCScreenshotManager 提供了异步截图 API,支持 CGImage 和 CMSampleBuffer 两种输出格式,复用 ScreenCaptureKit 的过滤和配置能力。
详细内容
Presenter Overlay 状态检测
(03:32)
应用需要知道 Presenter Overlay 何时启用,以便调整 UI:
let stream = SCStream(filter: filter, configuration: config, delegate: self)

// 实现 SCStreamDelegate 回调
func stream(_ stream: SCStream, outputEffectDidStart didStart: Bool) {
    if didStart {
        presentBanner()
        turnOffCamera() // 隐藏本地摄像头 tile
    } else {
        turnOnCamera()
    }
}
关键点:
outputEffectDidStart在 Presenter Overlay 启用/停用时触发- 启用后 AVCaptureSession 不再输出常规摄像头流,因为摄像头被 overlay 直接使用
- 视频通话应用应调整音视频同步,隐藏演讲者的本地摄像头 tile
- 建议优化到更高帧率,因为 overlay 涉及实时分割渲染
系统级内容选择器
(06:48)
SCContentSharingPicker 替代了自建内容选择界面:
let picker = SCContentSharingPicker.shared()
picker.addObserver(self)
picker.isActive = true

// 应用内按钮触发系统选择器
func showSystemPicker(sender: UIButton) {
    picker.present(for: nil, using: .window)
}

// 选择完成回调
func contentSharingPicker(_ picker: SCContentSharingPicker,
                          didUpdateWith filter: SCContentFilter,
                          for stream: SCStream?) {
    if let stream = stream {
        stream.updateContentFilter(filter)
    } else {
        let newStream = SCStream(filter: filter, configuration: config, delegate: self)
        // 启动新流
    }
}

// 失败和取消回调
func contentSharingPicker(_ picker: SCContentSharingPicker,
                          didCancelFor stream: SCStream?) {
    if let stream = stream {
        resetStateForStream(stream: stream)
    }
}

func contentSharingPickerStartDidFailWithError(_ error: Error) {
    presentNotification(error: error)
}
关键点:
isActive = true必须设置,系统才会将该应用纳入 Video 菜单栏present(for:using:)的contentStyle可选.window、.application、.display- 回调返回的
SCContentFilter可直接用于创建或更新流 - 每个流可独立配置选择器行为
按流配置选择器
(08:41)
let pickerConfig = SCContentSharingPickerConfiguration()
pickerConfig.allowedPickingModes = [.window, .application]
pickerConfig.excludedBundleIDs = ["com.foo.myApp", "com.foo.myApp2"]
pickerConfig.allowsRepicking = false

picker.setConfiguration(pickerConfig, for: stream)
关键点:
allowedPickingModes限制用户可选的内容类型excludedBundleIDs和excludedWindowIDs隐藏敏感应用或窗口allowsRepicking = false禁止用户更改已选内容- 每个流可以有不同的配置
高清截图 API
(12:26)
// 方式一:CGImage 输出
if let screenshot = try? await SCScreenshotManager.captureImage(
    contentFilter: myContentFilter,
    configuration: myConfiguration
) {
    // screenshot 是 CGImage,可直接用于 NSImage/UIImage
}

// 方式二:CMSampleBuffer 输出
if let sampleBuffer = try? await SCScreenshotManager.captureSampleBuffer(
    contentFilter: myContentFilter,
    configuration: myConfiguration
) {
    // 支持更多像素格式,适合视频处理流程
}
完整使用流程:
// 1. 获取可共享内容
let content = try await SCShareableContent.current

// 2. 创建内容过滤器(可用 picker 或手动)
let filter = SCContentFilter(display: content.displays.first!,
                             excludingApplications: [],
                             exceptingWindows: [])

// 3. 配置截图参数
let configuration = SCStreamConfiguration()
configuration.width = 1920
configuration.height = 1080
configuration.showsCursor = true

// 4. 调用截图 API
if let screenshot = try? await SCScreenshotManager.captureImage(
    contentFilter: filter,
    configuration: configuration
) {
    print("截图成功,尺寸: \(screenshot.width) x \(screenshot.height)")
}
关键点:
captureImage返回 CGImage,适合直接显示或保存captureSampleBuffer返回 CMSampleBuffer,支持更多像素格式- 配置选项与 SCStream 基本一致,包括光标显示、分辨率、颜色空间等
- 从 CGWindowListCreateImage 迁移时,窗口层级选项在 SCShareableContent 中获取
核心启发
-
一键屏幕录制工具
- 做什么:做一个菜单栏小工具,点击后弹出系统选择器,选定窗口后开始录制 GIF/视频
- 为什么值得做:SCContentSharingPicker 提供了完整的选择 UI,无需自建,几行代码就能实现专业级屏幕录制
- 怎么开始:用
SCContentSharingPicker.shared()获取选择器,回调中创建SCStream输出到AVAssetWriter
-
智能截图笔记应用
- 做什么:截图后自动 OCR 识别文字,按应用分类存档
- 为什么值得做:
SCScreenshotManager可以精确截取特定窗口,配合excludedBundleIDs过滤隐私内容 - 怎么开始:用
SCShareableContent获取窗口列表,创建SCContentFilter指定目标窗口,调用captureImage
-
远程协作白板
- 做什么:共享屏幕时自动叠加演讲者手势和激光笔标记
- 为什么值得做:Presenter Overlay 已经处理了演讲者分割,应用只需在接收端叠加自定义标注层
- 怎么开始:检测
outputEffectDidStart回调,调整 UI 布局,在共享画面上叠加 CAShapeLayer 绘制标记
-
应用使用分析工具
- 做什么:定时截取用户活跃窗口,生成每日应用使用时长的可视化报告
- 为什么值得做:截图 API 可以精确按应用过滤,配合
SCShareableContent的窗口层级信息 - 怎么开始:用
SCShareableContent.current获取应用列表,为每个应用创建 filter,定时调用captureSampleBuffer分析像素变化判断活跃度
关联 Session
- Meet ScreenCaptureKit — 2022 年 ScreenCaptureKit 基础入门
- Take ScreenCaptureKit to the next level — 2022 年进阶使用技巧
- Add SharePlay to your app — 将屏幕共享与 SharePlay 结合实现协同体验
- Discover Continuity Camera for tvOS — 跨设备摄像头共享技术
评论
GitHub Issues · utterances