
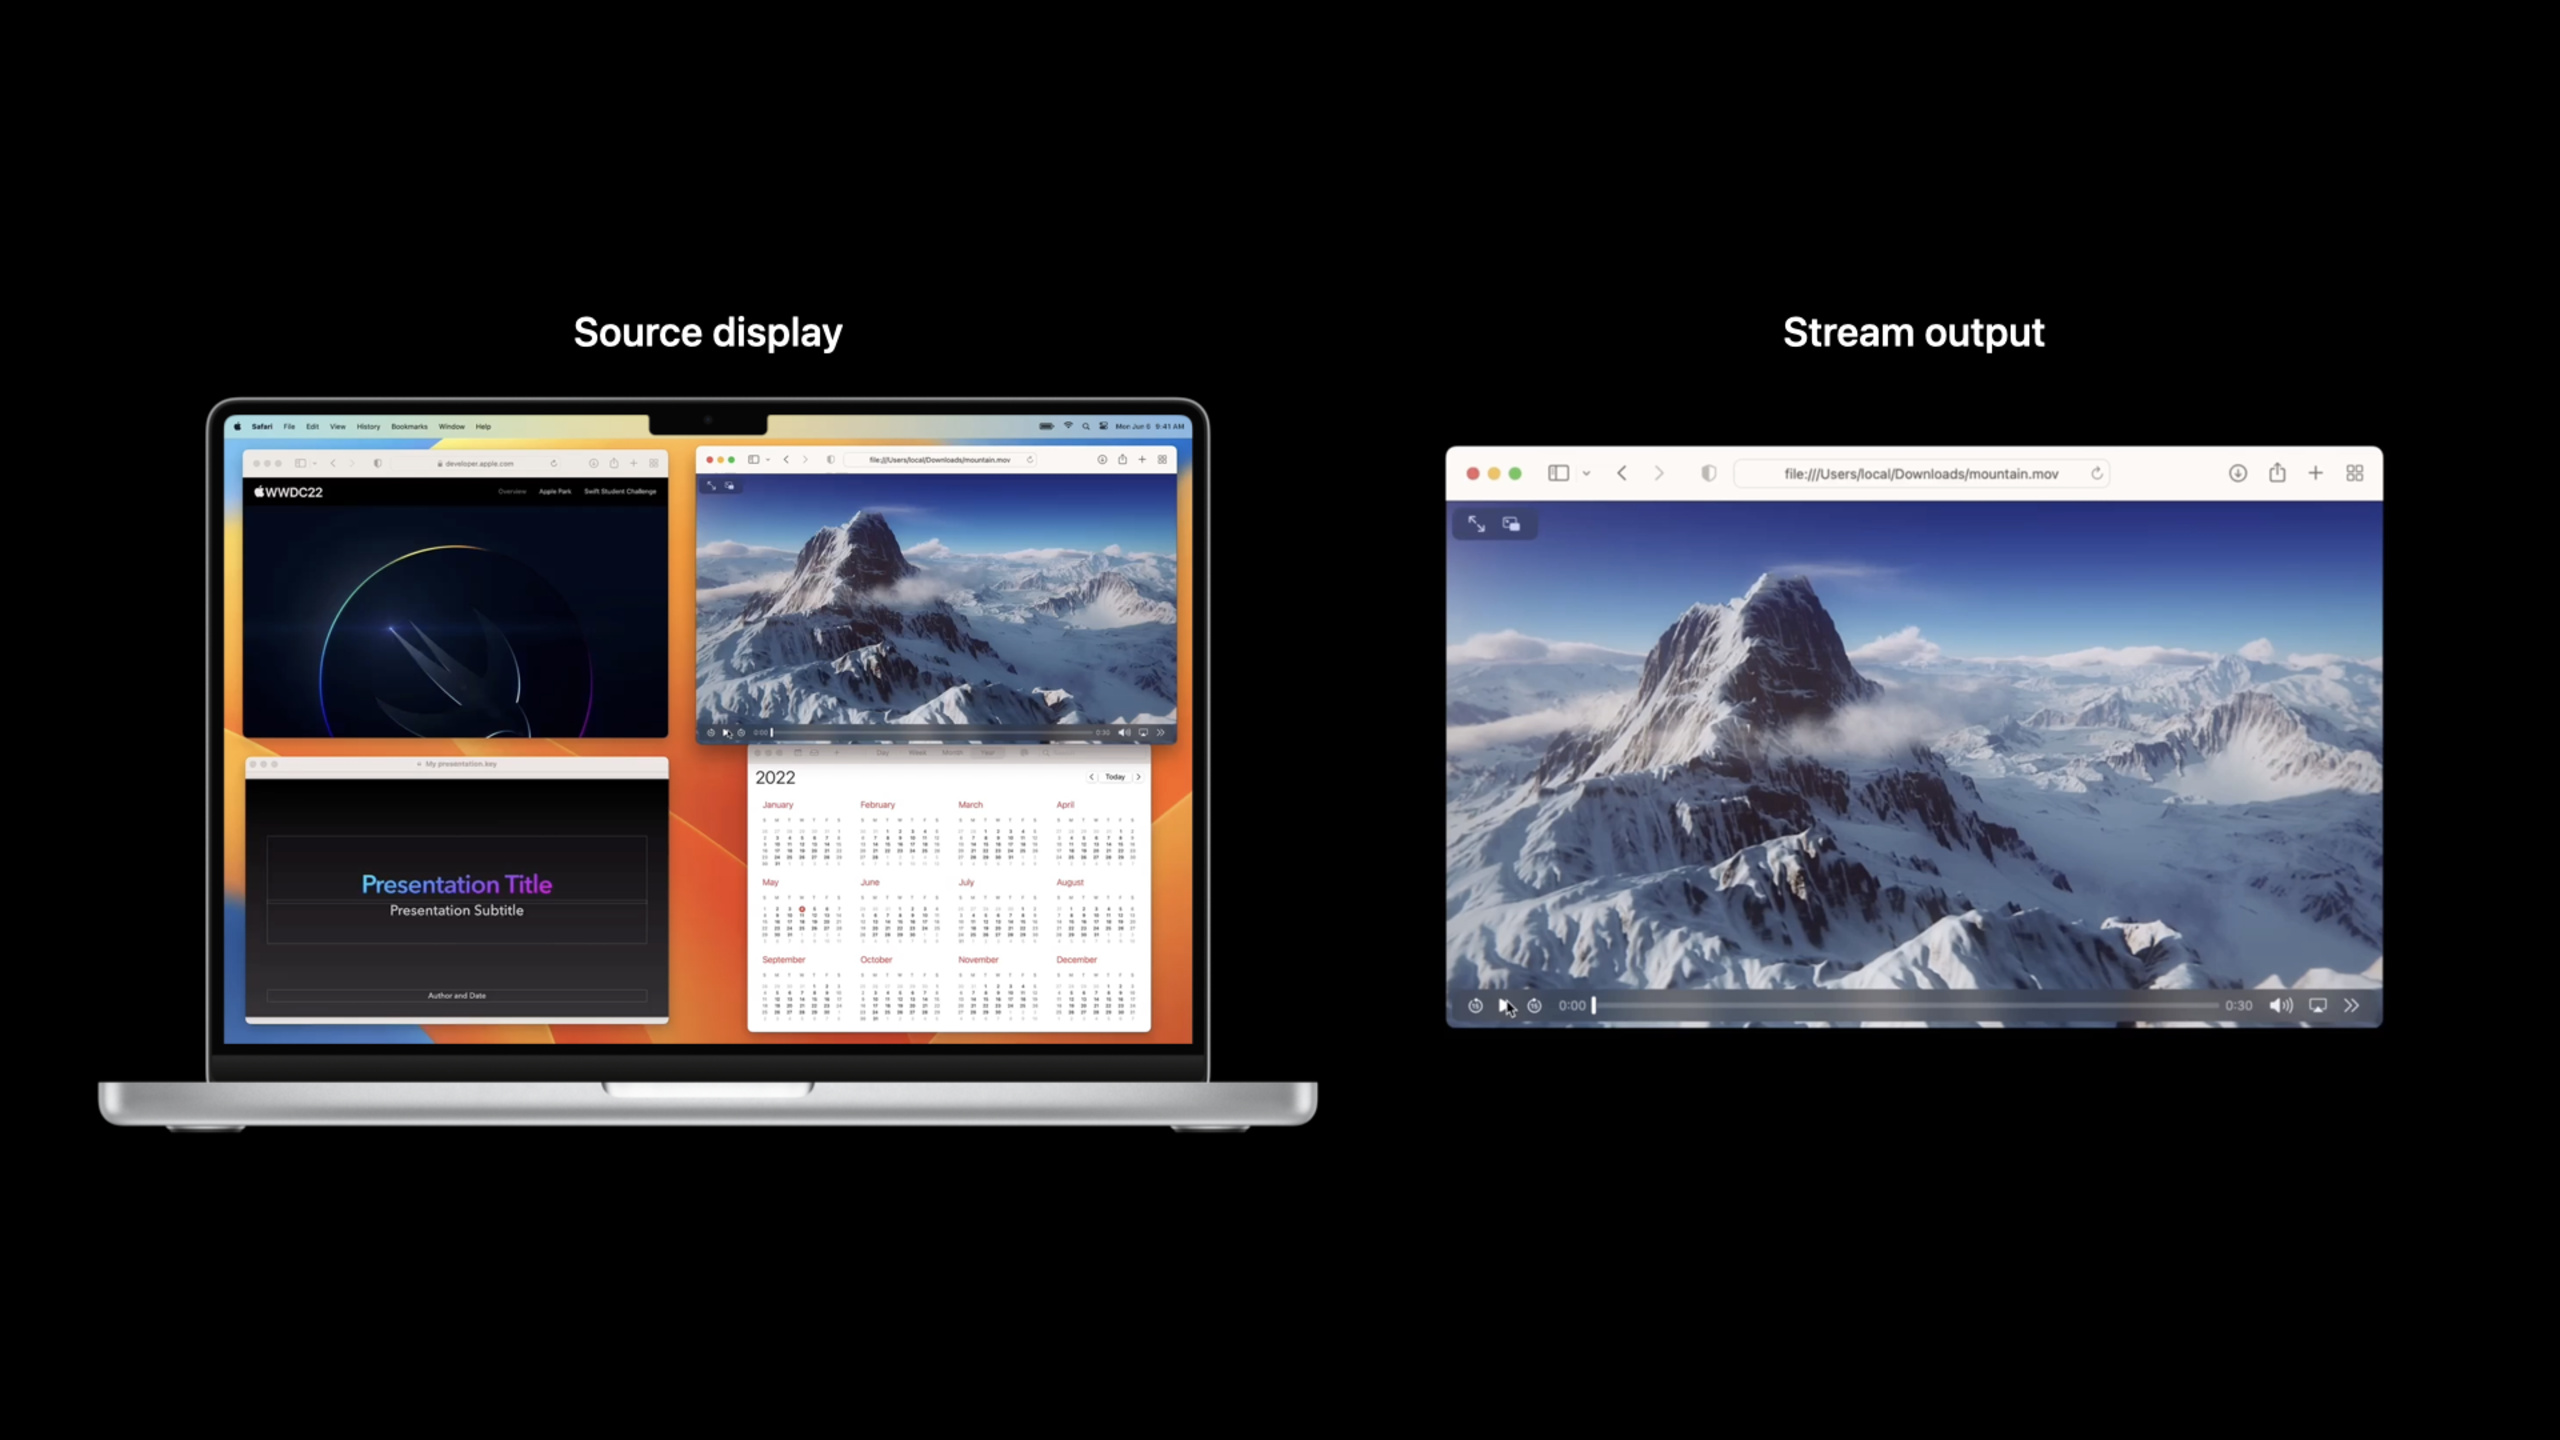
Highlight
ScreenCaptureKit 进阶篇:深入掌握内容过滤器(Content Filter)的五种模式、帧元数据(dirty rects、contentRect、contentScale、scaleFactor)的解读、流配置动态调整(4K 60FPS 与 720p 15FPS 实时切换)、以及窗口选择器(Window Picker)的构建方法。
核心内容
ScreenCaptureKit 在 macOS 13 中首次亮相,替代了老的 CGDisplay 系列 API。基础 Session “Meet ScreenCaptureKit” 介绍了创建流、捕获屏幕和窗口的基本流程。本场则聚焦更复杂的实际需求:如何精确控制捕获哪些内容、如何理解每一帧的元数据、如何在运行时调整流参数,以及如何构建带实时预览的窗口选择器。
屏幕捕获在真实应用中有很多微妙场景。Zoom 和 Google Meet 需要共享单个窗口但排除特定提示条;OBS 需要捕获整个显示器但跳过某些应用窗口;Twitch 主播需要在游戏场景切换时调整分辨率和帧率。ScreenCaptureKit 通过五类 ContentFilter 和帧元数据机制,把这些问题变成 API 调用而非 hack。
本场演讲从单窗口捕获开始,逐步展开到显示器的多窗口过滤、流配置的动态调整、帧元数据的使用,最后以 OBS Studio 集成案例收尾。
详细内容
单窗口独立捕获
(04:36)SCContentFilter 的 desktopIndependentWindow 初始化方式创建独立于显示器的单窗口捕获。这种方式输出帧只包含目标窗口内容,即使窗口被其他窗口遮挡,捕获的帧中仍能看到完整窗口。
// Get all available content to share via SCShareableContent
let shareableContent = try await SCShareableContent.excludingDesktopWindows(false,
       onScreenWindowsOnly: false)

// Get window you want to share from SCShareableContent
guard let window: [SCWindow] = shareableContent.windows.first(where:
                                    { $0.windowID == windowID }) else { return }

// Create SCContentFilter for Independent Window
let contentFilter = SCContentFilter(desktopIndependentWindow: window)

// Create SCStreamConfiguration object and enable audio capture
let streamConfig = SCStreamConfiguration()
streamConfig.capturesAudio = true

// Create stream with config and filter
stream = SCStream(filter: contentFilter, configuration: streamConfig, delegate: self)
stream.addStreamOutput(self, type: .screen, sampleHandlerQueue: serialQueue)
stream.startCapture()关键点:
excludingDesktopWindows(false, onScreenWindowsOnly: false)获取所有窗口,包括桌面和离屏窗口SCContentFilter(desktopIndependentWindow:)创建独立于显示器的窗口过滤器capturesAudio = true启用音频捕获——注意音频是 App 级别的,不是窗口级别addStreamOutput绑定回调队列和输出类型
帧元数据:Dirty Rects
(09:38)每帧 CMSampleBuffer 附带元数据字典,其中 dirtyRects 标记了当前帧相对于上一帧发生变化的区域。屏幕捕获中大部分帧变化只涉及小范围区域(鼠标移动、输入光标闪烁、通知弹出),利用 dirty rects 只编码变化区域可以大幅降低带宽。
// Get dirty rects from CMSampleBuffer dictionary metadata

func streamUpdateHandler(_ stream: SCStream, sampleBuffer: CMSampleBuffer) {
    guard let attachmentsArray = CMSampleBufferGetSampleAttachmentsArray(sampleBuffer,
                                                          createIfNecessary: false) as?
                                                         [[SCStreamFrameInfo, Any]],
        let attachments = attachmentsArray.first else { return }

        let dirtyRects = attachments[.dirtyRects]
    }
}

// Only encode and transmit the content within dirty rects关键点:
CMSampleBufferGetSampleAttachmentsArray获取帧附件数组SCStreamFrameInfo是元数据键的枚举类型.dirtyRects返回CGRect数组,标记本帧变化区域- 编码时只处理 dirty rects 内的像素数据
帧元数据:Content Rect 与缩放
(13:34)三个关键元数据字段协同工作:contentRect 标记有效内容区域,contentScale 是逻辑到物理的缩放比例,scaleFactor 是像素密度。三者配合可以把捕获帧还原为原始窗口的尺寸和像素密度。
/* Get and use contentRect, contentScale and scaleFactor (pixel density) to convert the captured window back to its native size and pixel density */

func streamUpdateHandler(_ stream: SCStream, sampleBuffer: CMSampleBuffer) {

    guard let attachmentsArray = CMSampleBufferGetSampleAttachmentsArray(sampleBuffer,
                                                          createIfNecessary: false) as?
                                                         [[SCStreamFrameInfo, Any]],
        let attachments = attachmentsArray.first else { return }

        let contentRect = attachments[.contentRect]
        let contentScale = attachments[.contentScale]
        let scaleFactor = attachments[.scaleFactor]

        /* Use contentRect to crop the frame, and then contentScale and
        scaleFactor to scale it */

    }
}关键点:
contentRect标识帧中实际包含内容的矩形区域contentScale是窗口逻辑坐标到捕获帧坐标的缩放比例scaleFactor是 Retina 像素密度(例如 2.0)- 还原公式:原始尺寸 = contentRect.size / contentScale * scaleFactor
显示器捕获:包含指定窗口
(15:37)捕获整个显示器时,可以通过 including 参数指定额外包含某些窗口(即使它们被其他内容遮挡)。适合屏幕共享时确保关键窗口始终可见。
// Get all available content to share via SCShareableContent
let shareableContent = try await SCShareableContent.excludingDesktopWindows(false,
                                                            onScreenWindowsOnly: false)

// Create SCWindow list using SCShareableContent and the window IDs to capture
let includingWindows = shareableContent.windows.filter { windowIDs.contains($0.windowID)}

// Create SCContentFilter for Full Display Including Windows
let contentFilter = SCContentFilter(display: display, including: includingWindows)

// Create SCStreamConfiguration object and enable audio
let streamConfig = SCStreamConfiguration()
streamConfig.capturesAudio = true

// Create stream
stream = SCStream(filter: contentFilter, configuration: streamConfig, delegate: self)
stream.addStreamOutput(self, type: .screen, sampleHandlerQueue: serialQueue)
stream.startCapture()关键点:
SCContentFilter(display:including:)捕获显示器同时额外包含指定窗口- 适合演示场景:捕获全屏 PPT 但确保弹幕/注释窗口也可见
- 被遮挡的窗口内容由系统合成进帧中
显示器捕获:包含应用、排除窗口
(18:13)更精细的模式是包含指定应用的所有窗口,同时排除某些特定窗口。例如捕获整个显示器,但只包含 Xcode 和 Safari,同时排除通知中心窗口。
// Get all available content to share via SCShareableContent
let shareableContent = try await SCShareableContent.excludingDesktopWindows(false, onScreenWindowsOnly: false)

/* Create list of SCRunningApplications using SCShareableContent and the application
IDs you'd like to capture */
let includingApplications = shareableContent.applications.filter {
    appBundleIDs.contains($0.bundleIdentifier)
}

// Create SCWindow list using SCShareableContent and the window IDs to except
let exceptingWindows = shareableContent.windows.filter { windowIDs.contains($0.windowID) }

// Create SCContentFilter for Full Display Including Apps, Excepting Windows
let contentFilter = SCContentFilter(display: display, including: includingApplications,
exceptingWindows: exceptingWindows)关键点:
includingApplications指定要包含的应用列表exceptingWindows在这些应用中排除特定窗口- 适合教学场景:只展示教学相关应用,排除通知和私密窗口
显示器捕获:排除应用
(20:46)与上一模式相反:捕获整个显示器,但排除某些应用及其窗口。这是最常见的屏幕共享场景——共享整个桌面但隐藏邮件、消息等隐私应用。
// Get all available content to share via SCShareableContent
let shareableContent = try await SCShareableContent.excludingDesktopWindows(false,
                                         onScreenWindowsOnly: false)

/* Create list of SCRunningApplications using SCShareableContent and the app IDs
you'd like to exclude */
let excludingApplications = shareableContent.applications.filter {
    appBundleIDs.contains($0.bundleIdentifier)
}

// Create SCWindow list using SCShareableContent and the window IDs to except
let exceptingWindows = shareableContent.windows.filter { windowIDs.contains($0.windowID) }

// Create SCContentFilter for Full Display Excluding Windows
let contentFilter = SCContentFilter(display: display,
                        excludingApplications: excludingApplications,
exceptingWindows: exceptingWindows)关键点:
excludingApplications指定要排除的应用exceptingWindows在这些应用中额外排除特定窗口- 排除的应用窗口在捕获帧中显示为模糊或替换背景色
流配置:4K 60FPS 高质量捕获
(28:46)配置高质量流需要同时设置分辨率、帧率、像素格式和队列深度。queueDepth 控制缓冲帧数,取值 3-8,值越大延迟越高但丢帧越少。
let streamConfiguration = SCStreamConfiguration()

// 4K output size
streamConfiguration.width  = 3840
streamConfiguration.height = 2160

// 60 FPS
streamConfiguration.minimumFrameInterval = CMTime(value: 1, timescale: CMTimeScale(60))

// 420v output pixel format for encoding
streamConfiguration.pixelFormat = kCVPixelFormatType_420YpCbCr8BiPlanarVideoRange

// Source rect(optional)
streamConfiguration.sourceRect = CGRectMake(100, 200, 3940, 2360)

// Set background fill color to black
streamConfiguration.backgroundColor = CGColor.black

// Include cursor in capture
streamConfiguration.showsCursor = true

// Valid queue depth is between 3 to 8
streamConfiguration.queueDepth = 5

// Include audio in capture
streamConfiguration.capturesAudio = true关键点:
width/height设置输出分辨率minimumFrameInterval用 CMTime 控制帧间隔,60FPS = 1/60 秒pixelFormat选择420v格式直接对接视频编码器,避免色彩空间转换sourceRect裁剪源区域queueDepth = 5在延迟和流畅度间取得平衡
流配置:运行时动态降级
(30:08)网络带宽下降或用户切换到低性能场景时,可以调用 updateConfiguration 实时降低分辨率和帧率,无需重建流。
// Update output dimension down to 720p
streamConfiguration.width  = 1280
streamConfiguration.height = 720

// 15FPS
streamConfiguration.minimumFrameInterval = CMTime(value: 1, timescale: CMTimeScale(15))

// Update the configuration
try await stream.updateConfiguration(streamConfiguration)关键点:
- 从 4K 60FPS 降到 720p 15FPS,一行
updateConfiguration完成 - 不需要停止流、重建
SCStream或重新绑定输出 - 适合根据网络质量动态调整质量等级
窗口选择器:带实时预览
(31:57)构建类似系统屏幕共享选择器的 UI:为每个窗口创建独立的小分辨率预览流(284x182,5FPS,BGRA 格式),在界面上展示实时缩略图供用户点击选择。
// Get all available content to share via SCShareableContent
let shareableContent = try await SCShareableContent.excludingDesktopWindows(false,
                                        onScreenWindowsOnly: true)

// Create a SCContentFilter for each shareable SCWindows
let contentFilters = shareableContent.windows.map {
    SCContentFilter(desktopIndependentWindow: $0)
}

// Stream configuration
let streamConfiguration = SCStreamConfiguration()

// 284x182 frame output
streamConfiguration.width  = 284
streamConfiguration.height = 182
// 5 FPS
streamConfiguration.minimumFrameInterval = CMTime(value: 1, timescale: CMTimeScale(5))
// BGRA pixel format for on screen display
streamConfiguration.pixelFormat = kCVPixelFormatType_32BGRA
// No audio
streamConfiguration.capturesAudio = false
// Does not include cursor in capture
streamConfiguration.showsCursor = false
// Valid queue depth is between 3 to 8

// Create a SCStream with each SCContentFilter
var streams: [SCStream] = []
for contentFilter in contentFilters {
    let stream = SCStream(filter: contentFilter, streamConfiguration: streamConfig,
                        delegate: self)
    try stream.addStreamOutput(self, type: .screen, sampleHandlerQueue: serialQueue)
    try await stream.startCapture()
    streams.append(stream)
}关键点:
onScreenWindowsOnly: true只获取屏幕上的窗口- 预览流用 284x182 小尺寸 + 5FPS 低帧率,节省资源
BGRA像素格式适合直接显示在屏幕上showsCursor = false预览不需要光标- 为每个窗口创建独立流,用户选择后停止其他预览流
核心启发
-
用 dirty rects 做增量编码:在
streamUpdateHandler中提取dirtyRects,只对变化区域编码。屏幕共享中大量帧变化集中在小范围(鼠标、光标、通知),增量编码可节省 70% 以上的带宽。 -
构建五层 ContentFilter 策略:单窗口独立捕获 → 显示器含窗口 → 显示器含应用 → 显示器排除应用 → 显示器排除应用含例外窗口。根据用户意图(演示、教学、隐私保护)选择对应层级,避免一刀切的全屏捕获。
-
运行时动态调整流参数:用
updateConfiguration在 4K 60FPS 和 720p 15FPS 间切换。网络好时高质量,网络差时自动降级,无需停止流——这对实时通信应用是刚需。 -
为窗口选择器建预览流池:用 284x182 / 5FPS / BGRA 格式为每个窗口建轻量预览流。用户选择目标窗口后,停止其他预览流并切换到正式捕获流。这种双流架构(预览流 + 正式流)是系统屏幕共享选择器的核心模式。
-
区分窗口级与 App 级音频:
capturesAudio = true捕获的是整个 App 的音频,不是单个窗口的音频。在 UI 中明确告知用户”此 App 的所有声音都会被共享”,避免用户误以为只共享了某个窗口的声音。
关联 Session
- What’s new in SwiftUI — SwiftUI 最新更新,可用于构建窗口选择器和设置界面
- Create a more responsive media app — AVFoundation 在媒体应用中的响应式设计
- Explore HLS variants in AVFoundation — 了解如何用 AVFoundation 处理 HLS 变体流
- Discover Metal 3 — Metal 3 新特性,与 GPU 内存缓冲的屏幕捕获配合
评论
GitHub Issues · utterances