
Highlight
TextKit 2 在 iOS 16 和 macOS Ventura 成为 UIKit 与 AppKit 文本控件的默认布局引擎,UITextView 与 NSTextView 获得自动迁移路径、TextKit 1 兼容模式和从 glyph/NSRange 代码迁移到 NSTextLayoutManager/NSTextRange 的策略。
核心内容
很多应用没有直接写文本引擎代码,却一直依赖 UITextView、NSTextView、UILabel 这类系统控件。WWDC 2022 的变化是:这些控件背后的默认文本布局引擎正在切到 TextKit 2(01:56)。
这件事对普通应用很省心。没有特别改动 text view 的应用,大多可以零代码获得 TextKit 2。Apple 在 iOS 16 完成 UIKit 的迁移,UITextView 默认使用 TextKit 2;macOS Ventura 里,AppKit 的文本控件也默认使用 TextKit 2(03:08)。
麻烦出现在深度定制文本的应用。老代码常会访问 layoutManager,再用 glyph API 计算行数、矩形或选择范围。TextKit 2 不再提供 glyph API,因为字符到 glyph 的连续映射对部分文字系统并不成立(15:33)。这类代码需要从“操作 glyph”改成“操作 layout fragment、line fragment 和 text range”。
Apple 给了两条过渡路径。短期内,UITextView 和 NSTextView 可以进入 TextKit 1 兼容模式,保证已有应用继续工作(09:03)。长期看,应用应该避免意外回退,因为一旦 text view 从 TextKit 2 切到 TextKit 1,系统不会自动切回来(11:54)。
详细内容
文本控件默认使用 TextKit 2
(03:08)TextKit 2 在 iOS 15 先进入 UIKit 的 UITextField。iOS 16 之后,UIKit 的所有文本控件默认使用 TextKit 2,包括 UITextView。AppKit 也在 macOS Ventura 让文本控件默认使用 TextKit 2。
需要明确选择引擎时,可以在初始化时指定 usingTextLayoutManager。这适合两种场景:新代码强制走 TextKit 2;必须兼容旧实现的 text view 在创建时直接选择 TextKit 1。
let textView = UITextView(usingTextLayoutManager: true)
let compatibilityTextView = UITextView(usingTextLayoutManager: false)
关键点:
UITextView(usingTextLayoutManager: true):创建使用 TextKit 2 的 text view。UITextView(usingTextLayoutManager: false):创建使用 TextKit 1 的 text view。- 初始化时选择引擎,比创建后替换 layout manager 更安全;演讲提到运行时替换可能造成焦点丢失和输入中断(11:03)。
先检查 NSTextLayoutManager,再访问 layoutManager
(13:20)意外进入兼容模式的最常见原因,是访问 text view 的 layoutManager 属性。跨系统版本的代码不能直接删掉 TextKit 1 分支时,Apple 建议先检查 textLayoutManager。
if let textLayoutManager = textView.textLayoutManager {
    // TextKit 2 code goes here
}
else {
    let layoutManager = textView.layoutManager
    // TextKit 1 code goes here
}
关键点:
textView.textLayoutManager:TextKit 2 可用时返回NSTextLayoutManager。if let textLayoutManager:把 TextKit 2 代码放在这个分支里,避免先访问旧的 layout manager。else:只在 TextKit 2 不可用时进入旧路径。textView.layoutManager:这个访问会触发 TextKit 1 兼容模式,所以必须放在 TextKit 1 分支里。
用 layout fragment 取代 glyph 遍历
(16:24)TextKit 1 里的 glyph API 很底层。演讲里的例子是统计 text view 中换行后的行数。旧思路会遍历 glyph,再查 lineFragmentRect(forGlyphAt:)。TextKit 2 的思路是枚举 NSTextLayoutFragment,再统计其中的 NSTextLineFragment。
// Example: Updating glyph-based code

var numberOfLines = 0
let textLayoutManager = textView.textLayoutManager

textLayoutManager.enumerateTextLayoutFragments(from:
                                               textLayoutManager.documentRange.location,
                                               options: [.ensuresLayout]) { layoutFragment in
        numberOfLines += layoutFragment.textLineFragments.count
}
关键点:
numberOfLines:保存统计结果。textView.textLayoutManager:取得 TextKit 2 的布局管理器。enumerateTextLayoutFragments(from:options:):从文档起点开始枚举布局片段。textLayoutManager.documentRange.location:枚举的起始位置。.ensuresLayout:枚举前确保需要的布局已经生成。layoutFragment.textLineFragments.count:每个布局片段内的行片段数量,累加后得到换行后的总行数。
在 NSRange 和 NSTextRange 之间转换
(18:09)TextKit 1 常用 NSRange 索引字符串。TextKit 2 引入 NSTextLocation 和 NSTextRange,用于表示更结构化的文本内容。Text view 仍然有 selectedRange、scrollRangeToVisible 这类 NSRange API,所以迁移代码经常需要转换。
从 NSRange 转到 NSTextRange:
let textContentManager = textLayoutManager.textContentManager

let startLocation = textContentManager.location(textContentManager.documentRange.location,
                                                offsetBy: nsRange.location)!

let endLocation = textContentManager.location(startLocation,
                                              offsetBy: nsRange.length)

let nsTextRange = NSTextRange(location: startLocation, end: endLocation)
关键点:
textLayoutManager.textContentManager:转换位置需要通过 content manager 完成。documentRange.location:文档开头的位置对象。offsetBy: nsRange.location:从文档开头移动到NSRange的起点。offsetBy: nsRange.length:从起点移动到NSRange的终点。NSTextRange(location:end:):用起点和终点构造 TextKit 2 的范围。
从 NSTextRange 转回 NSRange:
let textContentManager = textLayoutManager.textContentManager

let location = textContentManager.offset(from: textContentManager.documentRange.location,
                                         to: nsTextRange!.location)

let length = textContentManager.offset(from: nsTextRange!.location,
                                       to: nsTextRange!.endLocation)

let nsRange = NSRange(location: location, length: length)
关键点:
offset(from:to:):计算两个NSTextLocation之间的线性偏移。location:文档开头到NSTextRange起点的偏移。length:NSTextRange起点到终点的偏移。NSRange(location:length:):把两个整数重新组合成 text view API 可用的范围。
UITextRange 通过 offset 做中转
(22:01)UITextView 和 UITextField 遵守 UITextInput,会使用 UITextPosition 和 UITextRange。大多数情况下不需要直接转成 NSTextRange。确实需要时,Apple 建议用整数 offset 作为中间层。
let offset = textView.offset(from: textview.beginningOfDocument, to: uiTextRange.start)

let startLocation = textContentManager.location(textContentManager.documentRange.location,
                                                offsetBy: offset)!

let nsTextRange = NSTextRange(location: startLocation)
关键点:
textView.offset(from:to:):把UITextRange.start转成相对文档开头的整数偏移。textContentManager.documentRange.location:TextKit 2 文档起点。location(_:offsetBy:):把整数偏移转换为NSTextLocation。NSTextRange(location:):创建从该位置开始的 TextKit 2 范围。- 演讲提醒,
UITextPosition只对创建它的 view 有效,不要跨 view 复用(22:51)。
核心启发
-
做一个 TextKit 2 迁移检查页:列出 app 内所有
UITextView和NSTextView的创建方式,优先把能直接使用 TextKit 2 的实例改为usingTextLayoutManager: true。这样可以尽早发现意外的 TextKit 1 回退;入口是textView.textLayoutManager和兼容模式日志。 -
给富文本编辑器加行数统计:把基于 glyph 的行数统计改为枚举
NSTextLayoutFragment。这能避开字符到 glyph 映射的问题,也和 TextKit 2 的布局模型一致;入口是enumerateTextLayoutFragments(from:options:)。 -
写一个 range 转换工具:把
NSRange、NSTextRange、UITextRange的转换集中到一个小模块里。编辑器中的选区、滚动、批注高亮都需要范围转换;入口是NSTextContentManager.location(_:offsetBy:)和offset(from:to:)。 -
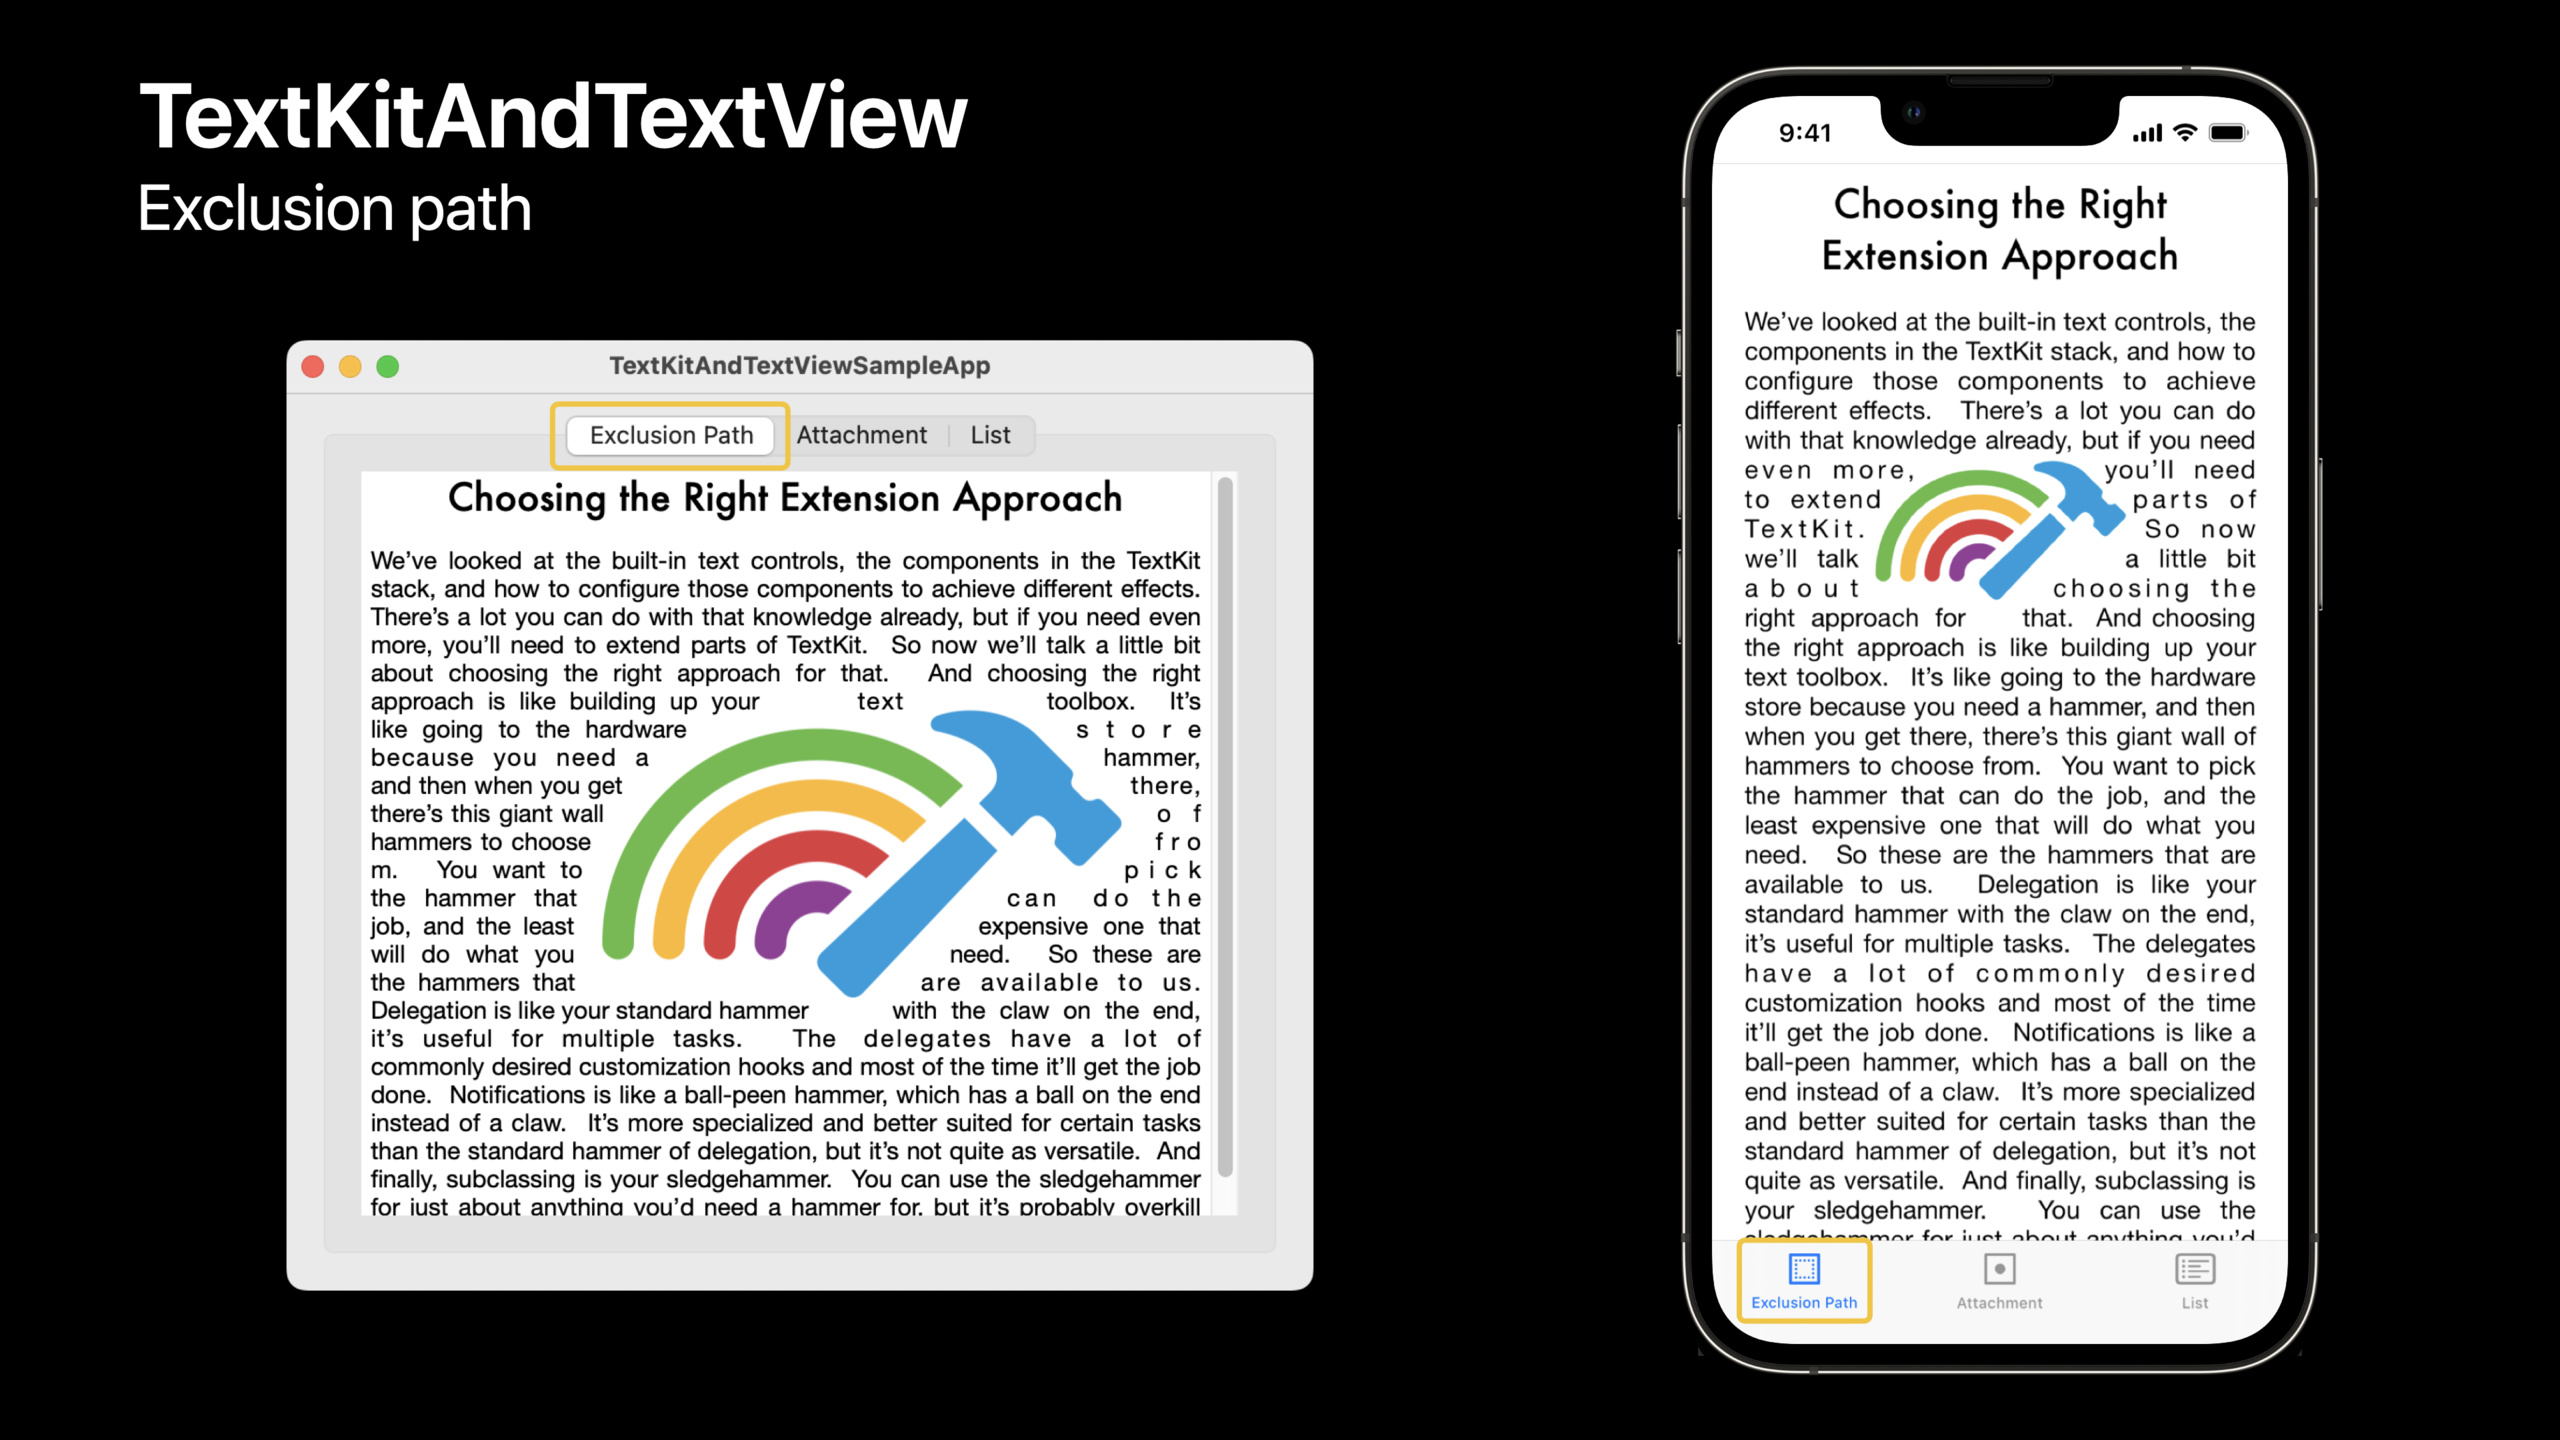
做图文混排的文本卡片:TextKit 2 支持 non-simple text container,可以通过
NSTextContainer.exclusionPaths让文字避开图片区域。适合新闻、笔记、长文阅读器中的内嵌图片布局。 -
做可交互的内联附件:TextKit 2 的 text attachment view provider API 允许用
UIView或NSView作为文本附件,并直接处理事件。可以从内联投票、任务勾选框、代码块操作按钮这类小功能开始。
关联 Session
- Meet TextKit 2 — 讲解 TextKit 2 的底层架构,适合在阅读迁移策略前补齐基础概念。
- What’s new in UIKit — 覆盖 iOS 16 的 UIKit 更新,可和
UITextView默认迁移一起看。 - What’s new in AppKit — 覆盖 macOS Ventura 的 AppKit 更新,可和
NSTextView默认迁移一起看。 - What’s new in PDFKit — PDFKit 处理文档文本、表单和标注,适合和 TextKit 的文本布局更新配套阅读。
- Adopt desktop-class editing interactions — 讲编辑菜单和查找交互,和 text view 的选择、查找、编辑体验直接相关。
评论
GitHub Issues · utterances