
Highlight
Vision 的 Barcode Detection 升级到 Revision 2 支持 Codabar、GS1Databar、MicroQR 等新条码,新增 VNDocumentSegmentationRequest 用于文档分割检测,OCR 扩展多语言支持包括中文和日文的准确识别模式。
核心内容
Barcode Detection 的新能力
条码检测升级到 Revision 2(02:07),新增四种条码类型:
- Codabar:用于图书馆、血库等场景
- GS1Databar:超市优惠券、收据
- MicroPDF:小型标签
- MicroQR:小空间里的二维码,比普通 QR 码节省大量空间
Revision 2 还修复了一个行为不一致问题(02:40):之前指定 Region of Interest(ROI)时,返回的 bounding box 仍然相对于全图。现在和 Vision 其他请求一致,bounding box 坐标相对于 ROI。
Vision 的一个优势是能同时检测多个条码和多种条码类型(04:07),不需要反复扫描。但要注意,指定的 symbologies 越多,检测越慢,只指定需要的类型。
文本识别的语言支持
Vision 的文本识别有两种模式(07:29):
- Fast:拉丁字符识别器,支持各种拉丁字符集(如德语的小写改符号)
- Accurate:基于机器学习的识别器,按词和行处理,支持中文、日文等非拉丁语系
语言选择影响识别阶段和语言纠正阶段(08:02)。在 Fast 模式下,语言选择决定支持哪些拉丁字符集;在 Accurate 模式下,语言选择决定使用哪种识别模型(中文用完全不同的模型)。
Revision 2 显著扩展了语言支持(09:25)。最好用 supportedRecognitionLanguages() 查询支持的语言,而不是假设固定列表。多语言时顺序很重要,模糊情况按顺序解析。
Document Segmentation:智能文档检测
今年新增的 VNDocumentSegmentationRequest(10:34)是一个机器学习驱动的文档检测器,训练在多种文档类型上:纸张、招牌、笔记、收据、标签等。
它返回一个低分辨率分割掩码(每个像素表示属于文档的置信度),以及四个角点。在有 Neural Engine 的设备上可以实时运行。VisionKit 的 VNDocumentCameraViewController 现在用这个请求替代传统的矩形检测器。
与 VNDetectRectanglesRequest 的区别(12:25):
| 特性 | Document Request | Rectangle Request |
|---|---|---|
| 算法类型 | 机器学习 | 传统计算机视觉 |
| 运行位置 | Neural Engine/GPU/CPU | CPU |
| 文档形状 | 任意形状 | 必须是矩形 |
| 模糊角落 | 能处理 | 有挑战 |
| 折叠文档 | 能处理 | 有挑战 |
| 返回结果 | 掩码 + 角点 | 仅角点 |
| 检测数量 | 只返回一个 | 可返回多个 |
详细内容
条码扫描基础代码
(06:18)
import Foundation
import Vision

let url = URL(fileReferenceLiteralResourceName: "codeall_4.png") as CFURL

guard let imageSource = CGImageSourceCreateWithURL(url, nil),
      let barcodeImage = CGImageSourceCreateImageAtIndex(imageSource, 0, nil) else {
    fatalError("Unable to create barcode image.")
}

let imageRequestHandler = VNImageRequestHandler(cgImage: barcodeImage)

let detectBarcodesRequest = VNDetectBarcodesRequest()
detectBarcodesRequest.revision = VNDetectBarcodesRequestRevision2
detectBarcodesRequest.symbologies = [.codabar]

try imageRequestHandler.perform([detectBarcodesRequest])

if let detectedBarcodes = detectBarcodesRequest.results {
    drawBarcodes(detectedBarcodes, sourceImage: barcodeImage)

    detectedBarcodes.forEach {
        print($0.payloadStringValue ?? "")
    }
}
关键点:
revision要显式设置,否则新 SDK 编译会自动用最新 revisionsymbologies可以指定单个或多个,空数组表示扫描所有类型- 1D 条码(如 Codabar)会返回多个检测,需要用 payload 去重
payloadStringValue是条码编码的实际数据
绘制条码边界框
public func createCGPathForTopLeftCCWQuadrilateral(
    _ topLeft: CGPoint,
    _ bottomLeft: CGPoint,
    _ bottomRight: CGPoint,
    _ topRight: CGPoint,
    _ transform: CGAffineTransform
) -> CGPath {
    let path = CGMutablePath()
    path.move(to: topLeft, transform: transform)
    path.addLine(to: bottomLeft, transform: transform)
    path.addLine(to: bottomRight, transform: transform)
    path.addLine(to: topRight, transform: transform)
    path.addLine(to: topLeft, transform: transform)
    path.closeSubpath()
    return path
}

public func drawBarcodes(_ observations: [VNBarcodeObservation], sourceImage: CGImage) -> CGImage? {
    let size = CGSize(width: sourceImage.width, height: sourceImage.height)
    let imageSpaceTransform = CGAffineTransform(scaleX: size.width, y: size.height)
    let colorSpace = CGColorSpace(name: CGColorSpace.sRGB)
    let cgContext = CGContext(
        data: nil,
        width: Int(size.width),
        height: Int(size.height),
        bitsPerComponent: 8,
        bytesPerRow: 8 * 4 * Int(size.width),
        space: colorSpace!,
        bitmapInfo: CGImageAlphaInfo.premultipliedLast.rawValue
    )!

    cgContext.setStrokeColor(CGColor(srgbRed: 1.0, green: 0.0, blue: 0.0, alpha: 0.7))
    cgContext.setLineWidth(25.0)
    cgContext.draw(sourceImage, in: CGRect(x: 0.0, y: 0.0, width: size.width, height: size.height))

    for currentObservation in observations {
        let path = createCGPathForTopLeftCCWQuadrilateral(
            currentObservation.topLeft,
            currentObservation.bottomLeft,
            currentObservation.bottomRight,
            currentObservation.topRight,
            imageSpaceTransform
        )
        cgContext.addPath(path)
        cgContext.strokePath()
    }
    return cgContext.makeImage()
}
关键点:
- 条码的四个角点用
topLeft、bottomLeft、bottomRight、topRight表示 - 归一化坐标(0-1)要乘以图像尺寸转换为像素坐标
CGAffineTransform(scaleX:y:)构造缩放变换
文档分割与透视矫正
(14:02)
import Foundation
import CoreImage
import Vision
import CoreML

guard var inputImage = CIImage(contentsOf: #fileLiteral(resourceName: "IMG_0001.HEIC"))
else { fatalError("image not found") }

let requestHandler = VNImageRequestHandler(ciImage: inputImage)
let documentDetectionRequest = VNDetectDocumentSegmentationRequest()
try requestHandler.perform([documentDetectionRequest])

guard let document = documentDetectionRequest.results?.first,
      let documentImage = perspectiveCorrectedImage(
        from: inputImage,
        rectangleObservation: document
      ) else {
    fatalError("Unable to get document image.")
}

documentImage
关键点:
VNDetectDocumentSegmentationRequest返回分割掩码和四角点- 需要自己做透视矫正,用 Core Image 的
CIPerspectiveCorrection滤镜 - 矫正后的图像可以直接用于 OCR、矩形检测、条码扫描
透视矫正辅助函数
public func perspectiveCorrectedImage(
    from inputImage: CIImage,
    rectangleObservation: VNRectangleObservation
) -> CIImage? {
    let imageSize = inputImage.extent.size

    // 验证检测到的矩形有效
    let boundingBox = rectangleObservation.boundingBox.scaled(to: imageSize)
    guard inputImage.extent.contains(boundingBox)
    else { print("invalid detected rectangle"); return nil }

    // 获取四个角点的像素坐标
    let topLeft = rectangleObservation.topLeft.scaled(to: imageSize)
    let topRight = rectangleObservation.topRight.scaled(to: imageSize)
    let bottomLeft = rectangleObservation.bottomLeft.scaled(to: imageSize)
    let bottomRight = rectangleObservation.bottomRight.scaled(to: imageSize)

    // 应用透视矫正滤镜
    let correctedImage = inputImage
        .cropped(to: boundingBox)
        .applyingFilter("CIPerspectiveCorrection", parameters: [
            "inputTopLeft": CIVector(cgPoint: topLeft),
            "inputTopRight": CIVector(cgPoint: topRight),
            "inputBottomLeft": CIVector(cgPoint: bottomLeft),
            "inputBottomRight": CIVector(cgPoint: bottomRight)
        ])
    return correctedImage
}

extension CGPoint {
    func scaled(to size: CGSize) -> CGPoint {
        return CGPoint(x: self.x * size.width, y: self.y * size.height)
    }
}

extension CGRect {
    func scaled(to size: CGSize) -> CGRect {
        return CGRect(
            x: self.origin.x * size.width,
            y: self.origin.y * size.height,
            width: self.size.width * size.width,
            height: self.size.height * size.height
        )
    }
}
关键点:
- 归一化坐标要乘以图像尺寸
CIPerspectiveCorrection滤镜矫正透视变形- 先 crop 到 bounding box 可以减少后续处理的数据量
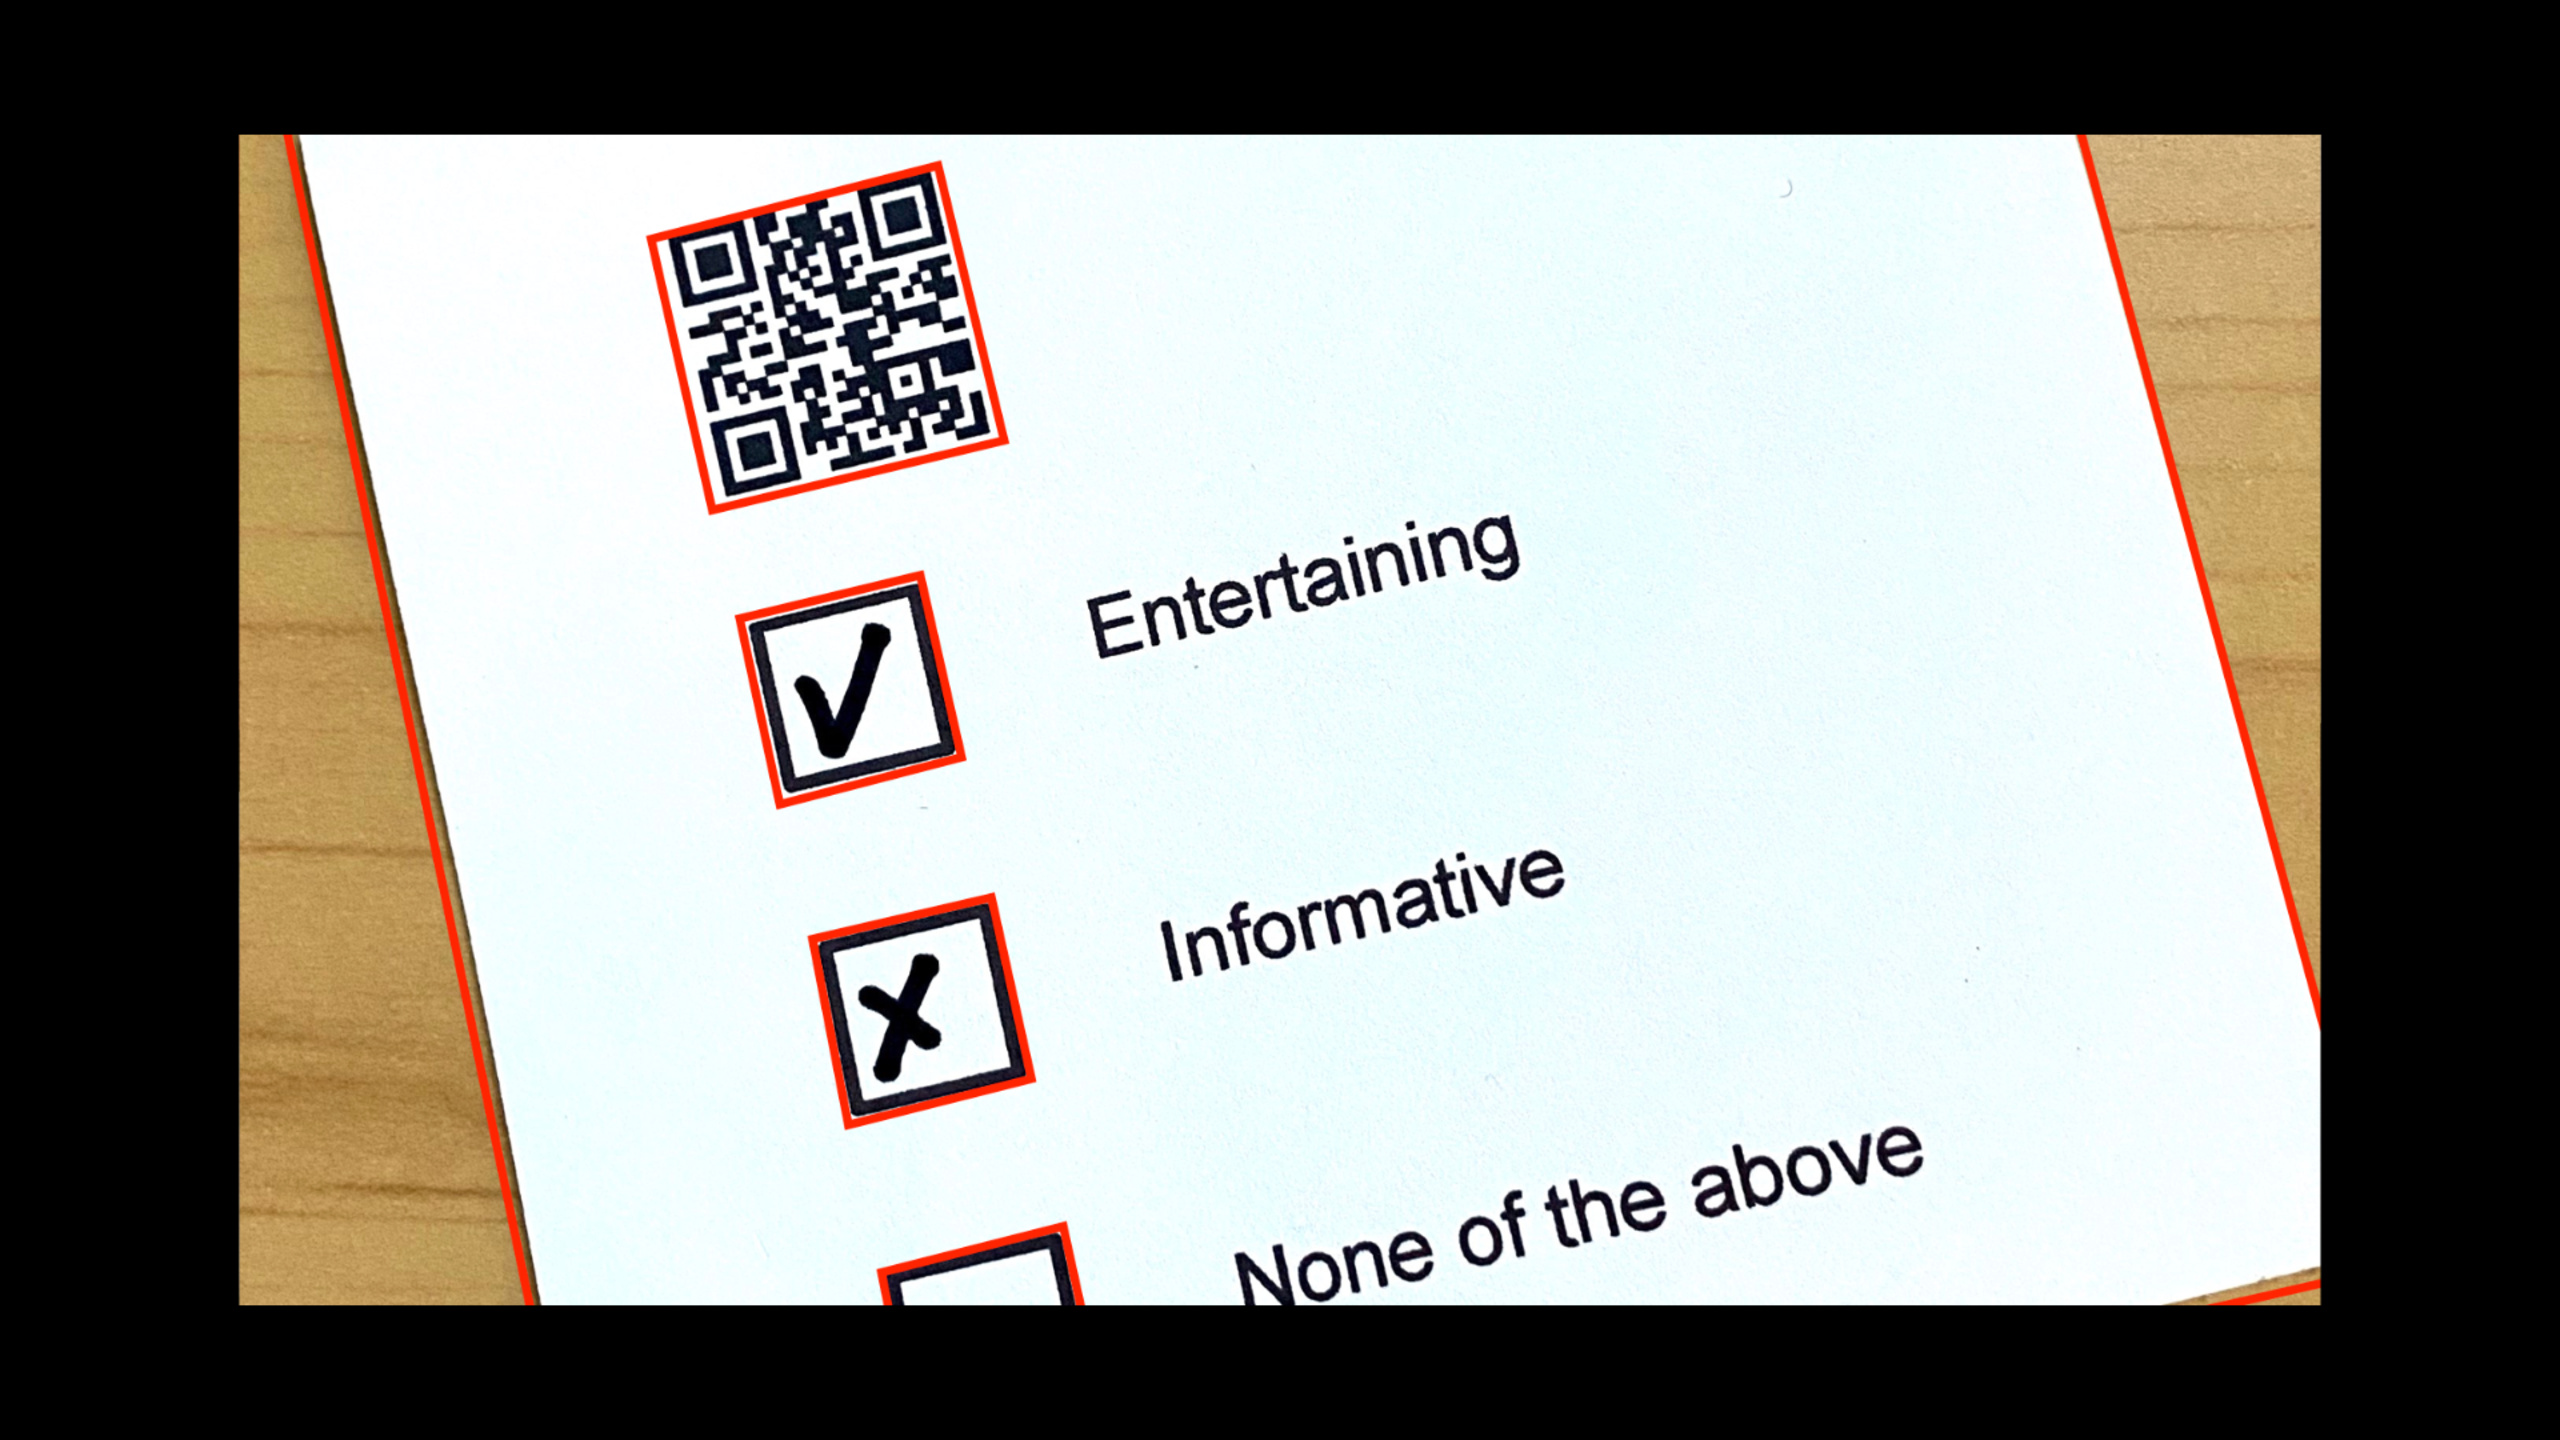
复杂文档扫描:问卷分析示例
演讲者演示了一个完整的问卷扫描流程(14:02):
- 文档分割检测 + 透视矫正
- 条码检测(QR 码存储问卷标题)
- 矩形检测(找到复选框)
- OCR(识别问题文本)
- Core ML 分类(判断复选框是否勾选)
关键配置:
// 矩形检测配置
rectanglesDetection.minimumSize = 0.1  // 默认 0.2,太小检测不到
rectanglesDetection.maximumObservations = 0  // 0 表示无限制

// OCR 请求
let ocrRequest = VNRecognizeTextRequest { request, error in
    textBlocks = request.results as! [VNRecognizedTextObservation]
}

// Core ML 分类器(复选框是否勾选)
let classificationRequest = createclassificationRequest()
对每个复选框区域做透视矫正后,输入 Create ML 训练的图像分类器,判断是 “Yes” 还是 “No”。如果置信度 > 0.9,找到对应的问题文本(用矩形位置匹配文本行)。
核心启发
1. 医疗场景的多条码扫描 App
- 做什么:医院里用 iPhone 一次性扫描病人腕带、药瓶、处方上的多个条码,自动汇总信息
- 为什么值得做:Vision 能同时检测多个条码和多种类型,比专用手持扫描器更灵活
- 怎么开始:用
VNDetectBarcodesRequest的 Revision 2,设置symbologies为医疗场景常用的 Codabar 和 QR
2. 多语言票据识别系统
- 做什么:自动识别中文、日文、韩文票据上的关键信息(金额、日期、商家)
- 为什么值得做:Accurate 模式的中文识别在 WWDC2021 得到改进,可以处理复杂的票据版面
- 怎么开始:用
VNRecognizeTextRequest的 Accurate 模式,recognitionLanguages设为目标语言,结合VNDocumentSegmentationRequest先检测文档区域
3. 智能表单填写助手
- 做什么:用户拍纸质表单,App 自动提取字段内容,生成可填写的电子版
- 为什么值得做:文档分割检测可以处理各种文档形状,矩形检测能找到表格单元格,OCR 提取文本
- 怎么开始:先用
VNDocumentSegmentationRequest检测并矫正文档,再用VNDetectRectanglesRequest找表项区域,最后用VNRecognizeTextRequest提取内容
4. 自定义复选框/勾选框识别
- 做什么:识别用户自填问卷、考试答题卡中的勾选状态
- 为什么值得做:Vision 的矩形检测能定位复选框位置,Core ML 图像分类器能判断是否勾选
- 怎么开始:收集勾选和未勾选的复选框图片,用 Create ML 训练二分类器,在 App 中结合 Vision 的矩形检测结果
关联 Session
- Detect people, faces, and poses using Vision — Vision 的人体分析能力,与文档识别共同展示 Vision 框架的广度
- Explore computer vision APIs — WWDC20 的 Vision 综合介绍,了解 Vision 的整体能力
- Vision and Core Image — WWDC20 的 Vision 与 Core Image 结合使用,包含文档预处理技术
- Tune your Core ML models — 与文档识别结合的 Core ML 自定义分类器优化
评论
GitHub Issues · utterances